When you click on links to various merchants on this site and make a purchase, this can result in this site earning a commission. Affiliate programs and affiliations include, but are not limited to, the eBay Partner Network.
I have been prepping for a respray these past months and drive the car weekly for a half hour or so. This morning I ran the engine in the garage for ten minutes and coolant came out from the front RHS of the grille and all over the floor.
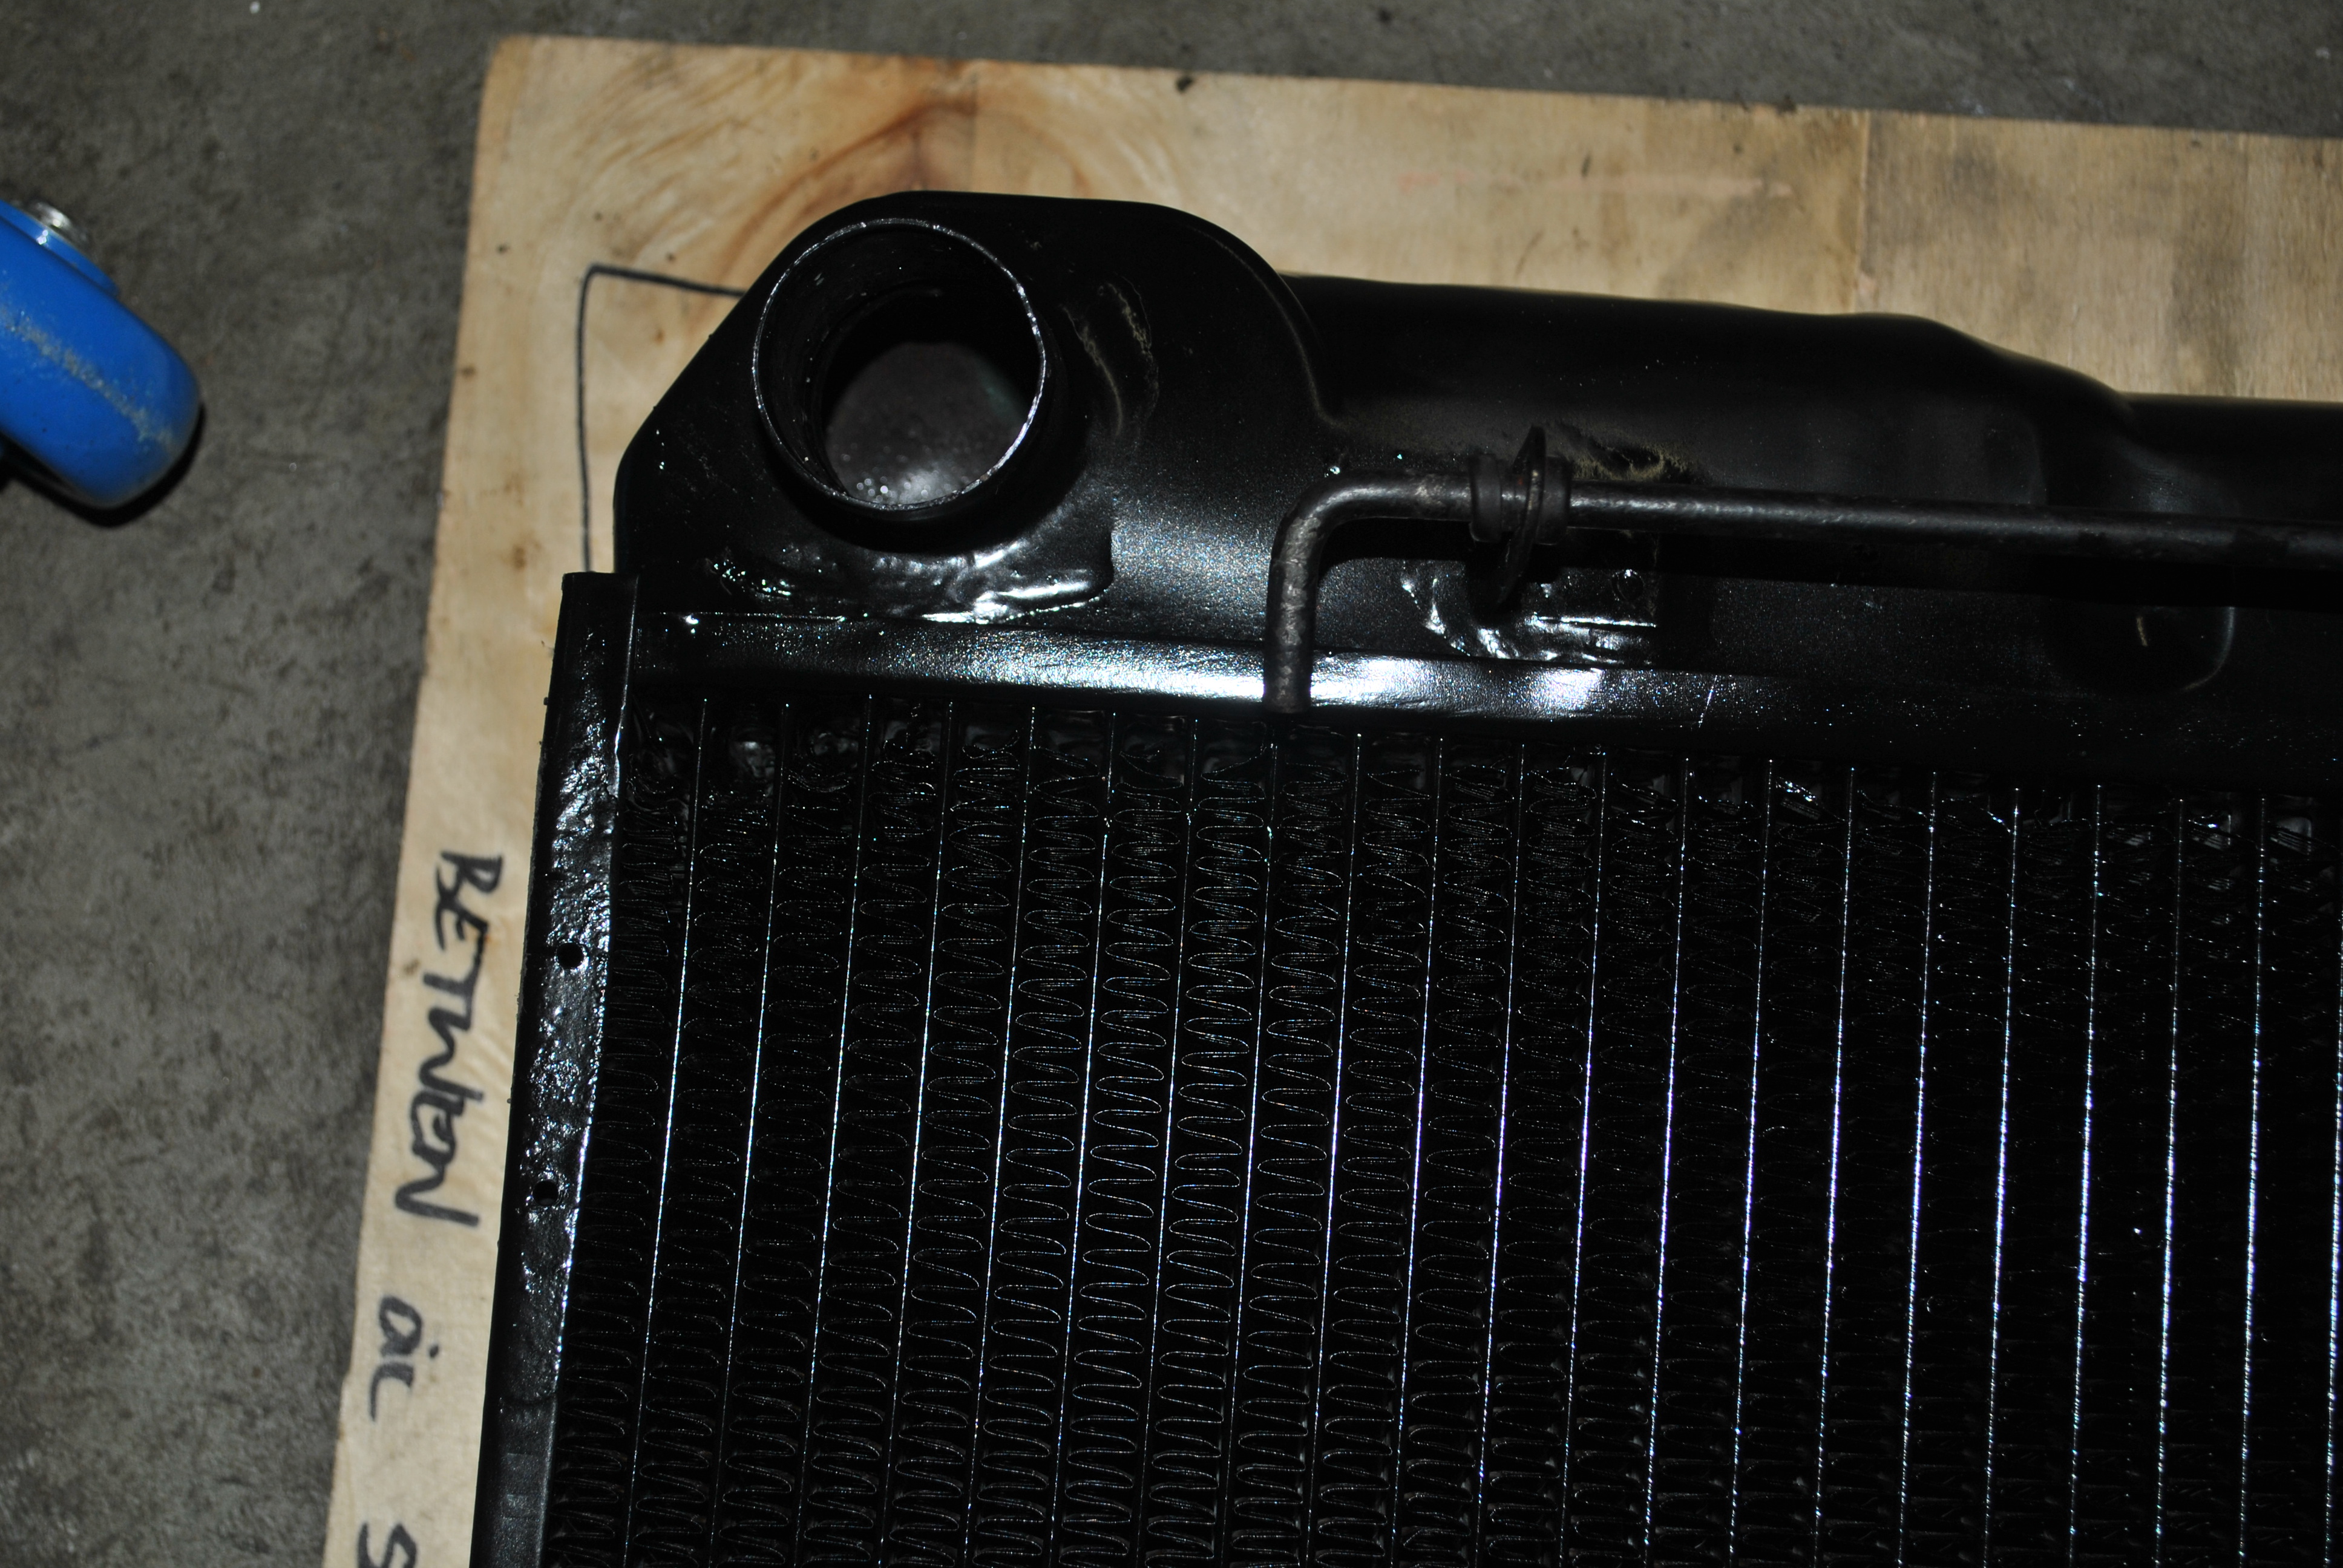
Opened the bonnet (hood) and could see top of rad RHS wet and leaking on the condenser.
Looking further there is an obvious old leak at what looks like the rad nipple
Should I repair this leak, refill and try or take the top covering off and have a look at the top of the rad and see if there's another problem?
It's difficult to see with the radiator top mounting panel in place, also how difficult is this to remove as it looks like electrics are mounted to it.
The way its squirted on the bumper makes me think it's not an actual radiator issue......thanks for any suggestions.
It's life, Jim, but not as we know it, not as we know it, not as we know it;
it's life, Jim, but not as we know it, not as we know it, Captain.
It sounds like a leak in the core Jim, I had one similar squirting through the condenser & grill. Removing the top panel is only a few bolts, electrics on it is simple. Just take lots of pics or draw a mud map of the wiring.
My local radiator guy crimped the parts of the core that were leaking and flushed it and painted it, been all good since (2 1/2 years, 20000 km) including track days.
Probably best to just remove the radiator anyway and give it a check up at your local guy.(unless you just have a leaking hose of course.)
Thanks Clarke, As you say may as well pull it out...
Did you have any problems with the bonnet?
PS...Love the quote
Not at all Jim, but I have electric fans mounted on the radiator instead of the original fan on the water pump. That may get in way if you still have the big plastic fan thingy.
Thank you both...I will remove it and take it to a radiator place and have it checked/repaired. Clarke your on the money looks like a leak in the core.
Haven't looked at the bottom but guess there's a couple of bolts down there.
Some are bolted from underneath, most are simply pins screwed into that frame, and slip through the rubbers in thd chassis crossbeam.
Get a mate to lift it with you, if its lifts up, bonus, otherwise, clamber under and undo those 2 silly bolts, then cut the heads off and make them studs and slip the unit back in when done.
Fought me all the way as one of the bottom bolts stuck hard....came out with bonnet/hood in normal position....huge hole in the core so at shop for a recore. The shop asked me if I wanted the current 3 row or 4 row so I opted for the 4 as it should cool better.
When I bought the kit to "lump" my car I had the option of a three row core or a four row. I chose the latter. Over a decade late, it cools just perfectly.
Totally unrelated to the issue at hand but relating to Clarkes Star Trek quote.
One of the lines from that song cam up in a flippant exchange between my wife and I. Our visiting millenial daughter has a puzzled look and thought we had missed our meds. We found the whole song on Youtube and played it for her. She dissolved in hysterics, she had never heard it and loves Star Trek :-)
Been cleaning up the the engine bay ready for the new rad and have a couple of questions....
Firstly is there a specific way of bleeding a series 2?..The Rover has a certain way to bleed the coolant and is a bugga.
Secondly when I removed the rad there was some foamy rubber (totally deteriorated) down in the bottom corners....should I replace?...I don't think it's necessary as it should bolt in very firmly.
Both caps off, vac hose pulled from heater tap (this defaults to ON), fill SLOWLY via the top opening, listening for the gurgling as you go.
When fluid dribbles out the header tank spout, cap it, continue the SLOW fill until the top opening is full, cap it, all done.
Start the beast and when its warmed and recooled, replace the vac hose on that tap. Then check the levels when cold.
Foam, NAH.
thanks Grant, put new rad in followed this and all good, car drives at normal temp...only question is that when I got home and parked a little coolent came out of the overflow hose under the front guard...never happened before so assuming it may have been too full and this is normal levelling...OR should I possibly replace cap?
Time to close this thread....after replacing cap it decided to leak from the blanking cap (thanks for your help with PM's on this one Grant) so new blanking cap and ALL GOOD.