
Failing Head Gasket ?

Thread Starter
|

Joined: Jan 2014
Posts: 28,386
Likes: 6,340
From: Delaneys Creek,Qld. Australia
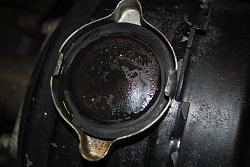
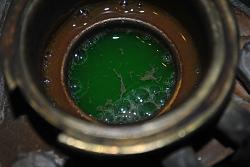
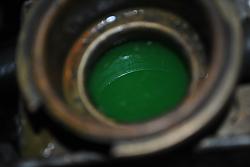
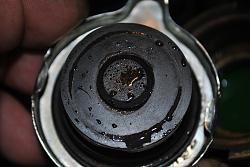
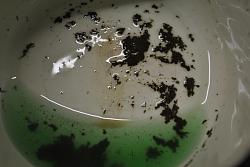
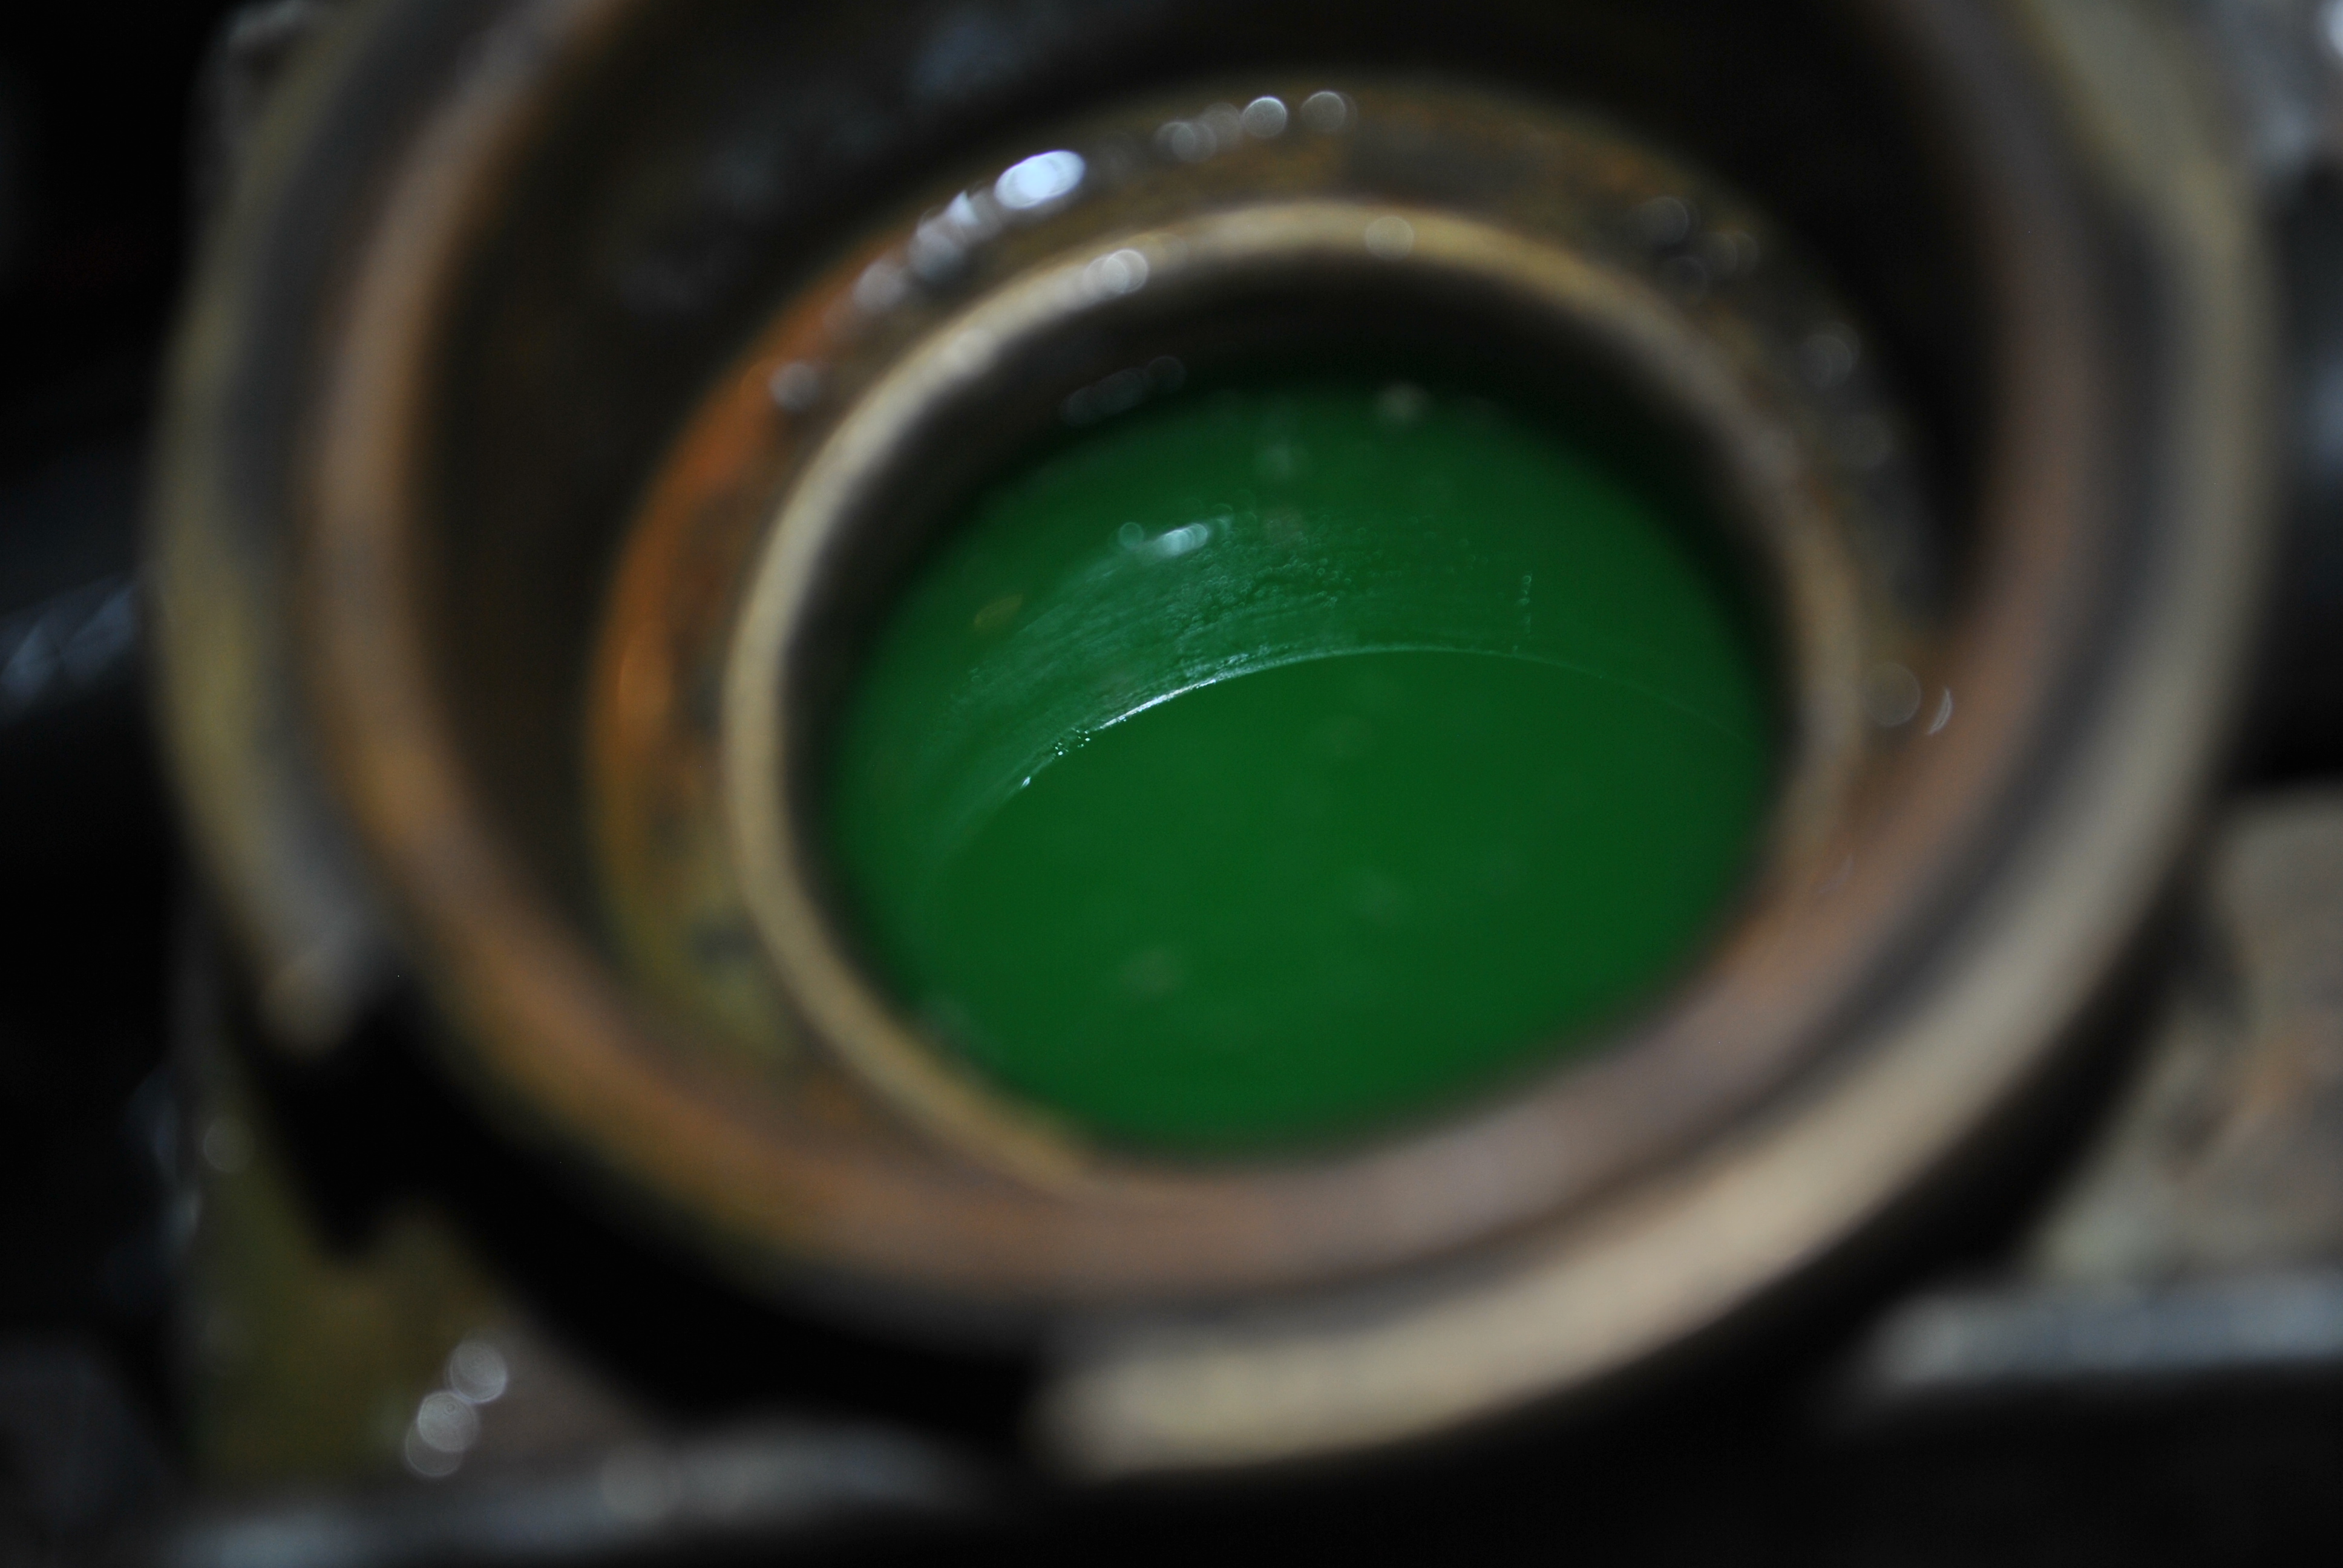
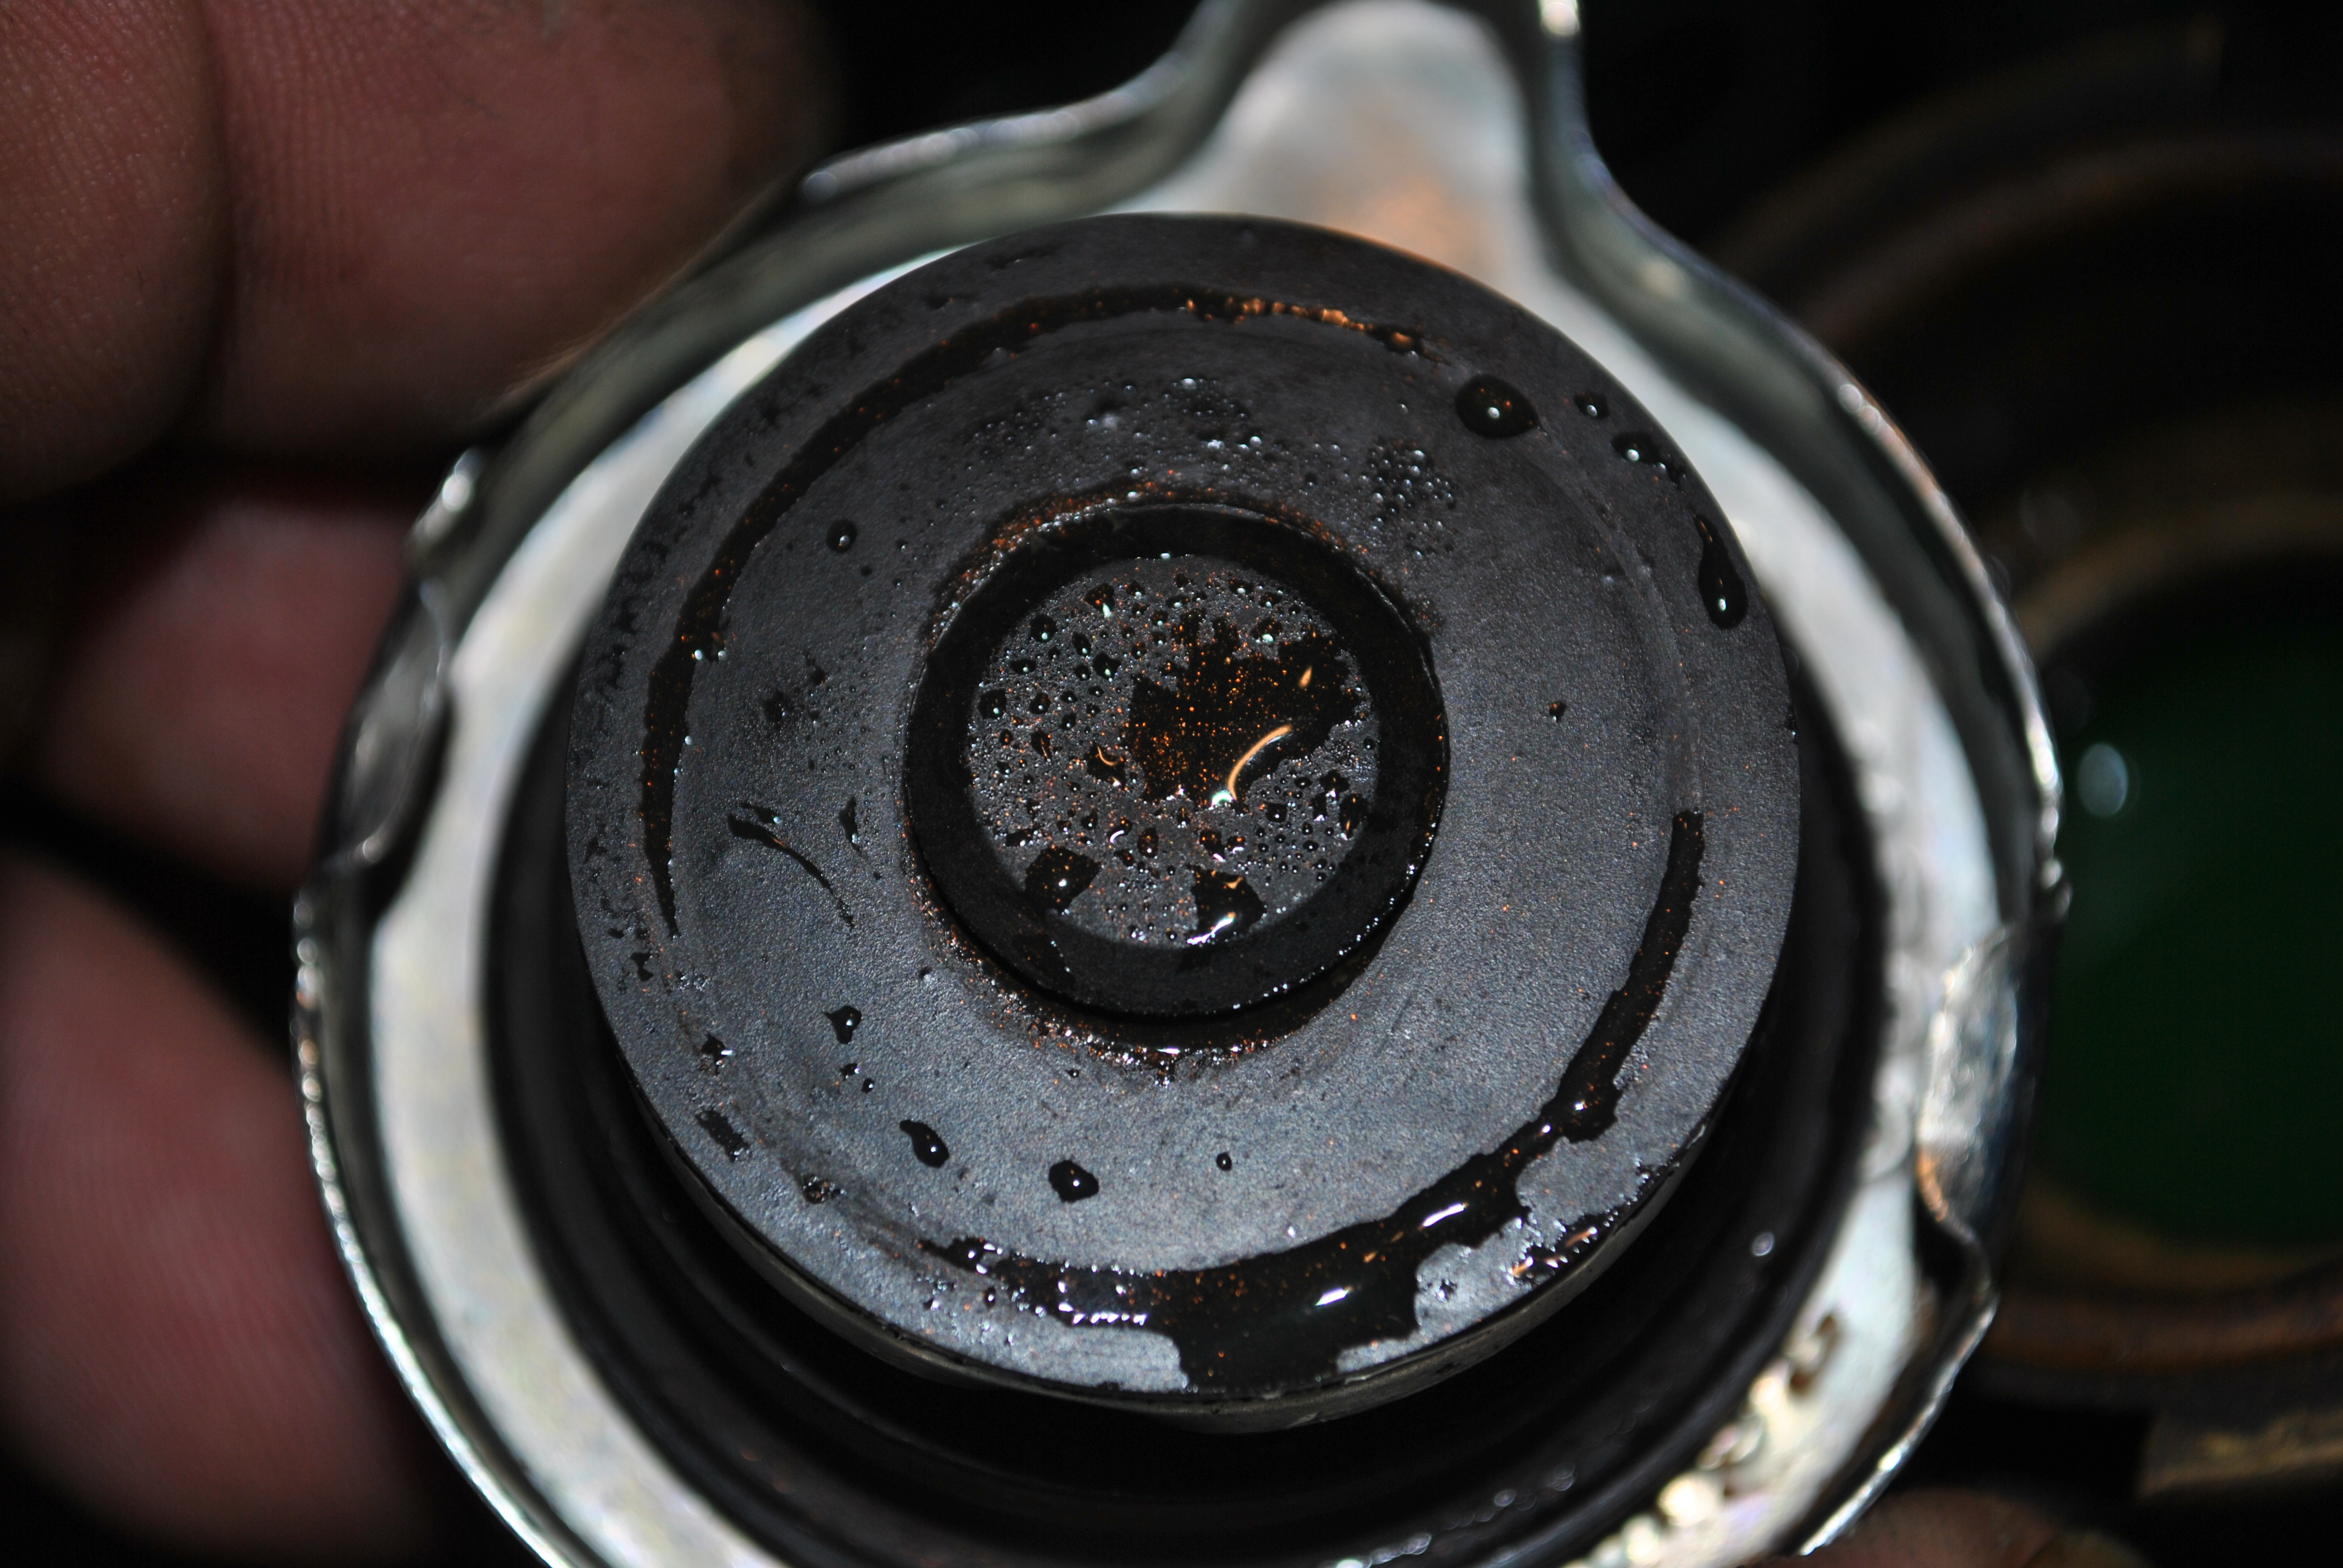
I discovered this yesterday when checking my coolant. The last two pictures are the contents of the overflow bottle.
Used 2 litres of coolant over the last three days driving 20 km each way to work.
Going to get a TK test done today if I have time.

Used 2 litres of coolant over the last three days driving 20 km each way to work.
Going to get a TK test done today if I have time.


Last edited by o1xjr; Feb 14, 2016 at 07:07 PM.
Veteran Member


Joined: Oct 2013
Posts: 1,048
Likes: 364
From: Austin, Texas
How many miles from the last time the head was off the block?
Compression test followed by a cylinder leakage test should at least confirm whether you have this problem and which cylinder(s) it affects.
Compression test followed by a cylinder leakage test should at least confirm whether you have this problem and which cylinder(s) it affects.
Thread Starter
|
Joined: Jan 2014
Posts: 28,386
Likes: 6,340
From: Delaneys Creek,Qld. Australia
TK test turned green so exhaust gases are in the coolant.
VRS kit ordered.
Head is going to be sent away for whatever it needs. http://www.brisbanecylinderheads.com.au/
Can't start the job for a couple of weeks as the Jeep is out on loan to friends holidaying from overseas.
Last edited by o1xjr; Feb 14, 2016 at 07:08 PM.
Veteran Member
Joined: Oct 2013
Posts: 1,048
Likes: 364
From: Austin, Texas
The shop will ensure that the head is or will make it perfectly level. You may want to ensure that the block is perfectly straight as well before re-assembling with a fresh head gasket
I use something like the one below to check for trouble:
I use something like the one below to check for trouble:
Thread Starter
|
Joined: Jan 2014
Posts: 28,386
Likes: 6,340
From: Delaneys Creek,Qld. Australia
The shop will ensure that the head is or will make it perfectly level. You may want to ensure that the block is perfectly straight as well before re-assembling with a fresh head gasket
I use something like the one below to check for trouble:
24" straight edge
I use something like the one below to check for trouble:
24" straight edge
Last edited by o1xjr; Feb 14, 2016 at 11:41 PM.
Veteran Member
Joined: Oct 2013
Posts: 1,048
Likes: 364
From: Austin, Texas
Trending Topics

Thread Starter
|
Joined: Jan 2014
Posts: 28,386
Likes: 6,340
From: Delaneys Creek,Qld. Australia
Thread Starter
|
Joined: Jan 2014
Posts: 28,386
Likes: 6,340
From: Delaneys Creek,Qld. Australia
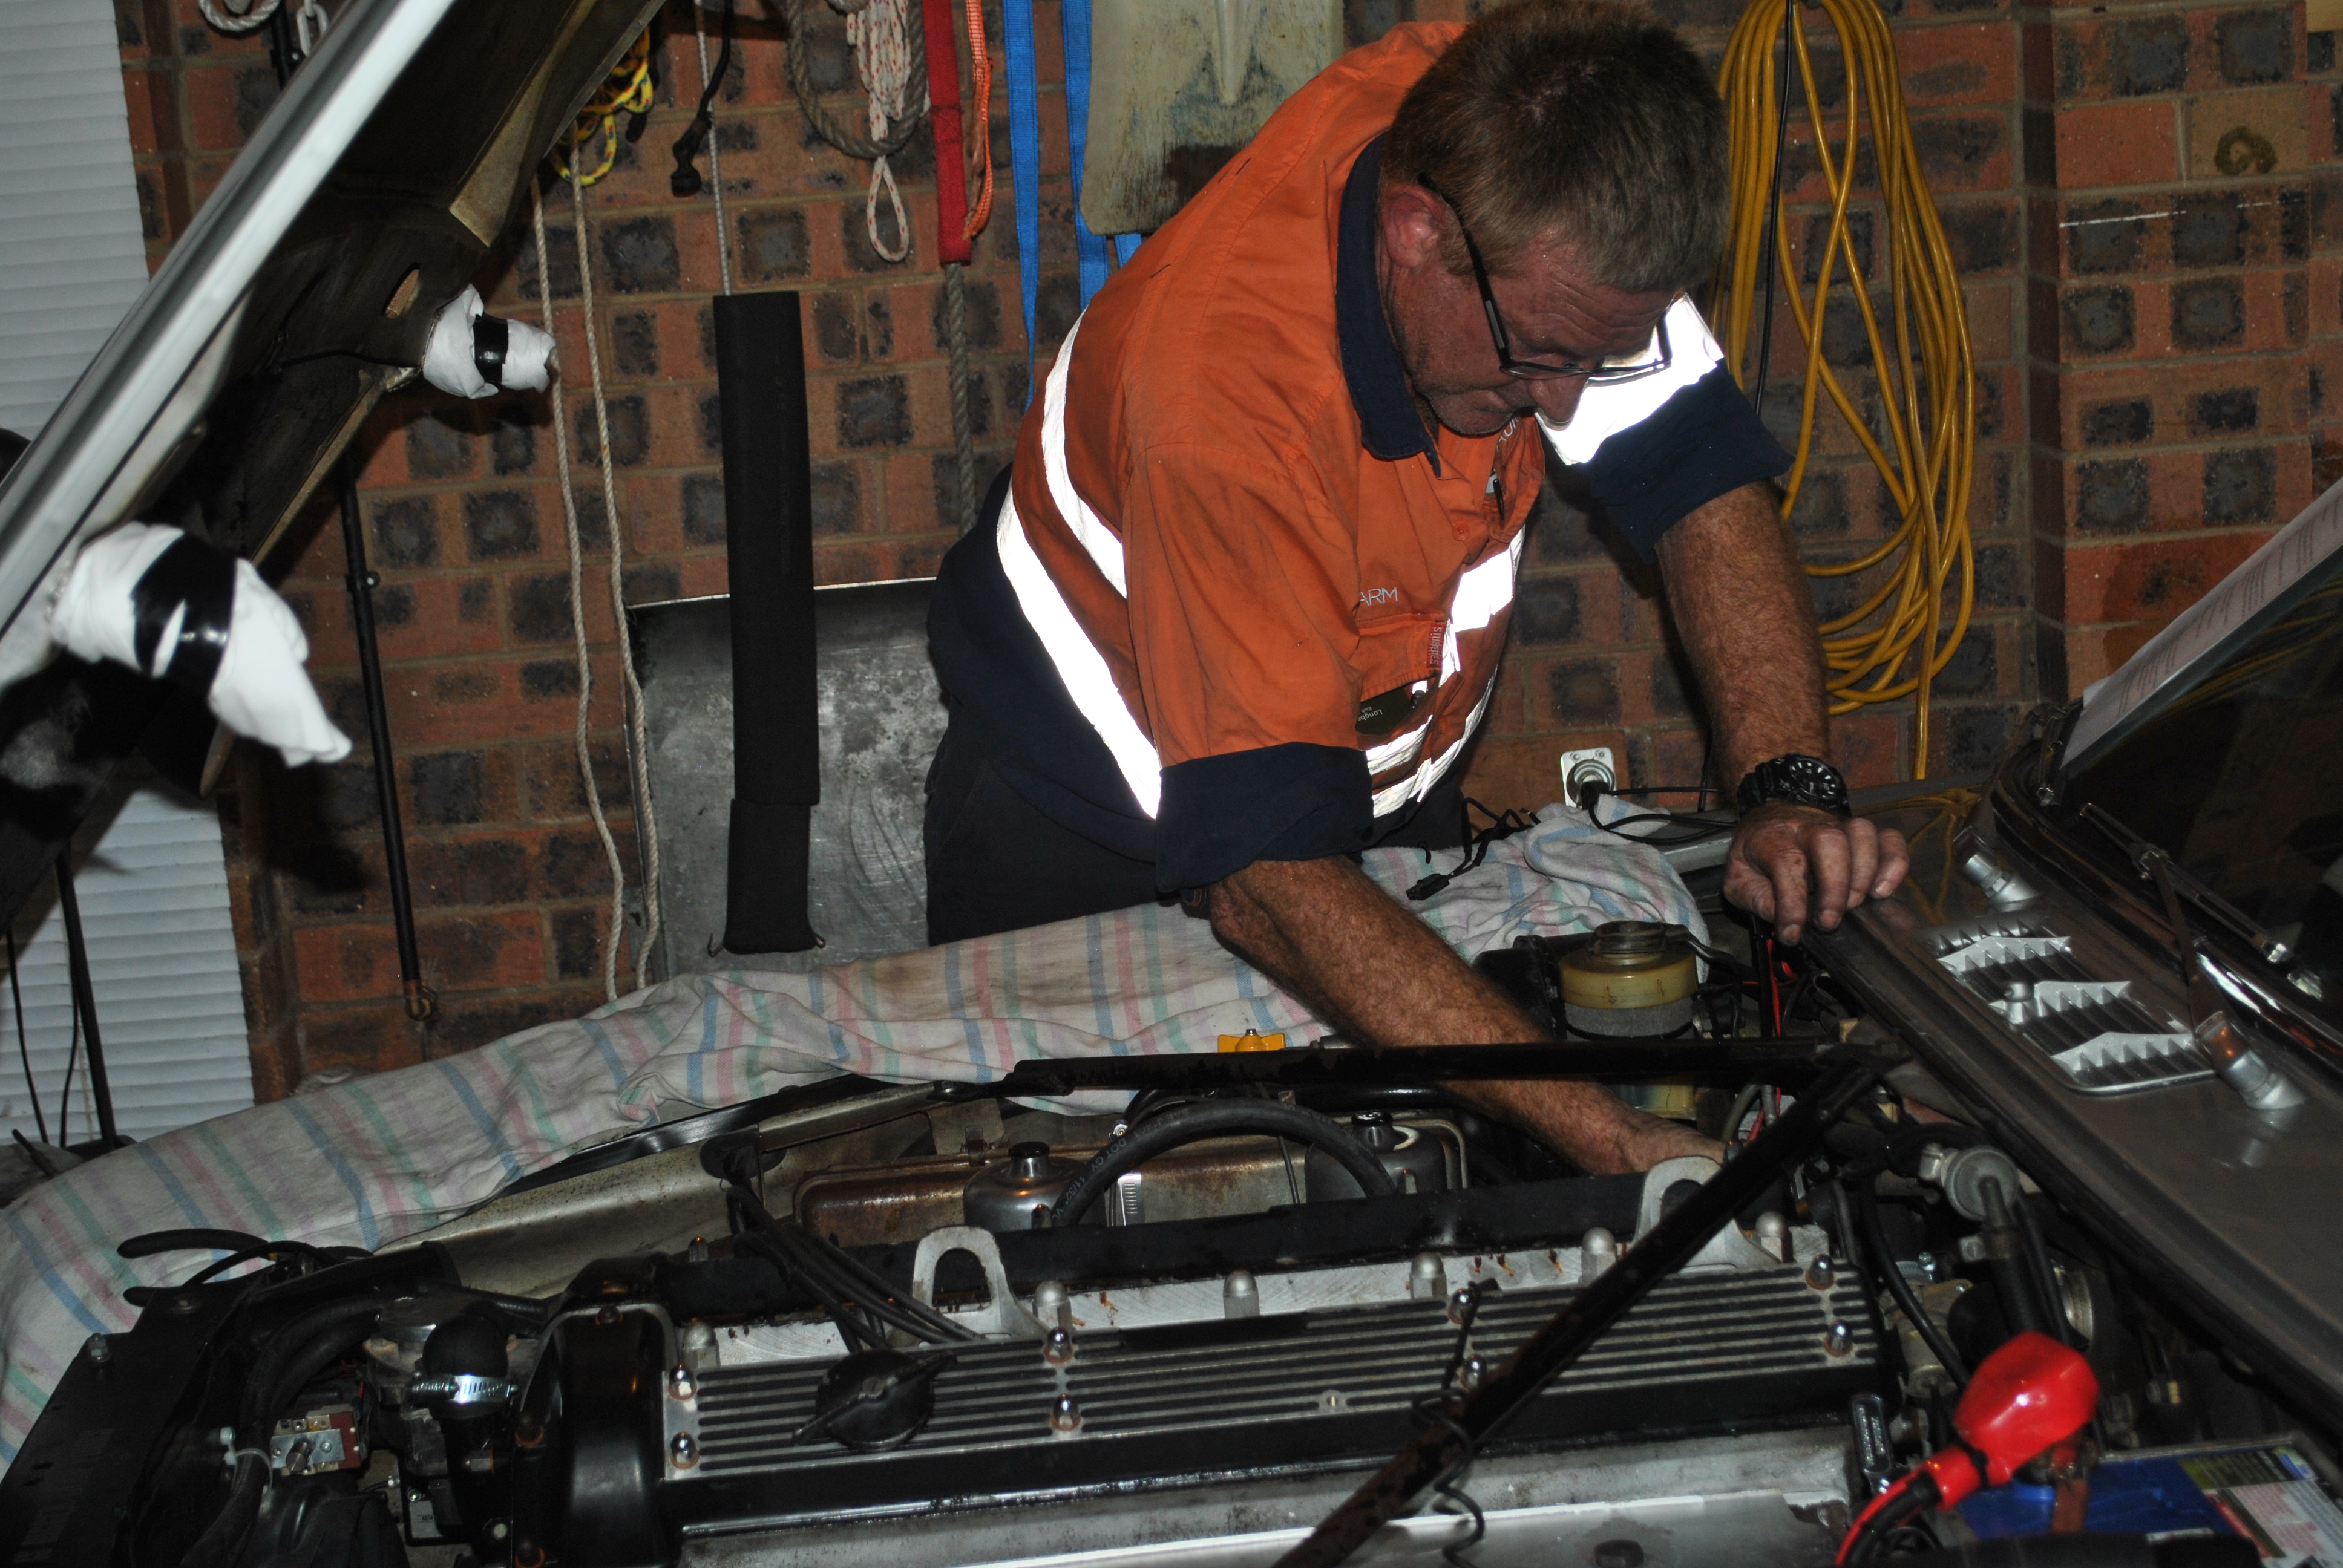
And great to have a mate willing to be on call. He did my HR ute way back when,but I was just the barman and gofor.
We made a deal back in the 80's where I never paid for mechanical help and he never paid for business cards or invoice books. I think I'm the winner in that deal.
It is only his second job on this car, last one was fitting the electronic ignition. The rest I have managed on my own. Needed to call on his talents this time as the car has appointments a couple weeks after I get my Jeep back. Wedding car and track day coming up next month.
Doing it by myself would be a slow process but very methodical.

Veteran Member

Joined: Mar 2014
Posts: 26,790
Likes: 10,320
From: Tehama County, California, USA
But I was thinking, my only experience with XK engines is what I read in here, but taking into consideration the head bolts going through the water jacket, and the propensity for rusting/corrosion of same, what if you loosened the acorn nuts just a twink (1/8 inch, 2mm), and fired the engine (draining coolant first, of course to prevent hydrostatic lock)? You might just dislodge the whole head, shazaam!
Then remove the acorn nuts and and lift the head clean off! Simple, eh?

If that doesn't work, maybe it's time for More Power!! GM small block transplant!
Just some thoughts (snicker).........
(';')
Veteran Member
Joined: Mar 2014
Posts: 26,790
Likes: 10,320
From: Tehama County, California, USA
I know I've been a bit distracted with Spring work and all, but did I miss something??
(';')
(';')
Thread Starter
|
Joined: Jan 2014
Posts: 28,386
Likes: 6,340
From: Delaneys Creek,Qld. Australia

Veteran Member

Joined: Dec 2009
Posts: 9,556
Likes: 2,555
From: Crewe, England
I'm not sure if a '73 engine is the long-stud engine. If it is then it is likely the block is cracked between the bores. This will be seen when the head is taken off, but unfortunately is very expensive to repair to ensure the head gasket won't keep blowing. I show a photo of a bore with the liner removed to show the coolant passages machined across the block. The cracks start at the top of the top passage and work their way to the top of the block. Insertion of lipped liners is the only real cure. You can see why the Americans are so keen on putting in US V8 engines, they keep running !!
If it's not a long stud engine, then a new head gasket may well cure the problem with a skimmed head and carefully checked block.
If it's not a long stud engine, then a new head gasket may well cure the problem with a skimmed head and carefully checked block.
Thread Starter
|
Joined: Jan 2014
Posts: 28,386
Likes: 6,340
From: Delaneys Creek,Qld. Australia
Is there a way to tell from the engine number? 8L204839-S
I have been told by the shop that is going to do the head the the long stud engine has the welsh plugs at the bottom of the block. mine are about 6" bolow the exhaust manifold (1/2 way down the block.)
I have been told by the shop that is going to do the head the the long stud engine has the welsh plugs at the bottom of the block. mine are about 6" bolow the exhaust manifold (1/2 way down the block.)
Veteran Member

Joined: Nov 2013
Posts: 3,415
Likes: 1,647
From: Regional NSW, Australia
Clarke, sounds short stud to me, especially if welsh plugs are that high . . . But let's step back a moment . . . Some of what follows from my addled grey cells may sound basic, but skim as necessary. Sorry it's long but hope it helps others also.
First things first - diagnostics. The compression tests will reveal heaps - or very little - depending on condition, damage etc . . . but you are correct; it must be done. Spend time with your mentor to understand fully what the readings reveal. At a minimum, I would expect generalized drop in all readings - but watch for one or more with a significant drop, especially but not exclusively in adjacent cylinders, often 2-3 or 4-5. Most common head gasket failures are inter-cylinder (comp test); then cylinder to water passage (bubbling in top rad tank); with cylinder to oil passage being very rare. Like others, I would approach the job expecting head corrosion, warpage and blown head gasket - but also, with uncertain history, valve/guide/seat wear as well.
Secondly, for someone who has been known to use his boot area as a blazing barbeque just to turn on a party for friendly firemen - but who then DIY'd one of the most incredible rebuilds I have seen - the R&R head is just a succession of tedious tasks which will prove a walk in the park - admittedly, a long, tiring and frustrating walk. The actual task of removal is not difficult - easy with the sort of tools I guess you have access to.
Thirdly, have a plan. Relying on having it all done for your holiday trip in a few days time is NOT a smart plan, nor is trying to remove all the head, manifolds, and attachments as one piece. It can be dome. I know. And I definitely do not recommend it! Like others, I can see that you are bringing that plan together, so here goes . . .
Drain oil and coolant. Workshop manual is a smart move. Follow R&R head explicitly - especially in separating exhaust at manifold flanges. Studs/nuts on the exhaust flanges can be a nightmare. Use plenty of WD40 penetrating oil and patience. Breaking off a stud here is no major panic provided you still have some to grip, but breaking out a corner of the manifold will certainly cloud your day. Set aside 30minutes for each of the 2-3 nights prior to going further. I often found it easier to clean and soak the end threads of the manifold studs and remove/replace the whole studs and nuts. By comparison, removing manifolds is easy for any trained snake with suitable spanners.
On the induction side, no such woes - just lots of fiddly bits and poor accessibility. As I know you do Clarke, but worth emphasizing for others contemplating this job, set aside a cleared bench area, a good supply of used clean ice-cream containers and label everything in order.
Now, we strip the ignition, pull plugs and lay out on the bench clearly numbered. Do NOT rush in to clean plugs. Spend time to inspect each. What can we learn of recent combustion in each cylinder? Any signs of soot, oil or fouling. Finally, we have reduced the tangle of upper engine add-ons and plumbing and have clear space all around.
Notice we have not yet opened the engine. My next step differs from the manual but only because I spend more time with "WD40 and patience" in cracking (no grasshopper, I do not mean "breaking") each of the central head nuts in correct order. The assigned order for both removing and refitting head nuts is "inside out" ie cylinders 3-4 first and diagonally, then moving towards each end, one cylinder at a time and alternately. Also, I find it useful to crack open 1/4 turn, try to apply WD40 to each, then retighten, then repeat. Eventually, you will have all the head nuts off; no head studs broken (Oh yes, they can!); and we still have not opened the engine.
Time to beg, borrow or buy some tools that turn this job into easy peasy - (1) a suitable cam action stud extractor to remove the head bolts and thus clean/check the top face of block; (2) mother of a long bar tension wrench so the head can be torqued back down to specs; (3) DIY inspired and fabricated timing chain restraint/support; and (4) an accurate 1" micrometer and feeler gauges.
Remove cam covers and front upper t/c cover. Bring the engine to TDC on cylinder #1. The key to this whole job is now upon us - unlocking/rotating the upper t/c tensioner; then removing/supporting each camshaft drive pulley. Immediately capture and retain a near full rotation of the chain around its gear using the soft but strong wire that construction steel fixers use. This ensures that the chain cannot slip teeth on either camshaft drive gear. They can be overlapped as the head is raised and will pass readily. Next major concern is to restrain the chain around the intermediate lower/upper t/c gear so that it cannot slip teeth on the t/c. Keep in mind that all these gears and chain have indented marks for correct registration on assembly - a great system if the entire engine is out of car and parts not covered in oil. Trust me . . . it's easier to make sure we do NOT slip teeth.
Final task is to remove camshaft shells, shafts, buckets etc - all carefully checked for numbered shells etc. One that bucks this trend is the bucket shims if, as I suspect, a full-on valve job is required. Keep them; polish them; but do not waste time looking for printed numbers.
Time for Elinor's brave solution - and I am NOT laughing. Only once have I found a need to "pop" a head, but by using "plugs in and starter" only. NO IGNITION - AND DO NOT DO THIS UNLESS YOU HAVE CORRECTLY REPLACED T/C AND CAMSHAFT DRIVE! Personally, I don't like it. All heads I have encountered, even badly damaged ones, have succumbed to a few gently placed hits with a RUBBER faced mallet.
A final note when you get to reassembly - adjusting valve clearances is the province of your micrometer and feeler gauges to fit/measure/record - then strip down and repeat with compensating shim adjustment. Compared to factory spec of .005" (I) and .008" (E), we always went for .006" and .010" and even more for competition work.
Hope this helps ease the pressure on an easily DIY task.
Cheers,

Ken
First things first - diagnostics. The compression tests will reveal heaps - or very little - depending on condition, damage etc . . . but you are correct; it must be done. Spend time with your mentor to understand fully what the readings reveal. At a minimum, I would expect generalized drop in all readings - but watch for one or more with a significant drop, especially but not exclusively in adjacent cylinders, often 2-3 or 4-5. Most common head gasket failures are inter-cylinder (comp test); then cylinder to water passage (bubbling in top rad tank); with cylinder to oil passage being very rare. Like others, I would approach the job expecting head corrosion, warpage and blown head gasket - but also, with uncertain history, valve/guide/seat wear as well.
Secondly, for someone who has been known to use his boot area as a blazing barbeque just to turn on a party for friendly firemen - but who then DIY'd one of the most incredible rebuilds I have seen - the R&R head is just a succession of tedious tasks which will prove a walk in the park - admittedly, a long, tiring and frustrating walk. The actual task of removal is not difficult - easy with the sort of tools I guess you have access to.
Thirdly, have a plan. Relying on having it all done for your holiday trip in a few days time is NOT a smart plan, nor is trying to remove all the head, manifolds, and attachments as one piece. It can be dome. I know. And I definitely do not recommend it! Like others, I can see that you are bringing that plan together, so here goes . . .
Drain oil and coolant. Workshop manual is a smart move. Follow R&R head explicitly - especially in separating exhaust at manifold flanges. Studs/nuts on the exhaust flanges can be a nightmare. Use plenty of WD40 penetrating oil and patience. Breaking off a stud here is no major panic provided you still have some to grip, but breaking out a corner of the manifold will certainly cloud your day. Set aside 30minutes for each of the 2-3 nights prior to going further. I often found it easier to clean and soak the end threads of the manifold studs and remove/replace the whole studs and nuts. By comparison, removing manifolds is easy for any trained snake with suitable spanners.
On the induction side, no such woes - just lots of fiddly bits and poor accessibility. As I know you do Clarke, but worth emphasizing for others contemplating this job, set aside a cleared bench area, a good supply of used clean ice-cream containers and label everything in order.
Now, we strip the ignition, pull plugs and lay out on the bench clearly numbered. Do NOT rush in to clean plugs. Spend time to inspect each. What can we learn of recent combustion in each cylinder? Any signs of soot, oil or fouling. Finally, we have reduced the tangle of upper engine add-ons and plumbing and have clear space all around.
Notice we have not yet opened the engine. My next step differs from the manual but only because I spend more time with "WD40 and patience" in cracking (no grasshopper, I do not mean "breaking") each of the central head nuts in correct order. The assigned order for both removing and refitting head nuts is "inside out" ie cylinders 3-4 first and diagonally, then moving towards each end, one cylinder at a time and alternately. Also, I find it useful to crack open 1/4 turn, try to apply WD40 to each, then retighten, then repeat. Eventually, you will have all the head nuts off; no head studs broken (Oh yes, they can!); and we still have not opened the engine.
Time to beg, borrow or buy some tools that turn this job into easy peasy - (1) a suitable cam action stud extractor to remove the head bolts and thus clean/check the top face of block; (2) mother of a long bar tension wrench so the head can be torqued back down to specs; (3) DIY inspired and fabricated timing chain restraint/support; and (4) an accurate 1" micrometer and feeler gauges.
Remove cam covers and front upper t/c cover. Bring the engine to TDC on cylinder #1. The key to this whole job is now upon us - unlocking/rotating the upper t/c tensioner; then removing/supporting each camshaft drive pulley. Immediately capture and retain a near full rotation of the chain around its gear using the soft but strong wire that construction steel fixers use. This ensures that the chain cannot slip teeth on either camshaft drive gear. They can be overlapped as the head is raised and will pass readily. Next major concern is to restrain the chain around the intermediate lower/upper t/c gear so that it cannot slip teeth on the t/c. Keep in mind that all these gears and chain have indented marks for correct registration on assembly - a great system if the entire engine is out of car and parts not covered in oil. Trust me . . . it's easier to make sure we do NOT slip teeth.
Final task is to remove camshaft shells, shafts, buckets etc - all carefully checked for numbered shells etc. One that bucks this trend is the bucket shims if, as I suspect, a full-on valve job is required. Keep them; polish them; but do not waste time looking for printed numbers.
Time for Elinor's brave solution - and I am NOT laughing. Only once have I found a need to "pop" a head, but by using "plugs in and starter" only. NO IGNITION - AND DO NOT DO THIS UNLESS YOU HAVE CORRECTLY REPLACED T/C AND CAMSHAFT DRIVE! Personally, I don't like it. All heads I have encountered, even badly damaged ones, have succumbed to a few gently placed hits with a RUBBER faced mallet.
A final note when you get to reassembly - adjusting valve clearances is the province of your micrometer and feeler gauges to fit/measure/record - then strip down and repeat with compensating shim adjustment. Compared to factory spec of .005" (I) and .008" (E), we always went for .006" and .010" and even more for competition work.
Hope this helps ease the pressure on an easily DIY task.
Cheers,
Ken
Senior Member
Joined: Jul 2014
Posts: 341
Likes: 54
From: Bellingen, NSW, Aus
Ken has spoken. The end.
However, being a young hoon who loves to extract all the power from everything whenever possible, what have you considered getting done to the head?
Just going for a skim of the block mating surface? Or delving into it deeper and doing new valve stem seals?
You did mention you were buying a VRS kit, which does mean valve regrind set, so are you going to that extent with the head rebuild? maybe get a 3 way valve grind for better flow, add a small amount of porting to remove any casting dags/rough edges while you are in there at the same time