
Still really rough idle - running out of ideas


Joined: Feb 2010
Posts: 28,812
Likes: 11,280
From: Adelaide Stralia
Aussie fix mate.
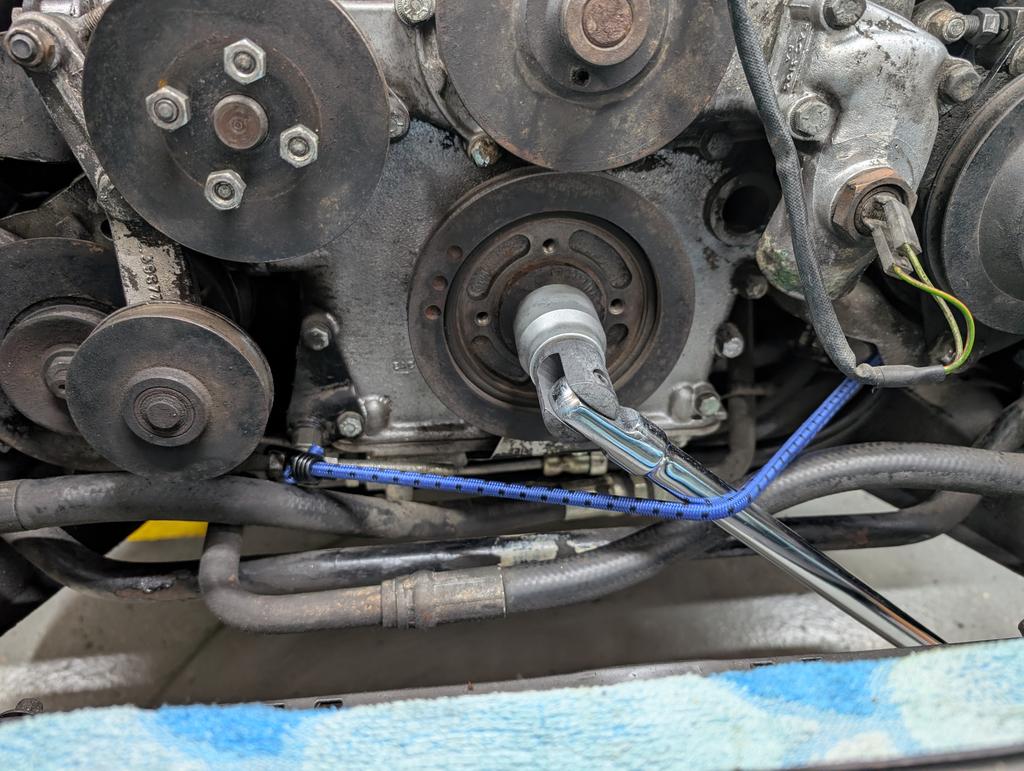
Socket to suit that bolt head 1" from memory/
Breaker bar, about 24" or more in length.
Remove the HT led for the coil from the dizzy cap, put it in your pocket so you dont forget it later, and have a "No Start Issue".
Place the assembled bar/socket on the bolt head, with the end of the bar touching the concrete at the B Bank, LH, side, of the engine.
Use the Ign key and TAP the starter, and WHACK, the bar end smacks the floor and the bolt comes undone. Magic.
Tightening that sucker, same bar and socket on the bolt, and jam the ring gear teeth, after the tin cover is removed, and heave away.
You could undo it the same, BUT BUT, if it slips the engine goes backwards, OOPS.
Refit that HT lead.
Last edited by Grant Francis; Dec 2, 2025 at 04:51 AM.

Thread Starter
|
Senior Member
Joined: Jan 2024
Posts: 117
Likes: 42
From: Germany
Ha, now thats a solution! Thanks!
Turn the engine, not the Bolt - would never have thought about that
Tightening shouldnt be much of a problem since you turn the engine in the correct direction.
Turn the engine, not the Bolt - would never have thought about that
Tightening shouldnt be much of a problem since you turn the engine in the correct direction.
Thread Starter
|
Senior Member
Joined: Jan 2024
Posts: 117
Likes: 42
From: Germany
Today i threw out the fromt of the car to get good access to the pulley to replace the seal.
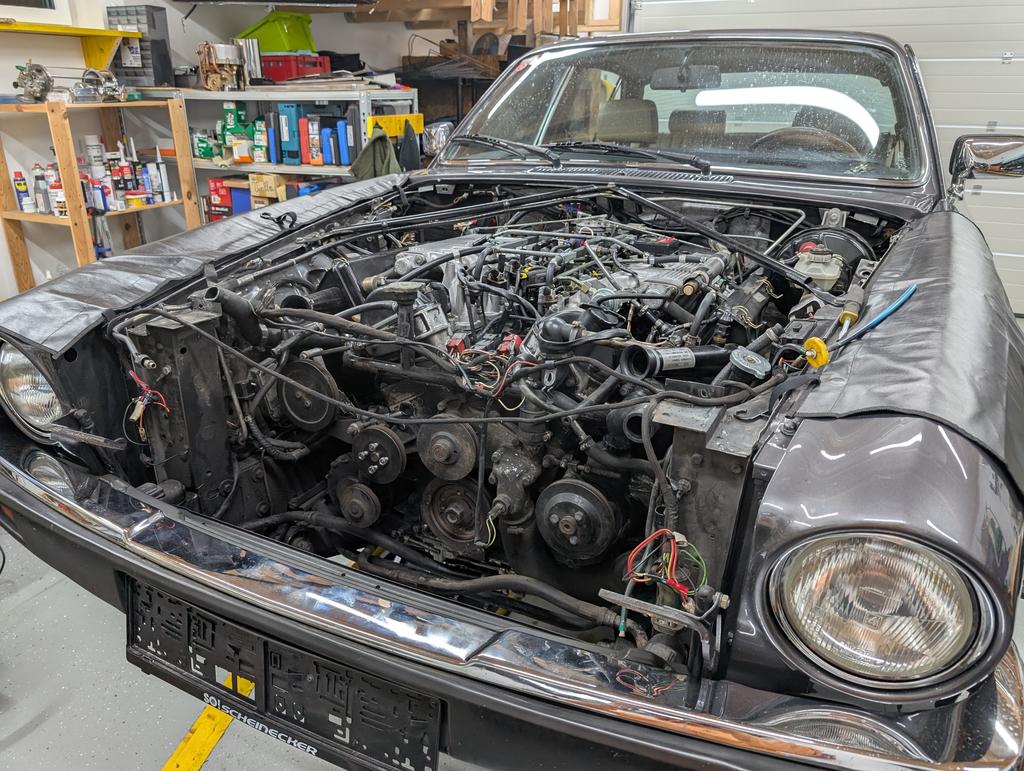
I have to remove the damper next and i did some research what i will find in there. That raises a question:
My dealer got the replacement seal or a "newer type seal" with a spacer. Since the newer type is over 100� and i didnt want a spacer i bought the original replacement seal - only to read now that there is always a spacer. The seal always seals to the spacer.
Now my question: Should one also replace the spacer when replacing the seal or is it fine to reuse? The spacer itself is more expensive than the new-type seal including the spacer :/

Senior Member


Joined: Oct 2013
Posts: 593
Likes: 510
From: Twin Waters, Sunshine Coast, QLD. Australia.
G'day Tyler,
If the spacer has a very worn seal track on it you may be able to flip it so that when you reinstall it the seal runs on a different part of the spacer.
I believe others have had success doing this.
Regards,
Jeff.
If the spacer has a very worn seal track on it you may be able to flip it so that when you reinstall it the seal runs on a different part of the spacer.
I believe others have had success doing this.
Regards,
Jeff.
Thread Starter
|
Senior Member
Joined: Jan 2024
Posts: 117
Likes: 42
From: Germany
So on todays christmas episode of how to not remove a front crankshaft seal:
Step 1: find a rusty spot when removing the radiator and loose two weeks doing a proper rust treatment
Step 2: be afraid of the ozzy method to open the main Bolt because you dont have ***** like Grant. But finally just do it with a fear strip so it does not toss the nut through the room:
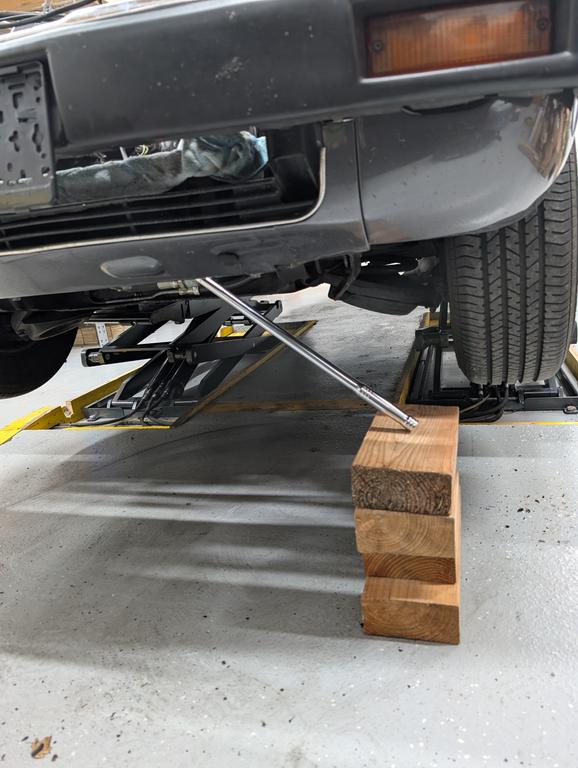
Step 3: Be surprised how easy and smooth the ozzy method works:
Step 4: remove the pulley
Step 5: remove the key from the crankshaft
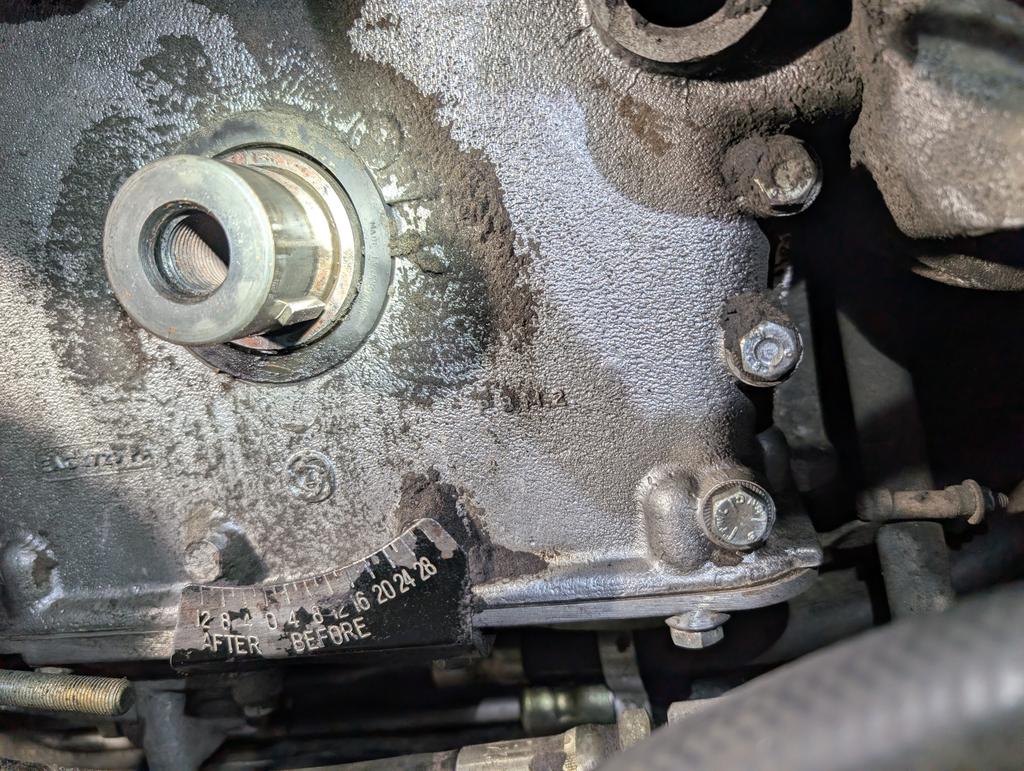
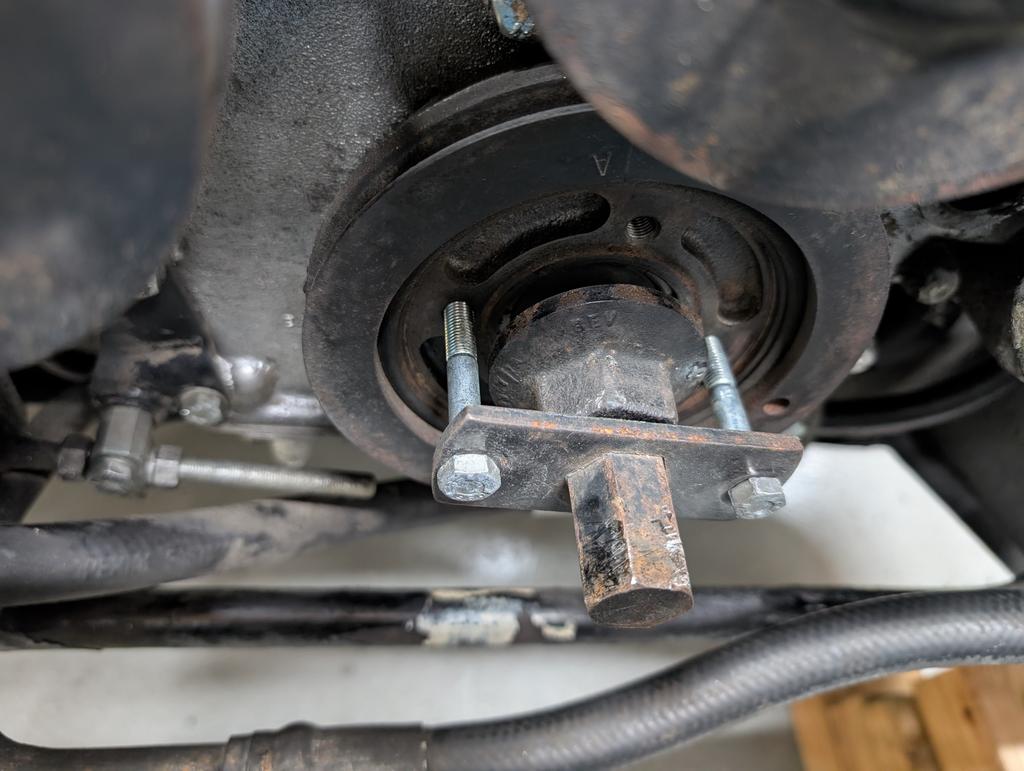
Step 6: Fail to remove it, spend 3 hours to hammer and wiggle around on it to get it out. Only google three times for the next junkyard to get rid of that damn thing. Finally get it out.
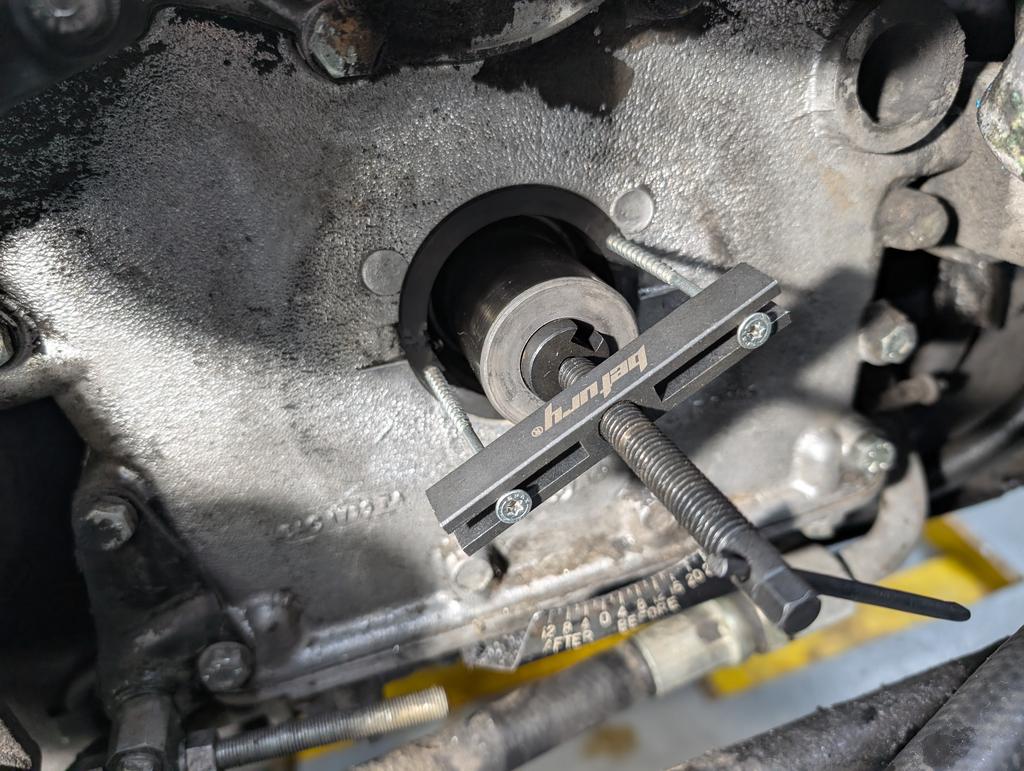
Step 7: Insert puller for the seal
[img]htps://i.postimg.cc/bN3dtcFx/PXL_20251225_185025299.jpg[/img]
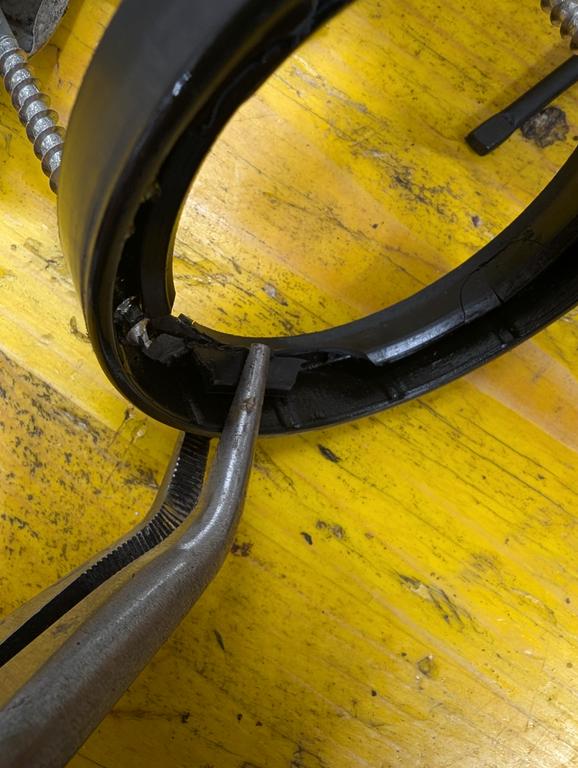
Step 8: Rip off puller arm
[img]htps://i.postimg.cc/vH3DVFSW/PXL_20251225_185129187.jpg[/img]
Step 9: give up for the day.
...good thing is the puller is magnetic and i got the ripped off part out. The seal is super brittle, almost like ice. No wonder it was loosing oil. Now i have to cool down and think of another way to get the seal out.
Step 1: find a rusty spot when removing the radiator and loose two weeks doing a proper rust treatment
Step 2: be afraid of the ozzy method to open the main Bolt because you dont have ***** like Grant. But finally just do it with a fear strip so it does not toss the nut through the room:
Step 3: Be surprised how easy and smooth the ozzy method works:
Step 4: remove the pulley
Step 5: remove the key from the crankshaft
Step 6: Fail to remove it, spend 3 hours to hammer and wiggle around on it to get it out. Only google three times for the next junkyard to get rid of that damn thing. Finally get it out.
Step 7: Insert puller for the seal
[img]htps://i.postimg.cc/bN3dtcFx/PXL_20251225_185025299.jpg[/img]
Step 8: Rip off puller arm
[img]htps://i.postimg.cc/vH3DVFSW/PXL_20251225_185129187.jpg[/img]
Step 9: give up for the day.
...good thing is the puller is magnetic and i got the ripped off part out. The seal is super brittle, almost like ice. No wonder it was loosing oil. Now i have to cool down and think of another way to get the seal out.
Thread Starter
|
Senior Member
Joined: Jan 2024
Posts: 117
Likes: 42
From: Germany
Here we go:
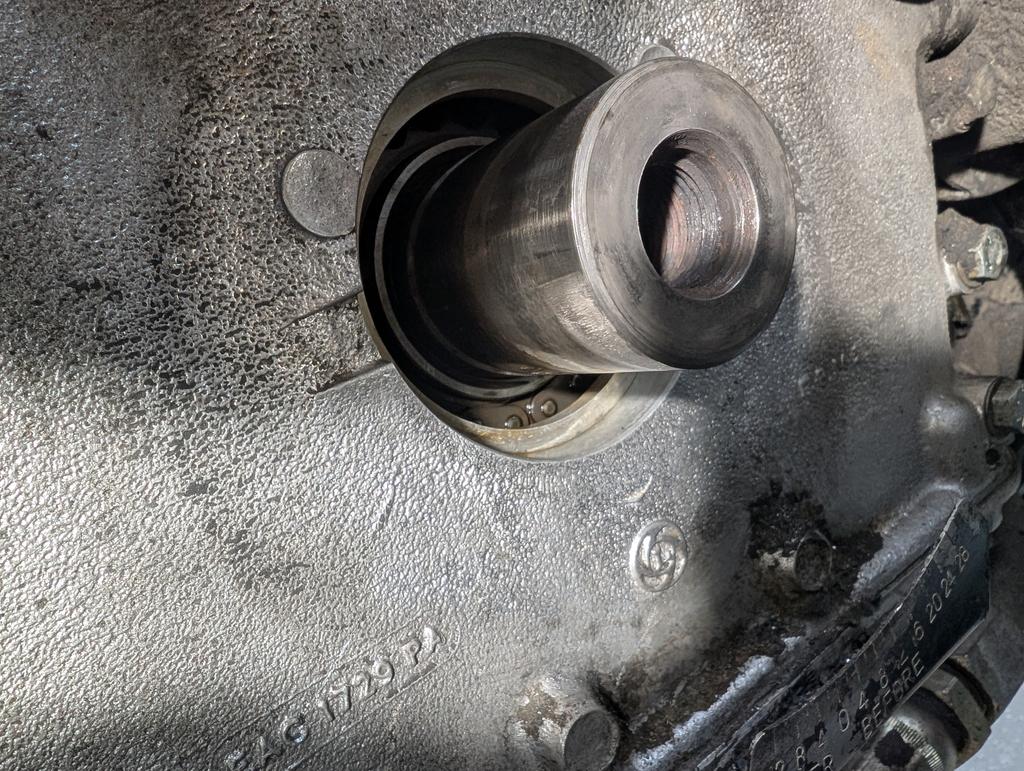
Step 10: have Influenca and loose another two weeks
Step 11: drill two holes in the old seal, screw some Spax in and use it as puller. Get it out without problem
Step 12: wonder how the old seal did hold any oil in the engine at all - i have seen glass more flexible than that seal:
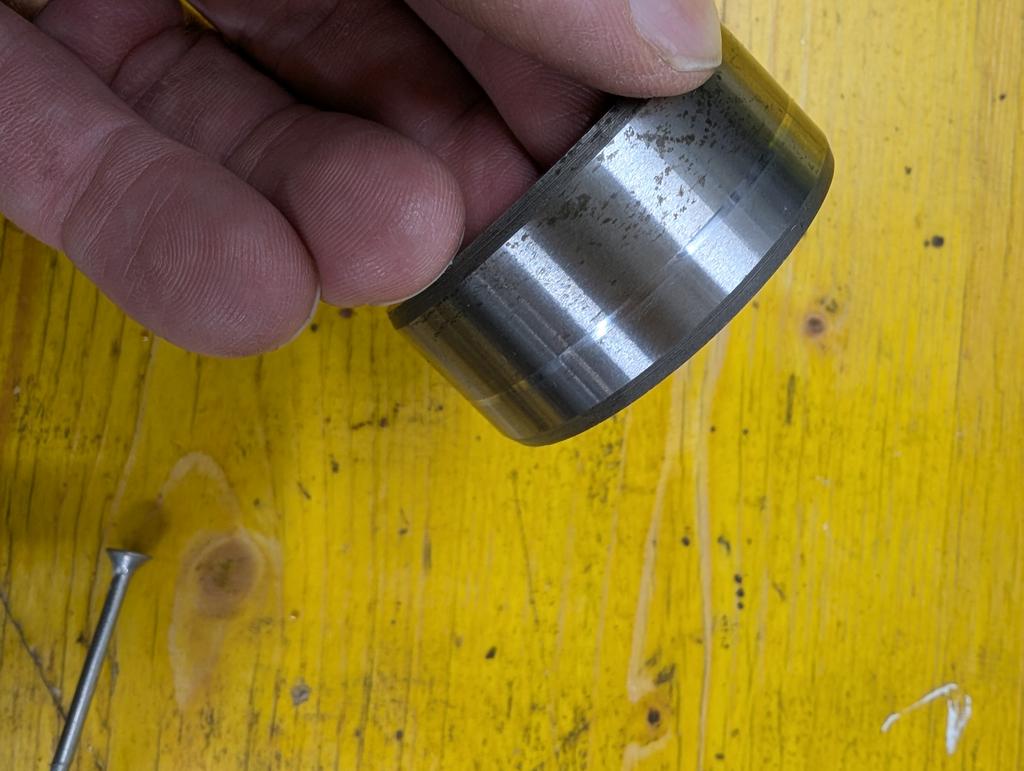
Step 13: Find out that there is a groove in the timing cover - i dont think there is any danger of putting it in too far. But maybe thats different on not H.E.'s? I dont know, i still hammered it in level with the surface, just in cause. First i tried to use the Screw to press it in but didnt get the right length of pipe pieces so i used a fitting pipe and hammered it into place carefully. The distance piece did show some amount of wear so i flipped it.
Step 14: reinstall the damper assembly and tighten the Screw with 205Nm.
now next i will install the pulley with all the (new) belts. Then i have to do a treatment to the fan-cover since the paint is coming off. And then put all together and replace all water hoses and tranny oil cooler hoses.
Until then i should recieve my rebuild kit for the A/C compressor. This will be next.
Step 10: have Influenca and loose another two weeks
Step 11: drill two holes in the old seal, screw some Spax in and use it as puller. Get it out without problem
Step 12: wonder how the old seal did hold any oil in the engine at all - i have seen glass more flexible than that seal:
Step 13: Find out that there is a groove in the timing cover - i dont think there is any danger of putting it in too far. But maybe thats different on not H.E.'s? I dont know, i still hammered it in level with the surface, just in cause. First i tried to use the Screw to press it in but didnt get the right length of pipe pieces so i used a fitting pipe and hammered it into place carefully. The distance piece did show some amount of wear so i flipped it.
Step 14: reinstall the damper assembly and tighten the Screw with 205Nm.
now next i will install the pulley with all the (new) belts. Then i have to do a treatment to the fan-cover since the paint is coming off. And then put all together and replace all water hoses and tranny oil cooler hoses.
Until then i should recieve my rebuild kit for the A/C compressor. This will be next.
Last edited by TylerDurden; Jan 10, 2026 at 12:00 PM.
Thread Starter
|
Senior Member
Joined: Jan 2024
Posts: 117
Likes: 42
From: Germany
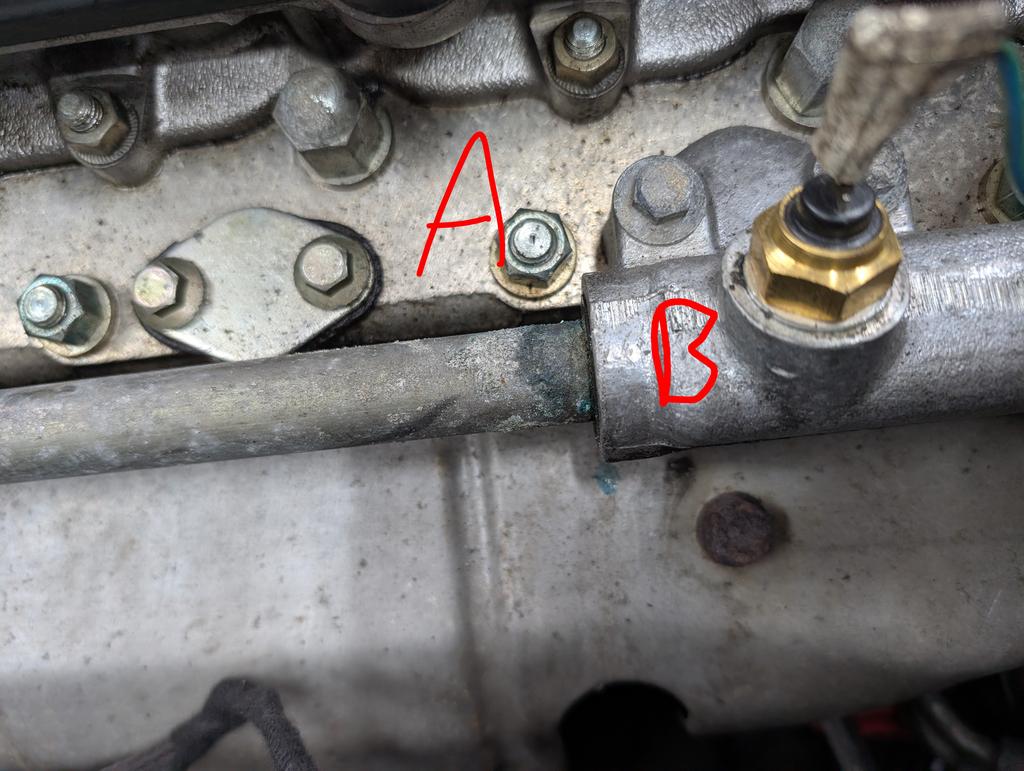
Today i removed the inlet manifolds and noticed that the pipe between the thermostat housings is slightly leaking and i will fix that too since its open. This rises a question:
The two screwed on housings connected by a pipe are also connected to the cylinder head right? so there has to be a seal between these housings and the head (or block?). To replace the rubber bushings from the pipe i have to remove the housings and so i also have to replace the seal to the head. But i cant find that seal anywhere? Does anyone know what seal that is?
The two screwed on housings connected by a pipe are also connected to the cylinder head right? so there has to be a seal between these housings and the head (or block?). To replace the rubber bushings from the pipe i have to remove the housings and so i also have to replace the seal to the head. But i cant find that seal anywhere? Does anyone know what seal that is?

Veteran Member
Joined: Jan 2012
Posts: 14,600
Likes: 10,794
From: France
I think you mean the water manifold to head gasket? If so it is part number EBC9634 - Gasket
Number 14 on this diagram:
https://parts.jaguarlandroverclassic.../brand/jaguar/
Number 14 on this diagram:
https://parts.jaguarlandroverclassic.../brand/jaguar/
Thread Starter
|
Senior Member
Joined: Jan 2024
Posts: 117
Likes: 42
From: Germany
Thank thats the one i mean. Interesting that my usual parts dealer does not have this on his list, but i got it on ebay.
Meanwhile i changed the valve cover seal, the half moon seals and the chopper washers of the banjo bolt behind the camshaft.
I did order the longer banjo bolts since i read that these are critical short. But i was not able to get the longer bolts in because they are ro long between the engine and the firewall. I used the original ones and luckely did not destroy the thread.
Thread Starter
|
Senior Member
Joined: Jan 2024
Posts: 117
Likes: 42
From: Germany
I now also did the oil filter hub o-rings, all new belts, new hoses. Put everything back together. One last thing was to reseal the AC compressor. The original A6 one.
I know that the clutch needs special tools so i got a set of tools that says GM A6 compressors. Everything fine, clutch comes off, resealed the compressor, put it all together.
Then i found out that the tool for assembling the clutch does not fit. It dousnt go through the Clutch and does not fit the tread on the shaft.There is no other way to get the clutch back together....i was in at least ten workshops and they all have the same tools as i have....not a single one fits that compressor. Any idea where i can find a fitting tool?

Thread
Thread Starter
Forum
Replies
Last Post
xjrwithproblems
XK8 / XKR ( X100 )
16
Nov 9, 2013 02:56 PM
Currently Active Users Viewing This Thread: 1 (0 members and 1 guests)