
Caliper Bolt Sheared Off! What should I do? (XJS V12)

Thread Starter
|
Veteran Member
Joined: Feb 2013
Posts: 17,809
Likes: 3,945
EZY out's and IO have never gotten along. I've resolved a lot of busted bolts and studs.
Drill and chisel has worked best for me. But, usually, where space to work in is nt n issue.
A left hand bit is intriguing for stuff like this.
If Loctited, it may take heat to bust the bond.
Carl
Drill and chisel has worked best for me. But, usually, where space to work in is nt n issue.
A left hand bit is intriguing for stuff like this.
If Loctited, it may take heat to bust the bond.
Carl
Senior Member
Joined: Apr 2014
Posts: 816
Likes: 222
From: Comox Valley, British Columbia
OB. If it happened to me again I would remove it from the car. Then use a drill press. Doing it on the car is a pain. I used an angle drill which helped a lot. But still a pain


Thread Starter
|
Veteran Member
Joined: Feb 2013
Posts: 17,809
Likes: 3,945
I've just got to get it off first.
Thread Starter
|
Veteran Member
Joined: Feb 2013
Posts: 17,809
Likes: 3,945
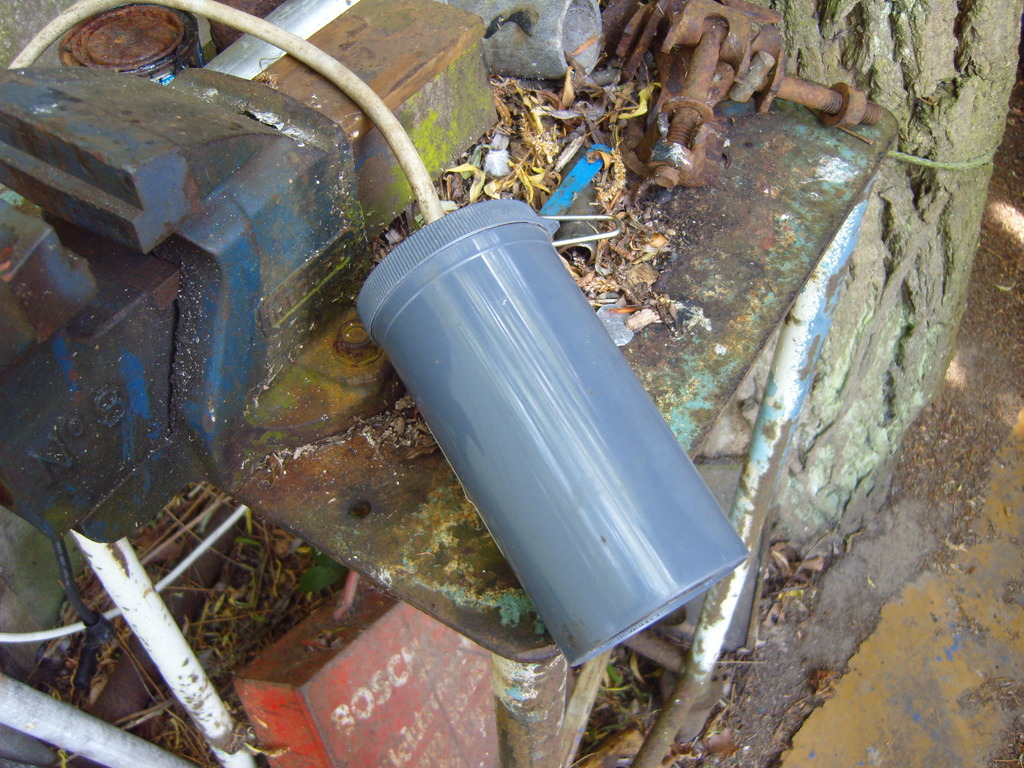
Having had to abandon Ship to try and fix my Car Lifter, I made this little 'Gizmo' in 5 Minutes.
Which is to keep the Plug dry when not in use.
This is just a Pill Container, which I got free from the Chemist/Drugstore.
First I drilled a hole in the Lid, put the Cable through the hole and then I put the Plug on. (and that's it!)
So when I've finished using the 'Lifter' which plugs into a Socket outside, I just put the Plug in the 'Pill Box' and put on the Lid.


Joined: Feb 2010
Posts: 28,829
Likes: 11,286
From: Adelaide Stralia
I reckon as Greg said, is to remove the remaining caliper, steering arm bolts, that way the upright unit should swivel a little more than with the steering arm/s attached.
Then when those bolts are out, the remaining caliper piece MAY swivel/wobble/move around on that broken bit. Lots of lube. some heat, more lube, etc etc, JD for you until the fuzzy stuff clears up, and you may just get that inner half to slide off the broken bit, then getting the broken bit out of the vertical unit will be a lot easier, and with the lube/heat you are about to provide, may just undo.
Time will be needed.
I use Diesel Fuel as a soaker, coz it dont evaporate like WD40 etc, and have had good success with it.
To remove that vertical, for bench access, you will have to support the lower wishbone using the weight of the car, OR, remove the spring first.
Last edited by Grant Francis; Jun 12, 2015 at 05:48 AM.
Thread Starter
|
Veteran Member
Joined: Feb 2013
Posts: 17,809
Likes: 3,945
Hi Grant
Cheers! This is the Story so far!
I removed the Caliper Bolt at the Top, where as you know the bottom one Broke and is now a Stud.
The Caliper flops about on this, which leads me to believe the Shim is missing.
Then I removed the Top Bolt which was next to the Top Bolt of the Caliper@Greg in France.
NOW! and this is a 'Biggie!' Using a FBH, I can rock the Steering Arm, up and down on the Broken Bolt (now reduced to a Stud!)
Without the Thread of the Broken Bolt, turning in the Caliper!
Can you see where I'm going with this!
So if I can manage to do it, I will grind the ragged top of this Stud, flush with the Steering Arm.
Then the only other thing I will need will be 'The Jaguar Gods!'
And a drop of JD!
Joined: Feb 2010
Posts: 28,829
Likes: 11,286
From: Adelaide Stralia
Yep,
Take the time to remove ALL those burrs on the now stud, then that arm will possibly slide off without the need for the FBH.
Then work on that caliper half, and maybe the FBH will be needed.
The "stud" sounds/looks like it siezed at the threads. If that is so, then heat/time will be the only safe way to release it.
Joined: Jan 2014
Posts: 28,386
Likes: 6,340
From: Delaneys Creek,Qld. Australia
I find when working on machinery at work when removing broken bolts (M6-M14 sizes) a good solid few hits with a decent centre punch and big hammer seems to crack/break the hold of the corrosion before drilling to insert the easy out.
Most times the stud comes out fairly easy but it hasn't been exposed to the conditions you get, just water and moisture most of the time. We very rarely use heat as we have 100% IPA and volatile solvents around.
Most times the stud comes out fairly easy but it hasn't been exposed to the conditions you get, just water and moisture most of the time. We very rarely use heat as we have 100% IPA and volatile solvents around.
Thread Starter
|
Veteran Member
Joined: Feb 2013
Posts: 17,809
Likes: 3,945
Yep,
Take the time to remove ALL those burrs on the now stud, then that arm will possibly slide off without the need for the FBH.
Then work on that caliper half, and maybe the FBH will be needed.
The "stud" sounds/looks like it siezed at the threads. If that is so, then heat/time will be the only safe way to release it.
Take the time to remove ALL those burrs on the now stud, then that arm will possibly slide off without the need for the FBH.
Then work on that caliper half, and maybe the FBH will be needed.
The "stud" sounds/looks like it siezed at the threads. If that is so, then heat/time will be the only safe way to release it.
I'm going to use my Mini Air Sander to remove the Burr on the Stud, rather than the Angle Grinder which may be a bit OTT!
Then if I reckon I can get one in there, I am going to buy a Fork Type ball joint Splitter.
If I can jam that between the back of the Steering Arm and the Upright, then with a few light Taps with a FSH might just do the trick?
Thread Starter
|
Veteran Member
Joined: Feb 2013
Posts: 17,809
Likes: 3,945
I find when working on machinery at work when removing broken bolts (M6-M14 sizes) a good solid few hits with a decent centre punch and big hammer seems to crack/break the hold of the corrosion before drilling to insert the easy out.
Most times the stud comes out fairly easy but it hasn't been exposed to the conditions you get, just water and moisture most of the time. We very rarely use heat as we have 100% IPA and volatile solvents around.
Most times the stud comes out fairly easy but it hasn't been exposed to the conditions you get, just water and moisture most of the time. We very rarely use heat as we have 100% IPA and volatile solvents around.
Cheers!
I've managed to get the Steering Arm rocking on the Stud and if I can manage to slide it off, I have a plan to get the broken Stud out of the upright.
The hammer and punch idea sounds great and will certainly give that a try if Plan 'A' doesn't work.

Veteran Member
Joined: Jul 2012
Posts: 6,796
Likes: 2,403
From: Walnut Creek, California
UGH, brute force at work. if only that would fix my issues????
Can you get behind the caliper at the now a stud place? If so, use a recip saw to cut the stud and free the caliper. Only a part fix as you will have the no longer a stud, but now a stub to attack. but, close to the locked threads, a bit of an improvement.
Is a FBH the dame as a BFH ? The sanitized version of the latter is Big Ford hammer. Very use full on Fords. Been there, done that.
Interestingly, a BFH is used to remove the locking wedge that secures the caliper on some Ford trucks!!
Persistance pays!!
Carl
Senior Member
Joined: Apr 2014
Posts: 816
Likes: 222
From: Comox Valley, British Columbia
If you have a stud left after you remove the caliper then try an outside easyout. Works the opposite of most other easyouts. It looks like a socket with tapered spirol teeth inside. I have a set and they work great.
Thread Starter
|
Veteran Member
Joined: Feb 2013
Posts: 17,809
Likes: 3,945
UGH, brute force at work. if only that would fix my issues????
Can you get behind the caliper at the now a stud place? If so, use a recip saw to cut the stud and free the caliper. Only a part fix as you will have the no longer a stud, but now a stub to attack. but, close to the locked threads, a bit of an improvement.
Is a FBH the dame as a BFH ? The sanitized version of the latter is Big Ford hammer. Very use full on Fords. Been there, done that.
Interestingly, a BFH is used to remove the locking wedge that secures the caliper on some Ford trucks!!
Persistance pays!!
Carl
Can you get behind the caliper at the now a stud place? If so, use a recip saw to cut the stud and free the caliper. Only a part fix as you will have the no longer a stud, but now a stub to attack. but, close to the locked threads, a bit of an improvement.
Is a FBH the dame as a BFH ? The sanitized version of the latter is Big Ford hammer. Very use full on Fords. Been there, done that.
Interestingly, a BFH is used to remove the locking wedge that secures the caliper on some Ford trucks!!
Persistance pays!!
Carl
FBH is just the same as a BFH, its just that we put a Verb before the Noun because it conveys a lot more intent on the part of the user of the Hammer, instead of just its size, if you know what I mean.
As for getting the Steering Arm off, I was using a crowbar to leaver it back, before hitting the Ball Joint Socket Up and Down (Ball Joint Already Removed) with an FBH and it actually started moving a few thou.
You could just about feel the edge of the dip with your finger, then it all went horribly wrong! as the Stud then started to turn, which was not what I wanted to happen at this stage.
If I could have got the Pistons out of the Caliper, then it would have given me room to put in a wedge but they were rusted in solid and wouldn't come out.
I was going to make the Steel Wedge by cutting a slot in a Cold Chisel, which I'm pretty confident, would have done the job.
But it wasn't to be, 'The Jaguar Gods' were not with me.
The Pistons in the Caliper, are also preventing me from sawing through the Stud, so I will have to try and think of another way.
This Job is the PIA from Hell! so theoretically simple but yet so difficult.
Thread Starter
|
Veteran Member
Joined: Feb 2013
Posts: 17,809
Likes: 3,945
The Stud should come out easy, as its already started to turn and that's my big problem.
If only the Stud were not turning, then I could rock the Arm up and down and hopefully slide it off.

Veteran Member


Joined: Jan 2012
Posts: 14,607
Likes: 10,802
From: France
OB
Progress! But I am a bit confused about exactly where you have got to! Pic maybe for us eager OB followers?
Are you are at the situation where the arm is on the stud, the stud is turning in the threads on the upright (knew it would!), but the arm is fouling on something ? Think VERY carefully before sawing through the stud as a flush of short stud give you many fewer chances to unscrew it using watchmakers tools!
Greg
Last edited by Greg in France; Jun 13, 2015 at 01:10 AM.
Thread Starter
|
Veteran Member
Joined: Feb 2013
Posts: 17,809
Likes: 3,945
OB
Progress! But I am a bit confused about exactly where you have got to! Pic maybe for us eager OB followers?
Are you are at the situation where the arm is on the stud, the stud is turning in the threads on the upright (knew it would!), but the arm is fouling on something ? Think VERY carefully before sawing through the stud as a flush of short stud give you many fewer chances to unscrew it using watchmakers tools!
Greg
Progress! But I am a bit confused about exactly where you have got to! Pic maybe for us eager OB followers?
Are you are at the situation where the arm is on the stud, the stud is turning in the threads on the upright (knew it would!), but the arm is fouling on something ? Think VERY carefully before sawing through the stud as a flush of short stud give you many fewer chances to unscrew it using watchmakers tools!
Greg
Things were starting to progress quite well.
The Caliper was held in place just by the Broken Bolt, which was turning in the Steering Arm, (no longer seized up!), while this Broken Bolt wasn't turning in the hole in the Upright, which was Good News!
If I levered the Steering Arm back (which was no longer bolted to anything) and then hit it up and down with a FBH, it started to show signs that it was sliding off, though only by a few Thou just to start with.
You could just feel the dip with your finger in the hole with the Broken Bolt (Now a Stud)
If things had kept on going like that, it would have opened up a Gap to get a wedge behind to drift it off.
But then this Broken Bolt started to turn in the 'Upright' which meant when I hit it the Steering Arm Up and Down with a Hammer, the Steering Arm and the Broken Bolt, both started turning together.
So the Steering Arm didn't continue to slide off the Stud as it was doing albeit by only a couple of Thou but it was definitely moving.
I also tried a bit of heat around the outside but that didn't make any difference in this Situation.
There is one more thing I can try before I follow your suggestion and Cut through the Steering Arm socket. (which may be the only option)
I have just found my Air Chisel and one of the bits that go in it, is a Shaft with a Point, so if I lever the Steering Arm Back with a Crowbar and then put the Point of the Air Chisel, on the end of the Broken Bolt (Stud)
And pull the Trigger, there is a Chance that it will start to Tap the Broken Bolt out of the hole, while 'Counter leverage' is being applied with the Crowbar to the Steering Arm.
There will be Pics!
But now off out for a bit of Saturday Shopping!
So there will be plenty of time to Stop me, If this is not a good idea?
Joined: Feb 2010
Posts: 28,829
Likes: 11,286
From: Adelaide Stralia
Good sound reasoning to my ears.
I would try and BFH the arm BACK ON the stud, then BACK OFF, as in sliding as much as it will allow in each direction. Any "burrs" on the section that WAS the head should be removed, as they will most certainly bind in that arm with conviction, and then you be screwed.
I would try and BFH the arm BACK ON the stud, then BACK OFF, as in sliding as much as it will allow in each direction. Any "burrs" on the section that WAS the head should be removed, as they will most certainly bind in that arm with conviction, and then you be screwed.
Thread Starter
|
Veteran Member
Joined: Feb 2013
Posts: 17,809
Likes: 3,945
Good sound reasoning to my ears.
I would try and BFH the arm BACK ON the stud, then BACK OFF, as in sliding as much as it will allow in each direction. Any "burrs" on the section that WAS the head should be removed, as they will most certainly bind in that arm with conviction, and then you be screwed.
I would try and BFH the arm BACK ON the stud, then BACK OFF, as in sliding as much as it will allow in each direction. Any "burrs" on the section that WAS the head should be removed, as they will most certainly bind in that arm with conviction, and then you be screwed.
Cheers!
I will give that a go! but first a little drop of JD to revive me from the Shopping Trip I never wanted to go on in the first place.
Pics and hopefully positive progress to follow!
Thread Starter
|
Veteran Member
Joined: Feb 2013
Posts: 17,809
Likes: 3,945
For a variety of reasons, the Air Chisel idea has failed to work, none the least because the Arm needs to be held dead rigid, with no play whatsoever or the impact from the pointed Chisel is going to get absorbed.
So now onto Plan 'B' where for the first time in my life, without the aid of a drill press, I managed to drill a dead straight (ish) hole, into the Caliper Bolt that had snapped off and is now a Stud.
The drill that I was using was 4.5mm and I drilled it to a depth of 15mm into the Caliper Bolt, which is approximately 11.75mm across (for all practical purposes)
I've decided to try an 'easy out' so how much wider and deeper, do I need to go with the drill?
Ideally I would really love to drill a hole right through it, from one end to the other but I am dead scared that the drill might snap in the hole, which is the thing that usually happens to me!
Is 15mm deep enough?
I also think I might have to drill a wider hole than 4.5mm
But how much wider with the drill should I go?
In the event that the hole that I drilled in the Caliper Bolt, is not bullet straight, I don't want to go too big, just in case I damage the thread in the upright.
Although I've got this 'Now' Stud to turn, when I wack the Steering Arm, with a FBH I'm pretty sure it will be a bit of a Bar Steward to unscrew.
Any advice would be appreciated.
In the Pic, I've left the drill in the hole to make it that much easier to see.

Last edited by orangeblossom; Jun 14, 2015 at 03:08 PM.