Cherry Blossom - Restoration 1990 XJS V12
#2601
Alex
I just mention this in case others want to do the bearings and washers with the plate off. Like you I do it cage upside down. Then I do the dog bone alignment and get that all correct and use the strongest loctite on the dog bone bolts - the stuff that requires 450 C do undo. Plate-on I make sure that the fulcrum shafts will go through cage, wishbone eyes, and cage the other side with no more than a decent tapping. I then leave ONE fulcrum shaft in position (no washer pack yet) with nuts on remove the plate. I then remove the unbolted shaft and insert the protection tube between the dogbone ends. And yes, I have forgotten this step in the past and had to redo it all!!
On the side without the shaft, the cage (with no plate) is more easily able to splay out a touch, which makes the insertion of the washer pack a touch easier, but NOT easy.
Once done and bolted up, I remove the other side and repeat. The main advantage as I see it, of no plate while this is done, is that levering the cage with the bottom plate on to get the washer pack in, might run a risk of deforming the cage s these is no place for it to give. Just a thought.
As to the large rubber washer idea, I cannot see much wrong with it. The OEM rubber seal has an X cross-section. This keeps grease in and grit out; but as your washer is so much wider I am sure it would work just as well. The outer ring, outside the OEM seal, is just there to keep the seal in place, again, as your seal is so much more robust and wider, I cannot see an outer ring is needed.
My own idea, and I have not tried this - and I hope never to have to do anything to my rear axle again after my tortuous time getting it right - was to see if there was a Dowty washer available that would be used in place of your rubber washer. Same idea as yours really. This sort of thing; but I would need to find one that was a decent fit over the washer inside it, or make a special washer to fit it, as the centre washer must not move about, it must hold the rubber or Dowty washer centralised.
https://www.ebay.co.uk/itm/352777762...r=622079941112
The following 3 users liked this post by Greg in France:
#2602
Hi Greg
Many Thanks for that which will no doubt be of help to anyone contemplating doing this job which is in fact quite dangerous as I am sure we both know, so once again I will mention to anyone doing this job how important it is to keep your fingers well out of the way, as if the Cage Snaps Back THERE ARE NO SECOND CHANCES!
I've done this job with the Base Plate on and also with it off, where I find there are many advantages to leaving the Base Plate in place, providing as Greg mentions the importance of making sure that the Dog Bones are tight
Though I always undo the 3 Bolts on each side of the Base Plate to Cage, where in my case its all done now and just requires a final little bit of Spit and Polish before painting as I want to at least get her ready before the Clocks go back at the Weekend
And very much hope that my Handbrake 'Mod' is going to get her through the MOT Test!
The following users liked this post:
Greg in France (10-29-2021)
#2603
Rebuilding The IRS Cage On 'Cherry Blossom' My V12 XJS
Greasing The Grease Points And Flipping The Cage Back Upright
Whenever I've done a rebuild on an IRS Cage I've always found it easier to turn it upside down, where having refitted the Washers and Seals to the Fulcrum Shafts, it was also easier to Grease all the Grease pointsGreasing The Grease Points And Flipping The Cage Back Upright
As you will see from the Photos, the outside of the Cage was looking Scruffy! which was quite deliberate, as turning it over would have ruined all that lovely paintwork that is hopefully going to happen 'Sometime Today'

Greasing all the Grease Points
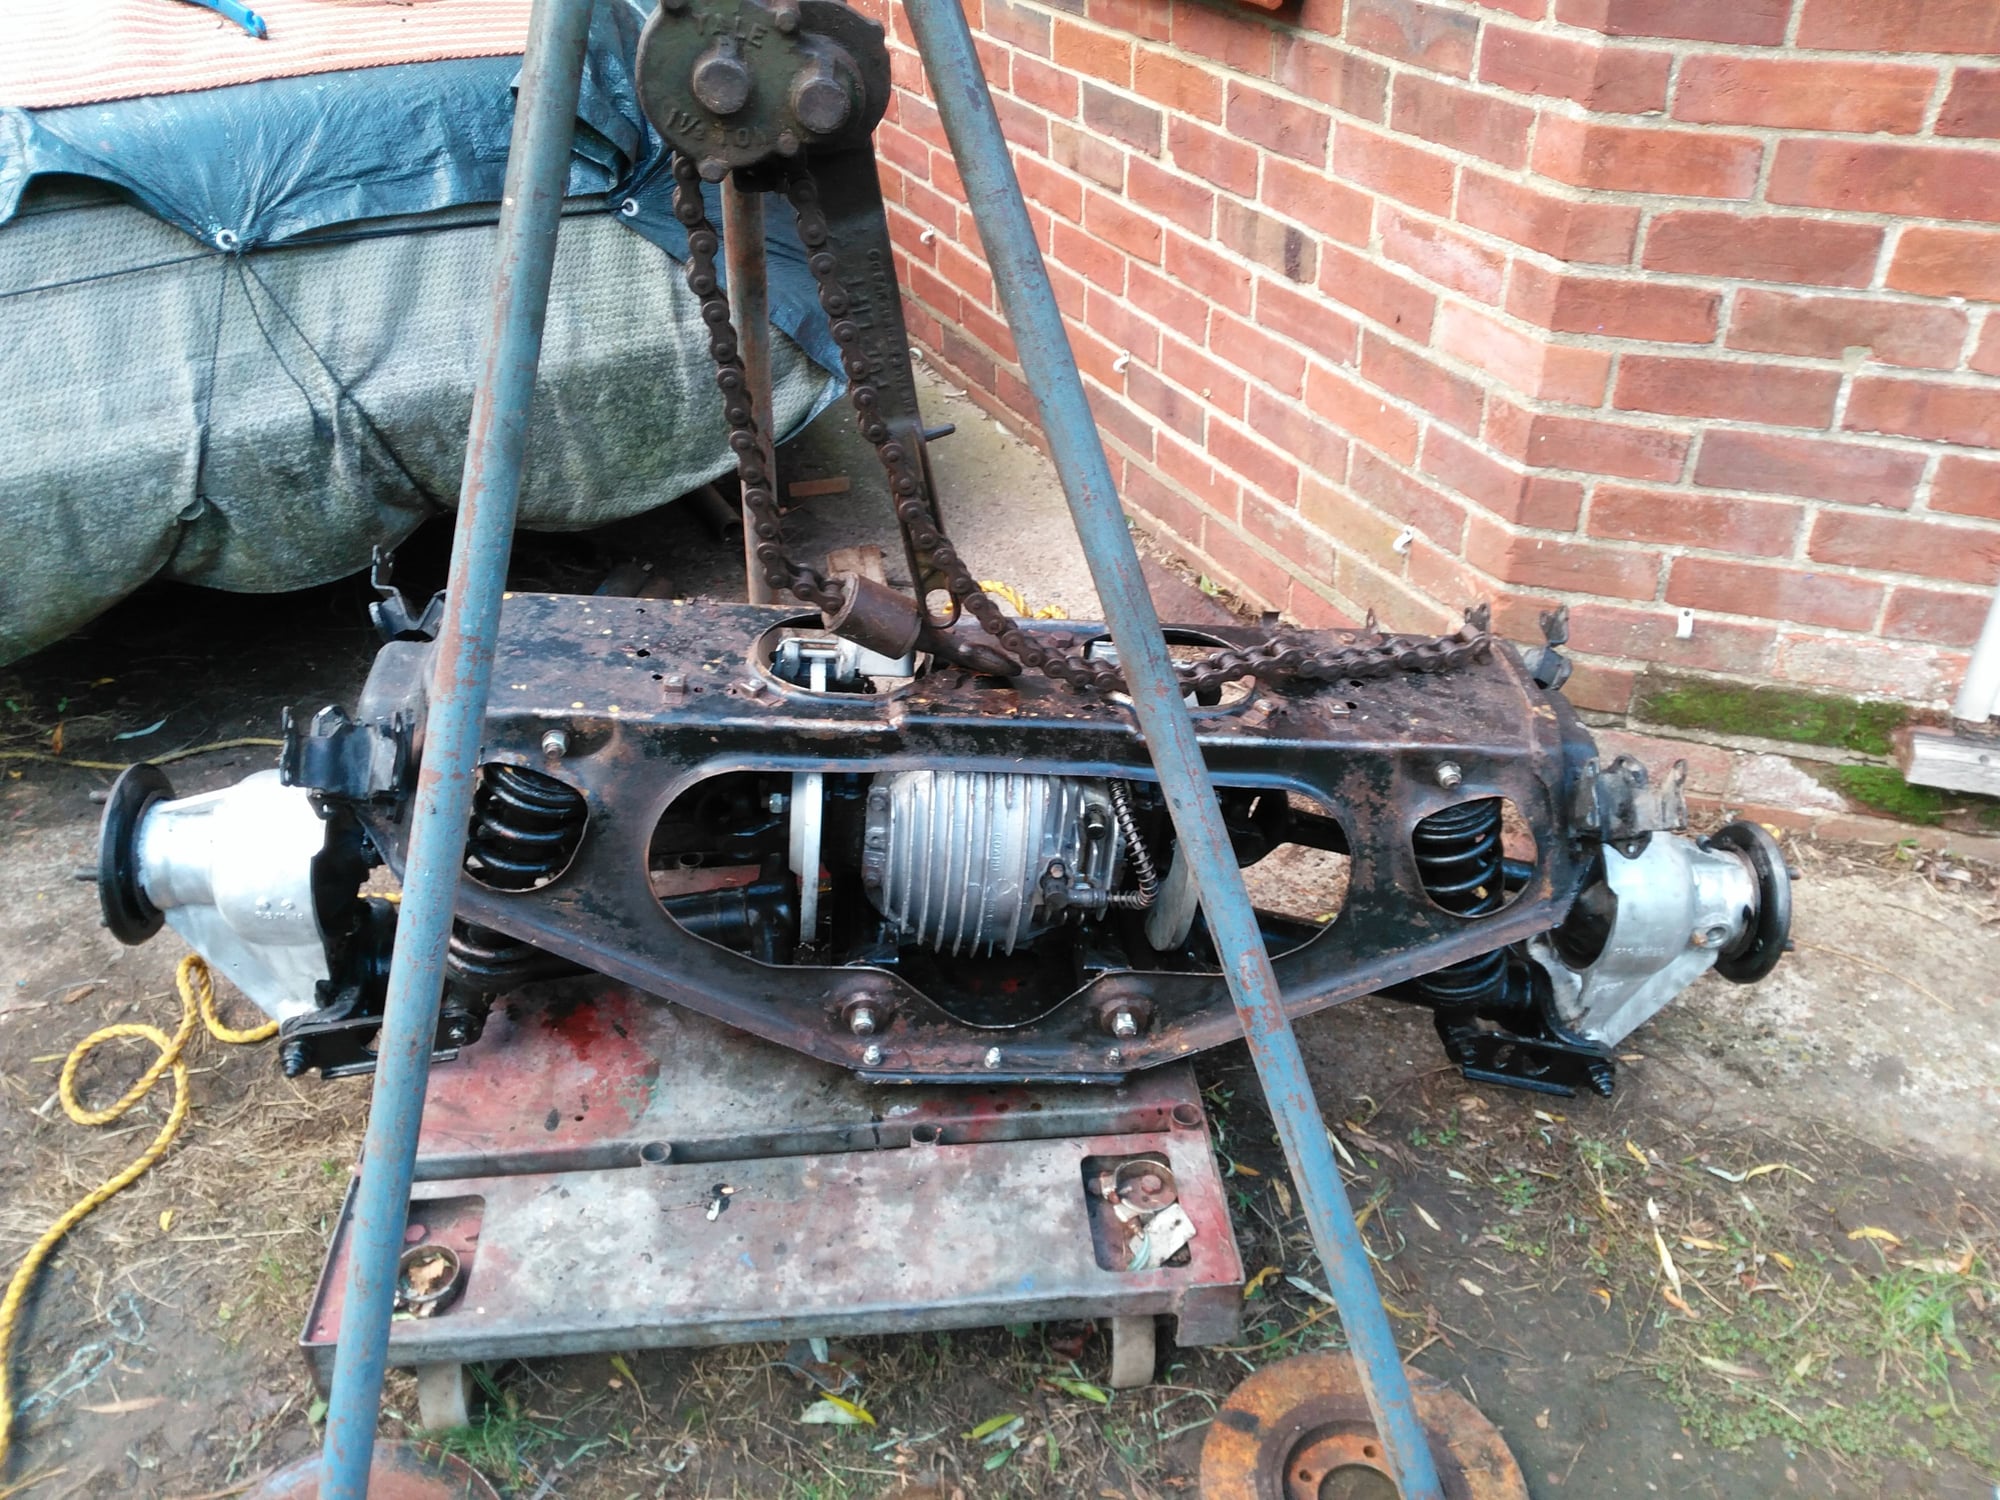
OOPS! A bit more to the Left might be better methinks

Yass! that's a lot more like it
Meanwhile back at 'Orange Blossom Towers' I thought I would do a quick 'Mod' on my Trolley Jack for when the time came to refit the IRS Cage
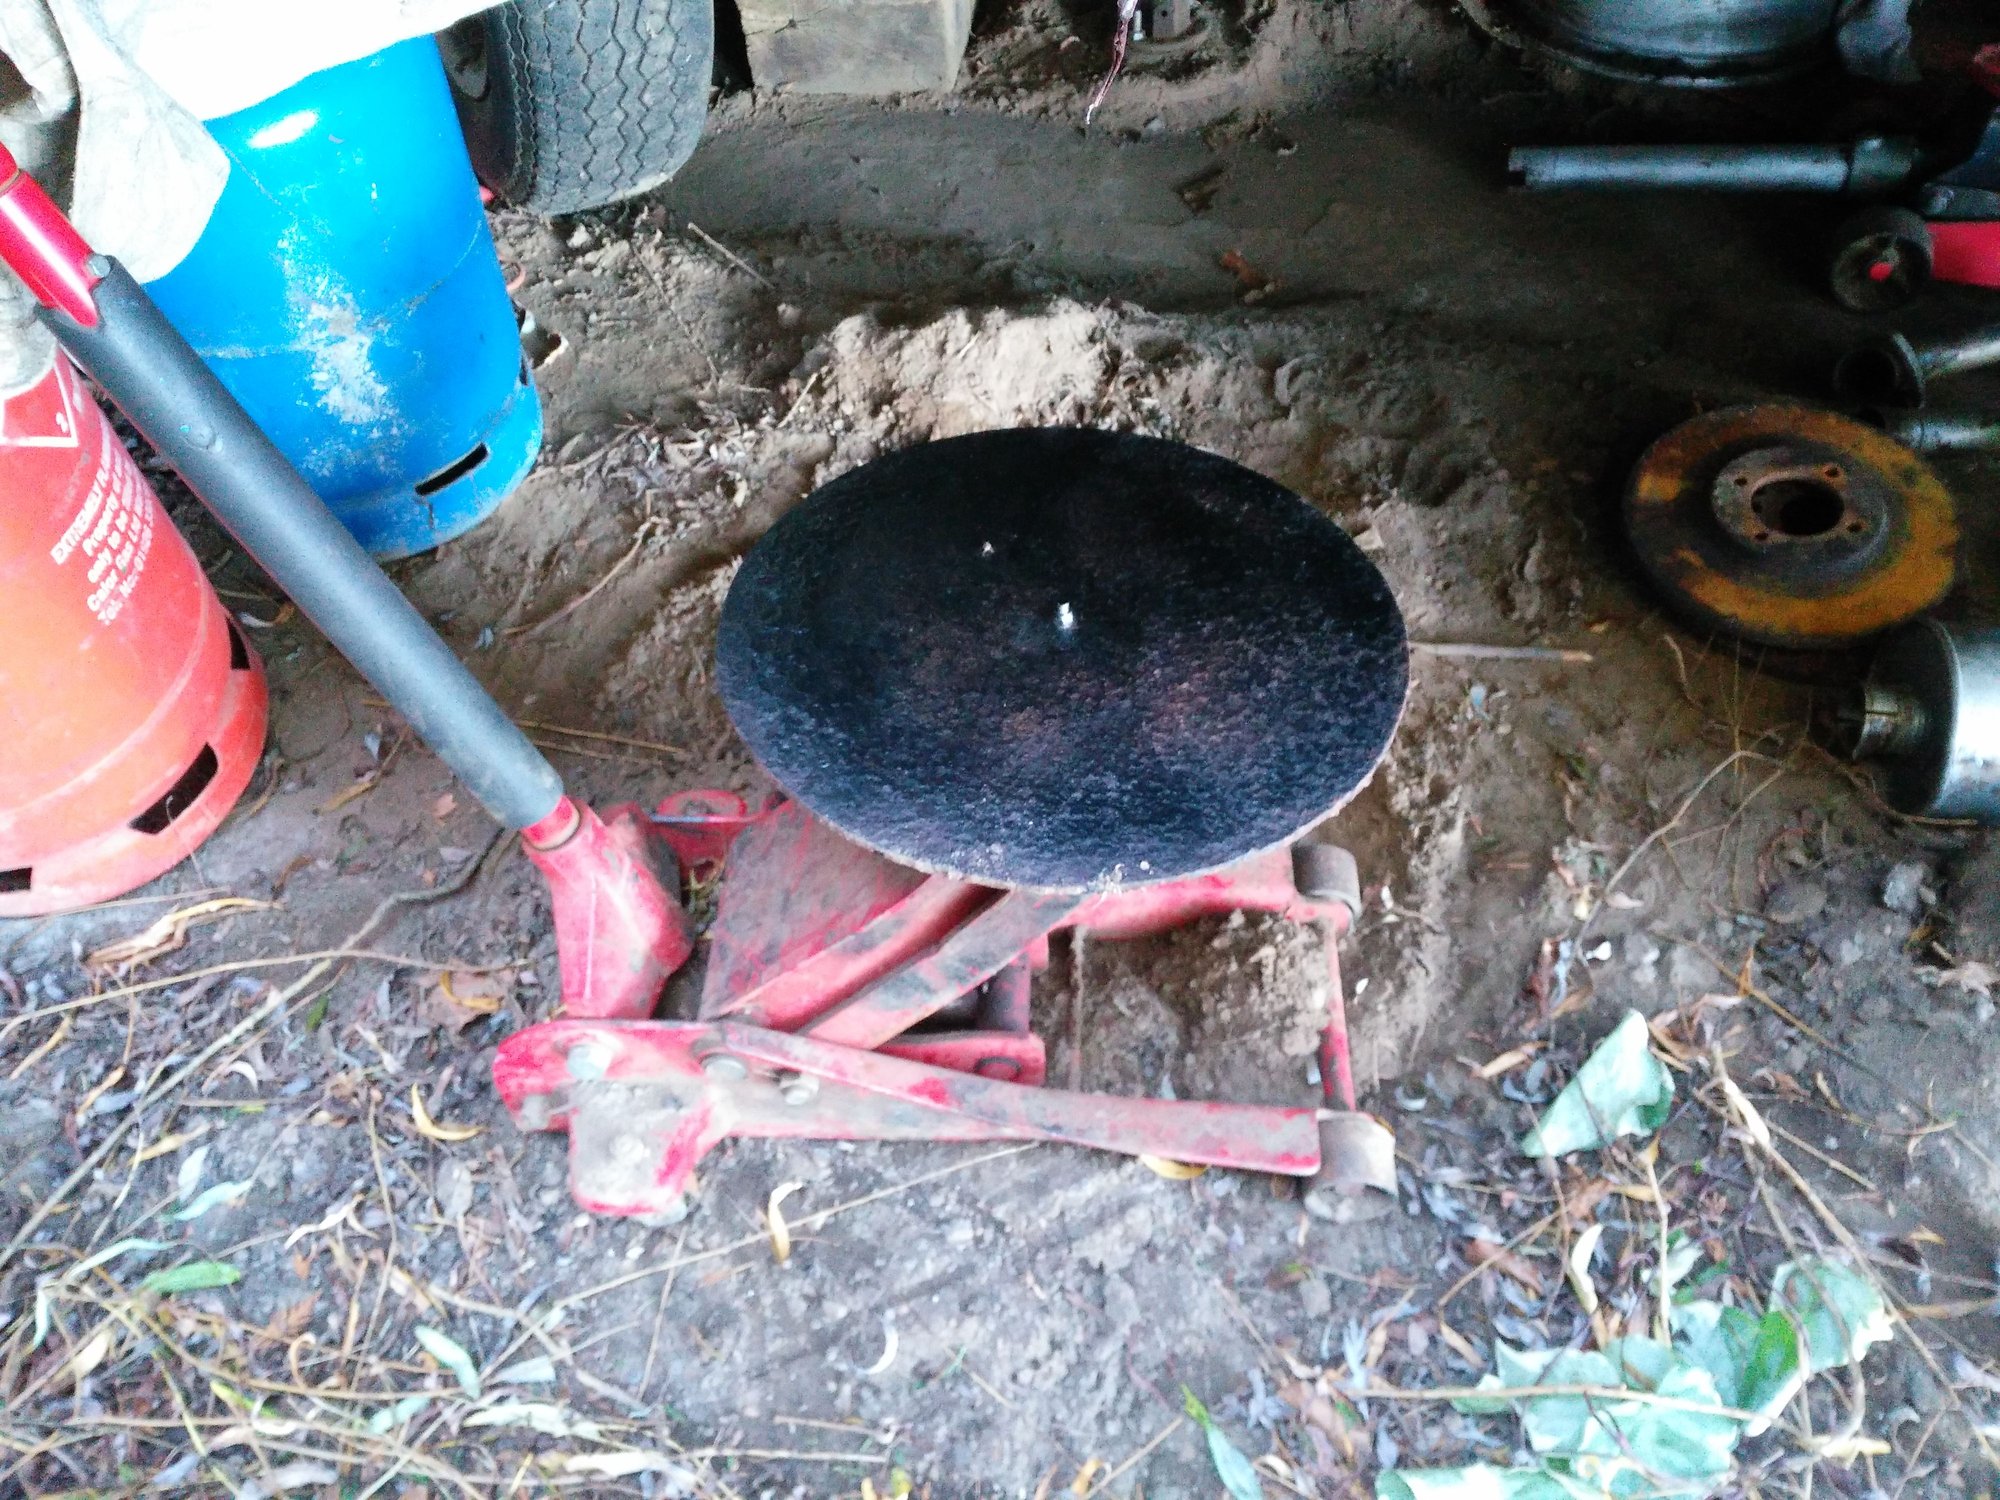
A slightly bigger Jack Pad to sit the IRS Cage on for when refitting it in the Car but now I'm off to get myself another Tin of Paint and who knows what else!
The following 2 users liked this post by orangeblossom:
Greg in France (11-02-2021),
ptjs1 (11-02-2021)
#2604
Rebuilding The IRS Cage On 'Cherry Blossom' My V12 XJS
All Done And Ready To Go Back Into The Car!
Although I wasn't in a rush with this one, with 3 nice days of Continuous Sunshine that felt more like Spring than the onset of Winter, the IRS Cage is now ready to go back into the Car, though just before I do that I've got to remove the end of the hydraulic Brake Pipe that I have left under the CarAll Done And Ready To Go Back Into The Car!

Looking a little bit rusty and in need of TLC

Yass! That looks a lot better and she's ready to go back
The following 3 users liked this post by orangeblossom:
#2605
The following users liked this post:
orangeblossom (11-03-2021)
#2606
#2607
Rebuilding The IRS Cage On 'Cherry Blossom' My V12 XJS
Final Preparation Before Refit
Very nearly ready to refit the IRS Cage and probably would have done so today, were it not for 'The Case Of The Vanishing Spanner' as I've learned the hard way that a near enough Spanner won't do, as trying to undo a fitting with anything less than the proper size, will leave you in danger of rounding off the Corners of the NutsFinal Preparation Before Refit
So I was quite justifiably proud of having a pair of 15mm Spanners (not always included in a Set) to undo the Lock Nuts that go to the Brake Pipe under the Car
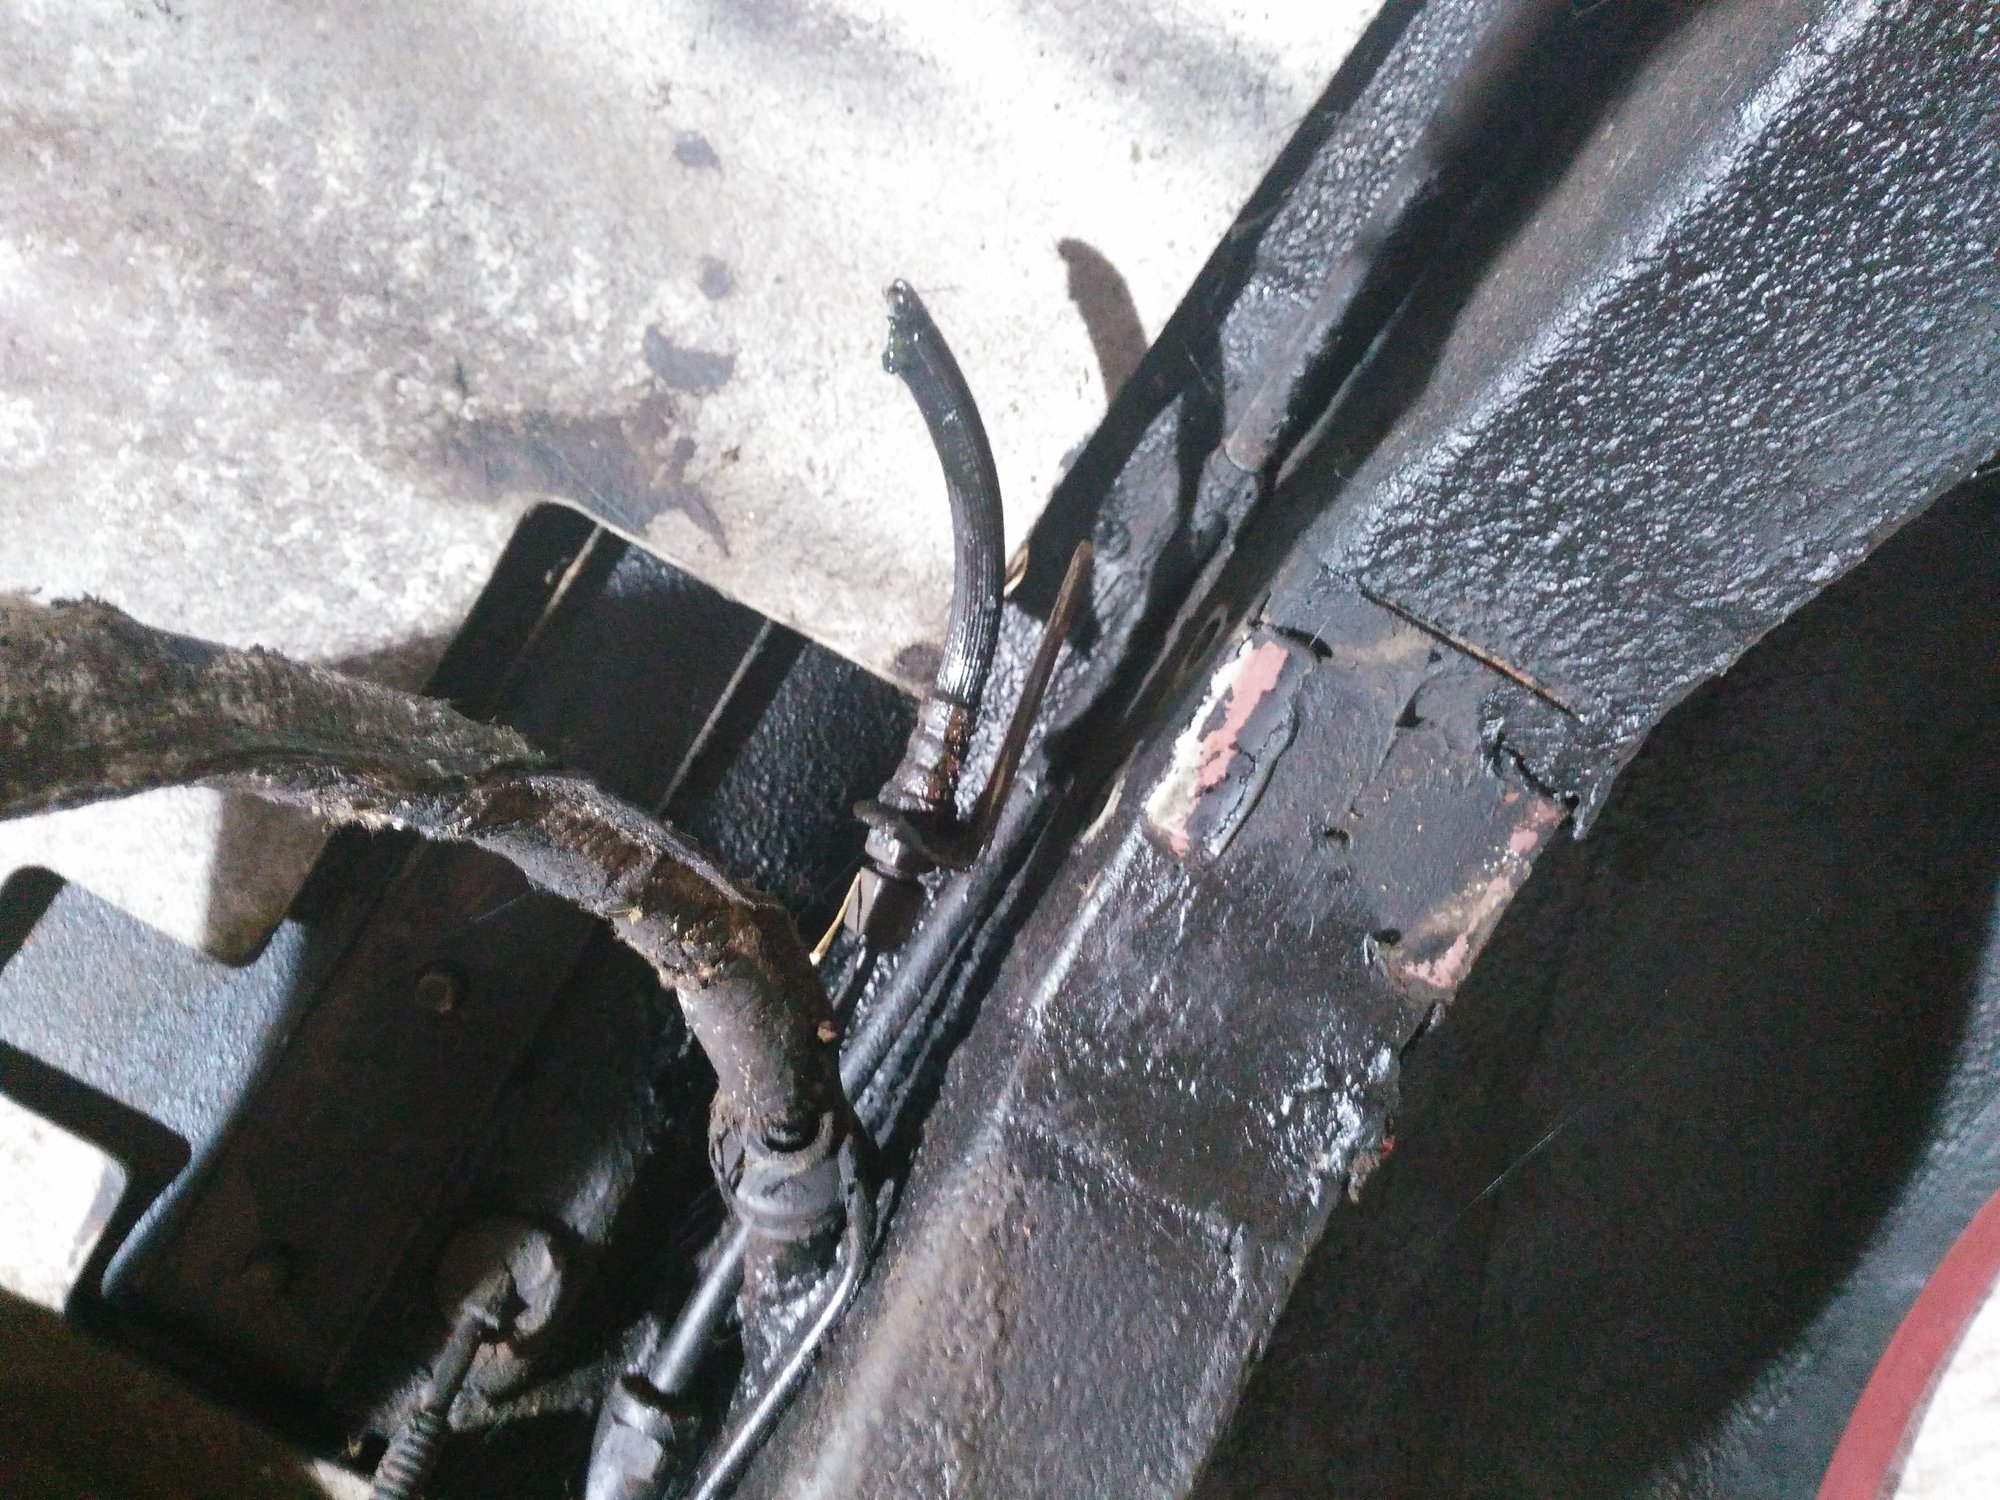
In order to undo the Lock Nuts on the Flexy 2 X 15 mm Spanners are required, so that you can counter Torque them to prevent any damage to the Brake Pipe and luckily I bought two of these especially for that job, as if they start to get rusty they can be a total PIA to undo
The only problem being, that I could only manage to find one of them and so I had to turn the Garage out in order to try and find the other one, where in the end I found it in my Spanner draw, then went indoors for a Cup of Tea, only to find that when I came back, the elusive 15 mm Spanner had disappeared again!
OMG! how could that be, either I was going crazy or that Spanner was Haunted!
And so now for the Third Time! I went through every Spanner in that Spanner drawer and then found it again! because as it turned out this mystery Spanner was marked 15 mm on one side and M8 on the other!
Who knew that could happen and those sizes were the Same! (Almost certainly Greg and Grant) but obviously Not me! so something to look out for in the future
Then having wasted half a day, including an hour undoing those nuts, it was time to reconnect the hydraulic lines from the Cage to the Calipers

Hydraulic Cage Brake Pipes ready to fit to the Calipers

These are the moments you start to pray to 'The Jaguar Gods' that none of these Pipes gets Cross Threaded but Thankfully all went OK!
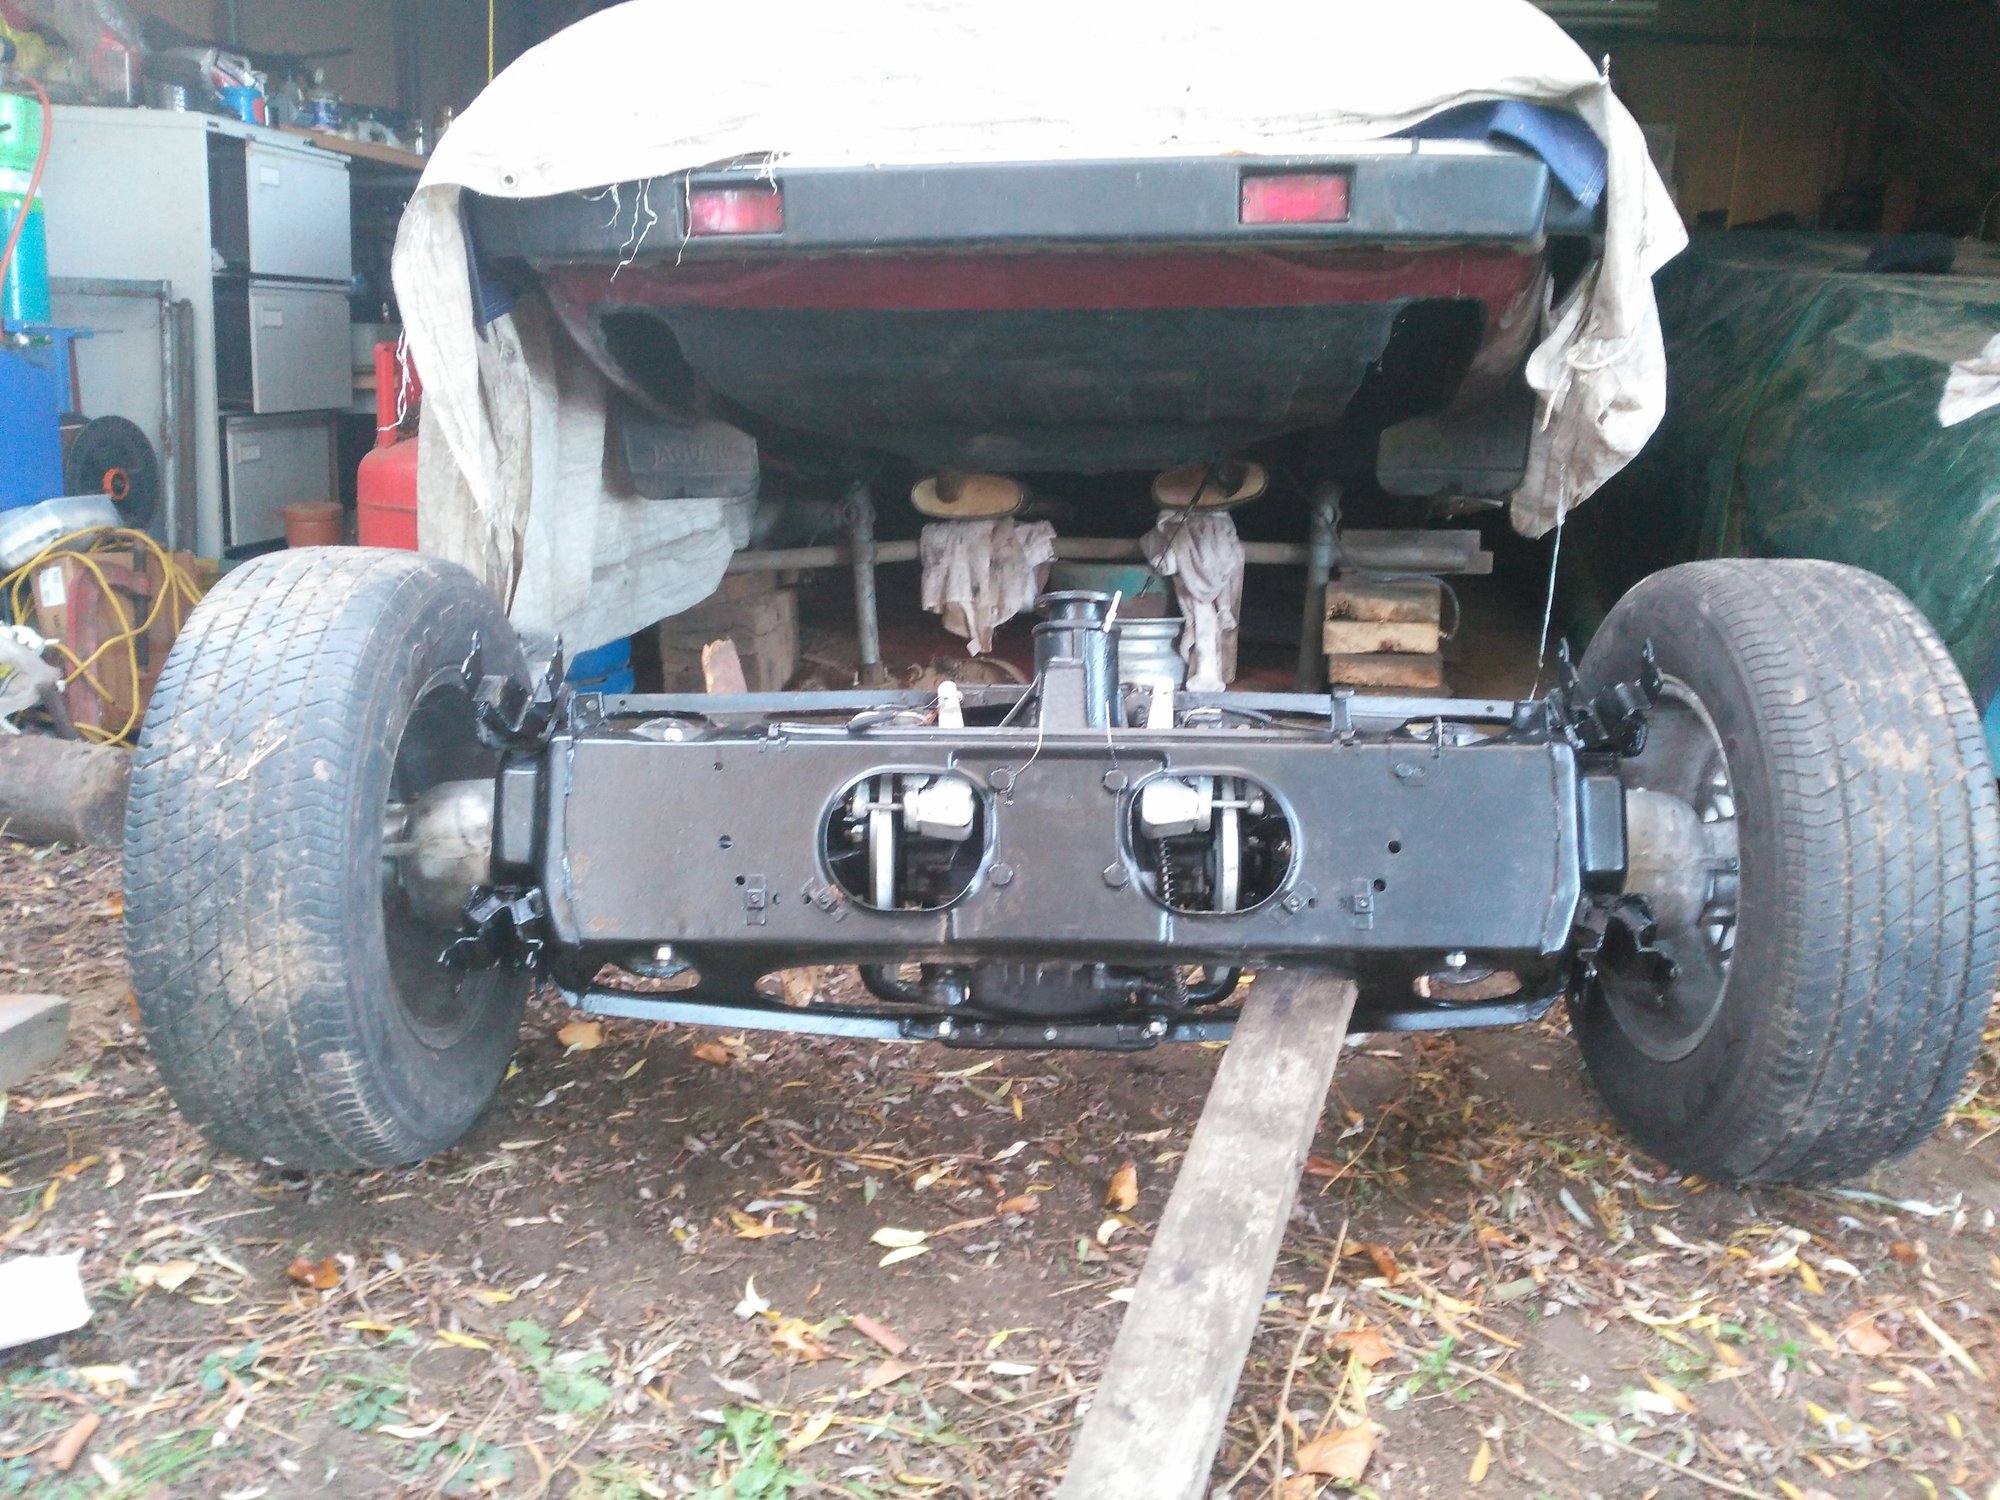
With everything connected up it was time to Roll in 'The Cage' which I put on Slave Wheels, as if you are doing this on your own as I was, it makes an otherwise difficult Job quite easy and totally cuts out all the heavy lifting
Where that length of Timber is only there to stop the Cage from taking a nose dive and turning upside down
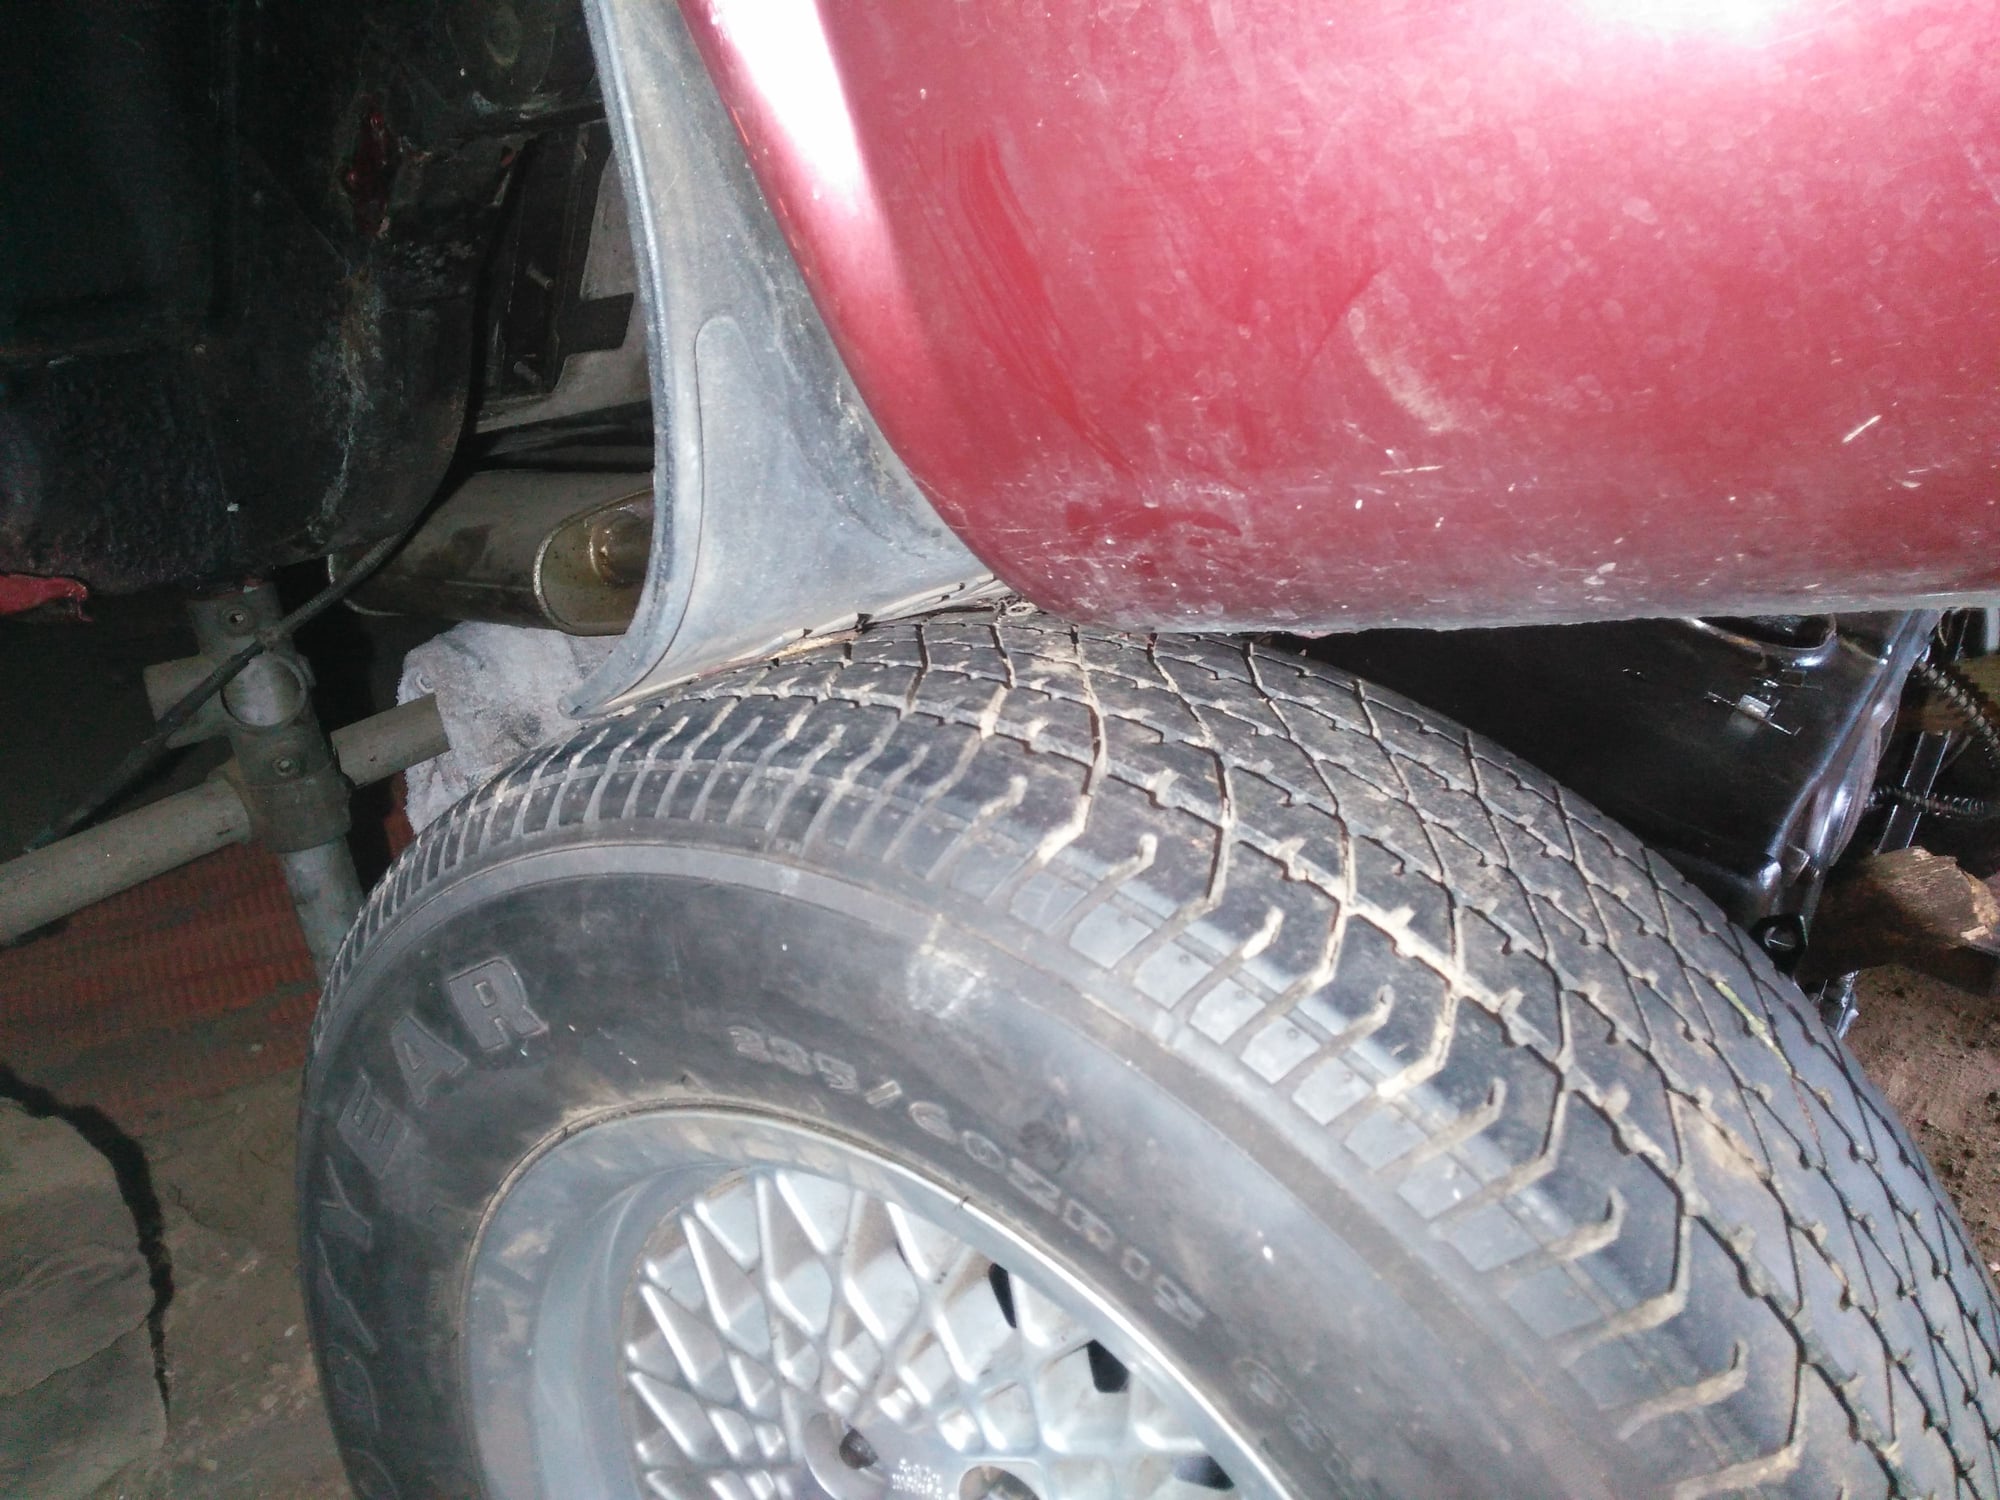
Talk about a really tight fit!
That tyre just missed the rear fender/wing as I pushed it in

Yass! At last I got there with the IRS Cage in position and now already to be Jacked up Tomorrow!
Last edited by orangeblossom; 11-07-2021 at 08:06 PM.
The following 4 users liked this post by orangeblossom:
#2608
The following users liked this post:
orangeblossom (11-08-2021)
#2609
#2610
Rebuilding The Cage On 'Cherry Blossom' My V12 XJS
'Not Much To See But Lots Going On'
Another Fantastic Sunny Day here in the UK!'Not Much To See But Lots Going On'
A Rinse and Repeat of Yesterday with not one drop of Rain, so Yesterday was the perfect day to put the Rebuilt Cage back in the Car, which was really nothing less than a bit of a 'Walk in the Park' as to be quite honest I love rebuilding Cages, a lot more that I love to change the Spark Plugs
And so Today was dedicated to all the other little and maybe not so little bits and pieces, starting with a 'Clean Up' and Repaint of the Exhausts
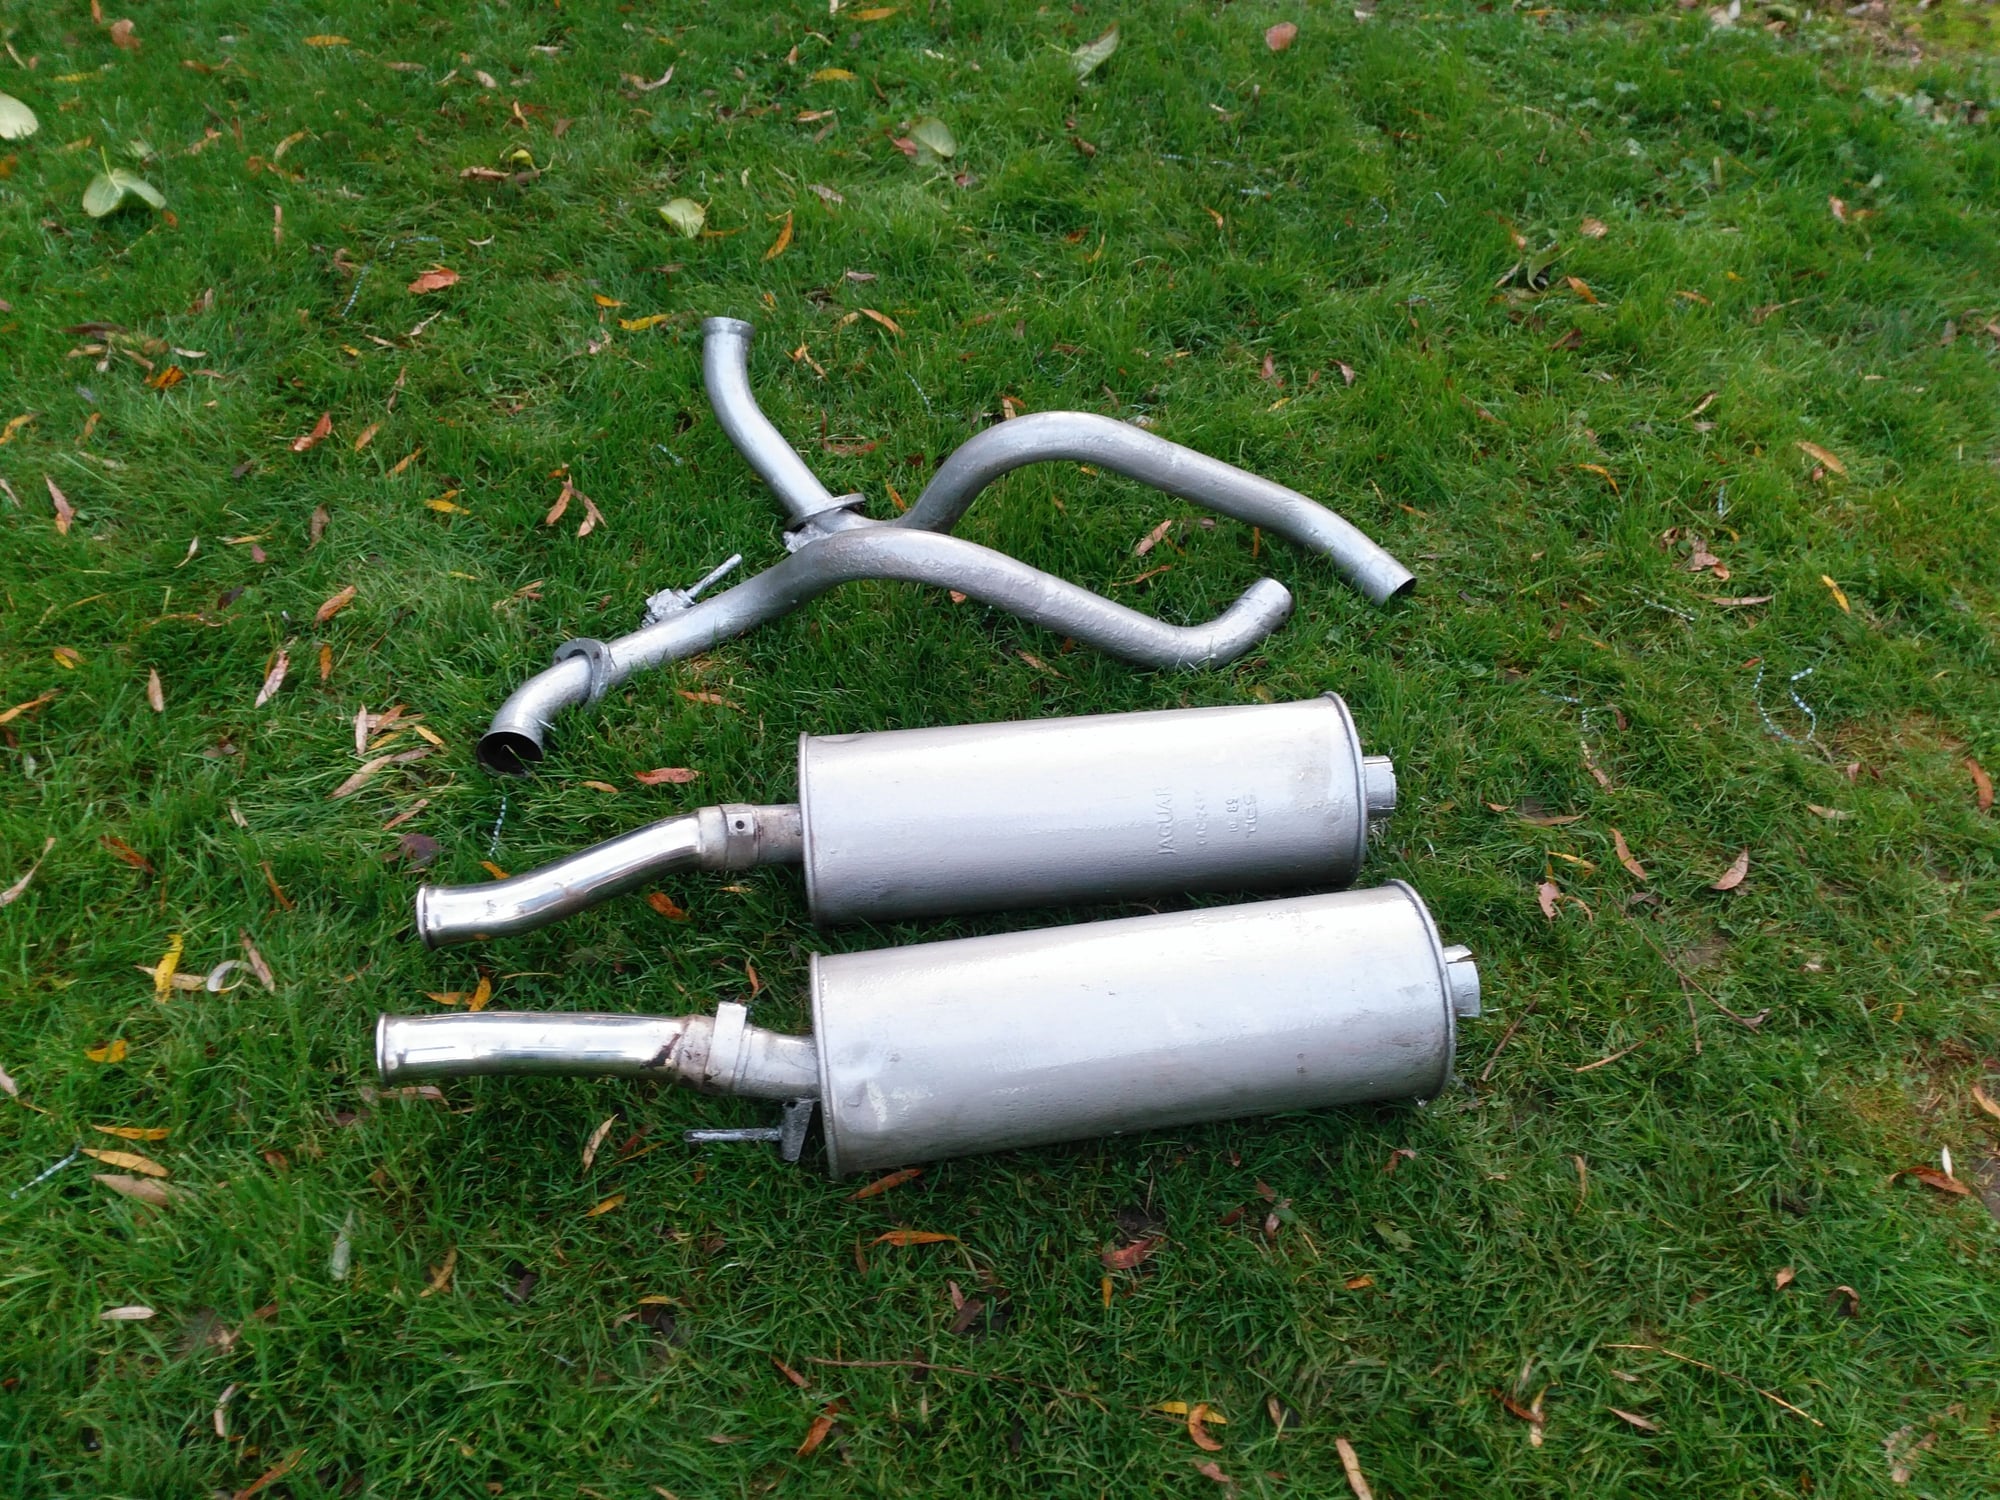
Exhaust Pipes and Mufflers Cleaned and Repainted and ready to go back
Having done that it was on with the job of Bolting up the Cage with some new bolts
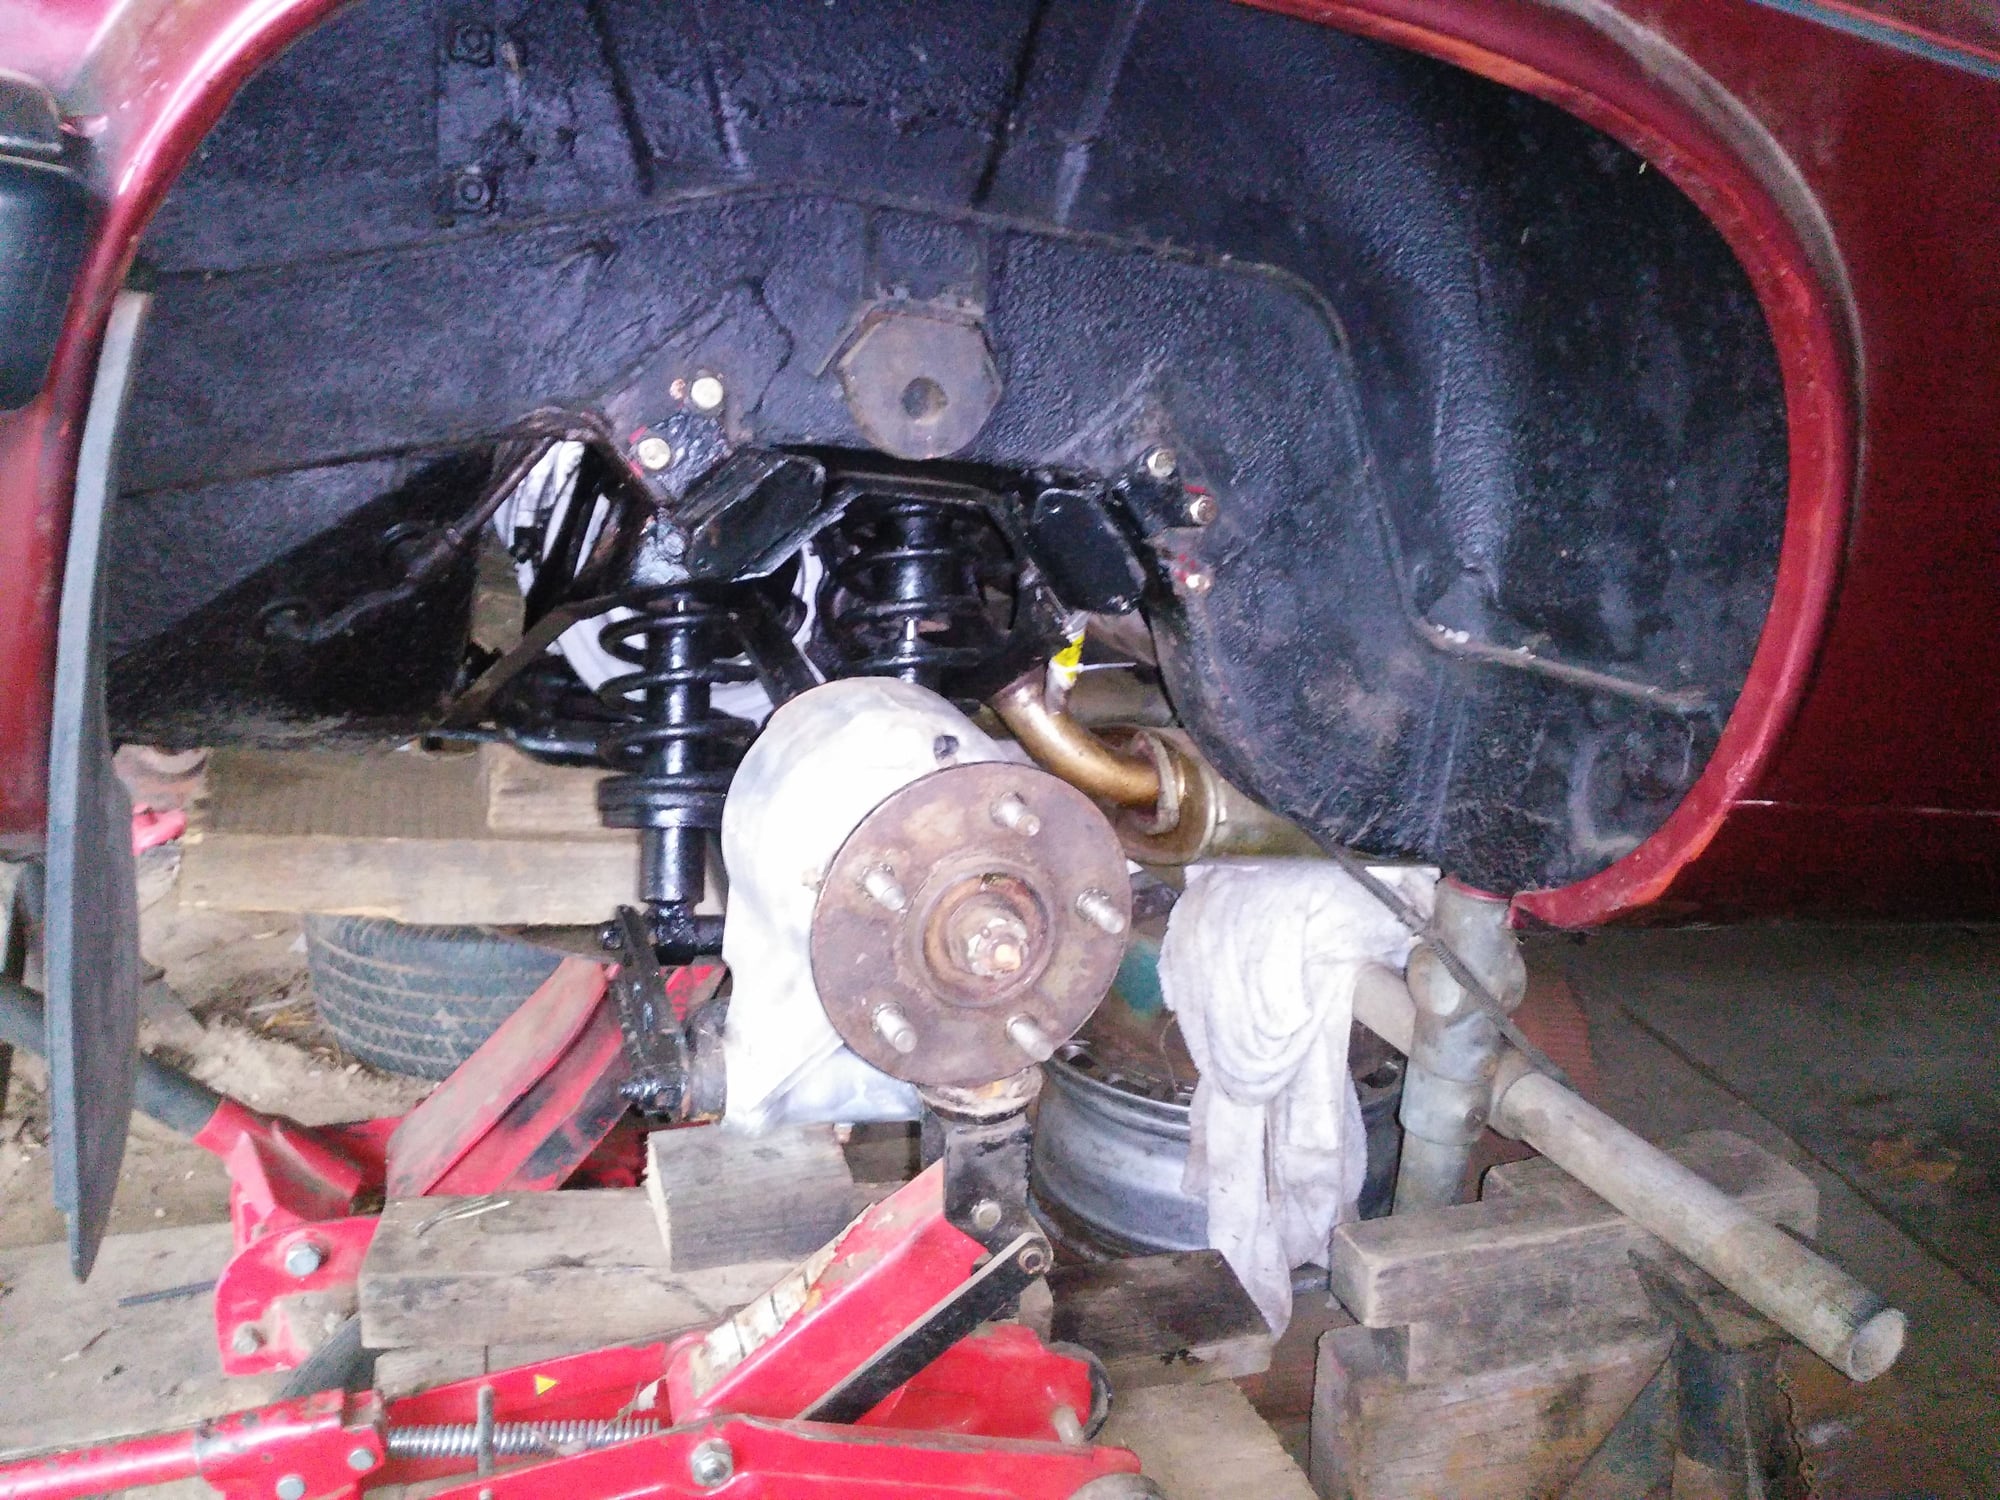
Bolting Up the Cage with Brand New Bolts
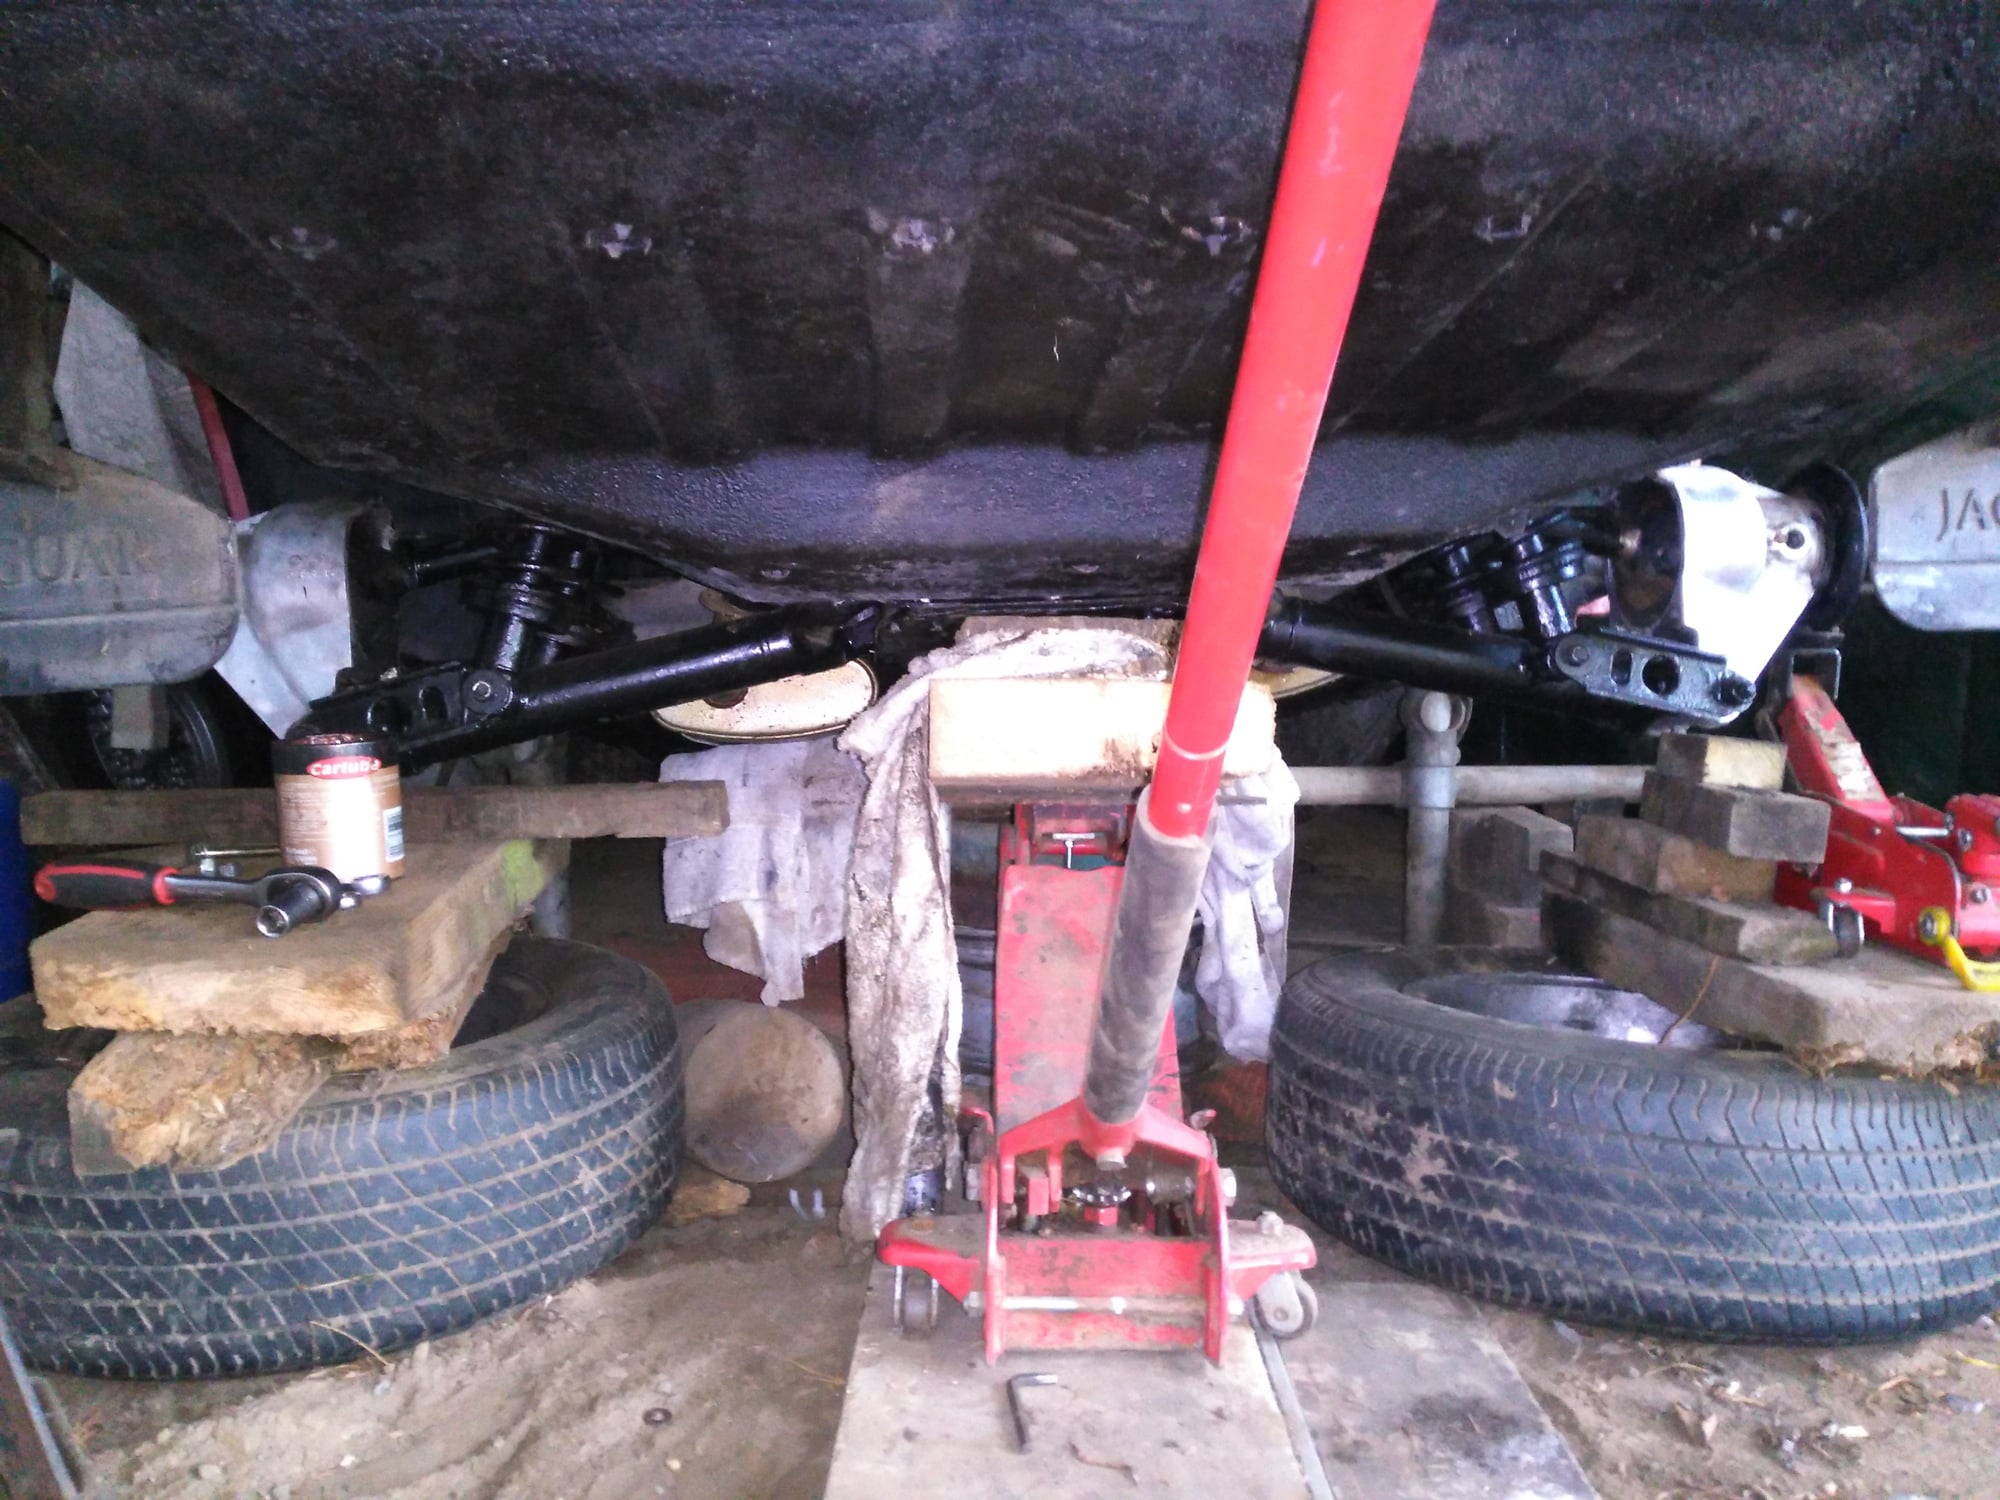
Not very much to show you here, as my main concern at this point was not to leave the Cage hanging by its rubberized Mounting Brackets
That's the hard part over with in the Scheme of Things, except that rebuilding the Cage is really such a Labour of Love for me that I'm always just a little bit sad when its over, although I've got another one to do
So next on the list for this one is:
(1) Bolting up the Propshaft
(2) Refitting the Hand Brake Cable
(3) Reconnecting The Speedo
(4) Refitting The Wheel Speed Sensors
(5) Refitting The Exhausts
(6) Connecting The Rear Flexy Brake Pipe
(7) Bleeding The Brakes
And that's just about it apart from the Trailing Arm Bushes but since I won't be using the Car until the Spring, I'm not in the mood for rushing this, as I've got loads of other non related other jobs to do
Price wise its probably cost me no more than £150 which also included a £22 Tin of Hammerite Paint, so all in all a little bit of a Bargain
Not expecting to get much done Tomorrow as we've got Visitors calling round to hold things up, although at least I've got the main part of the Cage rebuild out of the way
The following 2 users liked this post by orangeblossom:
Greg in France (11-19-2021),
ptjs1 (11-18-2021)
#2611
The following users liked this post:
orangeblossom (11-18-2021)
#2612
Doesn't really matter. You can hang the rear muffler from it's mount, then weave thru the over the axle pipes, then join them. Sometimes I've had the clock the differential flanges to clear the front flanges on the over the axle pipe. Keep checking that both the rear muffler hanger and the axle pipe hangers stay engaged as you slip the pipes together.
The following users liked this post:
Thorsen (11-18-2021)
#2613
Hi Thorson
A lot depends on whether or not you intend to remove the inner drive shaft covers, which many including myself have decided to do, on the recommendation from other Forum Members, as apparently they are not needed and can get in the way
At first I'll admit that I was reluctant and took some persuading to do this, although in the event I was very glad that I did, as for one thing it does make greasing of the UJ's easier, although the main advantage from my point of view suddenly came into focus when trying to fit the 'Hooped' Exhaust Pipes, which go through the Cage
And while I would not like to say that doing so isn't impossible with those UJ Covers on, I think that it would probably have taken me for ever and a day, where once those UJ Covers were no longer in the way (as I removed them) fitting those Exhaust Pipes was a Breeze!
So on the previous Cage I did, I took those UJ Covers off 'As part of the Refurbishment' (they are only held on by Pop Rivets) and then once having done the refurb, I fitted the Cage back into the Car and then did the Exhaust Pipes, in the following sequence
First I fitted the 'Hooped Pipes' that go over the Drive Shafts, where you have to be Careful that you don't forget to 'Hook' these 'Hooped Pipes' into their Exhaust Hangers and while you can do it afterwards, it make the job a lot easier if you don't forget you need to do this
Or you could find these 'Hooped Pipes' getting hit when the drive shaft revolves, which of course is something that you do not want to happen for obvious reasons, so just make sure that those 'Hooped Pipes' are hanging on their hangers inside the Cage and double check it over when all the exhaust system is in place
OK: so once the 'Hooped Pipes' are in place in the Cage, the next best way to go on from there is to Connect the 'Long Pipes' to the 'Hooped Pipes' as this should prevent any hanging down strain on the Exhaust Manifolds, because at that point it is self supporting
Though only do the Bolts up 'Finger Tight' at this Stage, because you may have to twist the Middle Boxes, so they are right up out of the way instead of hanging down, which is another little Jaguar 'Quirk' which will be very obvious and doesn't need any explaining, as you will see for yourself
In between gazing in Wonderment, at the lack of Exhaust Hangers which seem to be so prevalent on many other Cars but it's a Jaaag! so what were you expecting!
Then once the Middle Boxes have been twisted into position, so that the Exhaust is not drooping down, then you can tighten the bolts on the Joiner up a little bit more, although you need to be prepared for a little 'Fine Tuning' when the Exhaust has been done, so don't over do the tightening up of the Bolts at this stage
Once that part is out of the way, then you can hang the Rear Boxes on their Pegs at the back, where once again some twisting and turning may well be required, to prevent those Rear Boxes from banging the sides of the Tunnel that they go in (which can be a Fun job Not) although it is fairly straight forward if your luck is in
Removing The UJ Covers on the drive shafts
The following 4 users liked this post by orangeblossom:
#2614
The following users liked this post:
orangeblossom (11-19-2021)
#2615
May I just add to OB's excellent points, that ensuring the exhaust pipe is at least an inch away from the brake calipers is also very important. Essentially, the trick that works for me is to get all the joints just holding, then align everything as best you can, then tighten up finally throughout the system.
I also place bits of wood each side of the silencer to hold it in place exactly centrally while I tighten up. Most exhaust clonks, on my car at least, come from the tunnel.
Also, if you ever have to replace a tunnel silencer, get one made a couple of inches in diameter smaller than the OEM one. This has no effect on noise or performance, and greatly reduces the chances of exhaust knock, while also making it easier to align the cage pipes properly, as tunnel alignment is more forgiving.
The following users liked this post:
Thorsen (11-19-2021)
#2616
Rebuilding The Cage On 'Cherry Blossom' My V12 XJS
The Sun Was Shining, It Was Warm But Even So It Wasn't Looking Good!
Why oh why of all days did my relatives choose to come and visit us, which was made a whole lot worse by the fact that I can't stand them! as while I haven't got places to go, I've got things to do, like taking full advantage of beautiful Weather such as this to finish off all the work I'm doing on the Cage of my V12 XJSThe Sun Was Shining, It Was Warm But Even So It Wasn't Looking Good!
So to cut to the chase if they turn up then its going to be a day wasted, which wouldn't seem quite so bad if it was raining, except that with hardly a Cloud in the Sky, there was no chance of that
Where the problem with this particular bunch is that they think they're doing us a favor, where cynical me is starting to wonder how far they will Travel to get themselves a very nice free meal, the answer being all the way to 'Orange Blossom Towers'
OMG! It really feels as if I'm being punished for something that I don't think I've done 'yet'
At which point I am feeling that I just can't seem to hack it any longer and that this planned flying visit must be stopped and so its out with the cell phone, where out of sight of the GF I start to dial the number and then when a Cheery voice answers, I tell them I'm not feeling well!
And can almost feel the Panic on the other end of the Phone, as my make believe coughing and sneezing, is convincing enough for me to win an Oscar and then seal the deal by saying that its probably just Hay Fever and there's nothing to worry about
Except of course that they are taking no Chances and are doing all they can to put off coming round, to which I then very quickly reply something along the lines of that's a real shame catch you later then, good bye!
At which point I realize I've just regained my Freedom and can continue working on my XJS
And so its back on with the Show, where the next job on the list is refitting the Handbrake Cable and if you've ever tried to do this, while laying under the Car, in a Space the Size of a Shoe Box then you will probably already know what a PIA this can be and that includes disconnecting it in the First Place
But Not anymore!
As I got so sick of doing this that I knocked up a 'Handbrake Wrangler' which does the job in just a couple of seconds, where spending 10 minutes making one, with the Angle Grinder out of a piece of Scrap can save you hours of Frustration, as this really is the kind of job where you might need Three Pairs of hands
As you need to be both side of the diff with both hands at the very same time
The only real way to describe it, is a Lever with a Slot cut down the middle with a Chamfer on the end of the Two Prongs
So what you do is use it, to dig out the Thin end of the Fitting on the Cable, then once having done so use it as a Lever to pull on the Handbrake Levers, where then as if by Magic, it also lifts the Handbrake Cable right out of the Slot and then 'Rinse and Repeat' this when your putting the Cable back
Where apart from making sure that the Handbrake is off, there is usually no need to adjust the Handbrake Cable beforehand!
Where just in case you cannot Visualize the way this works, I've made a short Video which hopefully explains it much better than I can
It literally took just Seconds to put the Cable back in its Slot and about the same time to take it out again, which you don't see me do on this Video as I only wanted to put the Cable in but at least it should give you a hopefully good idea of how it works
The following users liked this post:
Greg in France (11-20-2021)
#2617
Rebuilding The IRS Cage On 'Cherry Blossom' My V12 XJS
Quick Update!
Forgot to mention Yesterday, that I also connected the Propshaft to the Diff and so Today with any luck I might even get her finished apart from the Trailing Arm Bushes, which there is no rush to do, as I won't be using her until SpringQuick Update!
Although on Monday I've got an MOT Test of '50 Shades' My Grey XJS which will be the first one with her refurb Cage installed that also has a Hand Brake Pad Modification and can hold the Car at 1500 rpm
Which was a bit of a balancing Act between not enough and too much! as the last thing I am going to need is the Hand Brake Pads binding during the Rolling Road Test
So fingers crossed on that one and also a couple of Prayers to 'The Jaguar Gods'
The following users liked this post:
Greg in France (11-20-2021)
#2618
OB,
Good luck with the MoT!
Just as a thought. Because our XJSs have mechanical LSDs, I refuse to let an MoT tester put my car on the rolling road. Indeed, my local guys won't do any rear brake test on a mechanical LSD car on their rollers. So they do a moving footbrake test using a Tapley meter, and a handbrake test in static conditions.
Maybe worth insisting that your guys do the same?
Cheers
Paul
The following 2 users liked this post by ptjs1:
Greg in France (11-20-2021),
orangeblossom (11-20-2021)
#2619
Hi Paul
Sounds like you've got a dream Garage there for your MOT but if they don't use a Rolling Road, then how do they Check for Stuck Calipers and Brake Pads?
But as for me I've got a great rapport with my Tester and his Garage, so I don't want to do anything that might 'rock the boat' as the one thing my dad taught me was to never be a 'Punter' and always 'act as if' rather than a 'Pigeon' who hasn't got a clue and therefore very easy to take advantage of
So if he sees a problem that may be looming up 'although it may be good for now' if he gives me the 'heads up' then he knows I will fix it straight away, because of course I'm Paranoid about that sort of thing
Though having said that the Rolling Road Test, never seems to fail to freak me out, as it does a Brake test on each individual Wheel and if that wasn't bad enough the same goes for the Hand Brake and so to say I'm nervous must be the understatement of the year, especially with my refurbished Cage
Talking of which Today didn't go exactly according to plan, as after connecting the Flexy Brake Pipe I thought the Exhaust would be a piece of Cake, except that putting this back on the Car is turning into a Nightmare of epic proportions, even though this system is near enough brand new!
And so to overcome this problem, I had an idea for a 'Mod' which I think is going to work like a charm (famous last words) except Tomorrow will be taken up with getting '50 Shades' ready for her MOT on Monday, which then puts 'Cherry Blossom' back on the back burner for a while
#2620
Rebuilding The Cage On 'Cherry Blossom' My V12 XJS
Quick Update
So glad I managed to change the minds of our impending Visitors Yesterday, as I managed to get some jobs done that are far better tackled in good daylight conditions and fine WeatherQuick Update
Unlike Today where the Weather was gloomy and cold, which can make it hard going at times, especially since I had somehow managed to overlook a problem, that as it turned out had been staring me right in the face, in the form of the Tunnels into which the Rear Silencers go
Which were not only looking quite grotty but even worse were showing signs of Rust!
And Trust me Rust is something that can't be left to fester on an XJS especially since the remedy could be quite an awkward repair and even worse if the Silencer decided to break free and come crashing down on the drive shaft without any Warning!

The Mounting for the Rear Silencer is looking very 'sketchy' and needs to be fixed before I do anything else

Connecting the New Rear Flexy to the Hardline for the Rear Calipers, turned out to be an awkward little job as any Cross Threading could easily spell disaster!

That's Not Rust but Copper Grease that I used to bolt the flange on the diff with Brand New Bolts although I'll admit they don't look it in this Photo

Bolting up the Rear Hooped Pipes was a 'Nightmare' so I had to use some very long Bolts which will be swapped for shorter ones when its all lined up
As for Tomorrow 'Cherry Blossom' is going back on the 'Back Burner' while I get '50 Shades' My Grey XJS ready for her MOT Test on Monday, which could be interesting as this will be her First MOT with her Refurbished Cage and Handbrake Pad 'Mod'


