When you click on links to various merchants on this site and make a purchase, this can result in this site earning a commission. Affiliate programs and affiliations include, but are not limited to, the eBay Partner Network.
Since there are a couple folks considering this, I thought I would document the conversion process as best I could, and detail any bumps in the road encountered. I will post as many pictures as possible throughout.
To recap what I have gotten, I bought an 415 BHP LS3 from a 2014 Camaro SS with 21,000 miles on it, with a 4L80e six speed automatic transmission for $8,500:
For the conversion, I have gone with the Jaguar Specialities kit. For all those folk who steered me towards Andrew, a big thank you. He has been amazing, and always seems available to answer my stupid questions. He is going to work closely with my mechanic throughout the process. When you but a kit from Jaguar Specialties you are not just getting the kit, you are also getting Andrew's impressive expertise.
The mechanic I will be using Is Ronnie from Tel Aviv Texaco in Hallandale. Another name I got from the forums here.
Just to recap, this is the car I am starting with:
Pretty clean overall. Interior is mint. No body rust to speak of. There is the thrown rod though...
And so it begins...
Goodbye V12.
Now that it is on the rack I can take a much better look at the underbody.
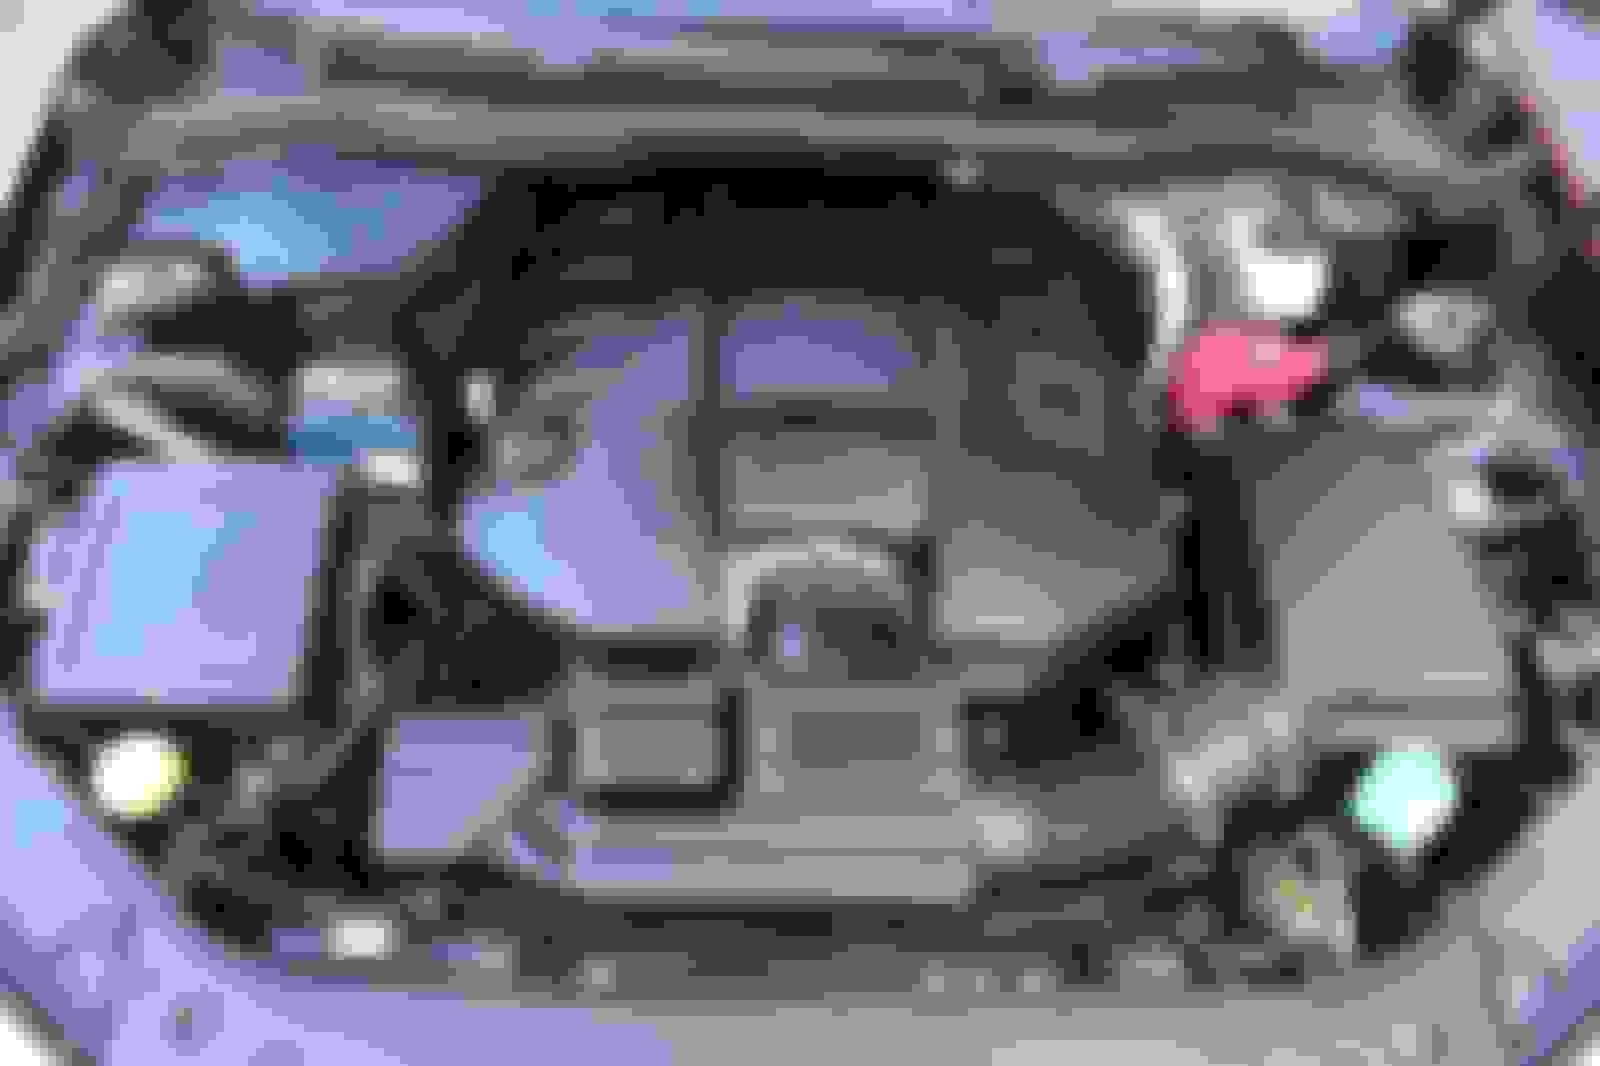
Now that the engine and tranny are out, and the exhaust has been pulled, we can take a look at the engine bay.
For a pretty rust free body, there was a lot of rust in the engine bay.
A bit of sandpaper and flat black spray paint was all I was prepared to do about it right now. A lot more care could have been take to refresh the engine bay, and it would have been nice to give the engine bay a proper gloss paint job, but I am at the point where I have to cut back on things to get other upgrades I want. Not painting it saved about $500, and you will not be able to see this mess after the engine is in. I plan on revisiting this in a year or two when I next pull the engine for upgrades. It is a 'for now' situation. I expect lots of groans about the crappy prep work and the overspray, but this will be very easy to come back to down the road. I just want to get the car running at this point.
However, I am still not comfortable with the structural integrity. After putting this much into a new engine I want it to be stable. Ronnie will be welding in some additional supports this week.
The engine arrived on Friday. Not crated, but palleted pretty nicely with a lot of heavy duty shrink wrap. It looks ok, but I will not be sure until it is unwrapped tomorrow.
I will keep a running total of my expenses so others can see how it all adds up in the end. I expect the whole conversion to be about $16,000 total. No, it is not cheap, and the car will be worth far less than that when I am done, but this is for me. For those with the know how and time to do it themselves would spend about $4,000 less.
So far, all I am in for at this point is the $8,500 for the engine, accessories and 4L80e Tranny. Andrew's kit should arrive tomorrow and I will list everything I got from him and update my total expenses.
Last edited by rsmithline; Oct 2, 2016 at 07:21 PM.
Good idea Warren. I have someone locally parting out a 95 convertible right now. Great timing.
Any reason not to add the back one too?
I'd add that too.
I live on a couple acres and before I got driveway crossover in I had to drive across the ditch. I could feel the car flex and its broken the windscreen seal and now leaks.
I live on a couple acres and before I got driveway crossover in I had to drive across the ditch. I could feel the car flex and its broken the windscreen seal and now leaks.
Thanks Warren. I'll do both.
On another note...I was strongly considering a wood steering wheel retrofit during this conversion, and I noticed in another thread that once the wheel is off, replacing the upper steering column might be possible if a newer one will fit:
(Image stolen from a post by Greg in France)
The one thing I have always hated about the early model Jag interiors is the toothpick-like appendages that come out of each side. Is it possible to retrofit one from an 89. (I think that is the only year with beefier arms that did not have the ignition on the steering column as well.)
On another note...I was strongly considering a wood steering wheel retrofit during this conversion, and I noticed in another thread that once the wheel is off, replacing the upper steering column might be possible if a newer one will fit: The one thing I have always hated about the early model Jag interiors is the toothpick-like appendages that come out of each side. Is it possible to retrofit one from an 89. (I think that is the only year with beefier arms that did not have the ignition on the steering column as well.)
The beefier stalks are stock Ford Europe items maybe other places too. I have no idea if they can be made to fit the earlier column and trim OK or not, but I would have thought the later column and trim would fit without too much trouble, providing you could get everything you needed from a scrap car. Quite a lot of late pre-facelifts had these newer stalks so they probably can go into the old-stalk vintage looms without too much trouble.
The actual wiring into your thin-stalk-loom car might be the main challenge, rather than bolting the column in, I reckon.
If you have the Lucas motor wheelbox wiper mechanism, rather than the later Electrolux wiper system (which changed about the same time as the stalks) you might lose some functionality, but they will work except for the intermittent wipe, with no wiring change at all.
Greg
Thanks for the guidance guys. I think the stalks are here to stay. That is a shame, I really hate them.
On the upside, all of the parts from Andrew are in and have been dropped off at my shop. Unfortunately Hurricane Matthew is hitting tomorrow and no work will be done on my car until next week.
In addition to the conversion parts, I also bought these from Andrew since they might as well be changed while we are doing this:
Front Subframe Mounts: $150
Poly Rack Bushings: $59
Poly A-Arm Bush Set: $179
1" Front Sway Bar Upgrade Kit: $279
Shipping for all of the above was: $85
Grand Total so far: $2,582
In addition to those parts, I also got some used parts from him. I got an oil pan that would fit (it seems like there is only one model that will fit the LS3 in a Jag, and Andrew grabs them when he see them), and an exhaust manifold. Unfortunately there are no headers that will fit; I am stuck with the manifolds. Custom headers may be a consideration down the road.
Good used oil pan set, LSx: $300.00
Good used exhaust manifold pair, XJS LS: $250.00
Shipping for those two: $60
That is an additional $610 in used parts from Andrew, bringing my total to him to $3,192. Added to the $8,500 for the engine, harness and trans I am now at $11,692. Ouch.
Sorry no pictures this time. It is just a pile of parts anyway. Next week there should be some actual progress and I will post some pictures.
Well since the shop was closed half of last week due to hurricane Matthew, there has not been much done. However, the engine mounts (I think they are the engine mounts) have finally been reattached. They had to wait for the welder to come in that was doing the extra support since one of the bolts sheared off when they were removed. They look a bit tired and I would probably have ordered new ones if the project's budget wasn't skyrocketing (see below).
That is where the 'good' news ends. I just started ordering all of the additional parts needed for the conversion...and the list is big.
This is page one of the list...there is a page 2 as well that I have not ordered yet:
[ IMAGE REMOVED AT THE REQUEST OF Jaguar Specialities (GGG) ]
Just page 1 was $1250 in parts, exclusive of the manifold which I had already ordered from Jaguar Specialities. I will post an exact amount later, but with that number, my running total is now $12,942.
Last edited by GGG; Oct 12, 2016 at 05:08 PM.
Reason: Copyright image removed
Really interesting, and my sympathies about how the costs mount when you try anything one-off.
FYI those are the rear mounts for the front subframe. Those thin steel covers are not standard and can be removed if the mount is otherwise standard factory. The actual mount looks fine.
Greg
Really interesting, and my sympathies about how the costs mount when you try anything one-off.
FYI those are the rear mounts for the front subframe. Those thin steel covers are not standard and can be removed if the mount is otherwise standard factory. The actual mount looks fine.
Greg
So that is what it is. Thanks.
I feel better now that you say it is fine; I was a bit concerned about their condition.
Yes, the costs certainly mount up after a while, and there are still some big expenses ahead. I haven't even started adding in labor yet.
Really interesting, and my sympathies about how the costs mount when you try anything one-off.
FYI those are the rear mounts for the front subframe. Those thin steel covers are not standard and can be removed if the mount is otherwise standard factory. The actual mount looks fine.
Greg
They are actually heatshields. My XJ-S was lacking them. The rubber has been burnt in a few spots... I've ordered some new ones...
They are actually heatshields. My XJ-S was lacking them. The rubber has been burnt in a few spots... I've ordered some new ones...
Thanks Daim. I will keep the heat shields on then.
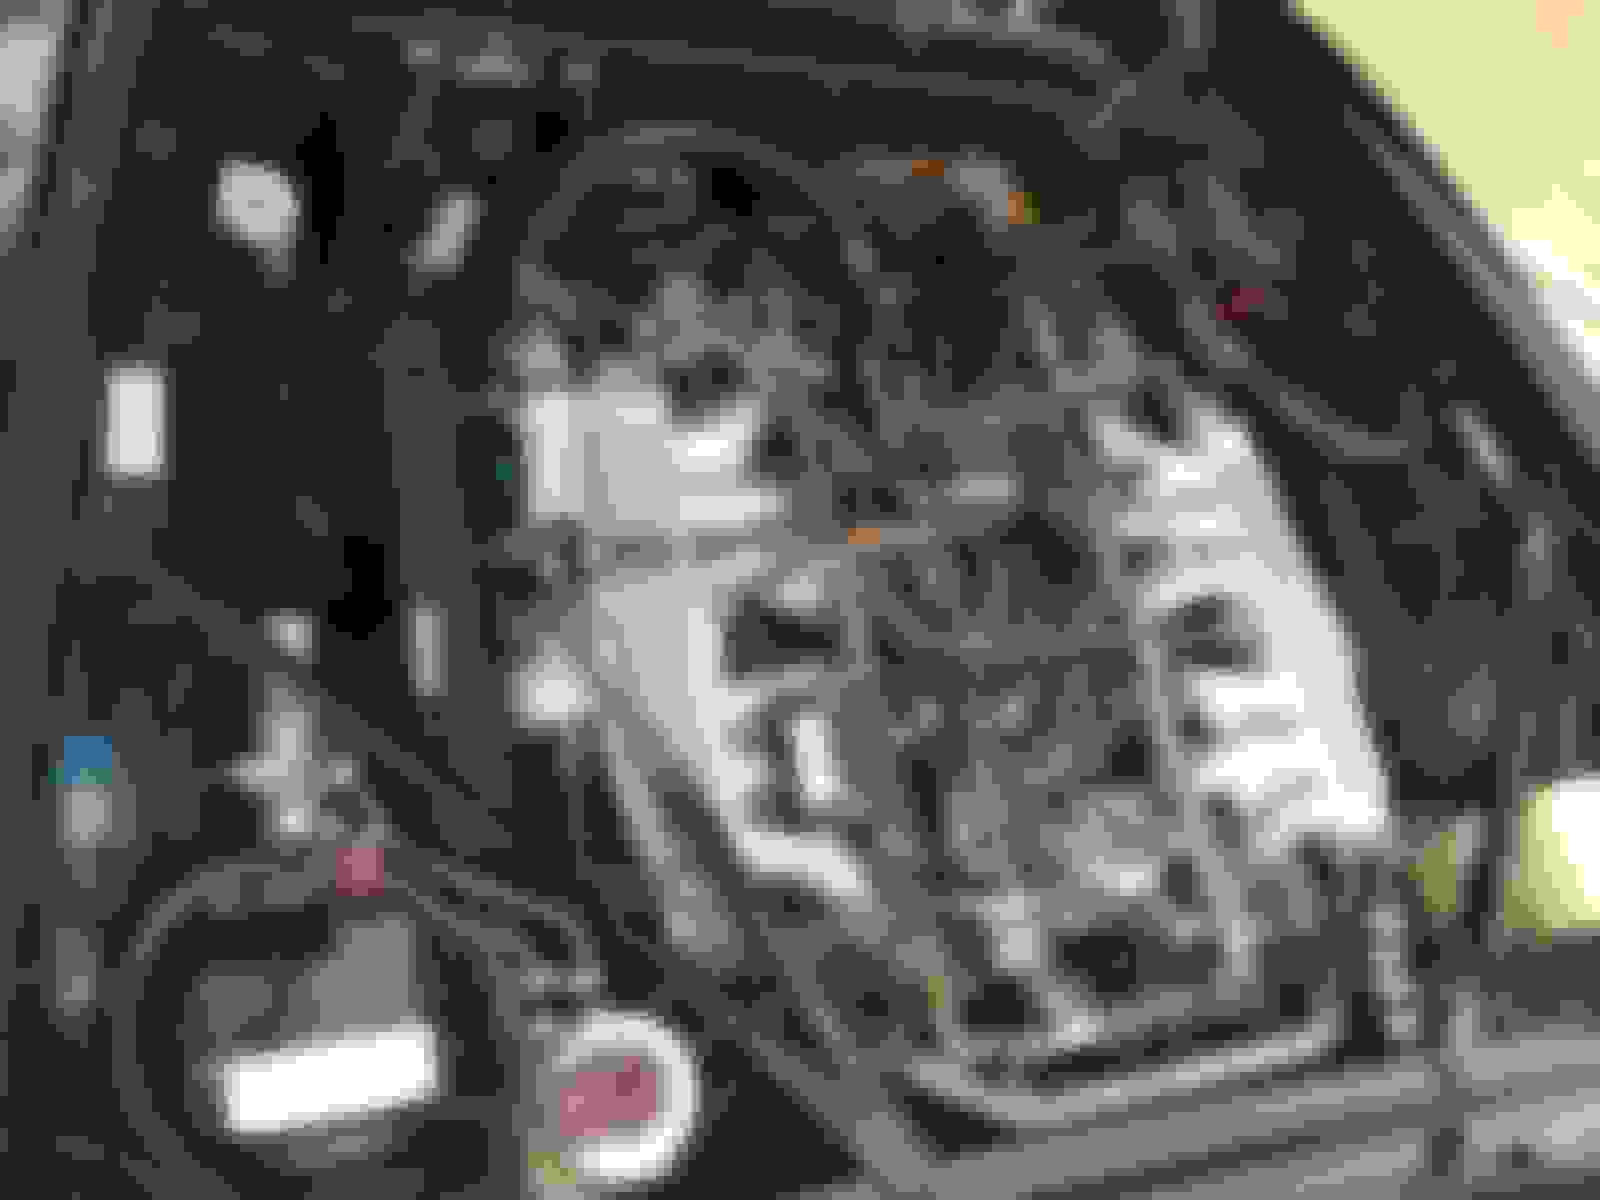
Big step today...the engine went in. I will get some more pictures from the top when it is down off the rack, but here is a shot of the custom Trans Mount my mechanic made. It certainly looks sturdy.
Edit: Removed image. That was actually the trans mount that came with the conversion package and I will not be sharing any images of Andrew's proprietary stuff.
Last edited by rsmithline; Oct 12, 2016 at 10:07 AM.
My car has them, and they are listed in JDHT parts.
I have just looked them up on JCP. And one side (part number C45367) is still available, and obviously that side is pretty easy to fettle to fit the other. Thanks guys, I have never seen one in real life!
Greg


 Thanks for posting the progress. I will be following with great interest.