When you click on links to various merchants on this site and make a purchase, this can result in this site earning a commission. Affiliate programs and affiliations include, but are not limited to, the eBay Partner Network.
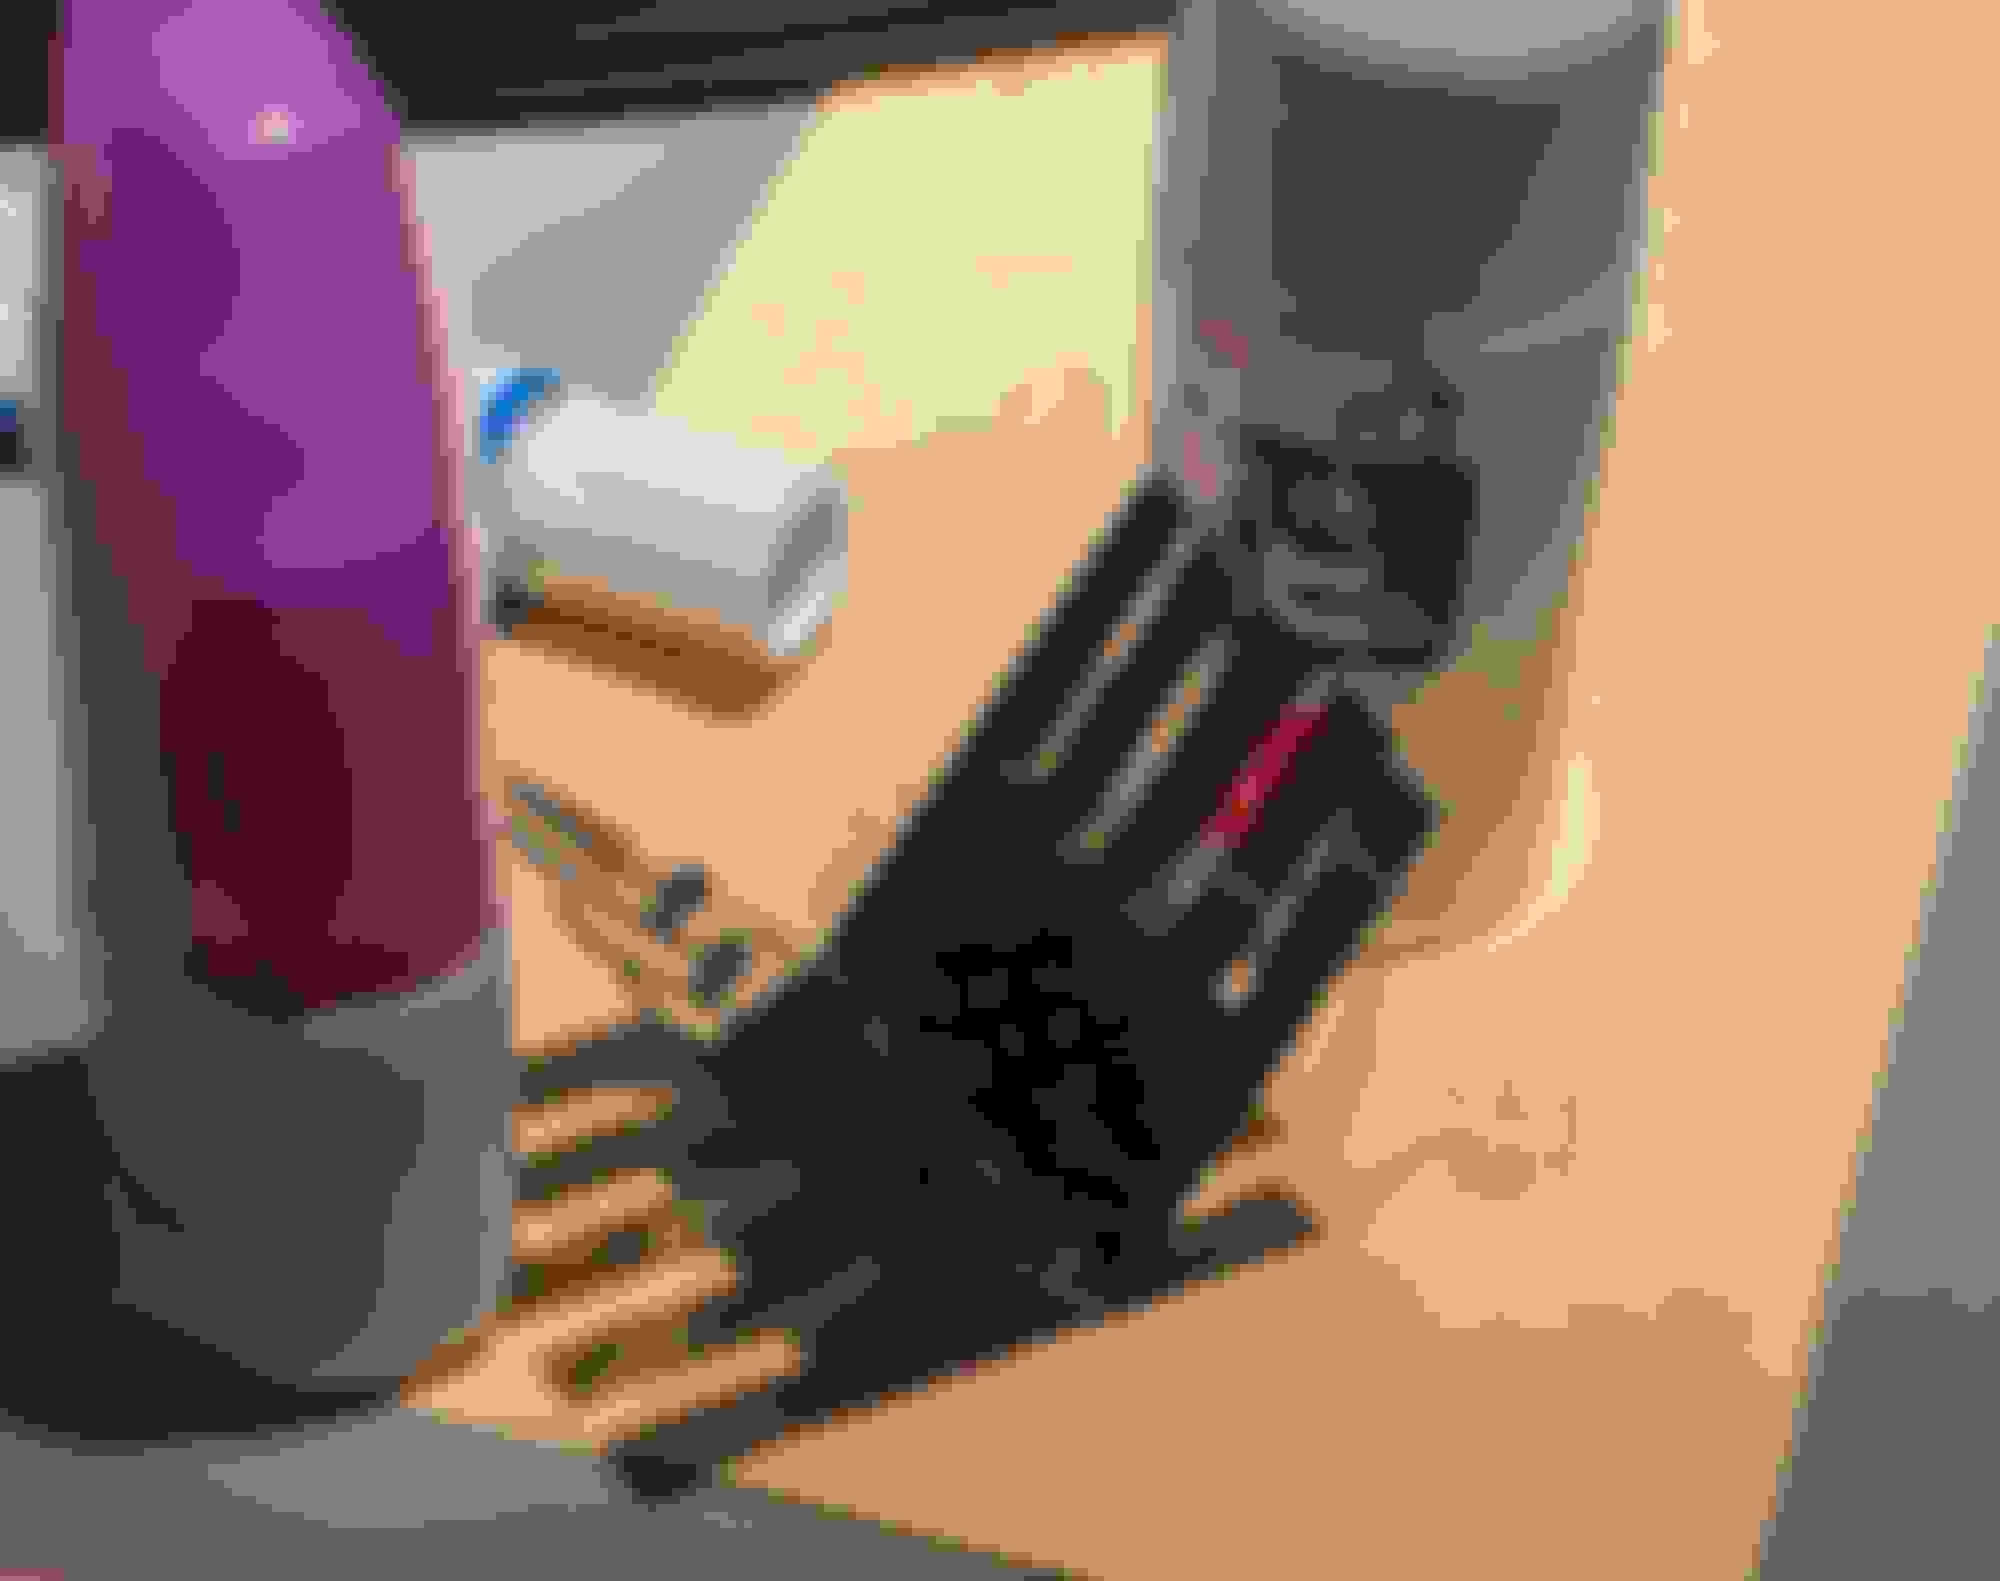
The inefficiency of the standard XJS central aircon vent is legendary. However, the newer type is almost impossible to get hold of these days. So I decided to see what adding my own directional vanes would do - I don't really need to control their direction, so long as they point at me and my passenger.
I got hold of some 1 mm black plastic (perspex) and some plastic glue, and after some trial and error with a hacksaw, found that normal scissors cut it perfectly well. Removed the vent to measure the height (42 mm) and spaces between fins (7 mm). However, the spacing between fins isn't that vital - erring on the side of wider slot for your new vanes won't affect the airflow that much. But the better they hold, the less glue you need.
Assembling the central V-shaped directional vanes.
I decided to use four vanes: one central V-shaped one, and two on each side. Mainly because I couldn't be bothered cutting out six vanes.
Then I simply assembled it, let the glue dry thoroughly, and put it back in the car. Tested it today. Sweet cool air blows straight at me now. Yay!
Not the most beautiful solution, as the vanes curled a bit when cutting, and are reluctant to uncurl in parts, and you can see the glue at the back in the right light, but I can live with this for the sake of not having to hire a punkah-wallah or two to ride with me everywhere I go....
I think I remember reading about yours - you have to perform surgery on the sides of the XJ40 vent, right? I seem to remember something about plastic welding or something....
Punkah wallah?
As in small, under-nourished urchin,
perched on rear seat with string tied to swinging big toe,
string neatly routed through cup hooks screwed into roof,
gently swaying your sun visor to fan driver's face?
I guess you need a matched pair if you carry a passenger?
Interesting . . . but I prefer the range of plastic solutions.