When you click on links to various merchants on this site and make a purchase, this can result in this site earning a commission. Affiliate programs and affiliations include, but are not limited to, the eBay Partner Network.
I know I'm not the first to do this and its not for everyone, but I really like it... IMO, this is a great Bang for Buck upgrade. I have attached the list of bulbs I used if anyone can get some use from it...
2010 XKR Bulb list
42mm Festoon error free bulb (5)- Door puddle Lights, Rear Boot Lights and Overhead Console Courtesy Light(Center Light)
194 error free bulb (13) - Foot well lights, Glove box Light, Overhead Map Lights, Puddle Lights on sidemirrors, License plate lights and all 4 Parking/Side lamps (Inside headlight assembly)
*Note - Side Mirror: Adjust side mirror all the way up to allow access to slot at bottom of mirror housing, use a small long flathead screw driver at a downward angle so you can to release tab holding light
*Note - Parking light above cornering lamp takes patience, you have to use a needle nose pliers or some other tool to hold bulb. insert bulb into housing holding it with pliers then attach bulb connector, you will probably drop bulb into light assembly a few times until you figure this out. It is best to leave out cornering lamp until this one is installed to allow more room to work and also to allow you to get bulb out of assembly after you drop it in there. Don't ask how I know this... IT CAN BE DONE, LOL
T5 LED bulb (4) – Vanity Visor Lights
*Note - OEM bulb holder has to be bent or cut to allow new bulb proper fit. You may have to squeeze bulb socket prongs together to get a more snug fit on bulb, Fuse for these bulbs is (F12 mini 10 amp) in footwell fuse box., if you accidentally ground out the prongs. Don't ask why I know that
*Note - Side Mirror: Adjust side mirror all the way up to allow access to slot at bottom of mirror housing, use a small long flathead screw driver at a downward angle so you can to release tab holding light
Is there any special trick to this? It seems pretty straightforward, but when I tried doing it a while back, I gave up because I felt like I was going to break the tab. Does it take a fair amount of force to release the tab, or was I doing something wrong?
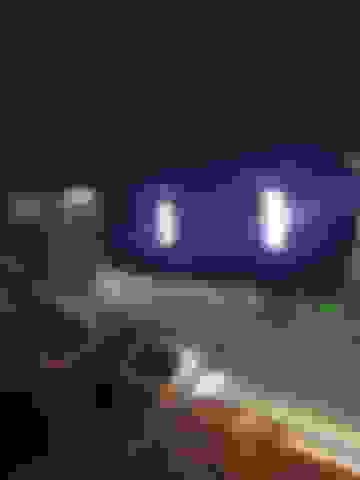
It does take some force and the sharper angle downward is best because of the way the clip pushes in. You want to get the tip of your screw driver as close to the bottom of the clip as possible so that you have leverage to push clip in, if you put screw driver straight in you will be pushing in at the top of the clip making your leverage minimal. I attached a pic, so you can see what the clip looks like.
Last edited by TexasTraveler; Jan 12, 2018 at 02:57 PM.
It does take some force and the sharper angle downward is best because of the way the clip pushes in. You want to get the tip of your screw driver as close to the bottom of the clip as possible so that you have leverage to push clip in, if you put screw driver straight in you will be pushing in at the top of the clip making your leverage minimal. I attached a pic, so you can see what the clip looks like.
Big thanks!!! That was exactly what I needed to see and was able to get it done earlier
I did the same sort of thing today with my 2007 XKR, pics attached.
Getting the side bulbs into the headlight was SUCH a pain so it was quite funny seeing this post in retrospect. In the end I had to use wire cutters to cut about 2mm off of the LED because it was too long to get into the slot. Even still it was a squeeze and I dropped the bulb inside of the light 3 times..... took about 1.5 hours in the end just to replace those two bulbs + the cornering lamp in which I bought an LED with a huge back to it that also barely fit! Bloody nightmare!
Overall 95% happy with the result - unfortunately the "white" headlights look a little blue but it's not horrible.
Also, and I didn't know anything about this until researching now... My LED bulbs seem to stay dimly lit after the car is off. I'm worried this means they will drain the battery. Should I worry? Is there any easy fix without getting all the bulbs out again?
For future reference I found these bulbs that are direct replacement and fit easily into headlights. You can plug them into socket and don’t have to take 30 minutes per bulb, lol...
*Note - Parking light above cornering lamp takes patience, you have to use a needle nose pliers or some other tool to hold bulb. insert bulb into housing holding it with pliers then attach bulb connector, you will probably drop bulb into light assembly a few times until you figure this out. It is best to leave out cornering lamp until this one is installed to allow more room to work and also to allow you to get bulb out of assembly after you drop it in there. Don't ask how I know this... IT CAN BE DONE, LOL
Thanks for the list. I changed some of the bulbs in my headlamps today but am bemused why people are having problems changing the side/parking lamps.
I just followed the instructions in the owners manual and they were changed in seconds. The bulb and housing came out together then I just changed the bulb and put the whole thing back in the socket.
some of the led bulbs are much longer than oem, making it much harder to get into socket...
I would say all should be the same, but you need to determine what type of connector you have on turn single lights, because there is two different types. Of course it doesn�t hurt to verify what you have beforehand.
Thanks for this guide, it helped me a lot doing the same on my own car recently.
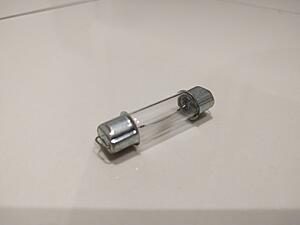
One question I have was around the upper center console light, the middle "courtesy light" bulb. I got a 41mm festoon (I went for Osram Cool White LEDs all round) and find that it's a fairly loose fit in that fitting. Did you have to engineer your fitting at all to make it more snug? My original bulb looked like this, so not exactly a festoon bulb like the ones in the boot/trunk etc.
It's been awhile for me now since doing this, I do remember having to bend some of the metal holding prongs on a couple of the bulbs by hand to insure a good fit/connection. The bulb I used was a 42mm so that 1 extra mm in length could be the difference in a good fit or not as well. I know I used the same bulb for the rear cargo area and door puddle lights as well.
Thanks for that, I will have a look and see if I can get a slightly longer festoon.
Incidentally, on my car at least the 41mm (or thereabouts) festoons were too long for the trunk lamps and lower door lamps, I found that 36mm festoons were a far better fit for mine.