
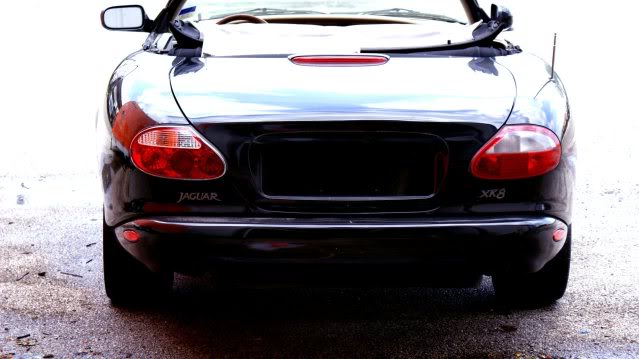
2005 tail lights in my 1997 xk8


Thread Starter
|
Senior Member
Joined: Mar 2011
Posts: 105
Likes: 17
From: Frisco, Tx
The jewel tail lights mount quite differently to the body.
Yours screw to the body, while the newer version protrude through the hole that the old would have screwed to, and have a bracket of sorts from the back side.. like a drywall screw approach.
Really freshens up the look i think... although subtle.
I made brackets out of aluminum, but i think they can be sourced directly from Jag.

Thread Starter
|
Senior Member
Joined: Mar 2011
Posts: 105
Likes: 17
From: Frisco, Tx
1 thing convenient about the swap is that the new tail lights use the same plug, so it's plug and play I think. Actually I haven't tested the new version with the battery attached just yet... but the plug does in fact plug in.

Sorry to say but every wire but the fog is in a different place, I can give you all the changes if you like.
I also do composite rear back plates, for a 3rd of the price of Jaguar if you are interested
I also do composite rear back plates, for a 3rd of the price of Jaguar if you are interested
Thread Starter
|
Senior Member
Joined: Mar 2011
Posts: 105
Likes: 17
From: Frisco, Tx
That'd be awesome to let me know the wire swap!
I haven't looked close enough, is it a cut and mend ordeal, or easy enough to remove pins?
Trending Topics
Thread Starter
|
Senior Member
Joined: Mar 2011
Posts: 105
Likes: 17
From: Frisco, Tx
Attached are the wiring changes, look on the plug and the positions are numbered, it is possible to get the pins out with a very small thin bladed screw driver, in the old days before I bought the correct tool I use to cut, solder and shrink wrap the connections which maybe your easiest option.
Good luck
P.S. Bare in mind this is for UK XKs so the drivers side is your passenger!
Good luck
P.S. Bare in mind this is for UK XKs so the drivers side is your passenger!
Kudos!
Senior Member
Joined: Aug 2010
Posts: 102
Likes: 16
From: Sweden
Isn't there a chrome ring that can be purchased for the older models? Would be a lot easier than replacing the whole assembly. Think I saw the parts at some spare part / accessory retailer.
(am I the only one who doesn't want the extra chrome bits? )
)
(am I the only one who doesn't want the extra chrome bits?
Thread Starter
|
Senior Member
Joined: Mar 2011
Posts: 105
Likes: 17
From: Frisco, Tx
But it wouldn't look as good as with the clear lenses in my opinion.
Granted the difference is subtle.
Veteran member
Joined: Jan 2011
Posts: 1,638
Likes: 173
From: France (UK expat)
+1. They make your car look 10 years younger. Huge difference, IMHO, and well worth doing.
Thread Starter
|
Senior Member
Joined: Mar 2011
Posts: 105
Likes: 17
From: Frisco, Tx
i.e. where is the plug 1 position?
Look on the plug, on the side wires go into each hole is numbered, to remove the pins you will need to remove the red plastic insert, look to the side of the plug and you will see a couple of red tabs sticking through, with a small srewdriver push them in and up at the same time.
Take all the wires out except the orange/black and then put them back in the relevant hole positions as described, one connection does not get used.
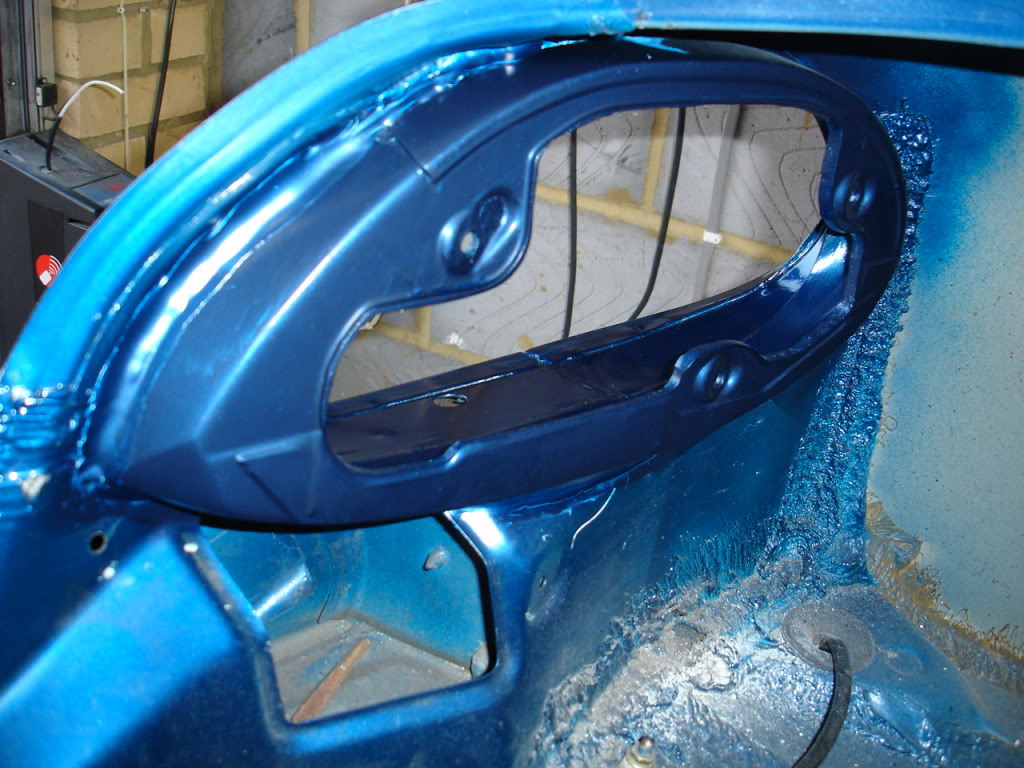
Fitting the original light back in would be quite simple, I dread to think when they see what I have done
Not so simple when you cut a hole like this.....
