
Boot restoration and updated tail lights...lots of pics.

Thread Starter
|
Veteran Member
Joined: Aug 2011
Posts: 1,294
Likes: 372
From: South Carolina
Hello guys,
I've got a 1997 coupe, which is in very good shape overall. But, like many of you, my joy in owning it induces is a zen-like desire to take the car as close to perfection as possible.
I recently (OK, a few months ago) completed two projects...a restoration of the boot area (under the carpet panels), and an upgrade to the later style tail lights. Our good forum friend Tony Murton (XKRacer) was quite helpful with both projects, so thanks again Tony.
BOOT RESTORATION
Before this work, a peek underneath the boot carpet panels was not pleasant. It looked quite shabby, the sad foam ring underneath the spare tire was ugly, there was old, powderized battery acid in certain spots and the paint was, well, second-rate. It was a very ugly area in a very beautiful car.
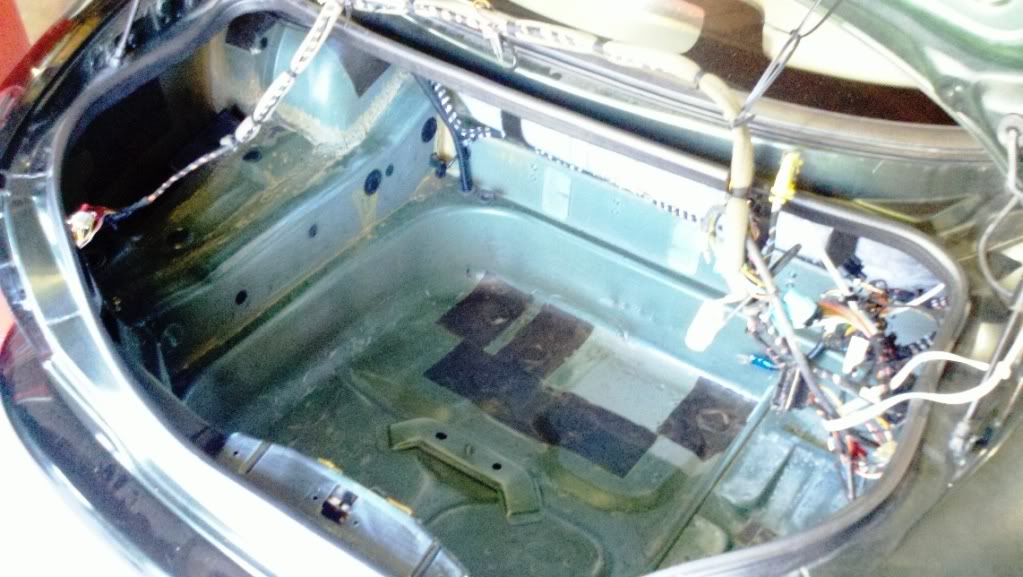
Exhibit A : Before the restoration, battery and boot fuse box removed.
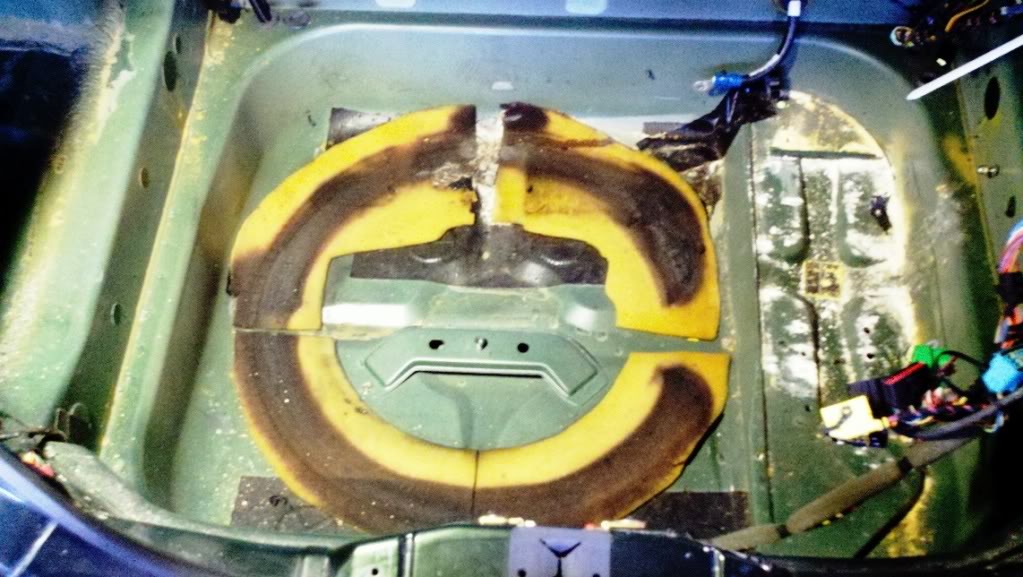
 Now THAT'S ugly. Here's another shot before the real work, but after I spent two hours removing the foam ring and its adhesive with a scraper, and neutralizing and removing the powderized battery acid. Sorry for the poor exposure.
I wanted a satin black finish througout the entire boot area. I chose a black, slightly rubberized coating from Rustoleum. It was a good choice, I think. To replace the sad foam ring under the spare tire, I bought a rubber-mesh mat at Home Depot and cut it to size to line the entire tub area for the spare. Sounds odd, I know, but I think it all came out well.
Here's a shot of the finished project. The rear and side carpet panels have already been reinstalled...but the same satin black paint is behind them. Now that looks better...no more junk in the trunk.
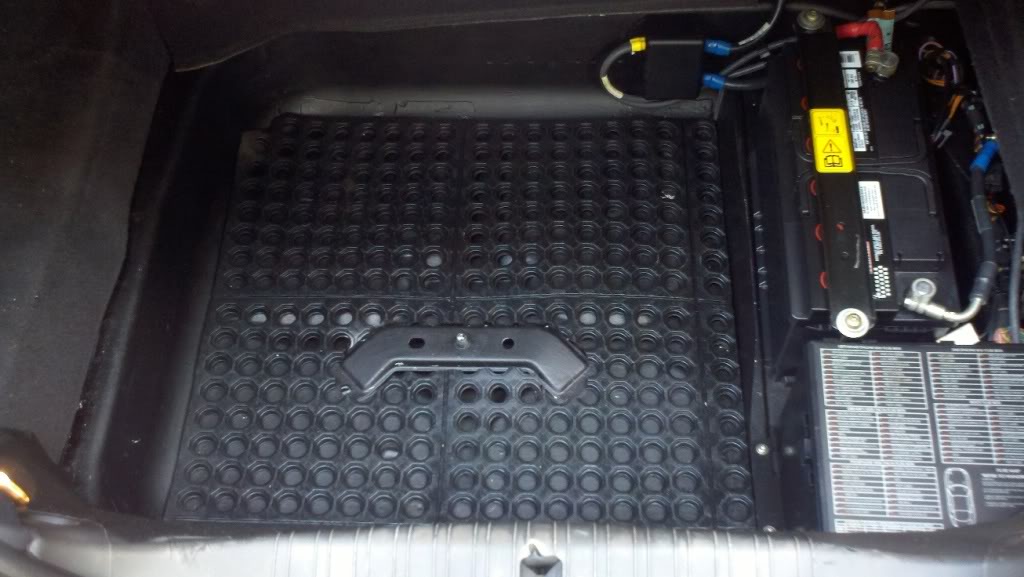
NOTE: the small areas under the mat that appear white in this photograph are black like everything else...it's reflection from the flash.
Given the amount and complexity of the electrical components I disconnected, moved and reconnected, I must say I was quite thrilled (and very relieved) when the car started right up after it was all buttoned back up.
UPGRADE OF THE REAR TAIL LIGHTS
Tony Murton (XKRacer) has said that an upgrade to the later-style tail lights can do wonders for the appearance of an early car. He was right.
There are several threads in the forum on this procedure, so I won't spell it all out here. Suffice to say that larger apertures must be cut in the rear body panel to accept the later-style lights, backing plates must then be installed, the wires need to be re-arranged in the connectors, and to finish it off nicely, new plastic covers for the lights and the rear of the boot are needed. Not a small job to do it right, but boy does it look better. XKRacer has a good instruction document for the procedure, which I have ATTACHED to this post.
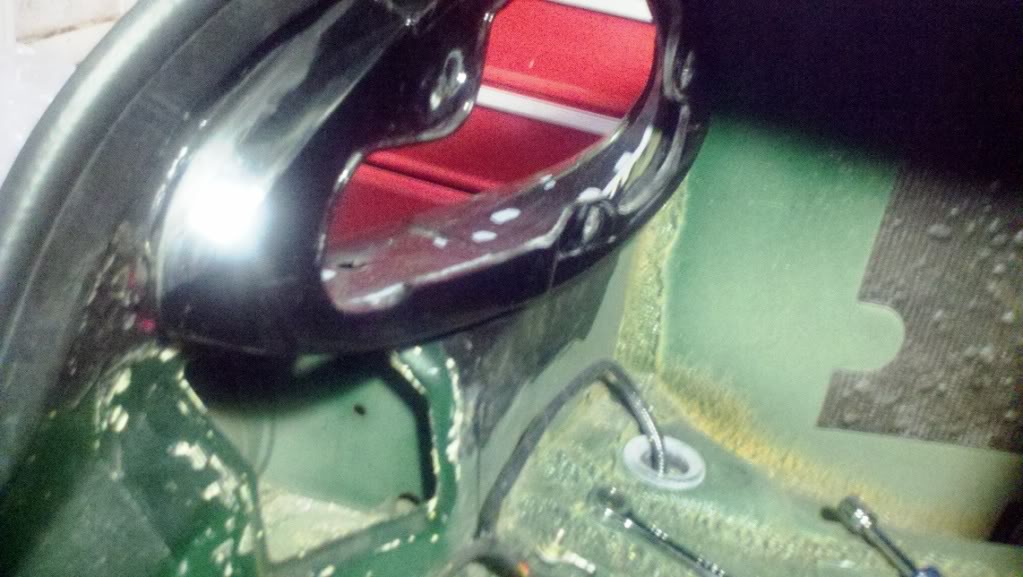
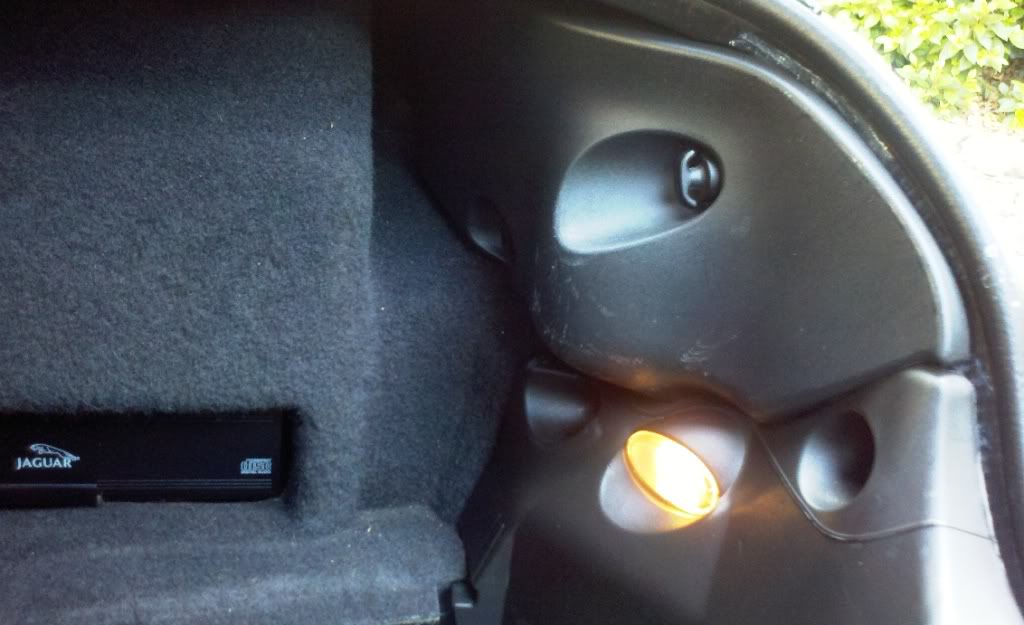
Here's a shot of one side, from within the boot (before the boot restoration project). The larger aperture has already been cut.

Here's the other side, after the larger aperture has been cut and a backing plate installed and held in place with JB Weld.
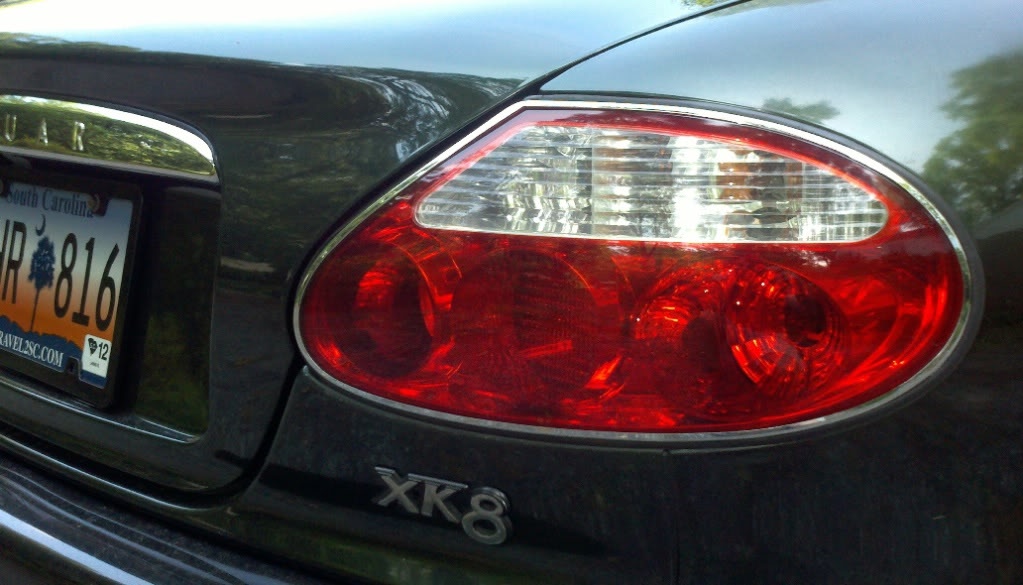
And here's what the tail light looks like after the boot restoration, with later-style plastic covers and rear boot trim in place. Looks stock to me. One regret...I went with used plastic covers, which are a bit scuffed. Should have purchased them new.
Looks stock outside, too.
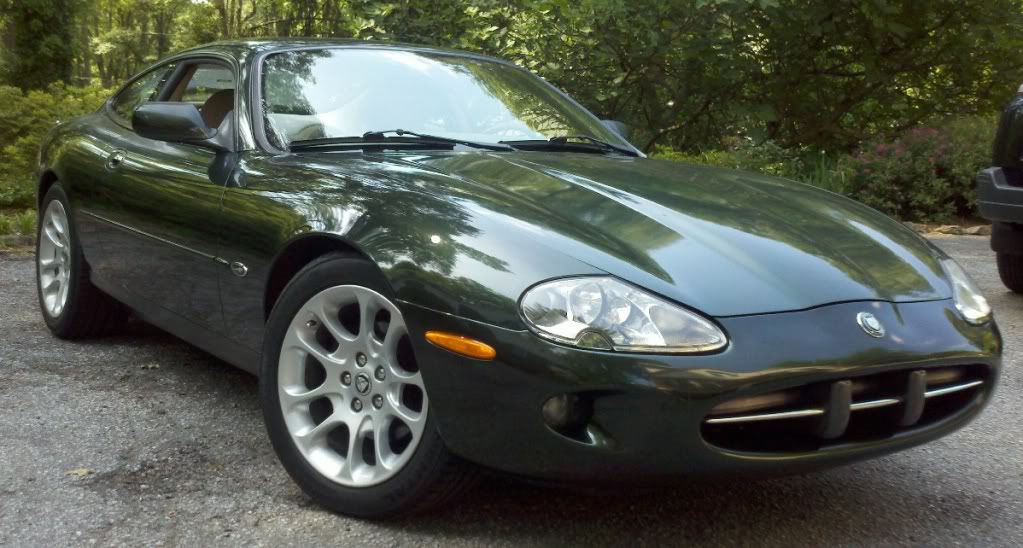
And of course, the obligatory glamour shot.
That's it, guys. Thanks to everyone who contributes to this forum. I'm having so much fun, and you're the group that makes it all possible.

I've got a 1997 coupe, which is in very good shape overall. But, like many of you, my joy in owning it induces is a zen-like desire to take the car as close to perfection as possible.
I recently (OK, a few months ago) completed two projects...a restoration of the boot area (under the carpet panels), and an upgrade to the later style tail lights. Our good forum friend Tony Murton (XKRacer) was quite helpful with both projects, so thanks again Tony.
BOOT RESTORATION
Before this work, a peek underneath the boot carpet panels was not pleasant. It looked quite shabby, the sad foam ring underneath the spare tire was ugly, there was old, powderized battery acid in certain spots and the paint was, well, second-rate. It was a very ugly area in a very beautiful car.
Exhibit A : Before the restoration, battery and boot fuse box removed.
I wanted a satin black finish througout the entire boot area. I chose a black, slightly rubberized coating from Rustoleum. It was a good choice, I think. To replace the sad foam ring under the spare tire, I bought a rubber-mesh mat at Home Depot and cut it to size to line the entire tub area for the spare. Sounds odd, I know, but I think it all came out well.
Here's a shot of the finished project. The rear and side carpet panels have already been reinstalled...but the same satin black paint is behind them. Now that looks better...no more junk in the trunk.
NOTE: the small areas under the mat that appear white in this photograph are black like everything else...it's reflection from the flash.
Given the amount and complexity of the electrical components I disconnected, moved and reconnected, I must say I was quite thrilled (and very relieved) when the car started right up after it was all buttoned back up.
UPGRADE OF THE REAR TAIL LIGHTS
Tony Murton (XKRacer) has said that an upgrade to the later-style tail lights can do wonders for the appearance of an early car. He was right.
There are several threads in the forum on this procedure, so I won't spell it all out here. Suffice to say that larger apertures must be cut in the rear body panel to accept the later-style lights, backing plates must then be installed, the wires need to be re-arranged in the connectors, and to finish it off nicely, new plastic covers for the lights and the rear of the boot are needed. Not a small job to do it right, but boy does it look better. XKRacer has a good instruction document for the procedure, which I have ATTACHED to this post.
Here's a shot of one side, from within the boot (before the boot restoration project). The larger aperture has already been cut.
Here's the other side, after the larger aperture has been cut and a backing plate installed and held in place with JB Weld.
And here's what the tail light looks like after the boot restoration, with later-style plastic covers and rear boot trim in place. Looks stock to me. One regret...I went with used plastic covers, which are a bit scuffed. Should have purchased them new.
Looks stock outside, too.
And of course, the obligatory glamour shot.
That's it, guys. Thanks to everyone who contributes to this forum. I'm having so much fun, and you're the group that makes it all possible.
Last edited by The Coupe; Apr 30, 2012 at 12:27 PM.


Veteran Member


Joined: Jan 2009
Posts: 13,080
Likes: 4,735
From: Raleigh, NC
Trending Topics


Joined: Oct 2007
Posts: 121,143
Likes: 6,654
From: PHX some of the time
Looks great, much improved!
I just pulled all the junk out of my trunk just to have a clean up and a check around and WhiteXKR is right, no foam ring.
The rubber mat looks like it may be worth adding.
I just pulled all the junk out of my trunk just to have a clean up and a check around and WhiteXKR is right, no foam ring.
The rubber mat looks like it may be worth adding.
Thread Starter
|
Veteran Member
Joined: Aug 2011
Posts: 1,294
Likes: 372
From: South Carolina
Nothing to rattle, really...the webbed mat is thick and has some weight to it. I also left the mat in one piece...cut on two sides to fit the tub, then cut out a piece of the middle to accomodate the spare attachment point.
The tail light install is tight and clean, no rattles there either. Maybe a few between my ears.


Thread
Thread Starter
Forum
Replies
Last Post
Currently Active Users Viewing This Thread: 1 (0 members and 1 guests)