
Loud clunk from front left when turning, getting worse...


Thread Starter
|
Veteran Member


Joined: Apr 2012
Posts: 1,854
Likes: 987
From: UK
I'm making no progress with the top arm bolt so I'm pushing on with other activities while it soaks in penetrating oil.
On to the strut brace no the wipers and cowl are out the way.

I want to get both strut braces cleaned up, this one is rusty at both ends.
I plan to paint with "rustbusters" epoxy mastic, it gets great reviews in the UK classic car mags.
The shock bush is a mess too.
Last edited by RaceDiagnostics; Mar 9, 2013 at 01:06 PM.
Thread Starter
|
Veteran Member
Joined: Apr 2012
Posts: 1,854
Likes: 987
From: UK
Right now I'm a bit stuck on the top arm pivot bolt. Has anyone had to cut them out before?

Senior Member
Joined: Jul 2011
Posts: 311
Likes: 44
From: Maine
When I replaced my shock bushings, it seemed that the existing bolt had quite a bit of play in the sleeve. I bought bolts that fit snug in the bushing and drilled out the lower shock mount to fit the new bolts.
Just something to check. Great going by the way!!! Nice pics!
Just something to check. Great going by the way!!! Nice pics!
Thread Starter
|
Veteran Member
Joined: Apr 2012
Posts: 1,854
Likes: 987
From: UK
OK, just put in another couple of hours this evening.
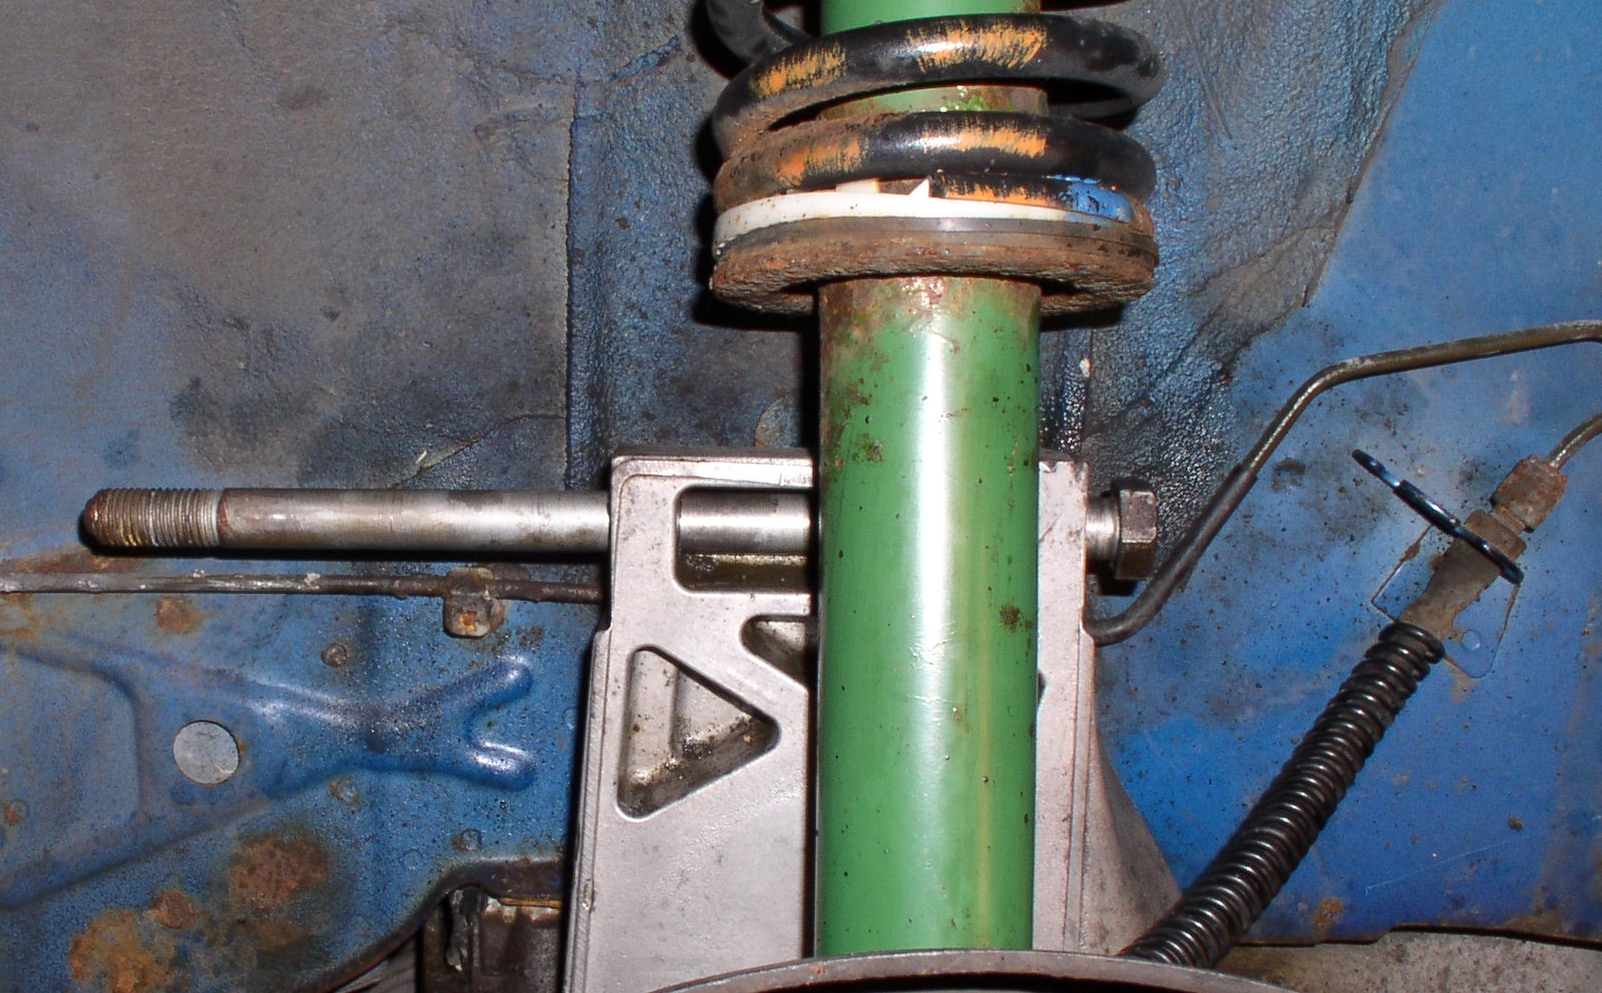
First I released the steering rack, no problem with seized bolts.
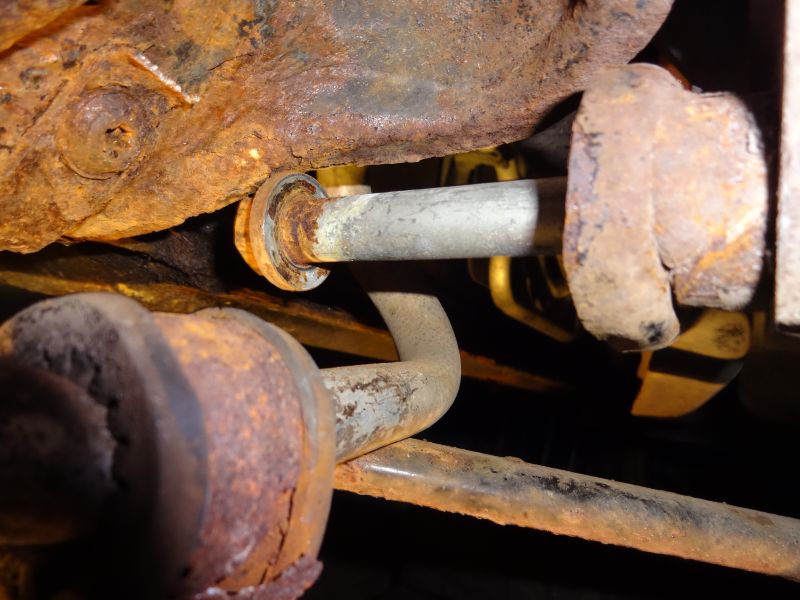
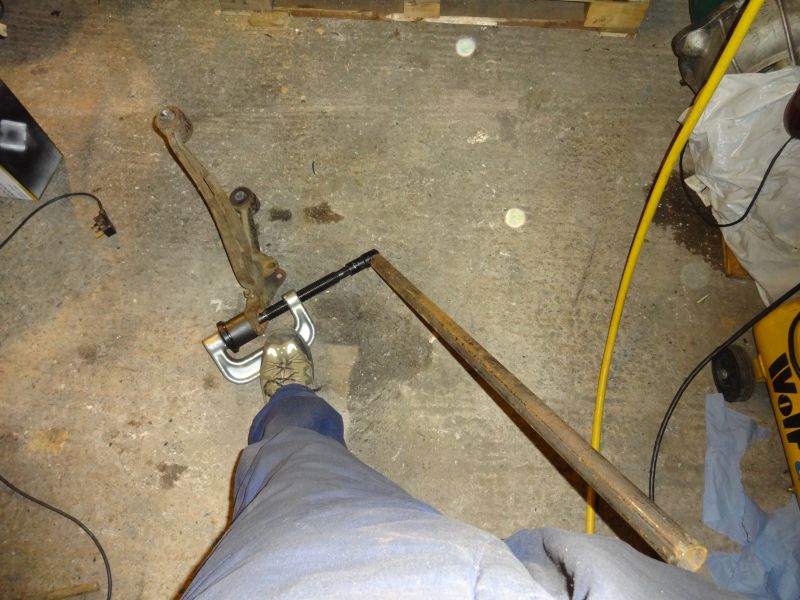
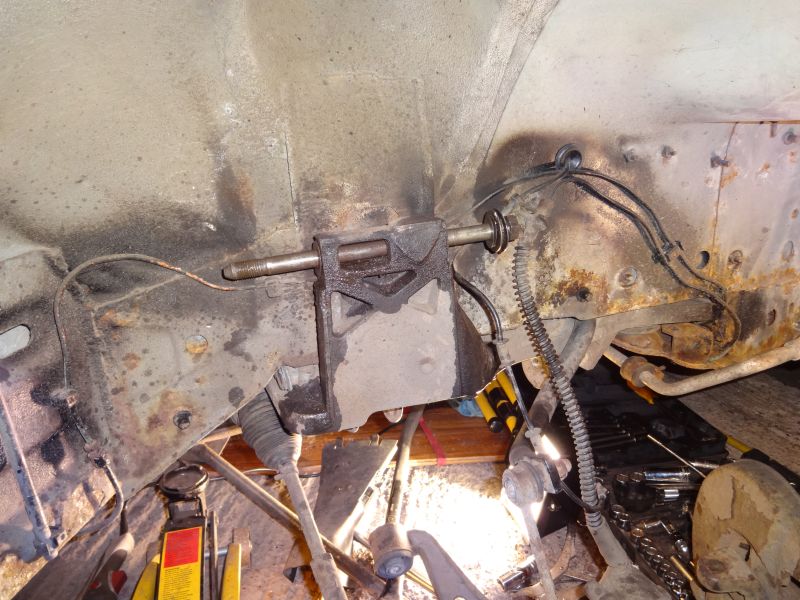
There was a problem with the front bolt, it would foul on this bracket, it was so rotten I pulled it off with some pliers.
It looked like I would get more space if I released the X brace, I want it off to paint it anyway.

Just great!

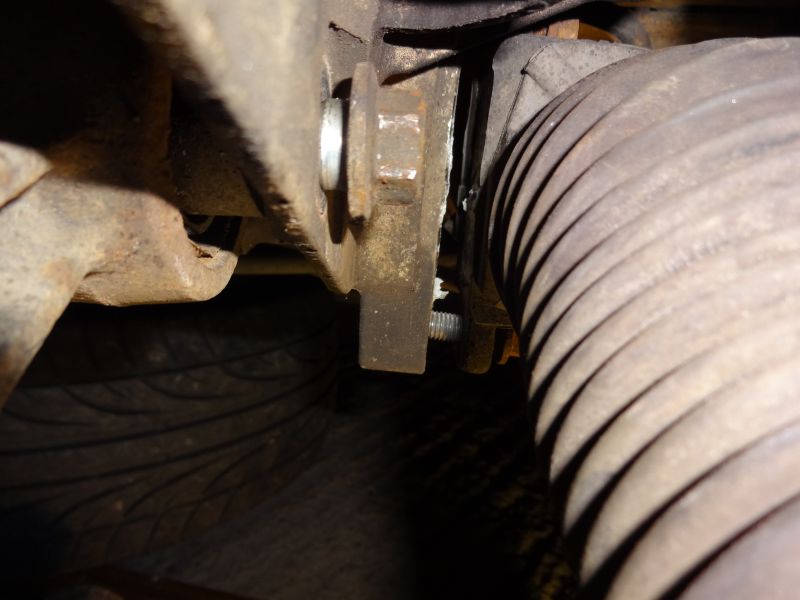
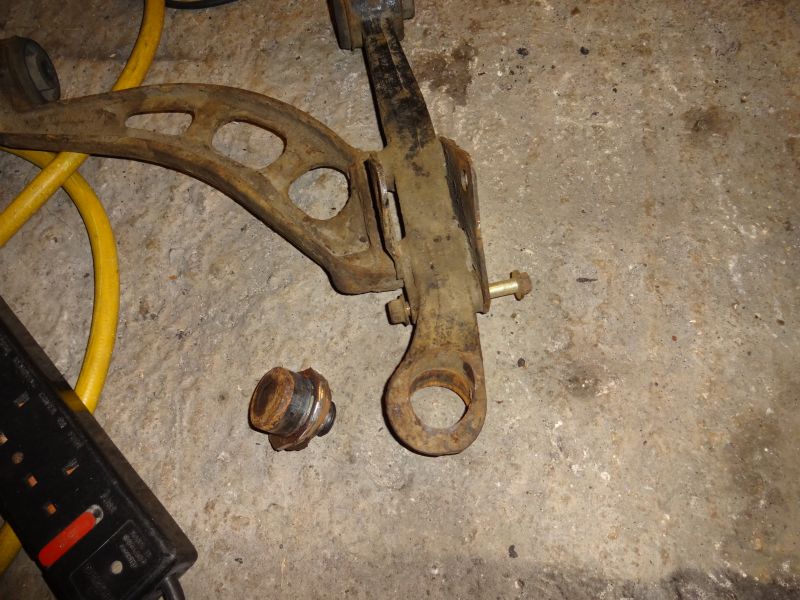
Next the bolt was fouling on this bracket, I want to take it off and refurbish or replace it, anyone know what it is called or its part number?
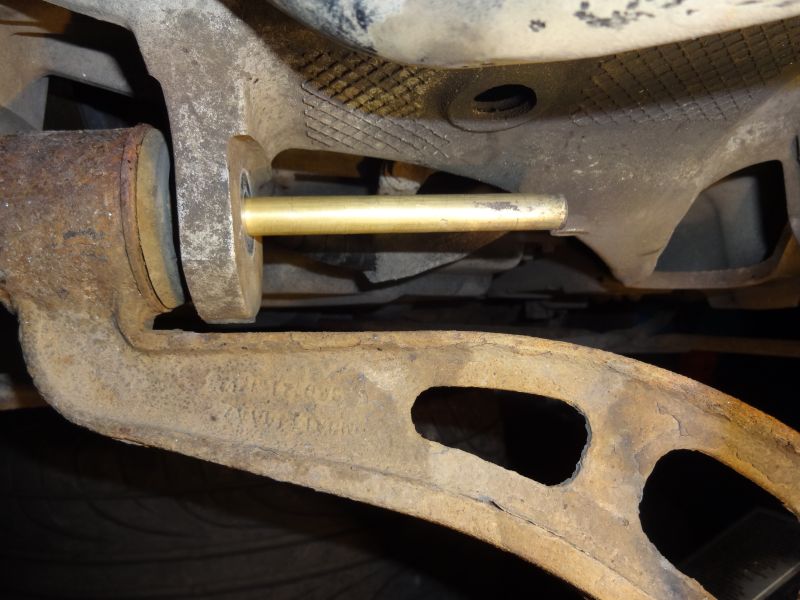
For the time being I knocked it out with a brass drift.
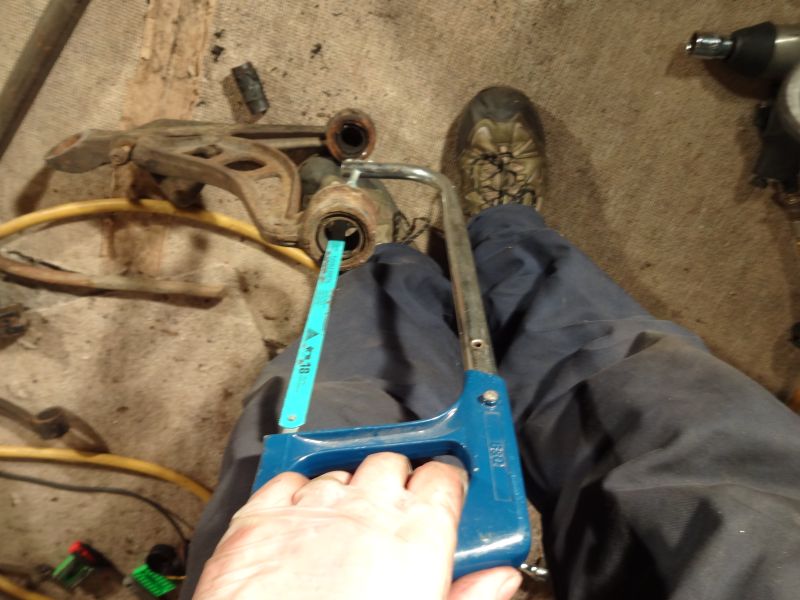
Now back to the top arm, I couldn't get it out by hammering so decided to take the angle grinder to it, but with this size of disc, it would not cut all the way through, so I cut the turned the bolt then cut......etc.


Finally, both arms off!
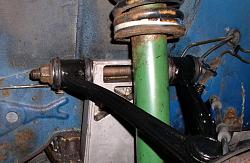
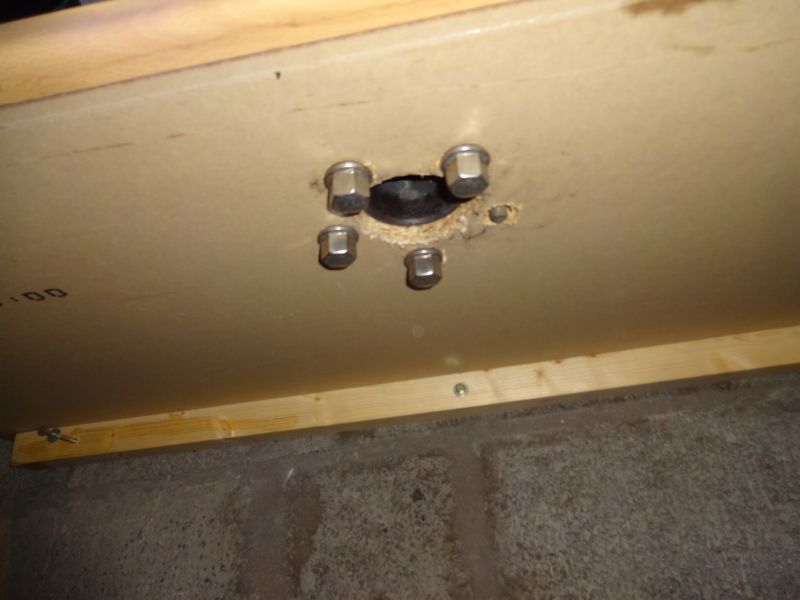
Finally, one potential source of the click is this, the right hand end of the top pivot bolt hole in the subframe, there is a bit of movement here. I'll get out a micrometer and measure the inside diameter compared to the bolt diameter tomorrow.
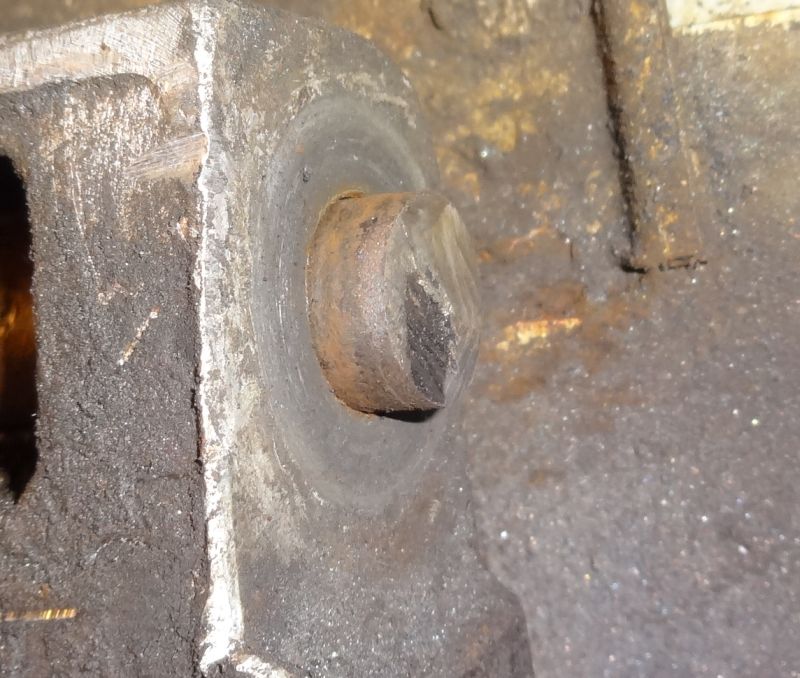
Has anyone else felt any movement here?
First I released the steering rack, no problem with seized bolts.
There was a problem with the front bolt, it would foul on this bracket, it was so rotten I pulled it off with some pliers.
It looked like I would get more space if I released the X brace, I want it off to paint it anyway.
Just great!
Next the bolt was fouling on this bracket, I want to take it off and refurbish or replace it, anyone know what it is called or its part number?
For the time being I knocked it out with a brass drift.
Now back to the top arm, I couldn't get it out by hammering so decided to take the angle grinder to it, but with this size of disc, it would not cut all the way through, so I cut the turned the bolt then cut......etc.
Finally, both arms off!
Finally, one potential source of the click is this, the right hand end of the top pivot bolt hole in the subframe, there is a bit of movement here. I'll get out a micrometer and measure the inside diameter compared to the bolt diameter tomorrow.
Has anyone else felt any movement here?
Thread Starter
|
Veteran Member
Joined: Apr 2012
Posts: 1,854
Likes: 987
From: UK
I was busy tonight so didn't get much done.
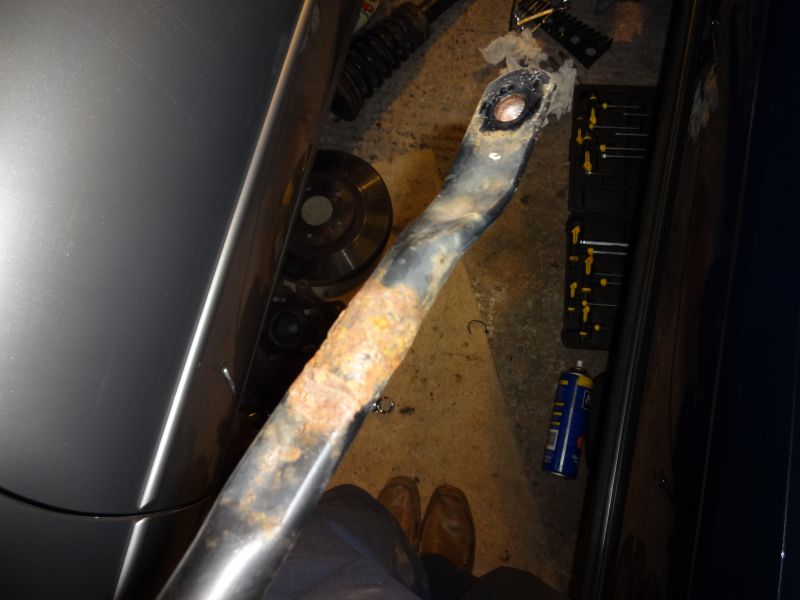
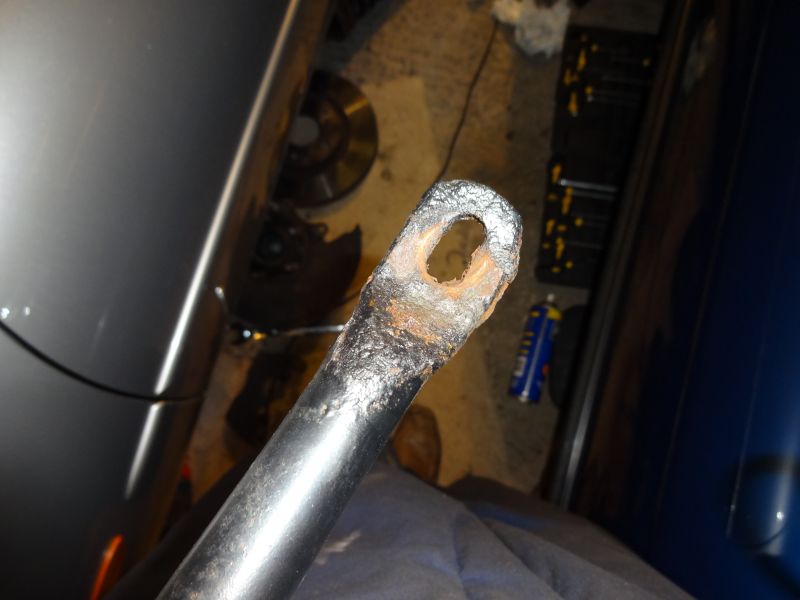
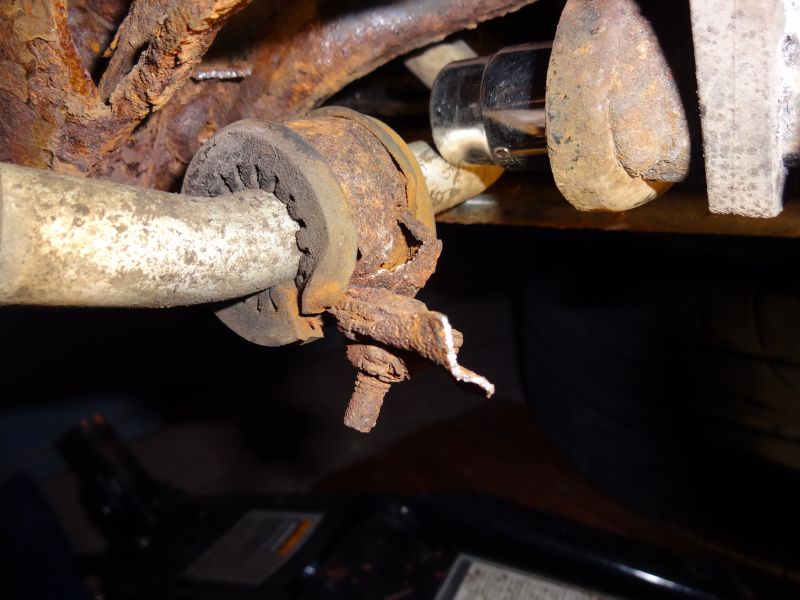
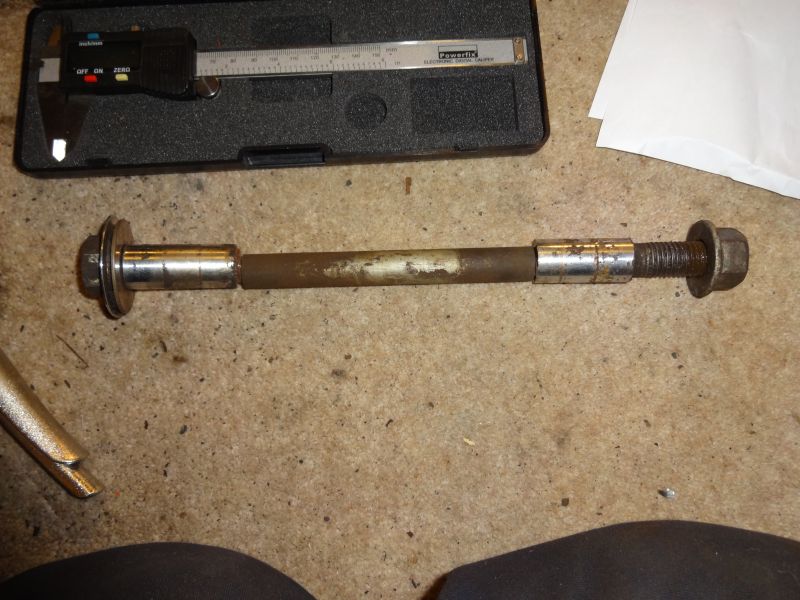
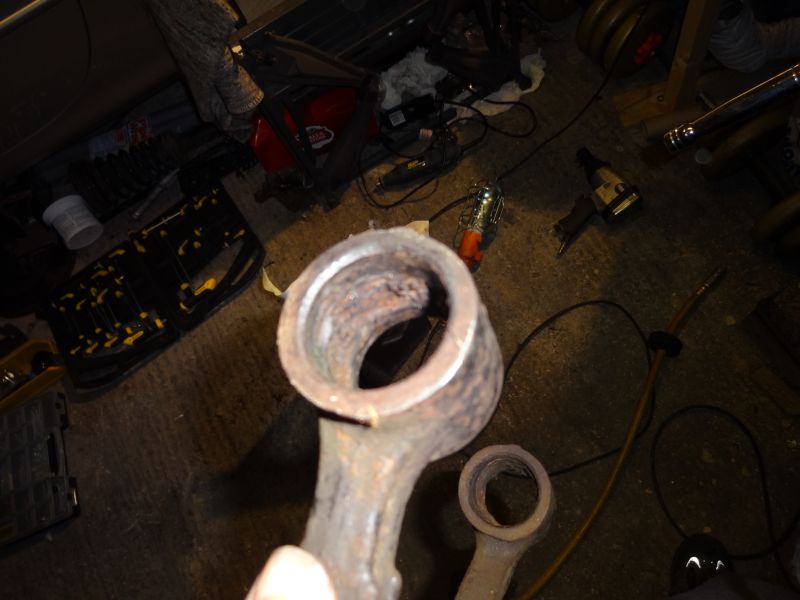
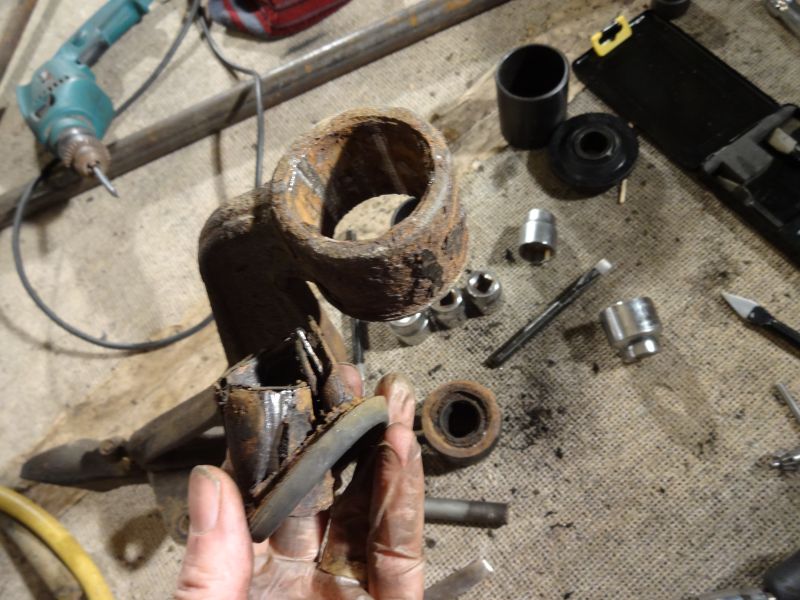
Here is what was left of the bolt, you can see that the steel tubes from the bushes now rusted onto the bolt.
I checked the diameter of the mid section of the bolt at both ends, it was 15.7mm and then checked the inside diameter of the holes at each side of the sub frame, they were 15.85mm so about 0.15mm of free play, but these measurements were made on my �15 micrometer which may not be the most accurate.
I am please that the consistency for each side of the sub frame but was surprised at how much wobble these was for such a "tight" fit, see video below.
I'm now hoping that this is within allowable tolerances, can anyone confirm this?
You can see what I mean here.
XK8 fulcrum bolt - YouTube

Joined: Dec 2011
Posts: 120,439
Likes: 17,016
From: Durham, UK
When I looked at the beginning of your video checking the play with a part fulcrum bolt in each end, the movement was such that I thought the crossmember had been compromised. However, when you inserted the bolt so it was within both ends of the crossmember, the movement was greatly reduced.
I've renewed several fulcrum bolts but (perhaps fortunately) never had to replace a cross member for excessive wear.
With a good fulcrum inserted right through the cross member, there should be no perceptible horizontal or vertical movement:
Try it with a new or good used fulcrum bolt to better assess the wear.
When you re-assemble - use plenty of copaslip:
Problems with the upper wishbone usually start when the steel tube in the bush corrodes onto the fulcrum pin.
Graham
Thread Starter
|
Veteran Member
Joined: Apr 2012
Posts: 1,854
Likes: 987
From: UK
Ok, is this day 4 or 5, losing track of time.
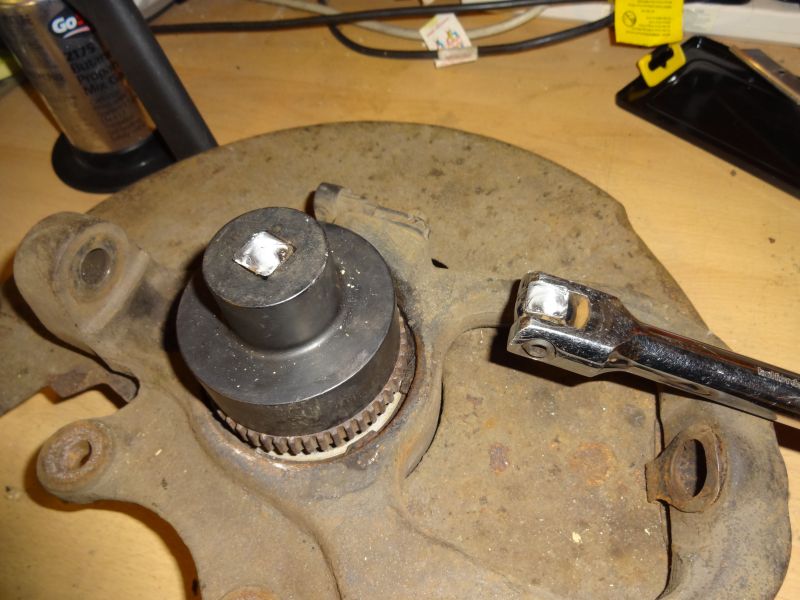
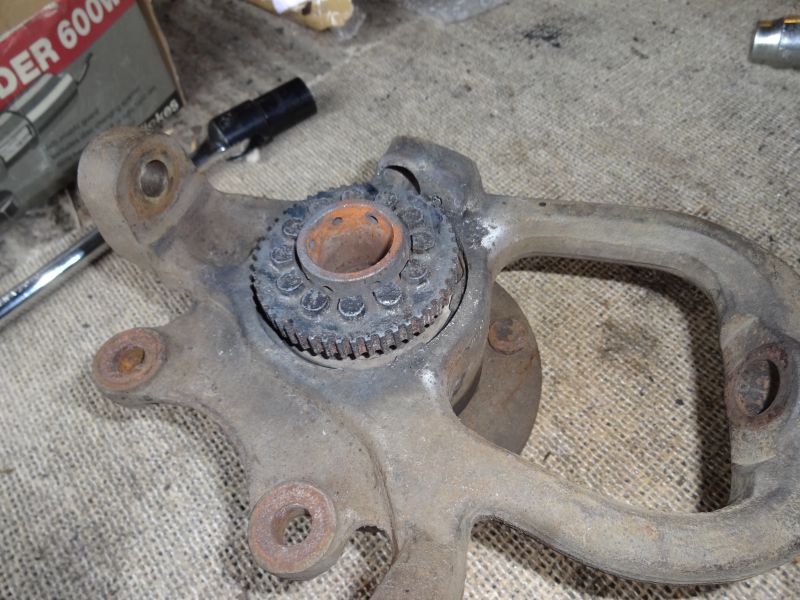
I thought I would have a go at the hub to remove the wheel speed nut.
First, how to secure the hub.
Now I bought this cheap set about 5 years ago and knew it would come in useful on day! Mrs RD never understands this.....
I just pushed the studs into the holes, but it immediately ripped out.
So next another hole.
And pushed it fully in,
And bolted from below.
So now it was very secure.
But my pry bar started to bend, not sure what to do next on this......suggestions welcome!

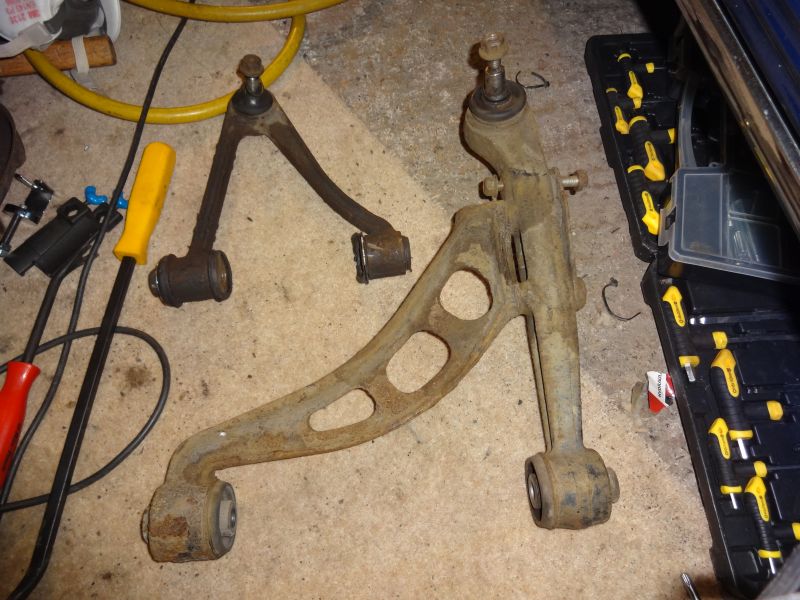
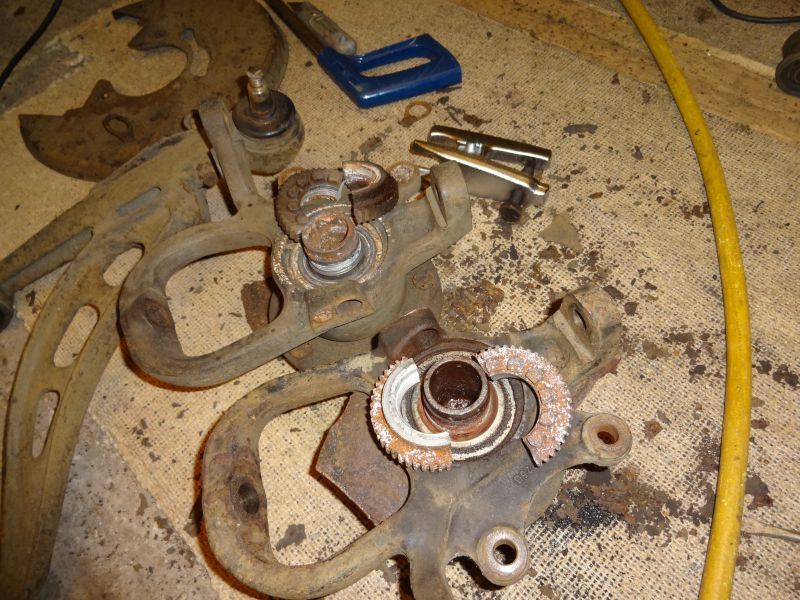
Now that the hub was at a dead end, on to the upper and lower arms.
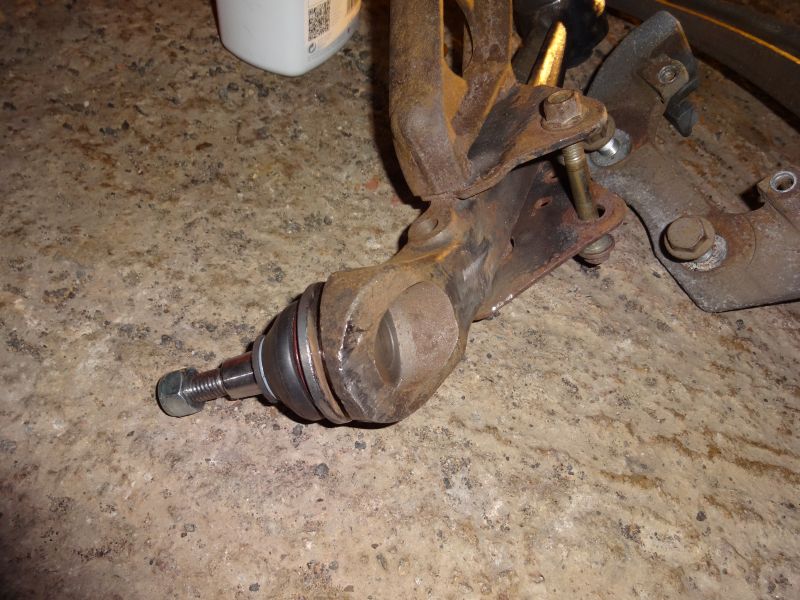
First I chiselled out the upper bushes, they were totally perished and took a lot of work to clean out.
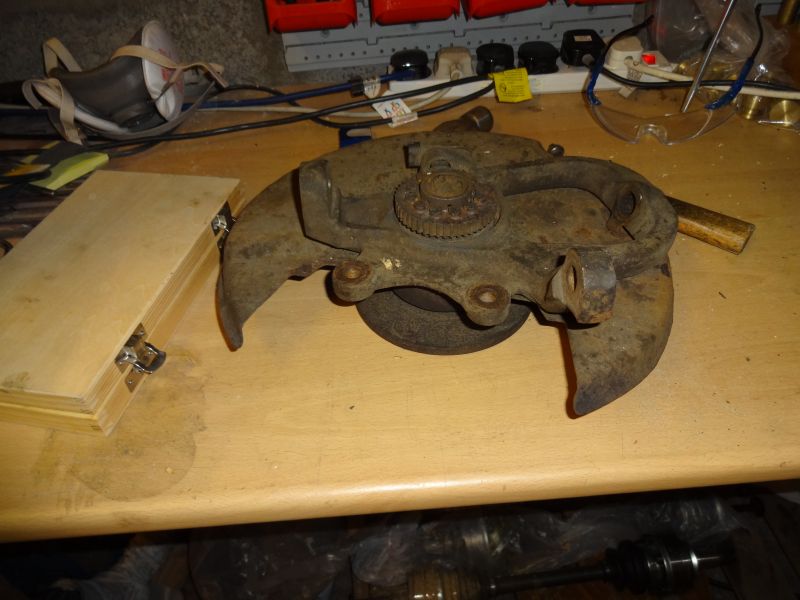
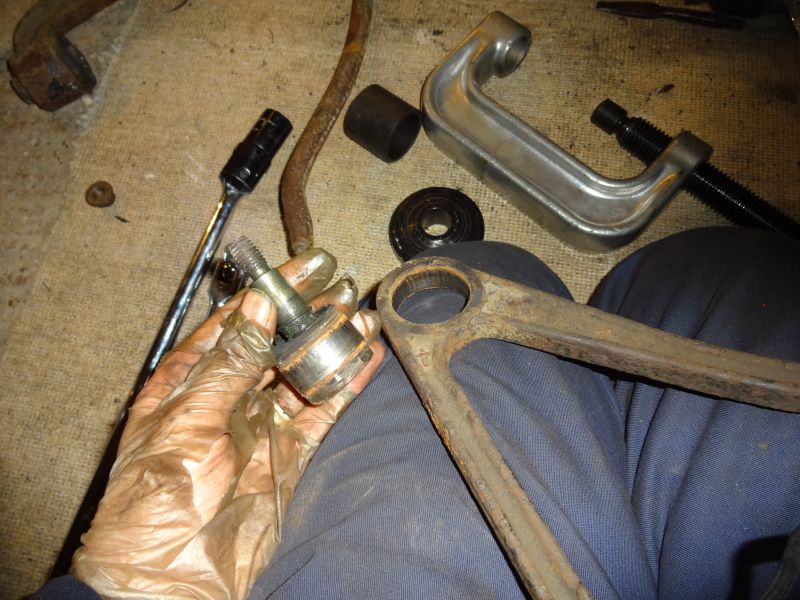
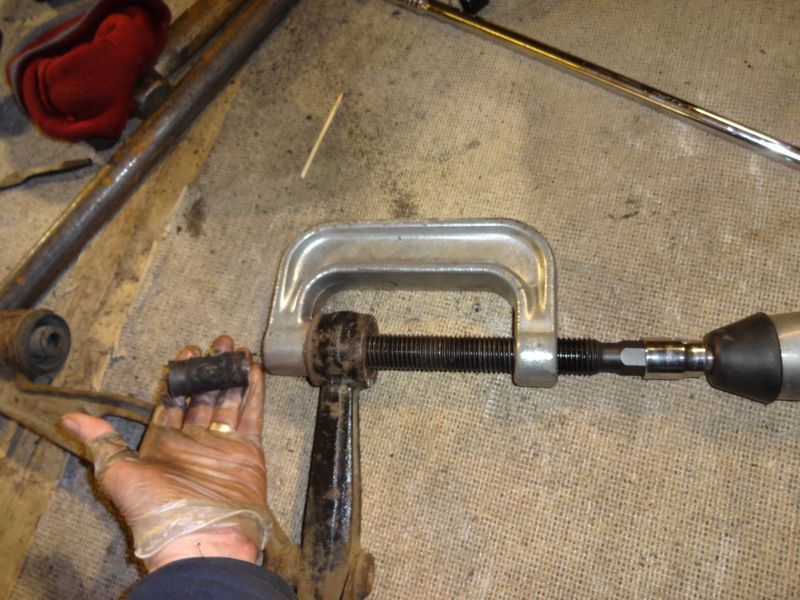
Next on to the ball joint, this is my new cool tool from ebay.

I was struggling to secure the arm so ended up doing this which held it perfectly.

It came out nice and clean after I gave it a bit of heat with a butane torch, I also cut off the ball joint rim with an angle grinder first so that the retainer cup fit nicely onto the arm.
So next on to the lower arm.
It came out easily too after a bit of heat was applied.
So next, I'll have a go at the lower arm bushes, they look a bit tricky.
Again if anyone can suggest what to do with the hub, please let me know, thanks.
I thought I would have a go at the hub to remove the wheel speed nut.
First, how to secure the hub.
Now I bought this cheap set about 5 years ago and knew it would come in useful on day! Mrs RD never understands this.....
I just pushed the studs into the holes, but it immediately ripped out.
So next another hole.
And pushed it fully in,
And bolted from below.
So now it was very secure.
But my pry bar started to bend, not sure what to do next on this......suggestions welcome!
Now that the hub was at a dead end, on to the upper and lower arms.
First I chiselled out the upper bushes, they were totally perished and took a lot of work to clean out.
Next on to the ball joint, this is my new cool tool from ebay.
I was struggling to secure the arm so ended up doing this which held it perfectly.
It came out nice and clean after I gave it a bit of heat with a butane torch, I also cut off the ball joint rim with an angle grinder first so that the retainer cup fit nicely onto the arm.
So next on to the lower arm.
It came out easily too after a bit of heat was applied.
So next, I'll have a go at the lower arm bushes, they look a bit tricky.
Again if anyone can suggest what to do with the hub, please let me know, thanks.
Thread Starter
|
Veteran Member
Joined: Apr 2012
Posts: 1,854
Likes: 987
From: UK
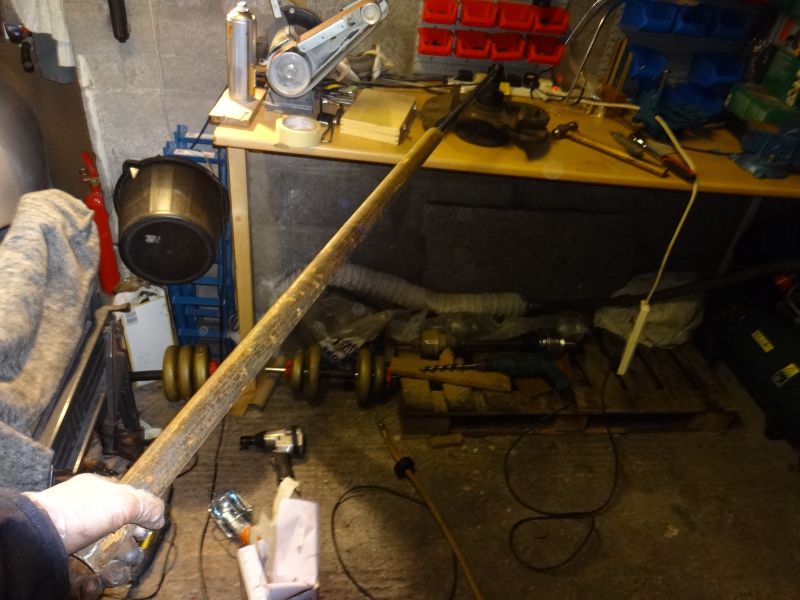
Tonight I tried heating the abs nut with a butane torch to ease its removal, it didn't work. I was probably putting in about 600 to 700Nm when the end twisted off my breaker bar.
Looks like it may need oxy to get it off. I've always wanted an oxy kit but cant justify the cost. :|
So I put that to one side again, Ill try to find a friendly garage tomorrow with an oxy torch.
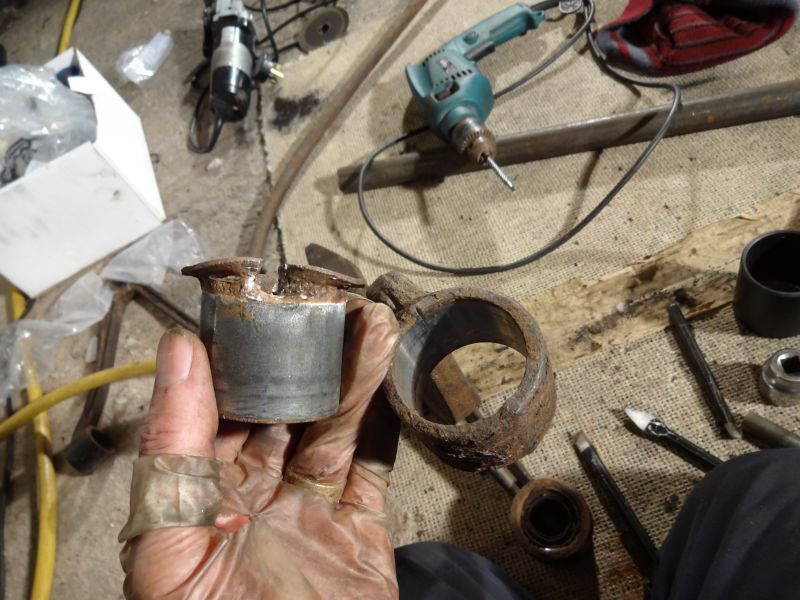
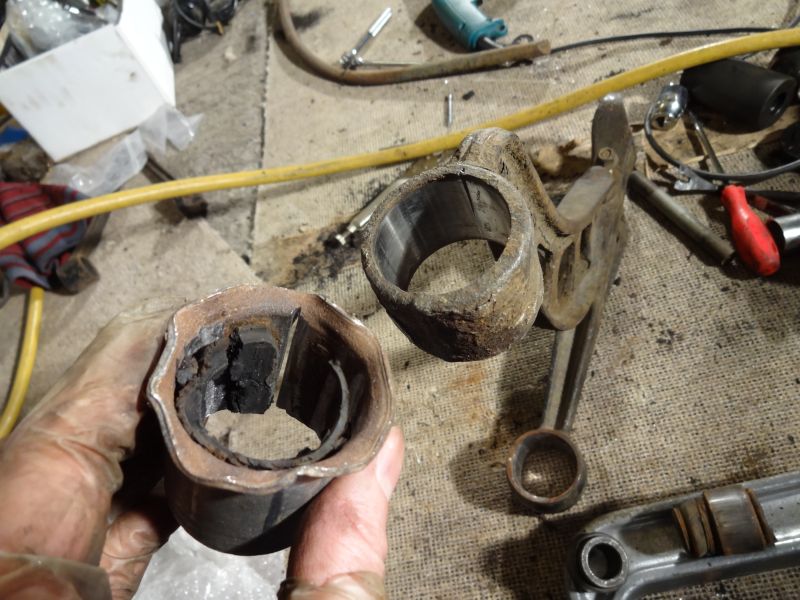
Next, on the the lower arm bushes. They are made of three metal tubes separated by rubber, first I pushed out the main inner tube that holds the bolt.
I then cut through the mid tube and drilled out the rubber between it and the outer sleeve, the chiselled it out.
Finally I hack sawed through the outer tube to weaken it then chiselled it out.
Tomorrow, back to the hub nut!
Looks like it may need oxy to get it off. I've always wanted an oxy kit but cant justify the cost. :|
So I put that to one side again, Ill try to find a friendly garage tomorrow with an oxy torch.
Next, on the the lower arm bushes. They are made of three metal tubes separated by rubber, first I pushed out the main inner tube that holds the bolt.
I then cut through the mid tube and drilled out the rubber between it and the outer sleeve, the chiselled it out.
Finally I hack sawed through the outer tube to weaken it then chiselled it out.
Tomorrow, back to the hub nut!
Veteran Member
Joined: Feb 2011
Posts: 9,733
Likes: 2,203
From: on-the-edge
I notice you have what looks like a 1/2 inch drive impact wrench in the pictures.
Have you tried that in place of the breaker bar?
The impact action is much more effective on frozen joints than a steady pull. Again, *extended* soaking in penetrating lubricant is helpful.
There is also plan B. Fracture it with a cold chisel and replace with new.
Have you tried that in place of the breaker bar?
The impact action is much more effective on frozen joints than a steady pull. Again, *extended* soaking in penetrating lubricant is helpful.
There is also plan B. Fracture it with a cold chisel and replace with new.
Thread Starter
|
Veteran Member
Joined: Apr 2012
Posts: 1,854
Likes: 987
From: UK
I notice you have what looks like a 1/2 inch drive impact wrench in the pictures.
Have you tried that in place of the breaker bar?
The impact action is much more effective on frozen joints than a steady pull. Again, *extended* soaking in penetrating lubricant is helpful.
There is also plan B. Fracture it with a cold chisel and replace with new.
Have you tried that in place of the breaker bar?
The impact action is much more effective on frozen joints than a steady pull. Again, *extended* soaking in penetrating lubricant is helpful.
There is also plan B. Fracture it with a cold chisel and replace with new.
Veteran Member
Joined: Feb 2011
Posts: 9,733
Likes: 2,203
From: on-the-edge
Just so you know, there are people working on old parts who go through a routine of applying penetrating lubricant, tapping with a small hammer to vibrate the joint and testing the joint ... for days or weeks before it comes apart.
One recipe that is popular is 1/2 ATF and 1/2 acetone or kerosene.
One recipe that is popular is 1/2 ATF and 1/2 acetone or kerosene.
Thread Starter
|
Veteran Member
Joined: Apr 2012
Posts: 1,854
Likes: 987
From: UK
Some more stuff from this morning.
I pushed out the old shock bush, no problem there.
Then the other lower arm bush was next, did a bit of drilling, hack sawing and then chisselling.
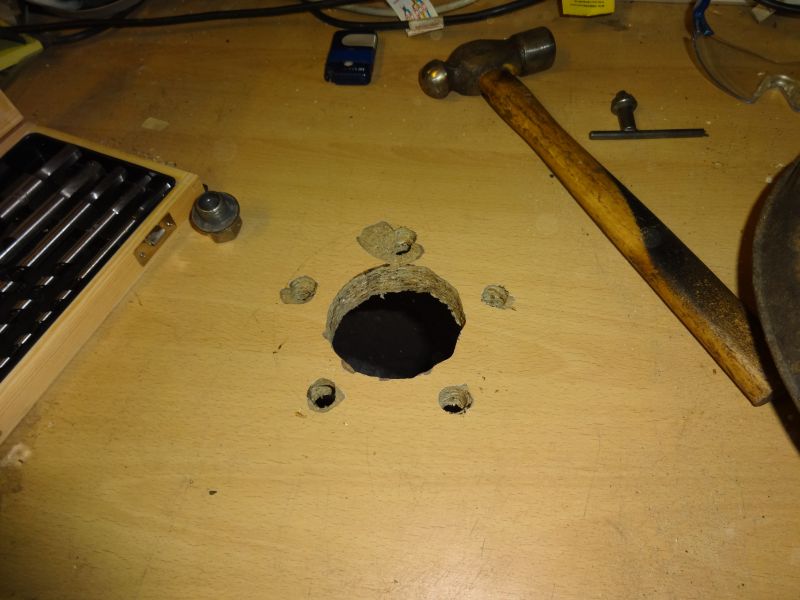
I then had to drill and chisel off the three screws holding the hub heat shield on, there is now way to get them off with a tool.
Once off, I took the hub round to a commercial vehicle repair shop, luckily only half a mile from my house. They then put an oxy torch or the hub nut, and believe it or not, they still could not budge it even with a 6 foot breaker.
Next I'm going to try to cut it off.
I pushed out the old shock bush, no problem there.
Then the other lower arm bush was next, did a bit of drilling, hack sawing and then chisselling.
I then had to drill and chisel off the three screws holding the hub heat shield on, there is now way to get them off with a tool.
Once off, I took the hub round to a commercial vehicle repair shop, luckily only half a mile from my house. They then put an oxy torch or the hub nut, and believe it or not, they still could not budge it even with a 6 foot breaker.
Next I'm going to try to cut it off.
Senior Member
Joined: Sep 2012
Posts: 420
Likes: 78
From: Chicago West Burbs
I am sure your XK8 (which reminds me of the Wizard of Oz' Tin Man) will be moving freely and clunk-free when all of your tenacity gets this thing back together with fresh, round bushings and a gallon of anti-seize! What a saga. Thanks for sharing the pain: I will keep my future grumbling about stuck bolts in perspective after having all of this as a comparison point. Jac
Thread Starter
|
Veteran Member
Joined: Apr 2012
Posts: 1,854
Likes: 987
From: UK
I've put the hub to one side again for the last few days and started to sand blast some of the parts and push the bushes back in.
This C clamp tool has been great.
The lower arm bush ready to go in.

One once it was in.

Next I moved on to the other side of the car and started stripping it down.
All went ok except for the lower ball joint, the ball joint splitter broke last night, I'll pick up a new one tomorrow. The top pivot bolt was also a pain to get out, it took a lot of hammering back and forth with a lot of penetrating fluid but it did eventually come out. The lower arm front bolt was also a pain and took a lot of hammering but also did come out. So here we are.
Surprisingly this fulcrum bolt on this side has more slack in it that the first side and was not giving any problems, So for the time being I probably won't replace the sub frame or get it sleeved.
However I will probably remove it to have a look at the engine mounts.
This C clamp tool has been great.
The lower arm bush ready to go in.
One once it was in.
Next I moved on to the other side of the car and started stripping it down.
All went ok except for the lower ball joint, the ball joint splitter broke last night, I'll pick up a new one tomorrow. The top pivot bolt was also a pain to get out, it took a lot of hammering back and forth with a lot of penetrating fluid but it did eventually come out. The lower arm front bolt was also a pain and took a lot of hammering but also did come out. So here we are.
Surprisingly this fulcrum bolt on this side has more slack in it that the first side and was not giving any problems, So for the time being I probably won't replace the sub frame or get it sleeved.
However I will probably remove it to have a look at the engine mounts.
Thread Starter
|
Veteran Member
Joined: Apr 2012
Posts: 1,854
Likes: 987
From: UK
Back to the hub, I started to cut into the nut with a small cutting disc, I cut a slot on both sides.

Next I hammered a chisel in to the slot and the nut split easily. Same for the other one.

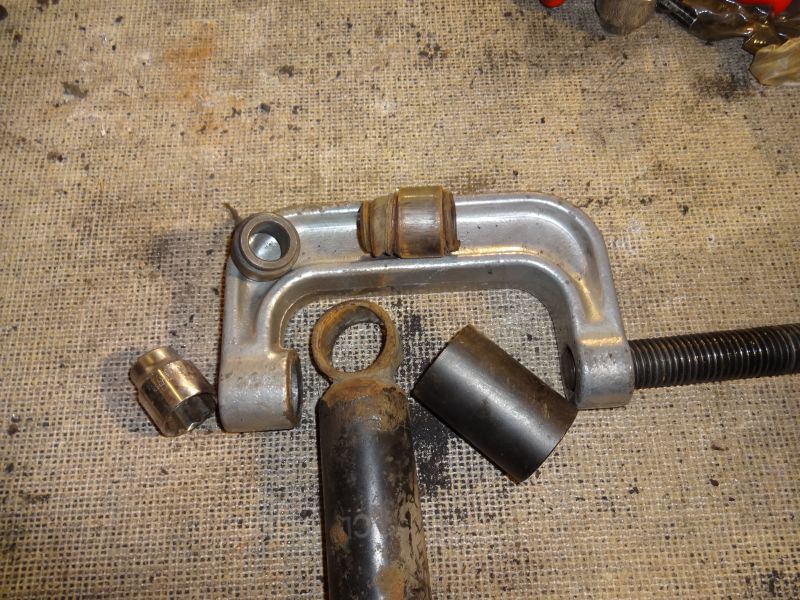
Next I started to fabricate a tool to help push the lower arm balljoint back in, still needs some fettling.

Next I hammered a chisel in to the slot and the nut split easily. Same for the other one.
Next I started to fabricate a tool to help push the lower arm balljoint back in, still needs some fettling.
Thread Starter
|
Veteran Member
Joined: Apr 2012
Posts: 1,854
Likes: 987
From: UK
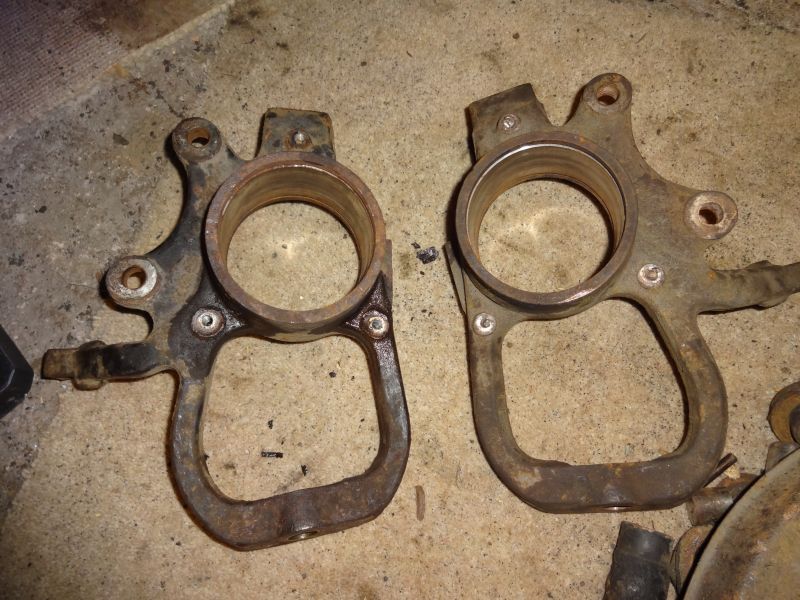
Got the bearings pushed out free of charge by the local truck garage that could not get the abs nut off, great support from them.
Now here is a tip, on the carrier on the right I drilled out the three screws that held on the hub rear cover plate so that I could save the rear plate, which needs to come off before the bearing can be pushed out. That was a mistake as the effort now needed to drill and tap the three holes is not worth the effort compared to getting a new rear plate. On the other side I just cut off the back plate and then got easy access to the screws after the hub/bearing was pushed out.
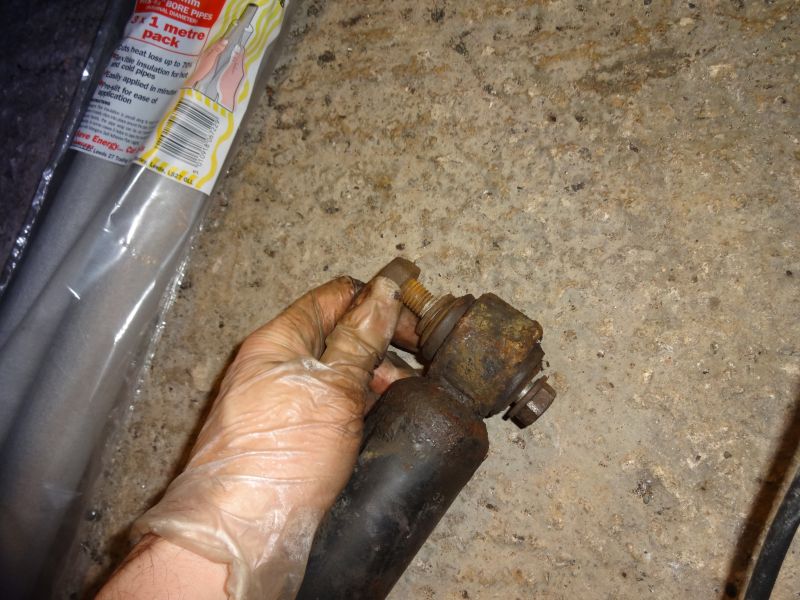
Now here is a tricky job, I've been trying to push in the new lower ball joint with my C clamp and a simple tool shown in one of the pictures above, however it has been very time consuming and due to tool problems am looking for an alternative solution.
Does anyone else know how to do it?
Now here is a tip, on the carrier on the right I drilled out the three screws that held on the hub rear cover plate so that I could save the rear plate, which needs to come off before the bearing can be pushed out. That was a mistake as the effort now needed to drill and tap the three holes is not worth the effort compared to getting a new rear plate. On the other side I just cut off the back plate and then got easy access to the screws after the hub/bearing was pushed out.
Now here is a tricky job, I've been trying to push in the new lower ball joint with my C clamp and a simple tool shown in one of the pictures above, however it has been very time consuming and due to tool problems am looking for an alternative solution.
Does anyone else know how to do it?