
Removing lower control arm bushings

Thread Starter
|
Senior Member
Joined: May 2013
Posts: 970
Likes: 119
From: PA
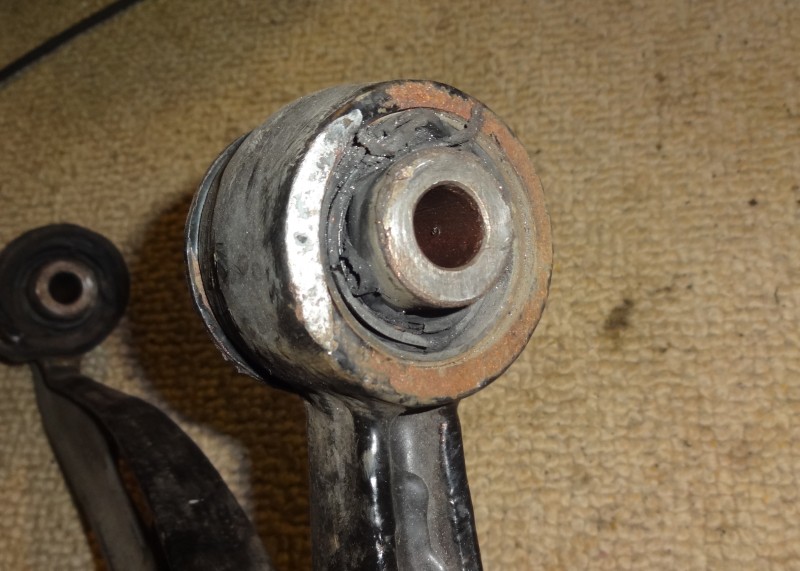
Any trick to this. My 20 ton press doesn't seem to even get any movement what-so-ever on any of the 4 I've tried. Using a 32mm axle socket which is just a hair smaller than the diameter. I would suspect a 34mm would be too big but I don't have one. Was hoping to replace all the bushings and ball joints on my 97, granted these look to be in just fine condition but still they are nearly 20 years old.

Senior Member


Joined: May 2014
Posts: 610
Likes: 125
From: Florida
I tried to remove mine with my 10 ton press and had no luck. I ended up bringing them to local shop and had them remove and replace. My press was able to get all other bushings and ball joints out.
Thread Starter
|
Senior Member
Joined: May 2013
Posts: 970
Likes: 119
From: PA
Mine is double that but still nodda, how much did you pay to have 'em pushed out if you don't mind me asking. From reading here I thought the ball joints were going to be the issue but they popped out like nothing.

Thread Starter
|
Senior Member
Joined: May 2013
Posts: 970
Likes: 119
From: PA
Will do, I can already say that it transforms the wooly feeling of the front end of an XJR. I did the bushings at around 75k on it (nothing was overly worn on the original suspension) and now it actually handles like something other than a buick on the twisties. Don't believe any of the crap you hear about feeling every bump, vibration and the squeal. Mine don't make a single sound 4 years later. Yes you will have a bit more feedback and vibration at the steering wheel but you hardly notice it even on nasty roads. Now if I can figure out a way to get the lower arm bushings out I'll be set. Guessing I may have to drill the center out so I can cut the collar. Not lookng forward to that! Unless anybody has some ideas.
Senior Member

Joined: Nov 2009
Posts: 753
Likes: 220
From: New York state
Press out the center sleeve out leaving the torn rubber and the outer sleeve. Then carefully cut a notch thru the outer sleeve. Then hammer a cold chisel between the control arm and the sleeve and the sleeve will fold inward and pop out
Did the uppers and lowers this way
Did the uppers and lowers this way

Veteran Member
Joined: Apr 2012
Posts: 1,854
Likes: 987
From: UK


Trending Topics
Thread Starter
|
Senior Member
Joined: May 2013
Posts: 970
Likes: 119
From: PA
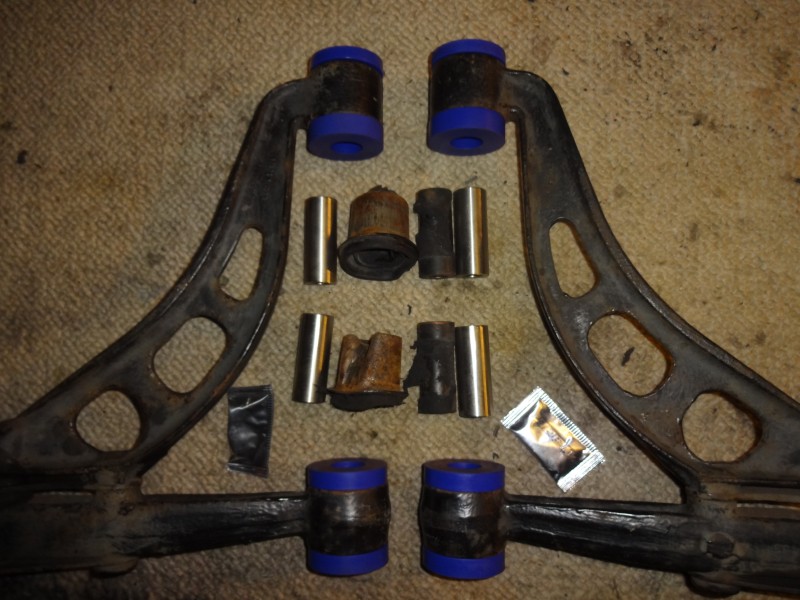
Got the first one out, Drilled around the center collar then pressed it out, tried to chisel it out but no luck cut it then chiseled and she finally popped. I do need to keep the arm notch free so that it doesn't create issues with the poly bush since it doesn't use a collar on the outer side. 3 more to go but I think I can go ahead and order my bushings now.
Thread Starter
|
Senior Member
Joined: May 2013
Posts: 970
Likes: 119
From: PA
Now I just need to figure out how to get the new ball joints in. Bent the collar on the first one a bit trying. Any ideas on getting a flat surface out there. Nothing shows up in a search.
Veteran Member
Joined: Apr 2012
Posts: 1,854
Likes: 987
From: UK
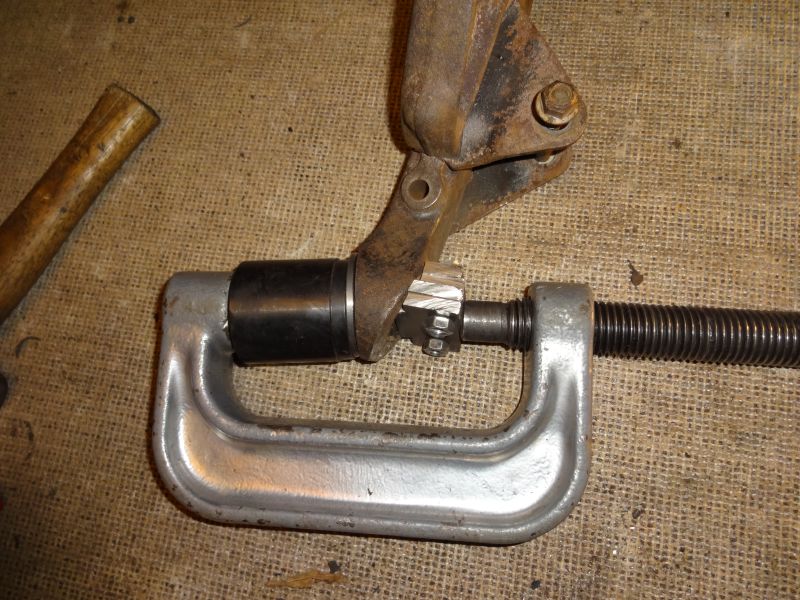
First give the internal surfaces a very good mechanical clean out with sandpaper.
Then make a tool to help push them in, you can probably do this with the old bush and a bit of weld. Some have said that they have been able to just drop them in after freezing the ball joint and heating the arm, but this did not work for me.


And it's in!
Then make a tool to help push them in, you can probably do this with the old bush and a bit of weld. Some have said that they have been able to just drop them in after freezing the ball joint and heating the arm, but this did not work for me.
And it's in!
Thread Starter
|
Senior Member
Joined: May 2013
Posts: 970
Likes: 119
From: PA
Heat and freeze is a given but still was a pita and took every bit of 20 tons. Got 2 6" pieces of 2" angle iron and drilled a hole in each so I could feed the stabilizer end link bolt thru them then drilled holes for a 1/2 inch bolt to be fed thru under where the press would push the ball joint down (so that the angle iron and bolt level the arm. It worked like a champ on the first and on the second it snapped the grade 5 bolt from home depot. Used another bolt and got it the remaining 1/4 inch down. All is well and just put a coat of paint on 'em. Now just need the poly bushes and of course I need to find to the time to swap em onto the car.
Thread Starter
|
Senior Member
Joined: May 2013
Posts: 970
Likes: 119
From: PA
Are those powerflex or another brand/ Haven't got mine yet but they look more blue then the purple ones I got for the XJR. When I looked Powerflex was all I found for poly bushes. I almost went with their plastic race version as I love what the stock ones did to my XJR and don't feel it made it too twitchy at all, with the XK I wouldn't mind a little twitchy so it would fit between the XJR and the TVR nicely.
Thread Starter
|
Senior Member
Joined: May 2013
Posts: 970
Likes: 119
From: PA
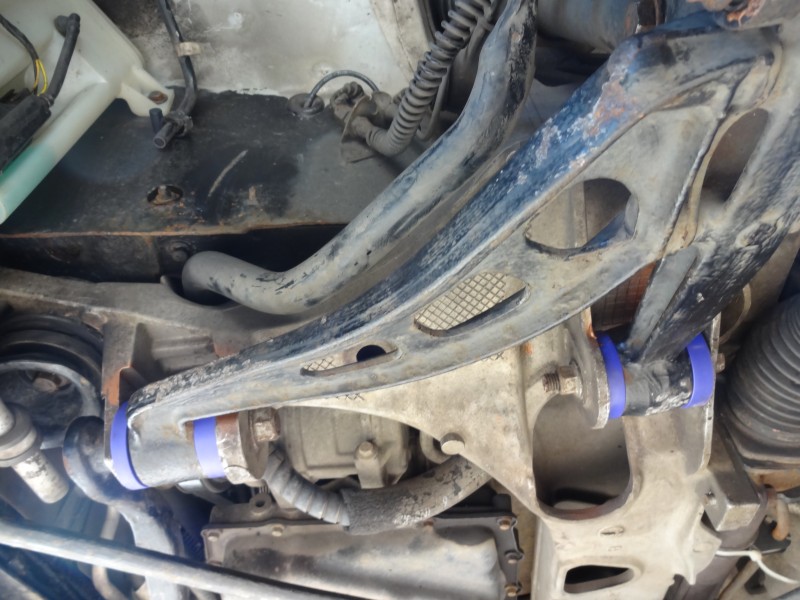
Finally got the last of the old ball joints out of the one hub today (I couldn't get it no matter what I tried, took it to my garage and it took about 15 minutes of heat, air chisel and beating til it popped. Arms with the poly went in as you would expect (hard to line up but if you did 'em slow they were fine). Only issue was I needed to shave a bit off the rear of the driverside back bush and collar to get it to slide in.
Drives so much more direct now (granted I just took it about a mile to seat the brakes and such). Worth doing but was a real PITA to do (just lots of time).
Drives so much more direct now (granted I just took it about a mile to seat the brakes and such). Worth doing but was a real PITA to do (just lots of time).

Junior Member
Joined: Apr 2020
Posts: 15
Likes: 9
From: Palm Coast, Florida
2000 xkr control arm bushings and ball joints were easily pressed out using a 34 mm impact socket. Getting them back in was a little tricky. Had to keep realigning the press. We also had to grind down the ring around the arm so the press sleeve would fit over and hold against the control arm.

Thread
Thread Starter
Forum
Replies
Last Post
beady
XJ XJ8 / XJR ( X308 )
7
Nov 12, 2014 04:51 PM
Currently Active Users Viewing This Thread: 1 (0 members and 1 guests)