
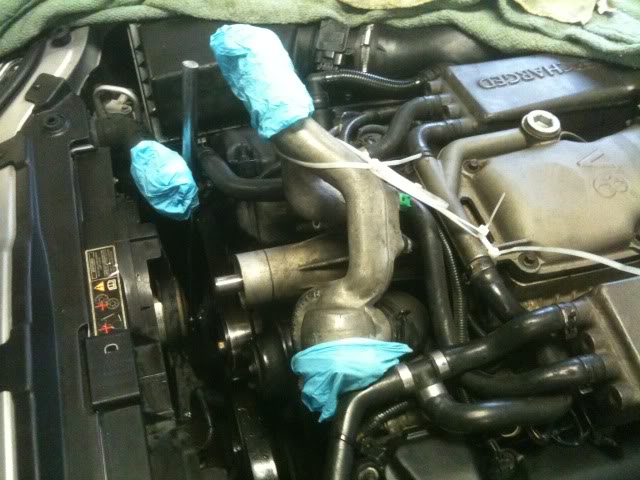
Supercharger belt tensioner access.


Thread Starter
|
Senior Member
Joined: Oct 2012
Posts: 259
Likes: 39
From: Falmouth
Hi Guys,
I want to replace my engine drive belt and have to remove the sc belt first. JTIS says to remove the electrical connector from the right hand fan and then insert the 1/2" bar into the tensioner.
Even with the fan disconnected, there still isn't enough room to fit a small bar, so I had a go at removing the twin fan / shroud assembly. Again, JTIS makes it sound so simple, but on lifting it upwards, the right hand mounting lug is snagging under the top radiator hose and no matter how I try to do it, I can't get it out. It looks as though I would have to drain the system and remove the top hose to get the fans out, so I can get a tool into the tensioner.
Does this sound right, or am I missing something
Thanks, Andy

Senior Member
Joined: Jun 2011
Posts: 355
Likes: 112
From: Vancouver
You don't have to do all that; I had to remove my belt a few times when installing my smaller SC pulley. You can use a 2x4 or a metal bar in there, and gently pry the opening to get access to the belt. No need to remove fans, etc.
Check out my post about the SC pulley upgrade in the link in my signature. In the first picture (attached below) you can see a metal bar in the top left hand corner, thats what I used for prying (I believe I used the frame as a leverage point, and pushed against the metal back of the fan). Just gently pry at it, I believe it only took an inch or so.
You'll notice I removed the metal coolant assembly to access the SC snout, but you won't have to do that unless you're changing the pulley. Hope that helps!
Last edited by pomosv; Nov 18, 2012 at 12:04 AM.
Thread Starter
|
Senior Member
Joined: Oct 2012
Posts: 259
Likes: 39
From: Falmouth
Thanks Plums, I looked up the posts from Avos and found that very useful.
Pomosv, thanks for the link to your mods post. I really liked some of what you have done. I'm surprised the difference removing the side mouldings makes and I think I'll have a go at that myself, as it really cleans up the side of the car.
As far as removing the supercharger belt, am I right in thinking you use the bar or 4 x 2 to push the back of the right hand fan forward to increase the gap between the tensioner and the back of the fan? Can you then fit a standard ratchet or breaker bar into the tensioner, or do you have to use the special tool I've seen mentioned?
Andy

Member
Joined: Jul 2011
Posts: 55
Likes: 4
From: Surrey England
When I did it I used standard breaker bar in the square hole to Release belt tension . I did unscrew the fan assembly unclipped the pipe on bottom of fan assembly and could then lift fans up enough to give room for the breaker bar. You can wedge the top of fan assembly so it stays up.
Veteran Member
Joined: Feb 2011
Posts: 9,733
Likes: 2,201
From: on-the-edge
Pushing on expensive electrical items that are still fastened is not a really great idea.
A breaker bar should be possible. If not, a short piece of 1/2 inch square steel bar turned with a pair of visegrips might be possible. But, if you have that piece, and some flat stock you might as well take it to the nearest garage or muffler shop and do some begging. Weld the piece to the flat stock and you have the right tool.
Another idea is to buy the thinnest, cheapest breaker bar you can find. Then grind off part of the square drive so that you do not need as much clearance.

Yep, Plums. That's what I did. Found a piece of 1/2 mild steel bar and welded it to a piece of 1/8 x 1" flat bar stock and made a nice, cheap tool that fits right into that hole in the tensioner. I have to push on the fan a little bit - but not much.
I have replaced a S/C belt in less than two minutes by using that tool and twisting the belt sidewise to slip it between the engine and the pulley.
Piece o cake!
Cheers!
I have replaced a S/C belt in less than two minutes by using that tool and twisting the belt sidewise to slip it between the engine and the pulley.
Piece o cake!
Cheers!
Trending Topics
Thread Starter
|
Senior Member
Joined: Oct 2012
Posts: 259
Likes: 39
From: Falmouth
Reading Avis's posts on the subject got me thinking and I do agree with Plums about pushing the fans around not being a good idea. I did some research on the net and came accross a Serpantine Belt Service Tool Kit by Laser Tools - Pt. No. 3757 - and got one the next day through my local auto factor.
Had another look at the job and found that I still needed a few millimeters extra clearance between the tensioner and the fan, but quickly discovered that there was enough movement in the fan / shroud assembly to let me get the new tool into position and hey presto as they say.
I removed both belts and cleaned up the flat idler and tensioner pulleys, as I had noticed a brownish deposit on the surface of the pulleys. Put everything back together and fitted the original SC belt, but fitted a new Gates engine drive belt Pt. No. 6PK2315, as I was suspicious that the original belt was slipping at cold start and whilst there was still a relatively high load on it from the alternator.
Does anyone have any experience of using this belt and is it good or bad?
Andy.
Veteran Member
Joined: Jun 2008
Posts: 1,714
Likes: 326
From: Chesapeake Bay area, Virginia
I need to change the belts soon too. I looked at this and I also saw that there was not adequate room to get the tool into the tensioner. I then noticed that the fan shroud had two vertical linear slots with a bolt in it, one on each side. By loosening these two bolts, the shroud will slide up about 2", clearing the access to the tensioner.


Thread
Thread Starter
Forum
Replies
Last Post
FS[MidWest]: 2001 Supercharged Vanden Plas
Col. Sandurz
PRIVATE For Sale / Trade or Buy Classifieds
1
Sep 28, 2015 07:29 PM
Currently Active Users Viewing This Thread: 1 (0 members and 1 guests)