
Working thru issues on my newly acquired 04 XK8

Veteran Member


Joined: Feb 2012
Posts: 2,997
Likes: 714
From: Waco, Texas, US
OEM shocks hold up very well. If they are not leaking and do not exhibit excessive "bounce", you are probably OK with less than 40K miles.
Do check all the rubber suspension bits since you're going to be in there anyway. A shake test with the tires on and car on stands is a good start. Plenty of you tube videos to show you how to check out the suspension and bushings.
Do check all the rubber suspension bits since you're going to be in there anyway. A shake test with the tires on and car on stands is a good start. Plenty of you tube videos to show you how to check out the suspension and bushings.
Senior Member
Joined: Dec 2012
Posts: 896
Likes: 156
From: North Texas
That is an OE Jaguar battery manufactured by Varta.
The manufactured date on these is stamped into the top of the negative terminal post in the format WW-YY for Week and Year:

This code on mine in the photo is 23-12 for the 23rd Week in 2012. I can't make out a code stamp on the negative terminal of yours. It could be the pic resolution or that it's worn off.
If it's five years or more old, it's probably on borrowed time.
Graham
The manufactured date on these is stamped into the top of the negative terminal post in the format WW-YY for Week and Year:
This code on mine in the photo is 23-12 for the 23rd Week in 2012. I can't make out a code stamp on the negative terminal of yours. It could be the pic resolution or that it's worn off.
If it's five years or more old, it's probably on borrowed time.
Graham
Thread Starter
|
Veteran Member

Joined: Jan 2009
Posts: 2,199
Likes: 1,371
From: Hudson, Florida
I removed the roof console to clean out what I thought was going to be leaking hydraulic fluid. It wasn't. Everything up there was completely dry. No evidence of a leak anywhere. I did notice that the foam rubber block that is in that assembly was starting to turn into goo. So I removed the screen that had the residue and cut a new block of foam to replace the aged one. After cleaning the screen I reassembled and reinstalled. Looks much better now.
I am pleased that I don't yet have any leaks. Next will be to reduce the pressure in the hydraulic system and hope it lasts a while. I'll be checking it periodically for sure.
I am pleased that I don't yet have any leaks. Next will be to reduce the pressure in the hydraulic system and hope it lasts a while. I'll be checking it periodically for sure.
Thread Starter
|
Veteran Member
Joined: Jan 2009
Posts: 2,199
Likes: 1,371
From: Hudson, Florida
Today I stripped both the A pillars that had the loose coverings. I found that the existing material held up really well to a good hand washing.
All the old foam bits are gone and the material looks good enough to reuse I think. So I am going to give that a try tomorrow after they dry overnight.
Hopefully I won't make a mess of it.
All the old foam bits are gone and the material looks good enough to reuse I think. So I am going to give that a try tomorrow after they dry overnight.
Hopefully I won't make a mess of it.
Thread Starter
|
Veteran Member
Joined: Jan 2009
Posts: 2,199
Likes: 1,371
From: Hudson, Florida
Have the battery load tested wherever they sell batteries.
Alternatively drive the car for 30 minutes or so to make sure the battery is fully charged. Then let is sit overnight. In the morning measure the voltage at the battery terminals with the ignition off. Anything under 12.3-12.4 volts is marginal in a Jaguar.
Alternatively drive the car for 30 minutes or so to make sure the battery is fully charged. Then let is sit overnight. In the morning measure the voltage at the battery terminals with the ignition off. Anything under 12.3-12.4 volts is marginal in a Jaguar.
I guess I will keep an eye on this battery for now and make replacing it a lower priority.
Thread Starter
|
Veteran Member
Joined: Jan 2009
Posts: 2,199
Likes: 1,371
From: Hudson, Florida
I finished the recovering using the original material. It worked great but takes a while.
After hand washing and drying the removed material, I ironed them flat.

Then I covered the plastic bases using 2mm thick dense foam you can get at most craft stores. I sprayed Permatex headliner adhesive onto the plastic and then formed the foam and trimmed the edges. Pics are of one covered and one cleaned plastic base.

I let the foam dry for a bit then sprayed it with same adhesive. Also sprayed the back side edges for the folded material bond.

I let that dry for a few minutes then laid the material onto each and pressed them smooth, folding the material around the edges like it was originally.
Popped them back in the car and they look good as new. Total cost was less than $15 for adhesive and foam. Time was probably 3 hours considering all the cleaning I had to do to get rid of the old crumbling foam.
Finished result below. Eventually I will need to do the header along the top of the windshield but it is not nearly as bad as the pillar covers so it can wait a while.

After hand washing and drying the removed material, I ironed them flat.
Then I covered the plastic bases using 2mm thick dense foam you can get at most craft stores. I sprayed Permatex headliner adhesive onto the plastic and then formed the foam and trimmed the edges. Pics are of one covered and one cleaned plastic base.
I let the foam dry for a bit then sprayed it with same adhesive. Also sprayed the back side edges for the folded material bond.
I let that dry for a few minutes then laid the material onto each and pressed them smooth, folding the material around the edges like it was originally.
Popped them back in the car and they look good as new. Total cost was less than $15 for adhesive and foam. Time was probably 3 hours considering all the cleaning I had to do to get rid of the old crumbling foam.
Finished result below. Eventually I will need to do the header along the top of the windshield but it is not nearly as bad as the pillar covers so it can wait a while.
Thread Starter
|
Veteran Member
Joined: Jan 2009
Posts: 2,199
Likes: 1,371
From: Hudson, Florida
Today I fixed the droopy visor mirrors by following Reverend Sam's Visor Mirror Repair FAQ
I found a way to do it without using glue. I added a post to the FAQ describing how I did it.
I found a way to do it without using glue. I added a post to the FAQ describing how I did it.

Joined: Dec 2011
Posts: 120,439
Likes: 17,014
From: Durham, UK
I would never have thought you could get away with washing and ironing that fabric.
Graham
Thread Starter
|
Veteran Member
Joined: Jan 2009
Posts: 2,199
Likes: 1,371
From: Hudson, Florida
I will say that the fabric is easily stretched and torn so don't tug on it too much when reapplying or it will start to separate.
When I do the header panel I hope to reuse that fabric as well.
Thread Starter
|
Veteran Member
Joined: Jan 2009
Posts: 2,199
Likes: 1,371
From: Hudson, Florida
I noticed today that the rear bumper can be moved up/down slightly. I slid under the car and can see that the movement is in the mountings where I think those adjusters are located.
Can those adjusters be tightened or am I going to need new bushings of some sort? Any guesses?
Can those adjusters be tightened or am I going to need new bushings of some sort? Any guesses?
Thread Starter
|
Veteran Member
Joined: Jan 2009
Posts: 2,199
Likes: 1,371
From: Hudson, Florida
It seems that most if not all of our Jaguars have this problem of crappy looking trunk buttons. My VDP looks exactly the same as the one on my 04 XK8.
I found this one on the Welsh site but $30 seemed ridiculous for such an item. Plus it still has that dated appearance that did not fit in with the updated badging I put on the rest of the car.
Green_Trunk_Switch_Badge_-_XJ8_XJ6_XK8_S-Type_X-Type
China to the rescue! I found this one on ebay for $3. A much better alternative and also looks more current.
20mm-Jaguar-Logo-Crystal-Carbon-Fiber-Badge-Emblem-Sticker-Decal
The Chinese one is slightly smaller but looks fine against the black plastic button top. Took a couple weeks to get it in the mail.
Its the first leaper logo on this car!
Before/After Pics
Veteran Member
Joined: Aug 2007
Posts: 3,431
Likes: 573
From: Los Angeles
Hey Rothwell--great to see the fun you are having with the car. I especially liked the way you dealt with the A-pillars. I believe most folks just fore go the new foam and re-use the fabric only but yours look great. I was also wondering what do do about the grungy looking trunk button and like the one you got--might have to do the same.
Doug
Doug
Veteran Member
Joined: Feb 2011
Posts: 2,916
Likes: 547
From: North Carolina
So I took a look at the pump and (sadly) no pressure relief installed. So it looks like I will be ordering one of those.
The hoses look to be original. Opinions on whether to replace these now?
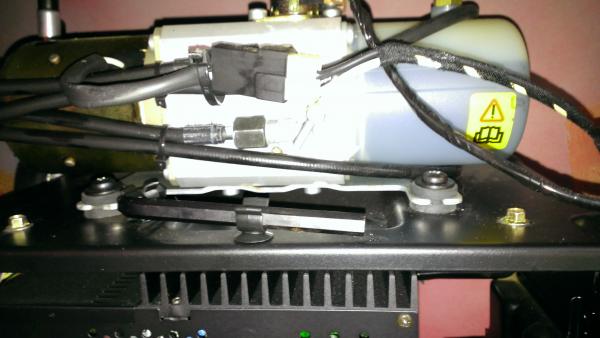
Then I noticed signs of a leak near the latch. It doesn't seem to be wet but definitely has some residue. On the drive home with the car I dropped the top and have not put it back up since. Until I sort out the hydraulics I don't plan to put it back up.
Since it is not "showering" at the moment is this something that might be solved by the pressure relief? What is the best course of action?

The hoses look to be original. Opinions on whether to replace these now?
Then I noticed signs of a leak near the latch. It doesn't seem to be wet but definitely has some residue. On the drive home with the car I dropped the top and have not put it back up since. Until I sort out the hydraulics I don't plan to put it back up.
Since it is not "showering" at the moment is this something that might be solved by the pressure relief? What is the best course of action?
Thread Starter
|
Veteran Member
Joined: Jan 2009
Posts: 2,199
Likes: 1,371
From: Hudson, Florida
I'll admit that my elbow is somewhat spoiled by the cushy trim in my VDP. Still, the lid on the XK8 just HAD to be improved. 
The lid on the console had the usual flat/wavy/lumpy problem from the crappy thin foam padding degrading. Today I pulled it apart (thanks again ReverendSam!) and added more padding on top.
I forgot to take a before pic but you all know what it probably looked like anyway.
Here's the results. Nice and smooth and soft. Elbow approved!
Thread Starter
|
Veteran Member
Joined: Jan 2009
Posts: 2,199
Likes: 1,371
From: Hudson, Florida
Hey Rothwell--great to see the fun you are having with the car. I especially liked the way you dealt with the A-pillars. I believe most folks just fore go the new foam and re-use the fabric only but yours look great. I was also wondering what do do about the grungy looking trunk button and like the one you got--might have to do the same.
Doug
Doug
I sent the seller a message to see if an emblem can be made that is 22mm instead of 20mm diameter. I think that would make it perfect. Will keep you all posted...
Last edited by rothwell; Aug 17, 2013 at 06:29 PM.
Thread Starter
|
Veteran Member
Joined: Jan 2009
Posts: 2,199
Likes: 1,371
From: Hudson, Florida
I strongly suggest you bite the bullet and replace the front hoses at least. When mine blew, they blew at the pump so I was spared the green shower but when we pulled out the hoses, they had been patched three or four times in places not visible. Otherwise, they looked factory original.
Veteran Member
Joined: Apr 2010
Posts: 7,657
Likes: 3,020
From: Arlington VA USA
Hats off to Rev. Sam for the great video...but here was the source of his inspiration: https://www.jaguarforums.com/forum/x...rinkled-45024/
Thread Starter
|
Veteran Member
Joined: Jan 2009
Posts: 2,199
Likes: 1,371
From: Hudson, Florida
Today I pulled the seats to fix the headrests and clean the carpet. Found a few leaves, 12 cents and a raisin. 
After that I did the throttle cable adjustment. Looking forward to testing that out (been raining all day). My 05 VDP seemed faster than the XK8 so hoping this fixes that.
After that I did the throttle cable adjustment. Looking forward to testing that out (been raining all day). My 05 VDP seemed faster than the XK8 so hoping this fixes that.
Senior Member
Joined: Aug 2012
Posts: 152
Likes: 59
From: Spokane, WA
My '03 XK8 convertible weighs over 4000 lb and my '04 XJ8 weighs 3726 with the aluminum frame and body. They both have the same engine and tranny. By the seat of my pants I'd swear that the XJ is faster than the XK. And I've done the throttle adjustment on the XK which made a big difference.