
XKR Air Intake Silencer-delete Writeup c/w pics!


Thread Starter
|
Senior Member
Joined: Jun 2011
Posts: 355
Likes: 112
From: Vancouver
Background, thinking about design...
I've been reading about air intakes on here and wasn't impressed by the Mina design, since its just a slap-on cone filter and would undoubtedly draw in hot air from the engine bay. I was impressed by workoutman0011's intake setup (which basically replaces all plastic intake tubes with intercooler-style metal piping, and bypasses the box to the wheel well where a cone filter is located).
I was ready to order in a 90* 3'' pipe and 75*3'' pipe to get this setup going, but in the end decided on a different direction. My two reasons for this:
1. I really didnt want to use metal tubing for the air intake. Temperatures are hot as it is, even hotter under the hood of an XKR with the supercharger sitting in there. I've installed numerous intakes to clients back when I used to PCM tune in the domestic circles, and IAT's are always higher on metal piping intakes, regardless if powdercoated or otherwise treated.
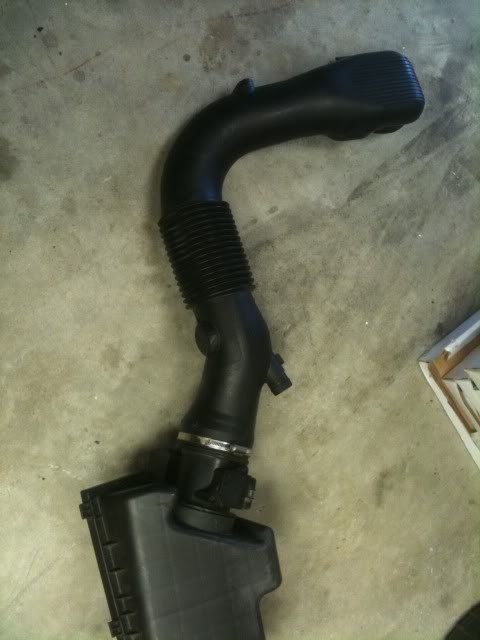
2. When you look at the stock XKR intake its really not that bad! With the exception of the silence tubes that disrupt airflow, the stock tube is a good 3'' diameter design with no hard bends, and no flat or tight spots.
So, I decided to remove the silencers from the stock plastic tube, and patch the holes by plastic welding them over, de-restricting the stock airflow while keeping the oem look.
For those interested, I wrote a little how-to below:
What's needed:
- Soldering gun with a flat tip
- About 2 hours
- 0$.
The How-to
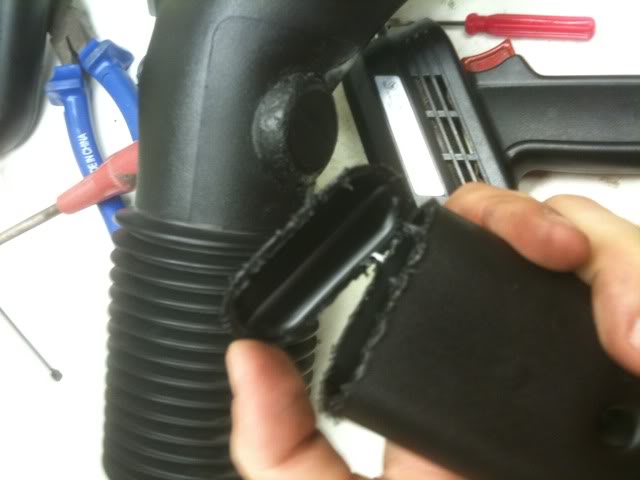
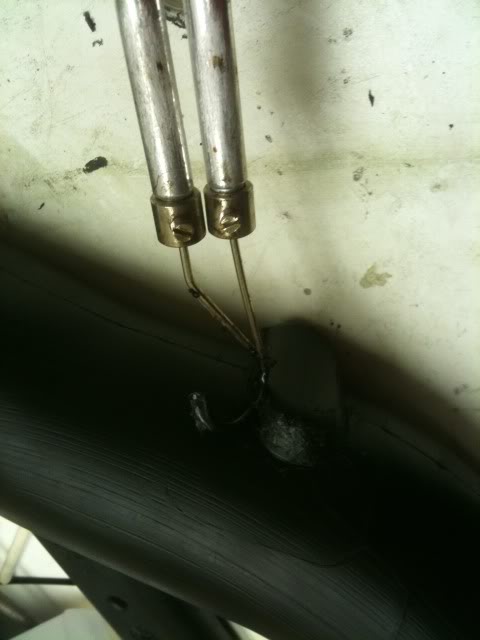
There are two silencers on the stock intake tube:
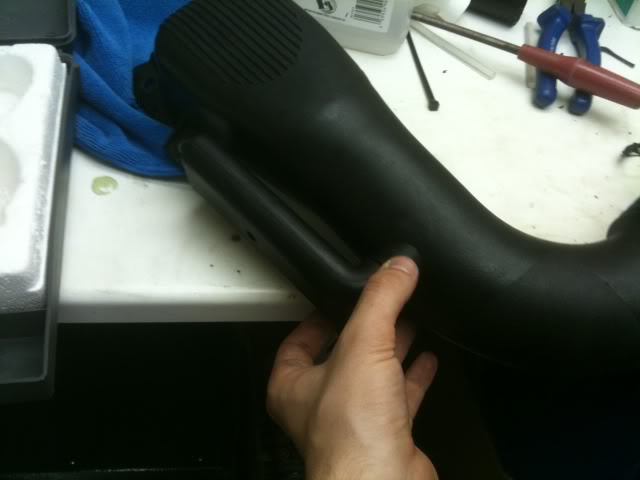
Remove these by using your flat tip soldering gun to cut off the silencers, at the spot where they are factory plastic-welded to the main intake tube.
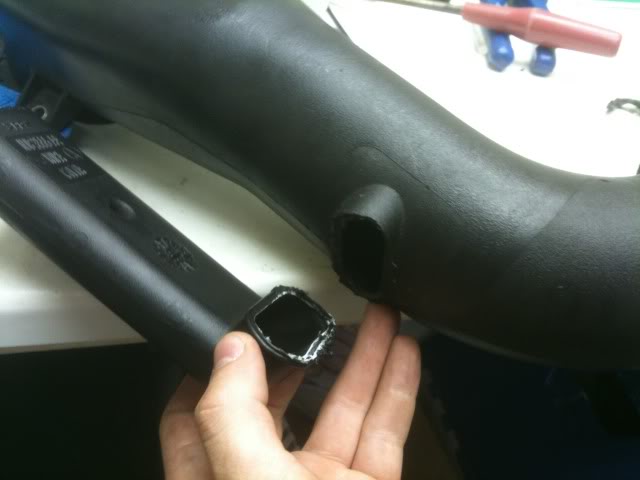
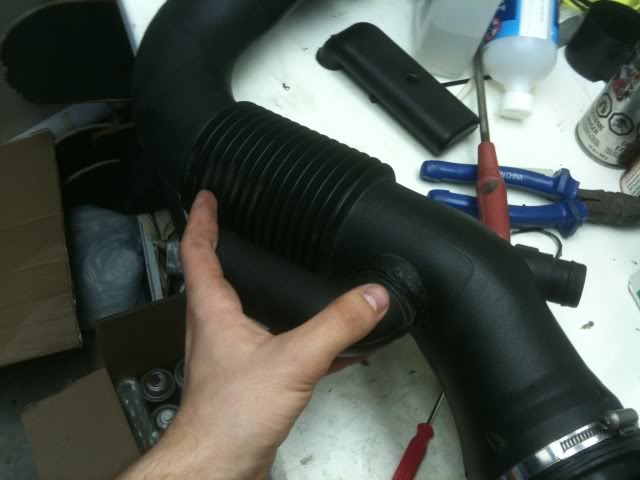
Next, we need to patch the holes. We are going to use the end-tips of the silencers, again cut with the soldering gun, with a few millimeters of curvature left over as bonding material. Like this:

Next, take these "patches" and apply them over the area where the silencers were removed. If done correctly, you'll notice the circular-silencer-end fits over the circular-silencer-hole perfectly, and same with the oval-shaped silencer.
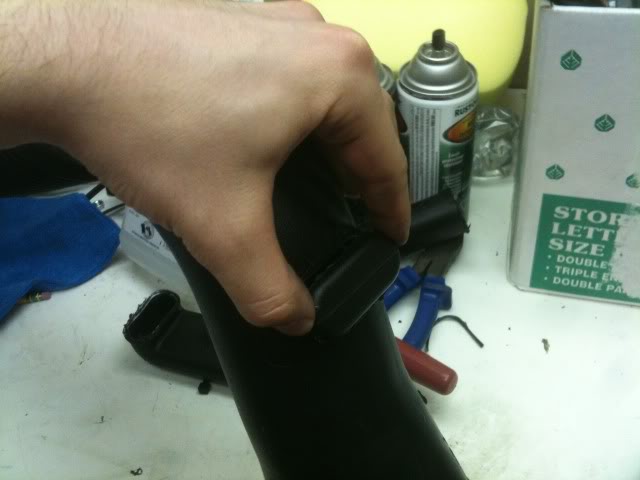
Now comes the fun part. Heat up your soldering gun to the max, and heat-weld the two pieces of plastic together. Basically, apply the flat top to the two mating surfaces, and hold there until the surfaces start becoming soft. You don't want them to melt, but don't worry, the plastic softens gradually so you'll have plenty of time to react. When it softens, sort of massage and "mix" the two areas to be bonded together. There should be enough plastic material on there, but if there isn't, you can make yourself a "stick" out of a scrap of the old silencer and use that as extra material to bond the two surfaces. Search on youtube for plastic welding if you're still unclear.
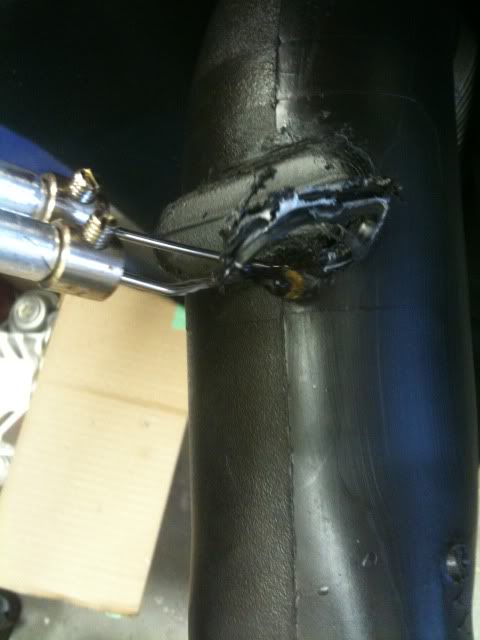
Here are some pictures of the plastic-welding and patching over the caps:
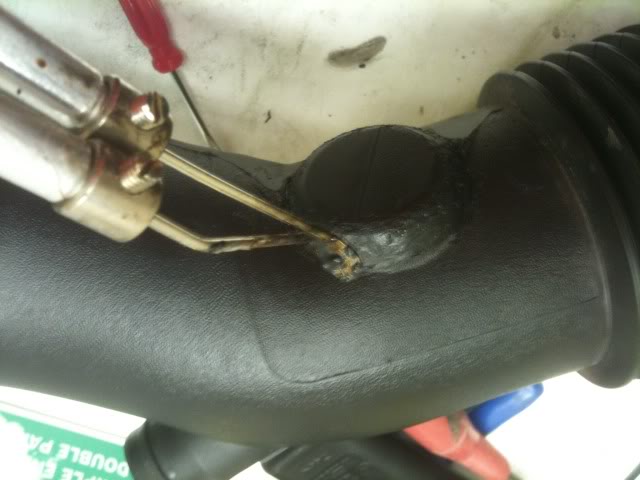
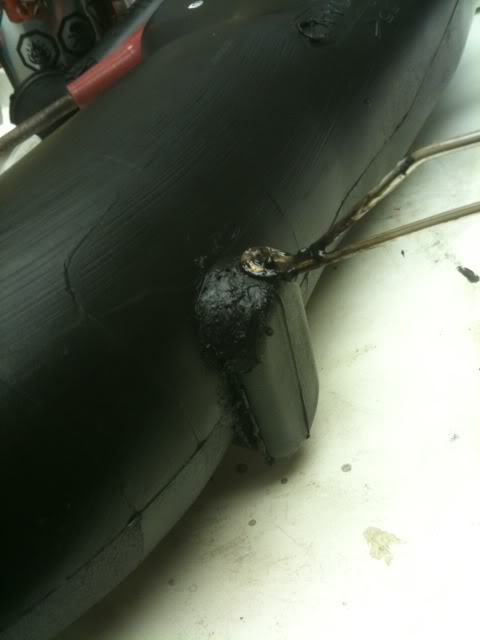
Below I'm using a scrap piece of the old silencer as extra bonding material. Notice that it's thin, to heat up faster:
Again, with a different scrap piece:
Once you patched the holes, to finish it off, smooth out the bonded plastic with the tip, at a lower temperature, to get the area nice and smooth. You should have a finished product like this:
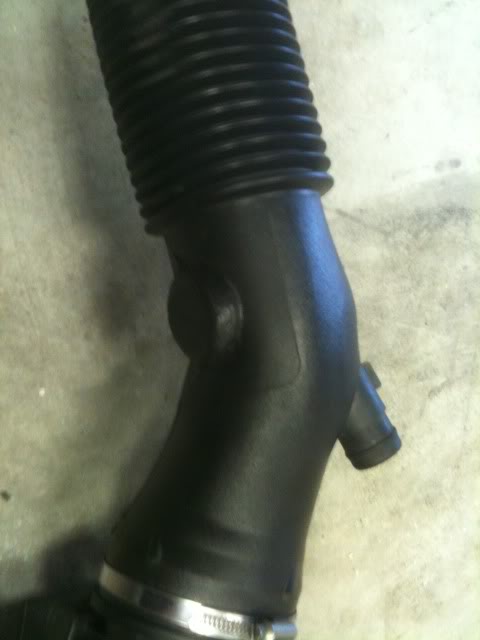

As you notice, because of the stock roughened "shrink paint" finish, you can hardly notice the stock tube has been plastic welded in the silencer spots.
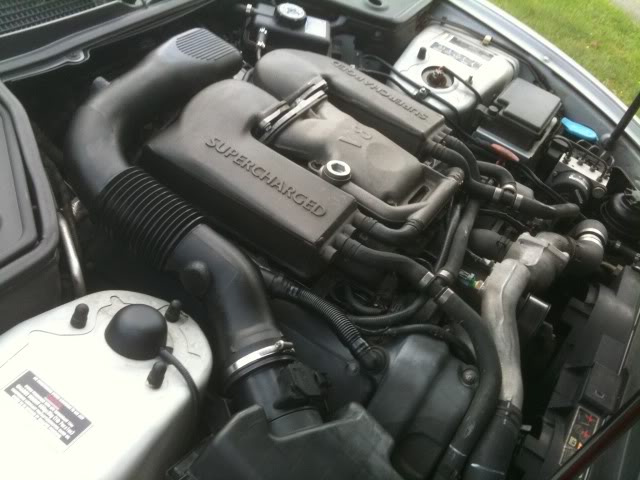
Clean the inside of the tube with a rag or vacuum making sure there's no debris, reinstall the tube, and go for a spin!
Conclusions:
You will notice an increased roar from the engine, especially at lower rpm's. Not to be confused with droning like from an exhaust, this sound is deep and quite pleasant, if you've had a cold air intake before then you know exactly what I'm talking about, if not you'll be pleasantly surprised!
I also noticed a quicker throttle response, the car definitely breaths and "perks up" a little better, again, just like an intake should modification should. Since the intake tube is a straight-through 3'' design with no "pockets" of air created from the silencers, the airflow is straightened without obstructions.
Importantly to me, my vehicle also retains the stock look, and throws no codes, and shows no complications resulting from this modification.
What's next?
Next on the list is to keep the stock intake lid, but enlarge the opening into the wheel-well with a 3'' pipe instead of the small stock squished plastic pipe.
The stock airbox is actually a quite nice design. It's similar to the airbox used on the f-body camaro's, where a design flaw was that the lid neck opening was squished (the one leading to the MAF) and numerous companies found that the optimum way to go there was to keep the airbox to maintain outside-the-engine-bay air supply, while making sure the lid had a large enough volume between itself and the filter, and also making sure that the neck leading to the MAF is a full circular 3''. That's exactly what our "lid" is, and why I'm sticking to it.
I also contemplated workoutman's design, which creatively bypasses the stock airbox with a tube going to the wheel well, with a 90*bend, and a cone filter, but decided against this due to: 1. In my opinion, the stock airbox being a quite nice and sufficient design, 2. I don't like the 90* silicon coupling required to fit the filter in there, in my opinion that's quite a large bend that will hinder airflow, and 3. Again, I wanted to maintain the stock look, and ease of replacing stock filters.
Last edited by pomosv; Jul 31, 2011 at 06:21 PM.

Thread Starter
|
Senior Member
Joined: Jun 2011
Posts: 355
Likes: 112
From: Vancouver
I'm not familiar with the XK8, but I believe you guys don't have the silencers on your intake tubes. XKR's have silencers to mellow out the sound of the motor, and help "baffle" the frequency of the supercharger.
I would do what I'm planning in "what's next", which is changing the stock box -> wheel well tube to a larger 3'' diameter (I measure it today and it should fit, maybe even 3.5'').
I'm also contemplating playing around with the idea of making a cone filter fit inside the stock airbox...
I would do what I'm planning in "what's next", which is changing the stock box -> wheel well tube to a larger 3'' diameter (I measure it today and it should fit, maybe even 3.5'').
I'm also contemplating playing around with the idea of making a cone filter fit inside the stock airbox...
Veteran Member


Joined: Aug 2007
Posts: 3,431
Likes: 573
From: Los Angeles
I wonder if that intake you worked on was for the 4.0 engine? On my 2005 XKR there are about 4 such strange tube things sticking out in different places. Moreover, they do not look to be cast with the main tube but instead look like separate pieces that are attached to fittings cast in the main tube.
I was wondering if the other way to go was to form some plastic sheets to stick on the inside of the main tube basically blocking off those little secondary tubes.
Doug
I was wondering if the other way to go was to form some plastic sheets to stick on the inside of the main tube basically blocking off those little secondary tubes.
Doug

Member
Joined: Feb 2010
Posts: 96
Likes: 4
From: lake bluff il
My 04 XKR has the same 4 tubes, my XJR 02 has 2 tubes one of them at the bend to throttle body about 4in. long. I'm wondering if I should cutoff those too. Any ideas?? Bueller? Bueller? LOL
BTW PERMATEX makes a high temp plastic epoxy that might work does anyone know what kind of plastic the housing is made of?
BTW PERMATEX makes a high temp plastic epoxy that might work does anyone know what kind of plastic the housing is made of?
Member
Joined: Feb 2010
Posts: 96
Likes: 4
From: lake bluff il
Taking the "silencer" or cone(venturi orifice) out of the intake is really not helping. I know there are allot of people that do the "Gotts Mod" , and I think he made a great design when he did it. But the science behind it, just does not support truth. I've studied fluid dynamics allot over the course of my life, and have help in design of model Bernoulli effect designs for various applications. But if you read and understand the following link you may realize, that it is a little more complex than it looks on the surface.
Be sure to scroll down to the experimental model in the link. The Gotts mod will have an added sound effect, that makes you feel like it sucking more power. But if you truly understand the principal you'll see, the the cone is more than a silencer. I'm not knocking the Gott's mod, I think it has true engenuity and that is what it take to make improvements and advancements in technology. But in this case, the math just doesn't back it up.
http://en.wikipedia.org/wiki/Venturi_effect
Just a side kicker to this post. This principal is also what our dpfe's use differentiate when to open or close the EGR on our engines
This link will help further understand the math in this application.
http://en.wikipedia.org/wiki/Bernoulli%27s_principle
Haven't you ever wondered with the top HP engines with the injectors on the top of the engine The injecter cones are narrower in the center
Trending Topics
Thread Starter
|
Senior Member
Joined: Jun 2011
Posts: 355
Likes: 112
From: Vancouver
I wonder if that intake you worked on was for the 4.0 engine? On my 2005 XKR there are about 4 such strange tube things sticking out in different places. Moreover, they do not look to be cast with the main tube but instead look like separate pieces that are attached to fittings cast in the main tube.
I was wondering if the other way to go was to form some plastic sheets to stick on the inside of the main tube basically blocking off those little secondary tubes.
Doug
I was wondering if the other way to go was to form some plastic sheets to stick on the inside of the main tube basically blocking off those little secondary tubes.
Doug
My 04 XKR has the same 4 tubes, my XJR 02 has 2 tubes one of them at the bend to throttle body about 4in. long. I'm wondering if I should cutoff those too. Any ideas?? Bueller? Bueller? LOL
BTW PERMATEX makes a high temp plastic epoxy that might work does anyone know what kind of plastic the housing is made of?
BTW PERMATEX makes a high temp plastic epoxy that might work does anyone know what kind of plastic the housing is made of?
You're right, the idea is to make the tube as smooth and free flowing as possible, which actually isn't that difficult with the stock XKR design compared to most other vehicles that usually have a crazy octopus of an intake design with numerous silencers, where you're better off just designing a silencer free tube (like K&N does with the plastic air intakes), or putting it together from metal intercooler-type pipes. I wouldn't be putting things on the inside of the tube though, it could theoretically work, but you don't want it dislodging and sucking that "whatever" in.
Plastic welding the holes is surprisingly easy, fast and very solid, sure alternatively you could plastic epoxy a patch on, one that you cut to size. As long as it's solid!
Taking the "silencer" or cone(venturi orifice) out of the intake is really not helping... The Gotts mod will have an added sound effect, that makes you feel like it sucking more power. But if you truly understand the principal you'll see, the the cone is more than a silencer....
 ) from what I see the stock XK intake is a pretty nice design without any restrictive components other than the silencers/resonators. If you were to remake the whole intake tube from metal piping I think the only noticeable difference would be that it would actually run hotter than the stock plastic, but it could be polished out for a bit of eye candy.
Last edited by pomosv; Jul 31, 2011 at 11:34 PM.
Veteran Member
Joined: Feb 2011
Posts: 9,733
Likes: 2,203
From: on-the-edge
Or, just cut flush, and use fiber glass patch on two sides to make sure they don't get sucked through.
Veteran Member
Joined: Feb 2011
Posts: 9,733
Likes: 2,203
From: on-the-edge
Helmholtz resonance - Wikipedia, the free encyclopedia
There is no "venturi" or "bernoulli effect" involved.
I must admit I have done similar things, but I have not gone to the extreme of pomosv. I simply fitted an early XK8 tube, they have no baffles at all, not so easy on 4.2s they have a different breather set up, but still do-able and you get to keep a pretty much stock look.
But of course, it is not free!
But of course, it is not free!
Thread Starter
|
Senior Member
Joined: Jun 2011
Posts: 355
Likes: 112
From: Vancouver
Thanks XKRacer, that's good to keep in mind in case someone with a 4.0 xkr comes across an older xk8 tube!
Have you experimented with the intake box at all? I was thinking about increasing the airbox -> wheel well hole to a 3''/3.5'' diameter and running a pipe or a longer silicone coupler to it, and connecting it to the airbox, again, going for keeping the stock look while providing an increased airflow for the stock intake.
I measured today that a K&N cone filter could fit inside the stock airbox, but on second thought I don't think the stock filter would be a restriction point, nor the stock airbox itself. Thoughts?
Last edited by pomosv; Aug 1, 2011 at 03:03 AM.
Have you experimented with the intake box at all? I was thinking about increasing the airbox -> wheel well hole to a 3''/3.5'' diameter and running a pipe or a longer silicone coupler to it, and connecting it to the airbox, again, going for keeping the stock look while providing an increased airflow for the stock intake.
I measured today that a K&N cone filter could fit inside the stock airbox, but on second thought I don't think the stock filter would be a restriction point, nor the stock airbox itself. Thoughts?
I measured today that a K&N cone filter could fit inside the stock airbox, but on second thought I don't think the stock filter would be a restriction point, nor the stock airbox itself. Thoughts?
Only to the degree of fitting a CDA box, but what I did for the air supply you could use. Look at the pic below and you see where I cut the metal away to allow for a larger pipe to go through, the problem you might have is the position of the pipe is further up (you can still see part of the original opening in the pic). What I would do is cut out as much as possible, the other issue you are going to have is the inner wheel arch liner being very close and resricting the size of the pipe/shape you use
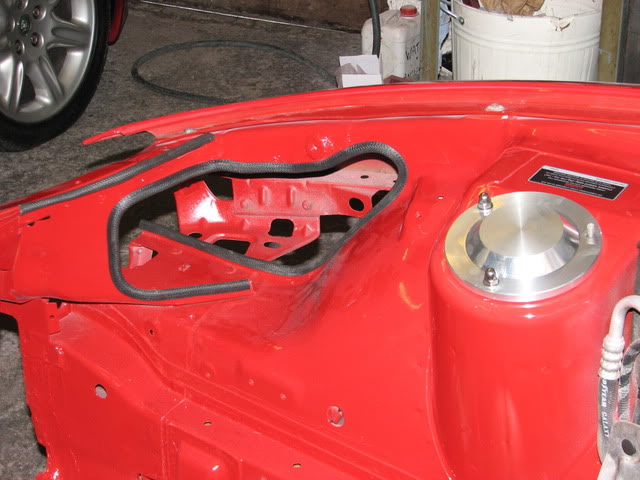
Good luck
Veteran Member
Joined: Apr 2008
Posts: 3,616
Likes: 1,070
From: Europe
Another option is to go straight down (see black cirkle), and use a 9" K&N cone filter right under the headlight. This has the advantage that there is no bend anymore. This in combination with the 3.5" MAF from Massflo will ensure no restriction anymore on tthat side of tehe intake. You can then also have your stock airbox installed as a cover, looks as good as stock 


Veteran Member


Joined: Nov 2014
Posts: 2,675
Likes: 1,578
From: Eastern USA
In short, I believe that removing these air pockets goes towards hurting the torque curve of the engine, not towards enhancing it. Not to say that an average person would really notice, but clearly Jaguar went out of their way to include this design, as unsightly as it is.
Obviously, your car, your wallet, your decision. If it was me, I would probably look into repairing these air pockets. I am sure duct tape could do for a bit (to avoid un-metered air/high fuel trims), but if you are looking at welding plastic anyway, I would weld the tanks instead. Just my thoughts.
Best of luck, keep us posted.
Veteran Member
Joined: Aug 2007
Posts: 3,431
Likes: 573
From: Los Angeles
I am not sure but I thought I had heard that all of those nubs and pockets were there to reduce the intake noise rather than improve performance. All I can say is that when I replaced the intake on my XKR with the smooth stainless pipe from Mina Gallery, the car was noticeably more responsive to small pedal blips, especially from a stop.
Doug
Doug
Senior Member
Joined: May 2010
Posts: 343
Likes: 60
From: California
Another option is to go straight down (see black cirkle), and use a 9" K&N cone filter right under the headlight. This has the advantage that there is no bend anymore. This in combination with the 3.5" MAF from Massflo will ensure no restriction anymore on tthat side of tehe intake. You can then also have your stock airbox installed as a cover, looks as good as stock
