
XKR hood liner rubs against engine

Senior Member
Joined: Mar 2010
Posts: 229
Likes: 43
From: Westland, Michigan but I'm from central New Jersey!
Hi Doug! How about an .eps file?
Would you happen to have Corel Draw? I have a .CDR file that I need to convert to a jpeg or an.eps file. It's the Nissan 50th Anniversary logo for a 300ZX.
My e-mail is below, thanks!!
Would you happen to have Corel Draw? I have a .CDR file that I need to convert to a jpeg or an.eps file. It's the Nissan 50th Anniversary logo for a 300ZX.
My e-mail is below, thanks!!
I am not keen on the R's shown and me personally would not consider anything other than the Jaguar original.
If all you need is a high res JPEG I will draw one up, I get doing all the different colours would be awkward and I would be OK if it was all red. but it would have to be something like below

If all you need is a high res JPEG I will draw one up, I get doing all the different colours would be awkward and I would be OK if it was all red. but it would have to be something like below
Senior Member
Joined: Mar 2010
Posts: 229
Likes: 43
From: Westland, Michigan but I'm from central New Jersey!
Agreed, I would need a tight close up L-A-R-G-E jpeg, 1024 pixels wide or larger. I was going through 5000+ fonts that I have and couldn't match it exactly; the ones I posted were the ones I thought would be almost there. But not quite.
I can do all-red for the "R", I could supply swatches of red and green to go along with the silver if someone wants an accurate and faithful reproduction but you'd need to cut it down and then apply each strip of colored vinyl yourself and then the silver R on top of the red. Just a thought.
I can do all-red for the "R", I could supply swatches of red and green to go along with the silver if someone wants an accurate and faithful reproduction but you'd need to cut it down and then apply each strip of colored vinyl yourself and then the silver R on top of the red. Just a thought.
Veteran Member
Joined: May 2009
Posts: 1,342
Likes: 202
From: Quad Cities IL
Gonzo
I just sent you a EPS of the logo XKRacer showed. If you need anything else let me know If you need the Coreldraw converted send me the file. I've got the version 15 so I can convert everything but 16
Doug
I just sent you a EPS of the logo XKRacer showed. If you need anything else let me know If you need the Coreldraw converted send me the file. I've got the version 15 so I can convert everything but 16
Doug
Last edited by RCSign; Oct 31, 2010 at 09:59 PM.
Veteran Member


Joined: May 2010
Posts: 4,114
Likes: 1,274
From: North Carolina
I've been ignoring this thread for days because I "thought" I had no interest in a hood liner. Then I saw that there were 45 replies, so I figured there must be something interesting going on in here! Now I'm thinking I want a new hood liner with a logo! The ones on the website look great. I have a question, though. Does the hood have to come off to install the liner? It seems like it would be very difficult to glue the liner on while it's hanging upside down. It seems more logical to take off the hood, lay it upside-down on some saw horses, and glue the liner on with gravity's assistance.

Senior Member
Joined: Mar 2010
Posts: 229
Likes: 43
From: Westland, Michigan but I'm from central New Jersey!
Hi everyone!
h20boy - Invoice coming soon!
I've done many installations, haven't met a hood that has given me problems! Not hard at all to do, you can mark it with something like a thin Sharpie, or some tape or a pencil, etc. When you go back to re-mount the hood all you need to do is to snug the bolts then slowly lower the hood and check for any hood-to-fender gaps. They should be the same on both sides, and also check where the front of the hood meets the front of the fender. You can always raise it up, have someone hold it in front, then go to the bolts and slowly loosen them so you can make your needed adjustments. Re-check the alignment and once you've got it back go ahead and tighten. What I do to prevent any slippage of the ratchet which could cause a scratching of the paint and fender is to may some old bath towels onto the fender directly under where the bolts are.
Once you do the installation of the liner you'll totally understand why the hood MUST come off. The end results are, well, you've seen them! And if it ever gets dirty just spray some Windex onto a terry cloth towel and wipe off! You can't do that with the stock insulation!
RCSign - Doug: Got it! Thanks! It looks great!! The large jpeg of it is attached here, this is what the silver R would look like against the black liner. This is the actual R from the car, without the red and green stripes since I can only run one solid color thorough the cutter.
Thanks!!
Gonzo, could you also do the 2 stripes? I understand they would be seperate and you would have to place and overlap them carefully, also if I wanted my own text, would it be a problem?
As to removing the hood, all I have done in the past is use a shapie to mark around the hinge plate and put it back in the same place. Not perfect everytime but a good starting point.
As to removing the hood, all I have done in the past is use a shapie to mark around the hinge plate and put it back in the same place. Not perfect everytime but a good starting point.
Senior Member
Joined: Mar 2010
Posts: 229
Likes: 43
From: Westland, Michigan but I'm from central New Jersey!
I can provide the green and red "swatches" for them and owners can cut them to size and shape. I really wish I could do multi-color but the machines that do that cost way more than what my cutter cost me! The decals come separate in the box and once the liner is installed and any adhesive overspray wiped off is when they get applied, then the hood goes back on the car.
No problem on doing custom decals with lettering, I only need to know what owners would like written and the font type. I have over 5,000 fonts on my computer - pretty cool but it slows my computer sometimes when I want to view a pdf file!
A Sharpie is a way to go, but some may be concerned with the black lines around the hinges. It eventually fades or it can be wiped off with a degreaser.
Veteran member

Joined: Mar 2007
Posts: 11,345
Likes: 1,165
From: Oak Ridge, TN
Received my liner today Gonzo. If I can find someone to assist with the removal and reinstall of the bonnet, I'll try to get it on this weekend. Its off to home depot for the special sticky-stuff.
Senior Member
Joined: Mar 2010
Posts: 229
Likes: 43
From: Westland, Michigan but I'm from central New Jersey!
Hi Matt! Thanks for letting me know you got it, that's great! If I were near you I would show you how to put it in. Look in the paint section for the 3M #80 where the glues and tapes are.
Veteran member
Joined: Mar 2007
Posts: 11,345
Likes: 1,165
From: Oak Ridge, TN
Ok, installed it tonight successfully. Tips that I discovered are as follows:
(1) Be generous with the glue, some of the interior depressions did not get enough and were not 'skin' tight like I intended.
(2) place the liner on the ground or away from the bonnet before putting all of the glue on the back of the liner. As mine was prepped while resting on the bonnet, I was too concerned about getting overspray on the bonnet and missed much of the edge of the liner, and had to peel back and respray a few spots during the 'pressing'.
(3) make sure you don't remove the hinge alignment marks you make with a pencil during the cleaning phase. (it wasn't me, it was my 'assistants'. see pic below). It took me 4 tries w/ various adjustments to get the hood back on and aligned perfectly.
(4) took me a few minutes to figure out which side was which. For the dummies out there, maybe you could put a sticker on the 'engine out' side? I guessed right, but someone may not.
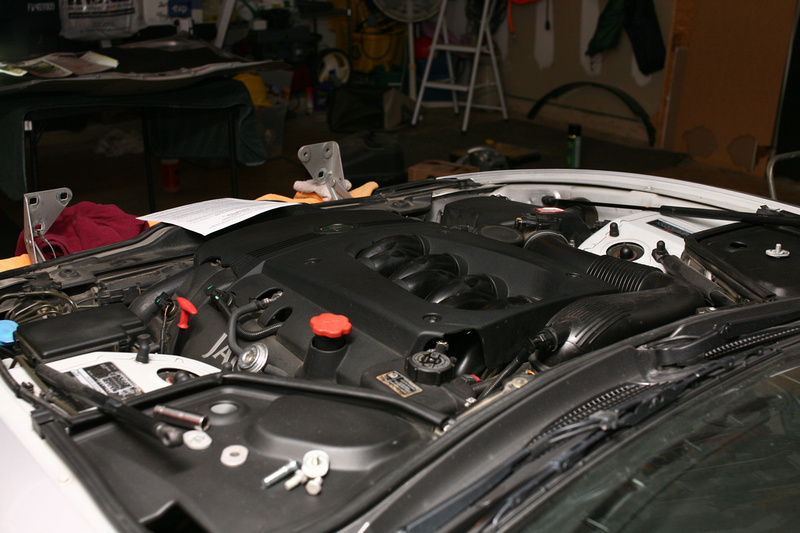
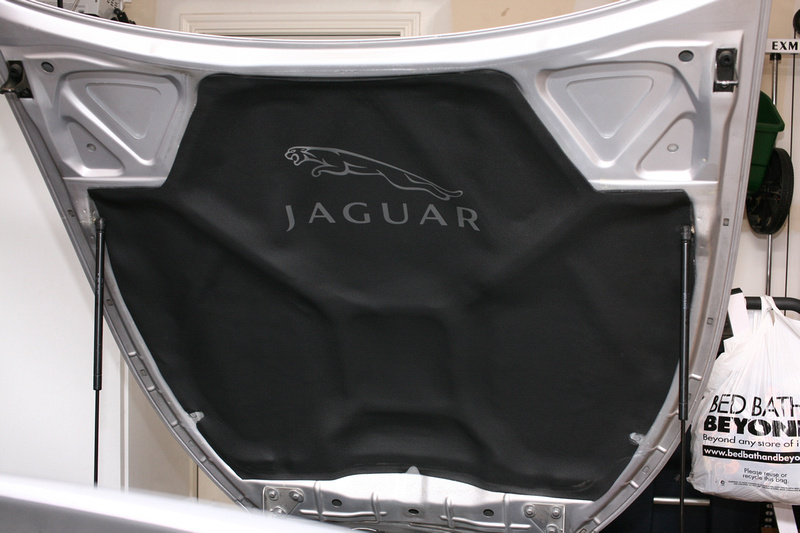
Perception so far - love it. My previous liner hit my abs unit and the brake reservoir cap, as well as my air intake and slightly on the strut tower nut covers. This one doesn't hit anything.
I've got some glue overspray I need to clean off to the sides of the bonnet tomorrow. (Nice one Matt)
Da pics
Bonnet missing
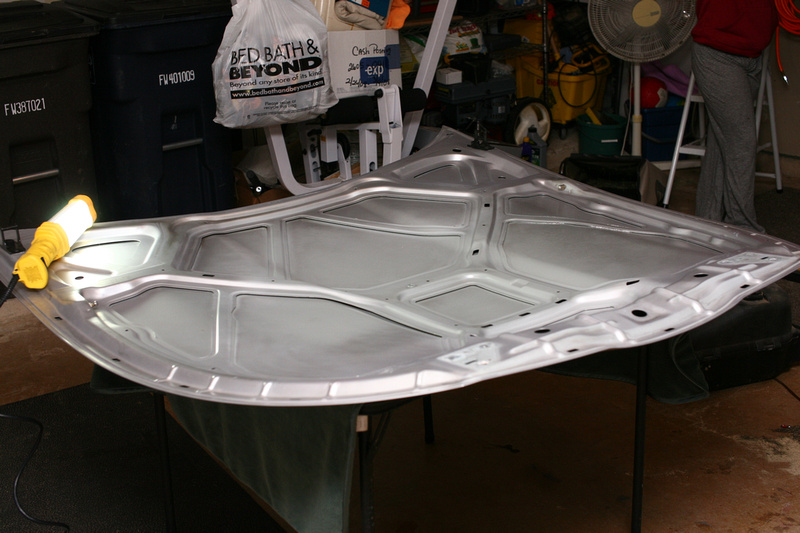
Old liner removed and surface cleaned up

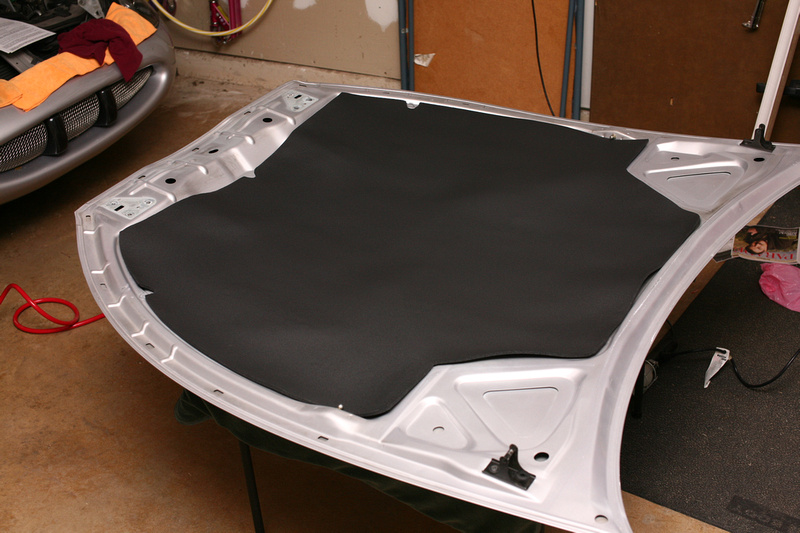
Lined up where it should be placed
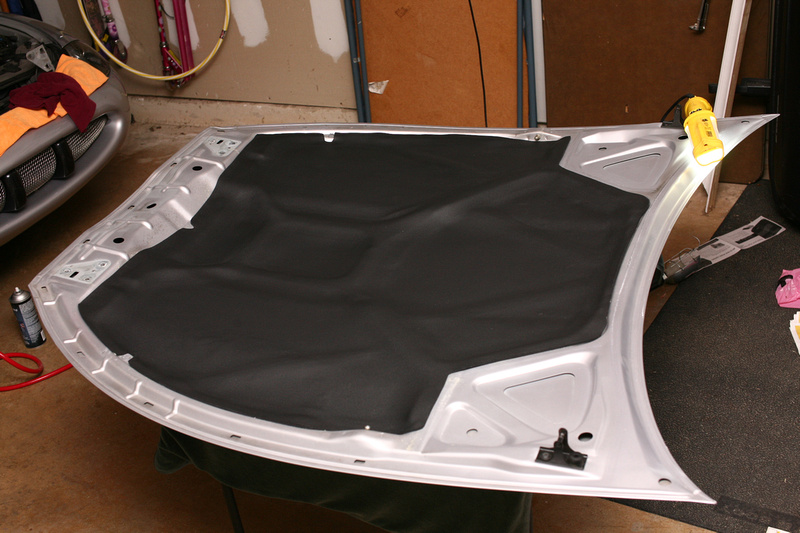
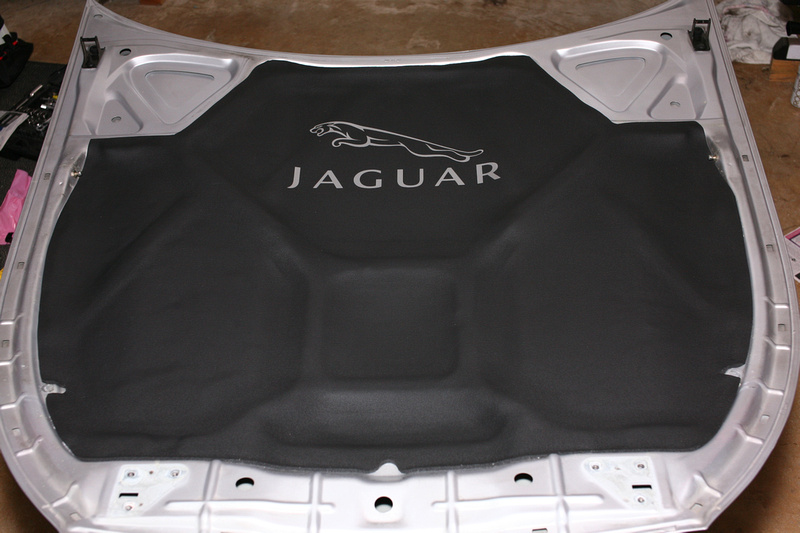
Glued and pressed down
My assistants - 'The Cleaning Crew' and the 'Adhesive Overspray Prevention Team', I promised them a photo on the internet for their help.

Installed with the decal applied
gonzo, I'll get a couple more 'blog-worthy' pics in the next couple days for you. These are good for forum use, but not for your portfolio.
(1) Be generous with the glue, some of the interior depressions did not get enough and were not 'skin' tight like I intended.
(2) place the liner on the ground or away from the bonnet before putting all of the glue on the back of the liner. As mine was prepped while resting on the bonnet, I was too concerned about getting overspray on the bonnet and missed much of the edge of the liner, and had to peel back and respray a few spots during the 'pressing'.
(3) make sure you don't remove the hinge alignment marks you make with a pencil during the cleaning phase. (it wasn't me, it was my 'assistants'. see pic below). It took me 4 tries w/ various adjustments to get the hood back on and aligned perfectly.
(4) took me a few minutes to figure out which side was which. For the dummies out there, maybe you could put a sticker on the 'engine out' side? I guessed right, but someone may not.
Perception so far - love it. My previous liner hit my abs unit and the brake reservoir cap, as well as my air intake and slightly on the strut tower nut covers. This one doesn't hit anything.
I've got some glue overspray I need to clean off to the sides of the bonnet tomorrow. (Nice one Matt)
Da pics
Bonnet missing
Old liner removed and surface cleaned up
Lined up where it should be placed
Glued and pressed down
My assistants - 'The Cleaning Crew' and the 'Adhesive Overspray Prevention Team', I promised them a photo on the internet for their help.
Installed with the decal applied
gonzo, I'll get a couple more 'blog-worthy' pics in the next couple days for you. These are good for forum use, but not for your portfolio.
Last edited by H20boy; Nov 7, 2010 at 03:17 AM.
Veteran Member
Joined: May 2010
Posts: 4,114
Likes: 1,274
From: North Carolina
That looks great! I was just out in the garage looking at mine. I had never really noticed before, but it's sagging in a couple of places and just looks kinda run-down. I think my wife would shoot me if I spent any more money on the Jag right now, but I might have to find a way to get this done while she's not looking...