When you click on links to various merchants on this site and make a purchase, this can result in this site earning a commission. Affiliate programs and affiliations include, but are not limited to, the eBay Partner Network.
DIY Paint Correction - It's not as difficult or scary as you might think!
Having very recently purchased a metallic black 2011 Jaguar XKR 175, I of course needed to upgrade my "wash and wax" regimen to Jaguar standards. I simply could not subject this beauty to my old "commuter car" techniques. Step one was going to be a big one: Turn the nice but four year old and moderately but extensively swirled paint into "perfect" paint - or at least as perfect as possible.
Heading to Google, I proceeded to read (and read some more) until I think I managed to uncover every possible method of making fancy automobile paint shiny and keeping it that way. The standard method is (apparently) to hand about $3,000 to a "master detailer" for a "full paint correction", after which you need sunglasses just to look at your ride. That sounded great to me, except for the money part. A one-time spend of a few grand is one thing, but it turns out that the cash transfer needs to be repeated every few years. Not an appealing option.
Being fairly handy, I of course thought about doing the work myself. These elite detailers had plenty of warnings about that: Swirls, holograms, burn-through, overheating, and more awaited me should I attempt to mimic their art. Read a detailers blog and you'll come away with two broad messages: 1) A talented detailer can work near miracles on your cars' paint 2) Mere mortals need not even try, lest they create an even larger mess than they started with.
But I decided to give it a try anyway. After much more reading, and some practice on an Audi A4, a Honda, and a Jeep, I proceeded to fully "correct" (detail) the paint on the Jaguar. I have this to report: It's actually pretty darn easy, if you are a generally careful and patient person, you have the right tools, and you can follow a few simple rules.
This is not a tutorial on compounding and polishing a car. You can find dozens of people on YouTube who will show you their technique. Watch a few and you'll get the idea, except that the wide variety of power tools, pads, and liquids described will most certainly confuse you, and the seemingly endless ways of messing up will definitely scare you. That's where my method comes in. Below is a distillation down to a set of specific tools and specific tips that can provide A+ results with zero chance of generating swirls or holograms and a very very low risk of doing any damage.
Those tools and tips? Here they are:
Start by two-bucket washing and "claying" your car as usual. Stop and Google if those terms are new to you; they probably aren't. I'm a huge fan of using a pressure washer set on a wide spray (very low water usage) connected to a CR Spotless de-ionizer that I bought from Costco. With this setup, you can wash a black car even in full sun with no spotting - really you can. I recently added a "foam cannon" to my setup, and I really like the way it blankets the car in thick wash foam. But washing a car is a different topic. Back to paint correction.
Buy a cheap paint thickness meter from eBay and record (on paper) the thickness of your paint everywhere before you begin. Stop if your paint is already thin from prior detailing, and even if not, be extra careful on areas that are borderline. Jaguar XK paint is remarkably thick but remarkably uneven compared to most other Japanese and European cars, so you'll almost certainly find spots where you want to be extra gentle.
Use a random orbital polisher, not an orbital polisher. This is critical. Orbital polishers can very easily cause holograms in the paint, and they are notorious for burning through, overheating the paint, getting out of control, etc. Random orbital polishers work more slowly but much more gently and with far greater control - and no chance of holograms.
To make your life easy, just buy a Rupes polisher. The Rupes units have much wider throw than other brands, so they work more quickly and yet more gently, with no need to apply pressure. I gave away my Porter-Cable, my large Harbor Freight, and my 3" Griots Garage polishers after the first time I tried a Rupes. The difference is extraordinary.
Get the tiny 3" model, the LR75. The small 3" diameter is really easy to use and greatly minimizes the chances of you doing any damage. Gliding the 3" Rupes accurately, slowly, and smoothly is incredibly easy compared to anything else that I have used. It'll take a bit longer than a 5" or 6" polisher, but not much.
Make life simple and use the Rupes pads and polishes. They work very well and the pads are color coded to the polish bottles so you can't accidentally mix them up.
Work slowly and carefully on one panel at a time, masking off the edges with low-tack tape in order to prevent any damage should you make a mistake. I went so far as to cover up all gaps so that there was no chance that I'd burn an edge. See the image below for details.
Finish with a nice wax, or optionally a "glass" coating and then wax. I used 22Ple VX Pro2 glass coating and then a week later P21S Carnauba wax.
If you can, practice on a not-so-fancy car first!
For my car in its specific condition, with extensive but fairly minor swirls and micro scratches, I ended up performing a light pass with the green or medium grit polish, followed by a more lengthy pass with the Yellow fine polish. After that I inspected with the swirl finder light and used the yellow to take out the very few remaining defects. After that, I finished with the white ultra-fine polish, after which the paint looked absolutely perfect. My car didn't have any "serious" scratches, so I never had to decide whether to risk doing any "serious" compounding. From my testing, I knew how many mils of paint each "pass" with each grit removed, and I always compared that with my paint measurements to make sure that I was not even close to going through the clear coat. The whole process reduced the thickness of the paint very little - around 1-2%.
Other notes:
I found the clear coat to be fairly soft compared to the Audi and Honda paint. This made the "correction" easy, but means that I'm going to have to be very careful if I don't want the swirls to re-appear. The 22Ple glass coating should help, as should the two-bucket wash method and the foam cannon. It has been about a month since I did the paint correction, and the paint is still flawless, even after two washes.
For safety, I used the yellow "frog" tape to cover the panel gaps so that there was no chance that I'd burn through an edge. This was probably not necessary, but it did give me a bit more confidence. Referring to the image below, if I was polishing the left panel, I would place tape over the gap between that panel and the one to its right, and I'd extend the tape to touch the left panel just slightly. That way, the polisher would ride on the tape, not the panel edge, if I accidentally overshot one of my polishing passes. This did mean that a millimeter or two of each panel did not get polished with the green or yellow polish. I would remove the tape before making the final pass with the white/ultra-fine polish since that compound had very little grit to it.
Here is the parts list in detail:
Rupes 3" random orbital polisher, the LR75 Mini
Two green, one yellow and one white 4" pads for the Rupes. The green ones wear out very quickly and the white ones last forever.
250ml of Rupes ultra-fine polish
500ml of Rupes fine polish
250ml of Rupes medium polish
An inexpensive paint thickness gauge. They are around $125-$160 on eBay. Get one that is compatible with Aluminum if you have a recent Jaguar.
Rupes swirl-finder flashlight - or really any small LED flashlight
Narrow yellow Frogtape. The 60-day 3M Blue tape works almost as well, but leaves a bit more residue
Lots of new microfiber towels. I bought a lot of 72 of them on eBay for less than $1 each.
P21S carnuba wax. Really good wax for a really good price
Optional: 50ml of 22PLE VX Pro2 coating (there are other brands as well) and a 22PLE applicator
If you have been on the fence about doing your own compounding and polishing, I hope that my experience gives you the confidence to give it a try. If you are a patient and careful person by nature, and you take the time to learn and practice the necessary techniques before you start, I am quite sure that you will be able to achieve really impressive results. While the tools needed are not inexpensive, and it does take quite a bit of time (about 15 hours in my case - I'm slow and this was my first such adventure), you will love the results, and it's much less expensive than taking it to a pro every few years, and very gratifying to do yourself.
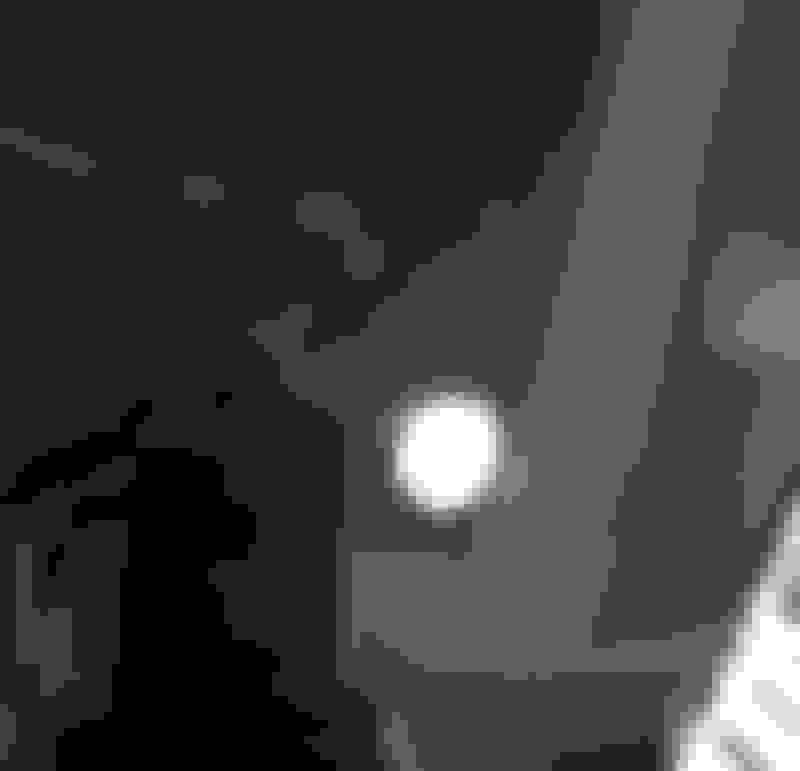
I find it challenging to show, in a photo, scratches and swirls that *aren't* there. Below is a close-up photo of about a 3" square of Ultimate Black metallic XKR paint showing a reflection up to a drywalled but not painted garage ceiling and one bare bulb in a recessed fixture. If there were swirls or scratches, you'd see them around that lightbulb.
The flecks you see are the metallic flakes in the paint. In the photo they look rather like dust. In person they are actually pretty - tiny shiny bits floating underneath the now water-clear clear coat.
I'm no photographer. This is an attempt to show nice shiny paint. The view is from the passenger side of the XKR looking back. All you can really see are reflections of the surrounding scene, which I guess is the point.
Wow, this thread has not had nearly the attention it deserves! Maybe the mods can move it to the detailing section where more will see it???
Great write up and thanks. Not being one of those 'patient' people I still don't know if I want to tackle this job, but your paint looks pristine and my car needs this badly! After a while of thinking I could get away with that quick "commuter" wash that I give my other cars I realize that's just not an option for the Jag if I want to keep it nice.
Very good post, and although our 'brands' of the equipment and paint correction products may differ, I certainly appreciate your attention to detail and tenacity!
I just purchased my 2011 a few weeks ago (ebony paint), and I've spent a full week...about 4-5 hours each night, wet sanding scratches, and using ultra-cut compound on EVERY SINGLE piece of sheet metal and bumper. It looks like it was only washed by those automatic drive-thru places. I resorted to removing the XJ and leaper badges on the boot lid because of so many swirls and scratches, I couldn't get close enough to the badging to get them. There was bird poop damage that also needed wet sanding, and now I have about a half-dozen little paint chips that need to be filled! That's my next phase of the restoration.
Here's a little video clip showing a typical door...and remember, roof, hood, boot lid...every panel looked like this!
It looks like someone moved or copied the thread to the detailing section - which I did not know existed since it hides under the cryptic "brand review" section. Anyway, thank you for moving the thread!
Originally Posted by Muddydog
Wow, this thread has not had nearly the attention it deserves! Maybe the mods can move it to the detailing section where more will see it???
Great write up and thanks. Not being one of those 'patient' people I still don't know if I want to tackle this job, but your paint looks pristine and my car needs this badly! After a while of thinking I could get away with that quick "commuter" wash that I give my other cars I realize that's just not an option for the Jag if I want to keep it nice.
Thanks for sharing the video H20boy. That's pretty much how mine looked as well. From a distance, when well waxed, it looked pretty good. But when you got close, or removed the wax, all you saw were swirls.
One question: You mention using "ultra-cut". Is that Meguiars Ultra-Cut 205? It's supposed to be able to polish from 2000 grit, which right around where the Rupes Green/Medium polish sits. Did you follow the 205 with a finer polish afterward?
Originally Posted by H20boy
Very good post, and although our 'brands' of the equipment and paint correction products may differ, I certainly appreciate your attention to detail and tenacity!
I just purchased my 2011 a few weeks ago (ebony paint), and I've spent a full week...about 4-5 hours each night, wet sanding scratches, and using ultra-cut compound on EVERY SINGLE piece of sheet metal and bumper. It looks like it was only washed by those automatic drive-thru places. I resorted to removing the XJ and leaper badges on the boot lid because of so many swirls and scratches, I couldn't get close enough to the badging to get them. There was bird poop damage that also needed wet sanding, and now I have about a half-dozen little paint chips that need to be filled! That's my next phase of the restoration.
Here's a little video clip showing a typical door...and remember, roof, hood, boot lid...every panel looked like this!
Thanks for sharing the video H20boy. That's pretty much how mine looked as well. From a distance, when well waxed, it looked pretty good. But when you got close, or removed the wax, all you saw were swirls.
One question: You mention using "ultra-cut". Is that Meguiars Ultra-Cut 205? It's supposed to be able to polish from 2000 grit, which right around where the Rupes Green/Medium polish sits. Did you follow the 205 with a finer polish afterward?
Yes, to both questions. Ater the ultra-cut, I use Zaino's Z-2 polish, then a sealer that you don't have to buff off. After all of these passes over the paint, I've had quite enough at the end.
I think that the Zaino Z-2 is a polymer coat, not a traditional polish. When your arms recover, you might want to use a very fine abrasive to bring up the gloss even further.
Originally Posted by H20boy
Yes, to both questions. Ater the ultra-cut, I use Zaino's Z-2 polish, then a sealer that you don't have to buff off. After all of these passes over the paint, I've had quite enough at the end.