When you click on links to various merchants on this site and make a purchase, this can result in this site earning a commission. Affiliate programs and affiliations include, but are not limited to, the eBay Partner Network.
Need some tips and tricks on replacing them.
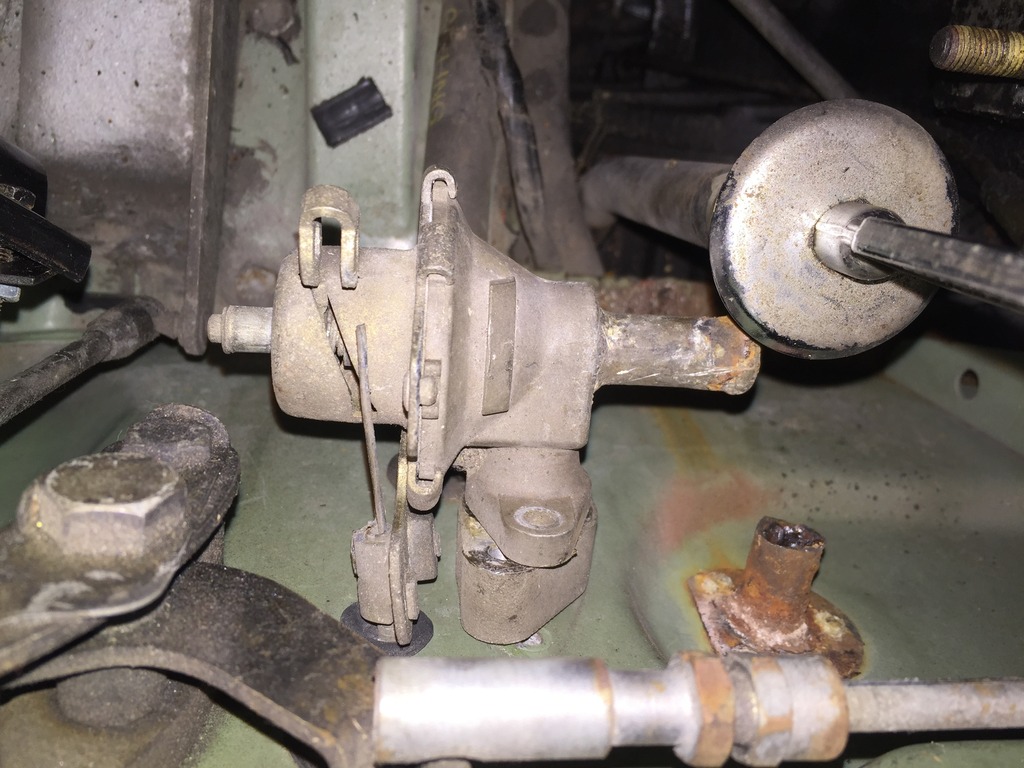
We took the bolts out of the heater valve but it still won't come off, what could be holding it still?
Also thru the dash I can grab the top coolant pipe (bent one) how do I get the other two? I might be able to grab one from here...
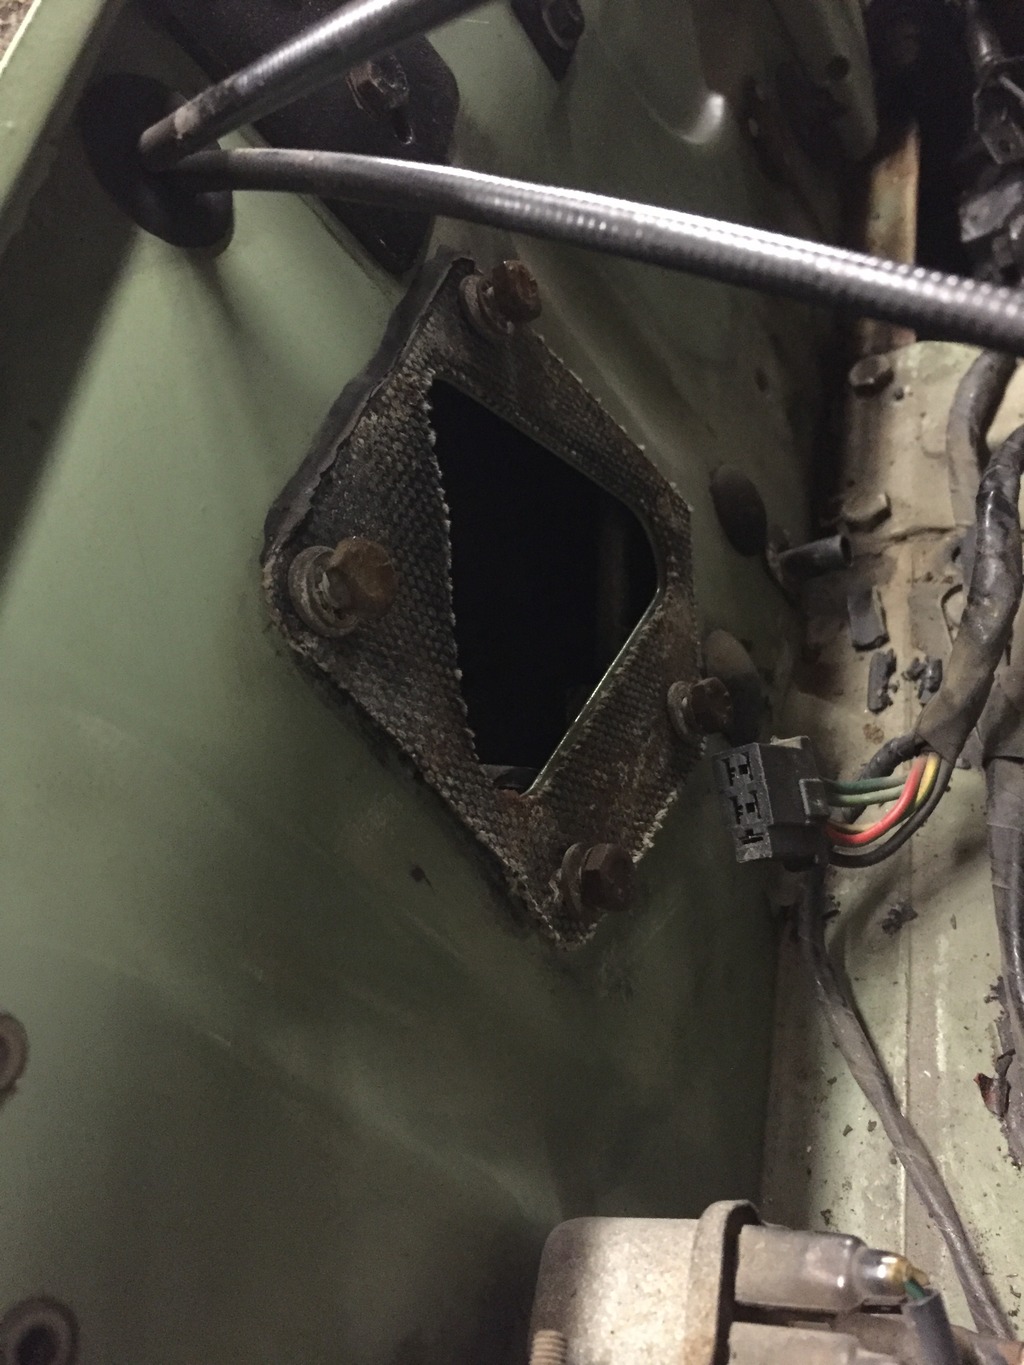
Which is the windshield wiper motor
Last edited by 1970WillowGreen; Jan 1, 2016 at 06:43 PM.
Hello 1970WillowGreen,
You haven't given us much to choose from in your picture, but its the motor that attaches to the area of the Bulkhead indicated by the Red Circle in the picture below.
It was a long time ago that I did this, so the memory may be playing tricks, but I think the process was made much easier by having the dash top pad out. It's not so much reaching the pipes as getting the old ones out and the new ones in. The old ones may be cut in half to make extraction easier, but getting the new ones in place is the real pain. This pipe change-out is one of the famous four-letter-word vocabulary builders in E-Type restoration.
I just finished replacing the valve on my '70...Fortunately the pipes were still in pretty good shape, but the valve would not come off, no matter what I did....
Now , I knew the valve was no good, so I was going to replace it anyway...I did not know the condition of the pipe.
After working for several hours, I finally "bit the bullet", and used my Dremel, with a fiber cutting wheel, and carefully cut between the valve and the stand off....I cut on both sides, as deep as I dared, without cutting so deep it would damage the pipe.
I then pryed into the grooves created by the cut, between the stand off and the valve..
Once there was a slight movement, I used two locking pliers, and twisted the valve away from the stand off....
Once the valve was off, I was able to twist the stand off away from the pipe....I might add that during the process, I used PB Blaster in the cuts....
Fortunately the pipe wasn't damaged,,,,The valve and stand off have been replaced, and all is "well".
What I surmised, was that there was some corrosion, but the main thing holding the valve and stand off on, was the hardened "O" ring, between them....
One more thing...You have to remove the clamp, holding the cable sheath, completely off , to do remove the valve.
Now wondering if using a hand-held propane torch, between the two, would have loosened them????
Edward
Last edited by Mr. Barry; Jan 3, 2016 at 09:58 AM.
I just finished replacing the valve on my '70...Fortunately the pipes were still in pretty good shape, but the valve would not come off, no matter what I did....
Now , I knew the valve was no good, so I was going to replace it anyway...I did not know the condition of the pipe.
After working for several hours, I finally "bit the bullet", and used my Dremel, with a fiber cutting wheel, and carefully cut between the valve and the stand off....I cut on both sides, as deep as I dared, without cutting so deep it would damage the pipe.
I then pryed into the grooves created by the cut, between the stand off and the valve..
Once there was a slight movement, I used two locking pliers, and twisted the valve away from the stand off....
Once the valve was off, I was able to twist the stand off away from the pipe....I might add that during the process, I used PB Blaster in the cuts....
Fortunately the pipe wasn't damaged,,,,The valve and stand off have been replaced, and all is "well".
What I surmised, was that there was some corrosion, but the main thing holding the valve and stand off on, was the hardened "O" ring, between them....
One more thing...You have to remove the clamp, holding the cable sheath, completely off , to do remove the valve.
Now wondering if using a hand-held propane torch, between the two, would have loosened them????
Edward
Thanks for the info, i think we're just going to get a hack saw and cut right down thru the pipe and just buy a new valve. Can't imagine its good since all the pipes we're replacing is rusted close anyway.
It was a long time ago that I did this, so the memory may be playing tricks, but I think the process was made much easier by having the dash top pad out. It's not so much reaching the pipes as getting the old ones out and the new ones in. The old ones may be cut in half to make extraction easier, but getting the new ones in place is the real pain. This pipe change-out is one of the famous four-letter-word vocabulary builders in E-Type restoration.
We do need a new dash pad so maybe we're commit to taking that off and trying that.
Had to cut the heater valve off the pipe and then it was easy getting the pipes out. Just doing some clean up under where the pipes mount maybe some painting then going to install new pipes. We had to undo one side of the vac pipe to get the long pipe free