

Repair and recondition your seats


Thread Starter
|
Senior Member
Joined: Feb 2011
Posts: 134
Likes: 18
From: Sacramento, CA
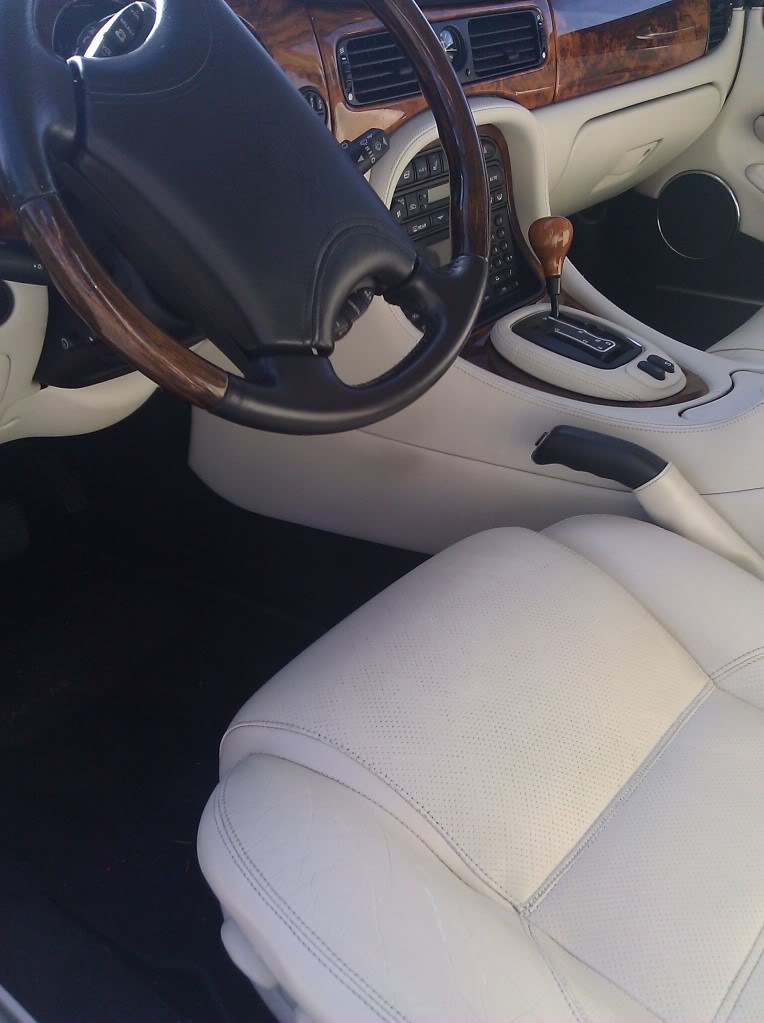
Anyone out there with wear marks on their leather seats, I may have a solution for you worth considering. My XJR is off-white, and it looked a little ragged. The previous owner took very good care of the car, but did not do much for the interior, perhaps because he was the only one who basically ever used it. So, the drivers seat showed some wear, with dark lines where the dye had come off, and many cracks between the perforations, running in diagonal dark lines. When completed, it looks as good as the seats that we never sat on, and they all look better, feel better, and smell better.
Disclaimer: I am not a leather professional, just did this on my own, and amazingly, it worked extremely well without me totally screwing it up. But, if I could do it, likely so could you, but proceed at your own risk.
CLEAN
First step was cleaning the leather well. A quick vacuume job to get up the big stuff. Then I used Simple Green to do the heavy lifting, with an interior brush and plenty of clean white cotton rags to get all the cleaner off and dry it up. Don't let this type cleaner sit too long, work it wet, the get it off. Use the brush in all the cracks and seams. When done, it was much brighter, but the dark lines were even more noticable.
CONDITION
After it dried well (a couple hours minimum) I conditioned the leather with Lexol (available on the web if your local auto parts or leather store doesn't have it). I sprayed this stuff on, rubbed it in with my hands (recommended by pros, it is oils and not toxic) let it sit for 30 minutes, wiped it off, sprayed it again heavily and did not rub it in, let it sit overnight, wipted it off, and then that night sprayed it again and sit overnight, then buffed it with said clean cotton rag. Now, it was MUCH more subtle, soft, and had a great leather odor, almost new-car-like. Lexol is good stuff.
REPAIR
Then, I bought a product from a company here in the states called "Tandy Leather", the product being Eco-Flo Cova Color. This is not a dye, but a rubber paint designed for leather application. This paint is an elastomer, a rubber-like product that stretches and bends, and does not crack. I bought white, brown, and yellow and, using mainly white and just a TOUCH of the others, got a close match. Eco-Flo Cova Color here: http://www.tandyleatherfactory.com/default.asp
Next, I painted the deepest groves, doing my best to keep it on the bad areas. If the leather was cracked, I used my fingers to pull the leather apart (with reasonable force), and painted the cracks with a good amount of paint. After a few minutes (it dries rapidly) I used a damp paper towel to gently wipe the paint off the SURFACE by back and forth motions. In other words, leave the paint in the cracks, but take it off the good leather. I did this a few times on the deepest cracks, and amazingly, they were virtually gone!
I applied the same treatment to the smaller cracks, but they were so frequent in their occurence I ended up just white washing entire areas, letting it sit a couple minutes, and wiping it off. Again, amazing results. It even fixed the area where the seat belt tears up the seat back near the driver door.
Once I got to this point, it was hugely improved, but the perforated areas did not look as good as I wanted, nor the just mentioned back portion affected by the belt, so I painted the entire area with a light coat of this same paint, then wiped it down with a very slightly damp paper towel, leaving a thin smear across the surface. It came out awesome! It looks near new, like maybe a year old. Amazing. It did fill in some of the holes, but the results are far superior to the many cracks running across the seat. Plus, you could probably take a toothbrush while the paint is still setting up and clear out the holes if it bothers you. It didn't bother me, and everyone who has looked at it has just said how good it looks. It didn't bother them either.
When speaking to the lady at Tandy Leather, she told me a story about another lady who had white leather in her Cadillac who once a year put a light coat over her interior with this paint, and she said it looked like new 10 years later. Unverified, but I believe her.
So, you can mix almost any color with these paints (they have like 20 colors to choose from, but you will likely only need three or four bottles, each about US$6.00.
RECONDITION AGAIN
After all this, I put more Lexol on, it went in just as before the paint, and it is smooth and soft. I will continue to use the Lexol periodically.
Take a look at the picture! I only wish I had taken a before pic, as that would have really showed how impressive this worked out. You can notice a few lines that are lighter that shows where I repaired it, but I got the yellow color, mixed a better match and they are now invisible.
I never did this before, and I felt like a pro when I got done! I will do this on all my cars when needed.
Good luck!
Last edited by michaeldeanrogers; Mar 15, 2011 at 11:09 PM.


Thread Starter
|
Senior Member
Joined: Feb 2011
Posts: 134
Likes: 18
From: Sacramento, CA
Cadillac, good call. I didn't know about this wing of the forum, but glad to have my attention drawn to it.
JimC, I wished I had, and will if I do this again. I had started this before joining the forum...
Another thing for those with my color, I also applied this product over the stitching, as they were quiet dark in areas compared to the seats not sat on much. It lightened them beautifully.
Again, I would paint it on, then use a paper towel to smear it in. It may be better to use a fine sponge like another similar post from a while back (which if I had known about this area, I probably would have used that approach). Honestly, this was not a difficult project at all, with little time required, though it was over a period of three days or so. I didn't know what I was doing, and it still turned out well.
Thread Starter
|
Senior Member
Joined: Feb 2011
Posts: 134
Likes: 18
From: Sacramento, CA
I am still tinkering with this, shining the apple so to speak, while I am idle while other tasks wait.
I discovered last night why the damp paper towel seems to work so well... this paint is water-based. It cleans up easy with water, and when you use the damp towel it dilutes the paint to make it stain-like. Whatever, it works like magic, and there seems to be no limit on how many times you apply it. Easy to work with. I'll try to post some new pics with the latest improvement, if it is even visible to the camera.
I discovered last night why the damp paper towel seems to work so well... this paint is water-based. It cleans up easy with water, and when you use the damp towel it dilutes the paint to make it stain-like. Whatever, it works like magic, and there seems to be no limit on how many times you apply it. Easy to work with. I'll try to post some new pics with the latest improvement, if it is even visible to the camera.
Trending Topics

Veteran Member
Joined: May 2010
Posts: 6,290
Likes: 485
From: Arlington, VA USA
Looks fantastic, but I am very wary of using something like Simple Green on the actual leather surfaces. Simple Green seems to be very aggressive (hell, I've used it on wheels and got some on the tires and it discolored the tires permanently!).
Thread Starter
|
Senior Member
Joined: Feb 2011
Posts: 134
Likes: 18
From: Sacramento, CA
AMC, I tried a "ph balanced leather cleaner" from Lexol first, and while it did clean the leather some, not to my satisfaction. I have used simple green on a lot of materials with no bad results that I can recall, but as I said, work it wet and then get it off. It substantially brightened my already "clean" interior, bringing it back to like-new coloration. No damage I can see.
I have done a bit more, but am at the point of diminishing returns; I looks so good there is not much to improve on. HOWEVER, as I think about this entire process, it occurs to me that the most critical aspect is getting the color match correctly. Although this has worked fantastic for me, if this was another color than off-white, I think the match would be more critical.
I did some searching on the web, and there are numerous companies that have similar products, pre-matched to factory colors. If I had it to do again, especially if I had a different color interior, I would have bought a matched color.
Here is the first one at the top of the Google list, but there were others...
Leather Dye Color Chart - leather repair kit, vinyl repair kit, leather cleaner, leather cleaning, leather dye & paint
Regardless, it is clearly not that difficult to restore and repair leather seats to near-new appearance, and anyone reading this should not be put off by the task. Very satisfying project that everyone admires!
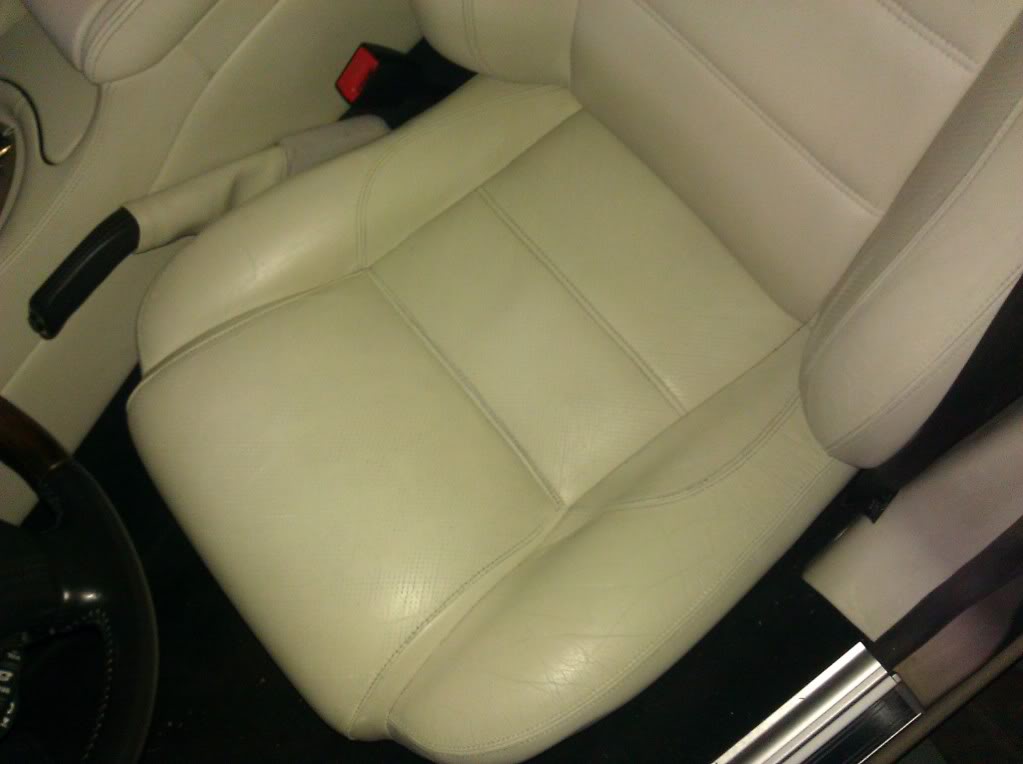
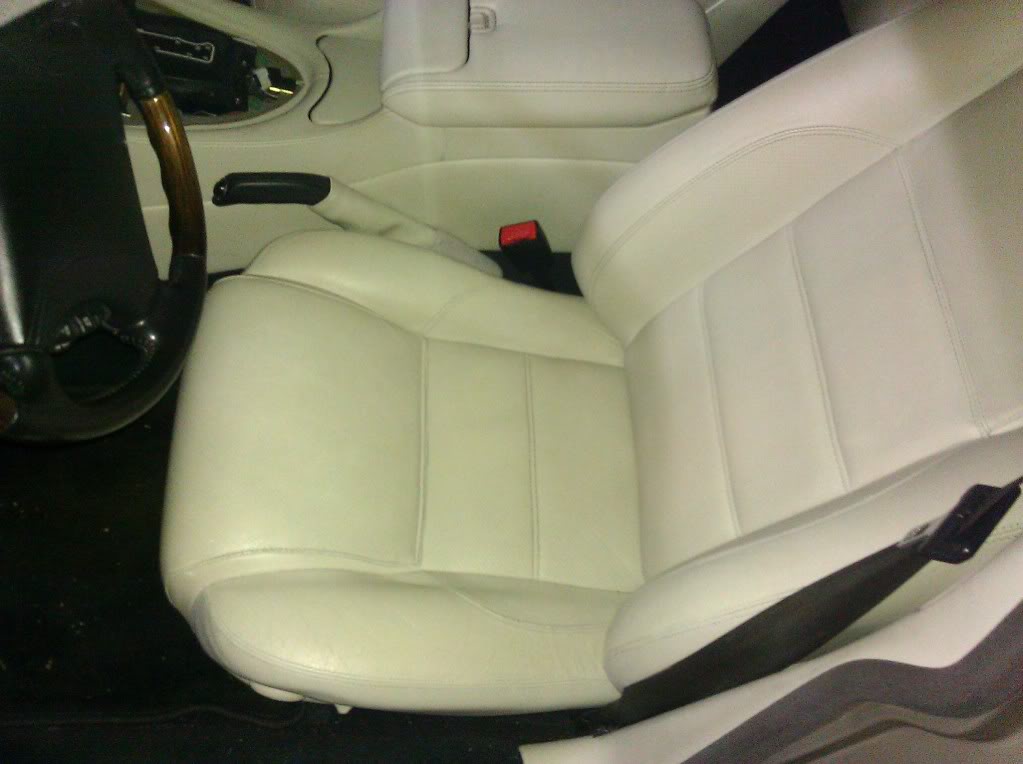
Finally, this is the current state of affairs on this seat. I think it came out pretty darn well.
I have done a bit more, but am at the point of diminishing returns; I looks so good there is not much to improve on. HOWEVER, as I think about this entire process, it occurs to me that the most critical aspect is getting the color match correctly. Although this has worked fantastic for me, if this was another color than off-white, I think the match would be more critical.
I did some searching on the web, and there are numerous companies that have similar products, pre-matched to factory colors. If I had it to do again, especially if I had a different color interior, I would have bought a matched color.
Here is the first one at the top of the Google list, but there were others...
Leather Dye Color Chart - leather repair kit, vinyl repair kit, leather cleaner, leather cleaning, leather dye & paint
Regardless, it is clearly not that difficult to restore and repair leather seats to near-new appearance, and anyone reading this should not be put off by the task. Very satisfying project that everyone admires!
Finally, this is the current state of affairs on this seat. I think it came out pretty darn well.
Last edited by michaeldeanrogers; Mar 24, 2011 at 11:57 AM.
Senior Member
Joined: Aug 2009
Posts: 504
Likes: 28
From: Scotland
Great thread.
Colour matching is very difficult and it is so worth while following the common instruction of 'try on an out of sight area first'. I did that when I repaired damage to the driver's seat in my car, even though it is black, because I was not sure whether matt or gloss would match better.
Colour matching is very difficult and it is so worth while following the common instruction of 'try on an out of sight area first'. I did that when I repaired damage to the driver's seat in my car, even though it is black, because I was not sure whether matt or gloss would match better.

Senior Member
Joined: Dec 2009
Posts: 354
Likes: 56
From: Camden, SC, USA
I have beautiful ivory colored leather seats in my 08 XK. The seats are still in virtually new condition, but there is a thin 4" long section of seam on the drivers side that has become black from what I believe is from rubbed in dirt/wear. Nothing I have tried will bring this area of seam back to the original clean ivory color.
Any suggestions?
Any suggestions?

Thread
Thread Starter
Forum
Replies
Last Post
Currently Active Users Viewing This Thread: 1 (0 members and 1 guests)