When you click on links to various merchants on this site and make a purchase, this can result in this site earning a commission. Affiliate programs and affiliations include, but are not limited to, the eBay Partner Network.
Mate good on you for tackling that on your own. You always inspire me OB
I have done the Air Con compressor a few times now but that was with James (34by151) and it was a PIA but I imagine alot harder by yourself. I am very fortunate I have a good mate up the road that is always lending a hand.
Kudo's for you though mate...the Lone Ranger!
I have to do my spark plugs when I get home so expect some PM's next week for some advice
Just don't over tighten them, when you put them back in 'Bro' once you have got them seated all they need is a 'Tweak' which seems very unnatural compared to changing the Plugs on other Cars.
As I'm getting her ready for the dreaded MOT I don't want her to fail on something Stupid and 'Windscreen Washers Not Working' can be the one that usually catches you out.
So after taking the Motors off and Testing them in a Bucket, one of them very clearly was not working.
Fortunately I had a spare one on my Parts Car and although it was the earlier version with the shorter suction stub, I couldn't see a reason why it wouldn't do the Job.
So after giving it a Test in order to make sure it was OK, I fitted it into the Washer bottle and also swapped the tubes round so the best one of the two would be used on the Windscreen.
Except it wasn't that easy, as all the Plastic Tubes had gone hard and had also got blocked up and since the blockage appeared to be somewhere near the Jets, I decided to do the job properly and re-tube the whole thing.
Which on an XJS is very easy, as instead of having to fiddle around, like you would on many other Cars, all you really have to do is to unscrew 4 Bolts and the whole thing lifts out, which include the Wiper Motors as well as the Grill.
And then when I looked in the Cavity, there was not a trace of rust in sight, so I sprayed 'easy grease' inside to help keep it that way.
Then having re-tubed everything I put it all back together and gave it a Test, which seemed to work a bit too well as the knob on the end of the Wiper Stalk got stuck and wouldn't come out.
This was very clearly down to lack of use, so I sprinkled the knob with Talcum Powder to make it slide in and out a whole lot easier.
And not for the first time either, as if you find your Car Ariel Sticks then provided its dry and not covered in oil a sprinkle of Talcum Powder makes the perfect lubricant and will soon have her working again.
Although it took all day to do, what with testing and getting it off the Parts Car, it was a fairly simple if time consuming sort of job to do but now that's done and dusted, unless I am very unlucky and another Motor burns out.
I am hoping it will last a good long while.
The Knob on the end of the Stalk kept sticking in, so I sprinkled it with Talcum Powder to lubricate and release it, which also works with Car Ariels when they get stuck,
Just undo four bolts and the whole lot comes out as one unit.
Dead easy to sort out Wiper problems on an XJS as removing for instance a Windscreen Wiper Motor, could be the job from Hell on other Cars.
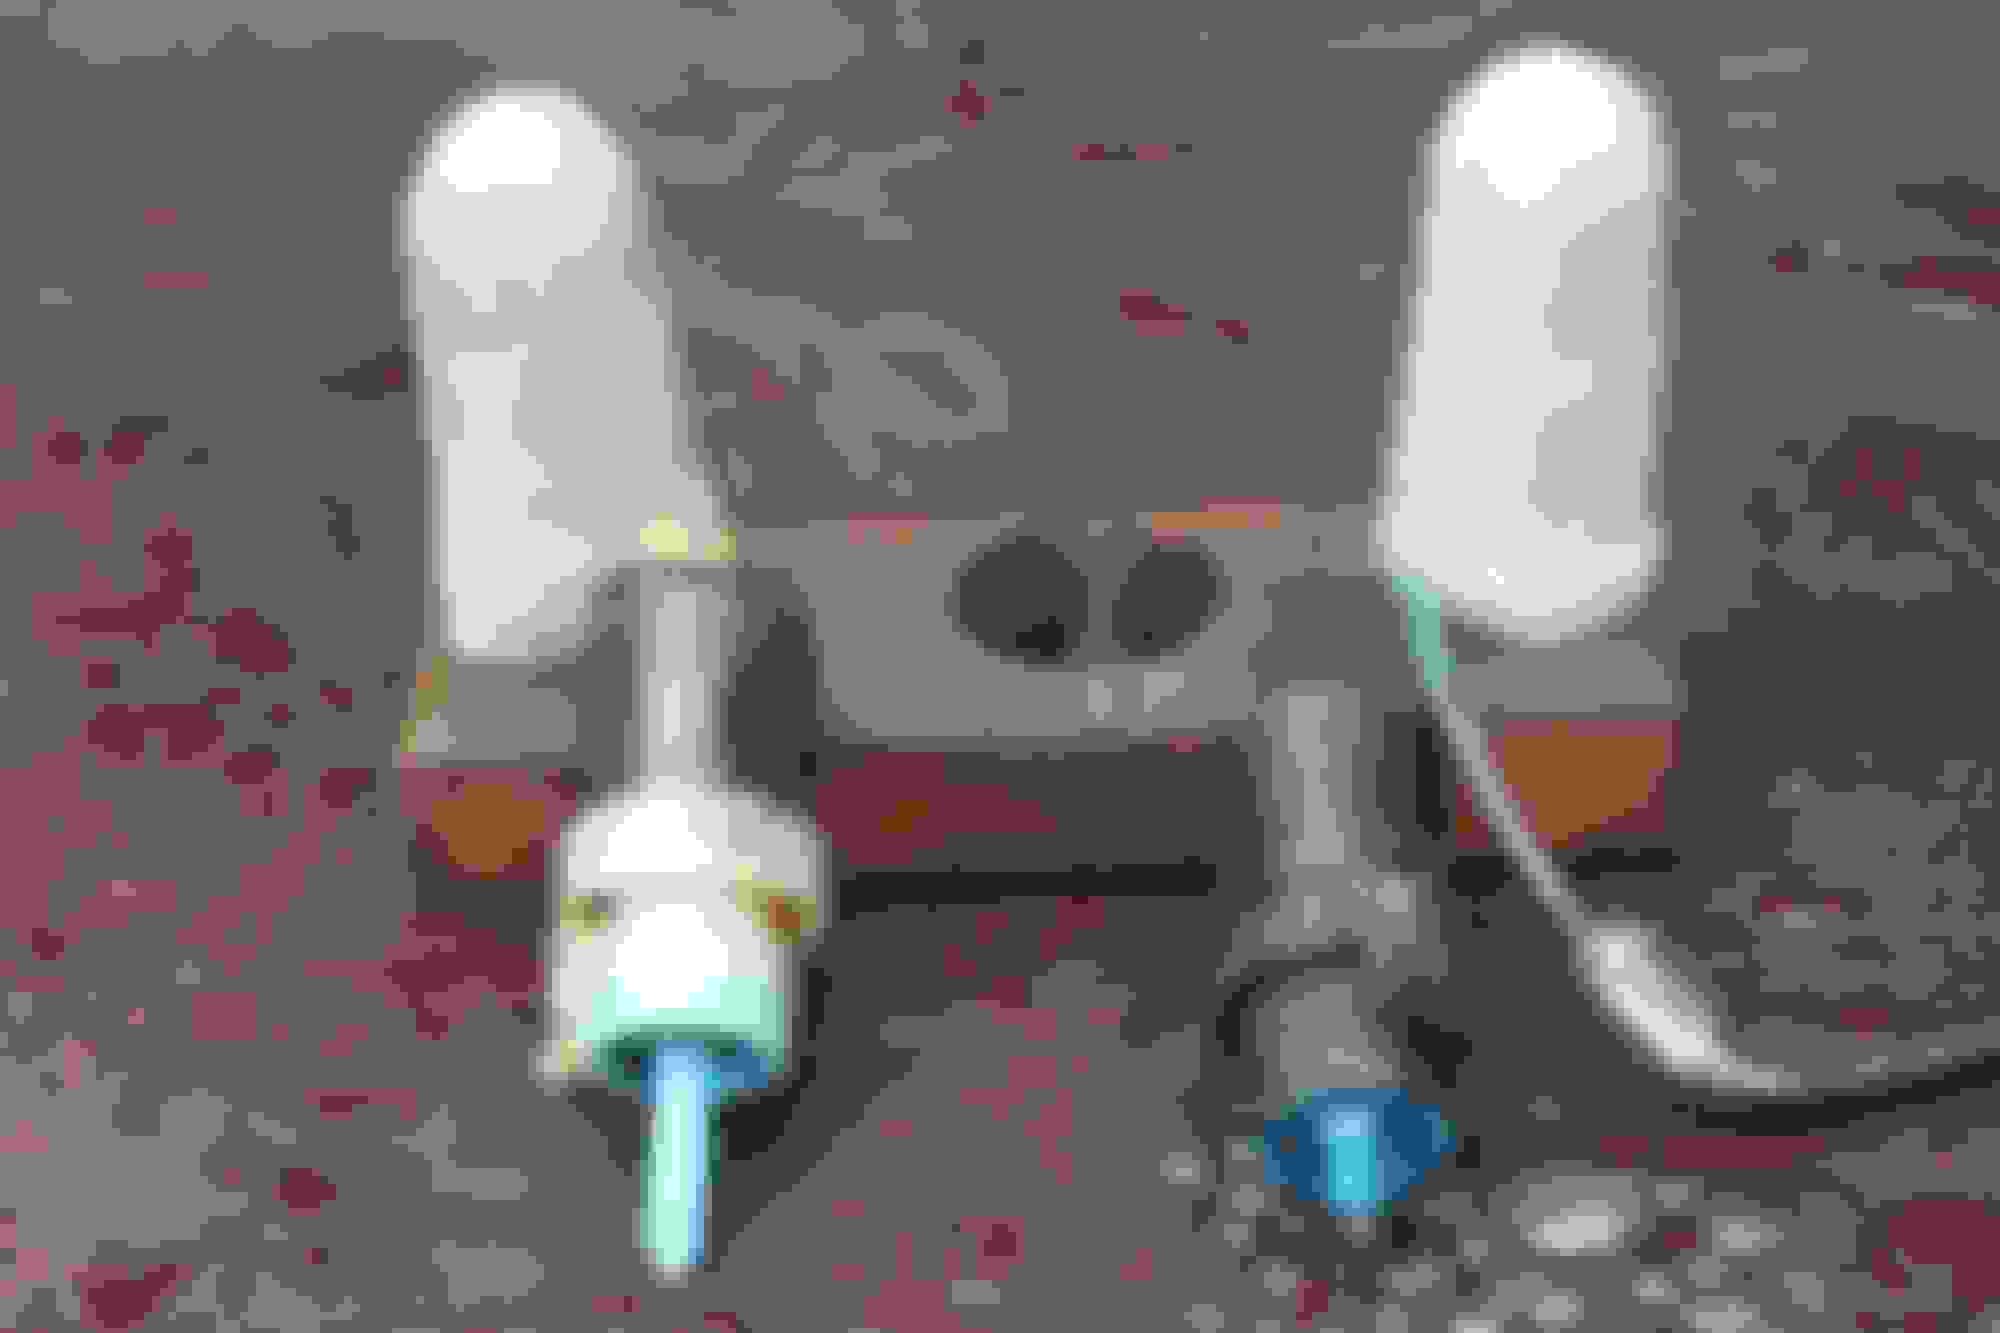
All the Green Tube had gone brittle and hard and so I decided to renew it all, including the Headlight Washer Tubes as well.
The Windscreen Washer Motors with their protective Sheaths which just slip over and wiring them up is as simple as plugging them in.
The Newer Washer Motor is the one on the left while the one on the right came out of my Parts Car.
But I also swapped the Tubes around, so the later style of Washer Motor was used on the Windscreen.
Last edited by orangeblossom; Sep 21, 2016 at 06:31 PM.
Brakes Binding Could it be a Problem with the Calipers?
One of the next jobs on the list was fixing the Brakes that were binding, could the Pistons be Sticking in the Calipers?
There was only one way to find out, remove the Brake Pads and then take a look which was not so easy as in order to remove them they were in so tight that I had to drift them out of the Calipers using a round Chisel and a FBH.
It took me an hour each side just to remove the Brake Pads when it should have taken 5 Minutes.
This was the cause of the Binding Brakes, the Brake Pads were touching the Calipers Top and Bottom, making them a very tight fit, so when the Pistons pushed them against the Rotors the Caliper Pistons retracted but the Pads stayed where they were.
And so I got the Sander out and took a Few Thou off each end after taking a measurement with my Micrometer.
After which the Pads slipped in nice and easy and the Brakes worked Perfect after that, as for the Pistons and rubbers they were in A1 Condition as I put New Caslipers on 16 year ago, just before I laid the Car up.
But since I've ordered a Refurb Kit as well as some 'Aerostyle Hoses' instead I am going to use them to Refurb the Calipers that I took off my Parts Car, so I can swap them over as a ready made unit.
As I need my Car to be mobile while I have to move it around to do other jobs.
It took me an hour with a Hammer and Chisel to get these Brake Pads out and the same on the other side.
I'm putting the blame on small differences in the manufacture depending on where they are made.
After I ground a few thou off each end the Pads fitted easily and the Brakes worked Perfect with no binding.
As after grinding a little bit off the Top and Bottom of the Backing Plate of The Brake Pad, everything seemed fine.
But after a few 'Test Drives' round the Garden, the Pads were starting to grab, where close inspection then confirmed that a couple of the Pistons in the Calipers were sticking, even though I thought I'd freed them off.
Exactly the same thing happened on my Grey XJS where the Brake Fluid started to boil, with clouds of smoke from the Wheel Arch, which very nearly resulted in the Car catching fire.
So seeing I never wanted for that to happen again, there was only one thing for it and that was to fit New Calipers (Service Exchange)
A 'Snip!' at �235! OMG! but that was better than meeting him in Person!
But then the GF Turned up 'Trumps' but this was 'Big Time' This Time.
As She somehow managed to find a Pair of Plated Calipers, that were Special Order for a 'Cobra' lookalike 'Kit Car' and probably worth �300 all day long.
Did I want them for �100 the Pair?
Let me think about that for a Second,
'Course I do!'
But first the little Problem of getting the Old ones off.
I mean, how hard Can it be for a person like me who spent some of the money I'd saved buying every Tool in the Box!
Well at least enough to get the Old Calipers off.
30 inch Breaker Bar
19 mm Spanners from China
A FBH to Hit the Spanners With!
A 3ft Scaffold Pole to slip over the Spanners for Extra Leverage.
A 4ft Scaffold Pole for even More Leverage!
Safety Glasses in case the Spanners shattered on Impact after being Hit with the FBH.
Although for reasons that seem unclear, using Brute Force and Ignorance, is one of those 'Out of the Box Techniques' that I couldn't find in the Manual.
But I know from past experience just how notoriously difficult, it can be to get Old Calipers off.
So First I had to Jack up the Car and make sure that it couldn't fall, with Blocks of Wood which were put under the Front Beam, together with Two Axle Stands and also a Spare Wheel pushed under the Car, as an extra precaution, with my Trolley Jack also left in place.
I had also been Oiling the Caliper bolts for a Week, so now was the time to get out 'The Big Guns' and use my 30 in Breaker Bar for the First Time.
This had all the Hall Marks of being a Piece of Cake, although it was anything but, even though I heated all around the Bolt.
As the Breaker Bar was totally useless and had too much Spring to exert any Torque, though may have been ok for some of those 'less demanding jobs' whatever they are.
And so the next Contestant to Step up to the Plate was a 19mm Chinese Spanner which I thought would Shatter if I hit it with a hammer.
So for this one I decided to put Safety Glasses on.
Then put the Spanner on the Bolt and Whapped it hard with a FBH!
The Bolt didn't move and neither did the Spanner and Amazingly it didn't Shatter either!
The Spanner seemed indestructible but I had a Cunning Plan!
So I just extended it a bit with a Three Foot Scaffolding Pole! but the Nut refused to Turn and the Spanner refused to Break!
It must have been made from Cryptonite to Superman's own Spec, as no matter what I did to it, I just couldn't Break it!
And even worse I couldn't undo the Bolt!
Although I did eventually manage to remove just one of them 8 hours Later!
It might sound counter-intuitive but try tightening the bolt just a fraction before then trying to undo it. It can sometimes be easier to break the corrosion friction by tightening it just a bit and it can then be undone.
It might sound counter-intuitive but try tightening the bolt just a fraction before then trying to undo it. It can sometimes be easier to break the corrosion friction by tightening it just a bit and it can then be undone.
Good luck
Paul
Hi Paul
I have tried everything but those bolts wouldn't budge.
Get a little blow torch and heat that bugger up. Or get some really good deruster, I like G�sol, an aviation grade solvent. I've managed to undo MANY really nasty, rusty and tight screws...
Get a little blow torch and heat that bugger up. Or get some really good deruster, I like G�sol, an aviation grade solvent. I've managed to undo MANY really nasty, rusty and tight screws...
Hi Daim
You won't believe how close I was to sending you a Plane Ticket!
As You could have probably done this in your sleep and can change an engine over as fast as other people can change shirts!
But I do have one more Trick up my sleeve that I am going to try.