XJS ( X27 ) 1975 - 1996 3.6 4.0 5.3 6.0

Cherry Blossom - Restoration 1990 XJS V12

Thread Tools
 
Search this Thread
 
Old May 28, 2017 | 07:19 AM
  #1121  
JigJag's Avatar
Veteran Member
5 Year Member
Liked
Loved
Community Favorite
Joined: Mar 2016
Posts: 1,333
Likes: 583
From: North Carolina
Default

Originally Posted by orangeblossom
protect the alloys with a piece of wood and then whack it with a Sledge Hammer.
I could replace alloys with almost any word here and it would still not sound like a good idea. Eggs, porcelain vase, baby, 20 year old bottle of scotch.

I agree with loosening the nuts and shocking the wheel loose. I'd prefer using the drivetrain over the jack.
 
Reply
Old May 28, 2017 | 03:26 PM
  #1122  
orangeblossom's Avatar
Thread Starter
|
Veteran Member
Joined: Feb 2013
Posts: 17,809
Likes: 3,945
Default

Hi Guys

Doug@Daim@Carl@Leo@Eric

I finally got the Wheels off!

By using a combination of your suggestions.

First I loosened the Nuts off and then I took the sloping ramps off my Car lifter, then rolled her back until She dropped off the end.

This was only a drop of 6ins which was inspired by a suggestion from Daim and then I drove her round the Garden Zig Zagging as much as I could@Doug.

Then I poured Hot Water over them@Leo, at which point they started to loosen up but not enough to come off, at which point the FBH came out!

But I only hit the rubber not the rim, where after a lot of Jiggling, I managed to get them off and having cleaned the corrosion off put plenty of Copper Grease on them.

Unfortunately I did not see Erics Inspired suggestion, until it was too late but will certainly be trying that out, if they get stuck again.


I finally got the Wheels off by using a combination of your suggestions.
Doug@Daim@Leo@Carl@Eric
Cheers Guys!


Most of the Corrosion was around the Center Hub and I used plenty of Copper Grease on them before I put them back.

Weather permitting Tomorrows Job, is to take the Wheels off again and then I'll clean and Waxoyl the Wheel Arches.
 
Reply
Old May 29, 2017 | 03:24 AM
  #1123  
Daim's Avatar
Veteran Member
Joined: May 2014
Posts: 5,906
Likes: 2,182
From: Bremen, Germany
Default

Technically, you should never hit a tyre on it's wall. That is the weakest part of the tyre. You can tear/break a wire inside the wall and the area will instantly inflate to an egg shaped lump.

The rim can take more but avoid hitting the tyres on their walls.
 
Reply
Old May 29, 2017 | 10:30 AM
  #1124  
orangeblossom's Avatar
Thread Starter
|
Veteran Member
Joined: Feb 2013
Posts: 17,809
Likes: 3,945
Default

Hi Daim

I'm getting new tyres anyway, as soon as She has passed the MOT.

I didn't hit them very hard but needed the sledge hammer to give me a bit more reach.
 
Reply
Old May 31, 2017 | 02:41 AM
  #1125  
warrjon's Avatar
Veteran Member
Joined: May 2010
Posts: 4,638
Likes: 2,583
From: Vic Australia
Default

Run a garden hose (full pressure) around the inside of the lip pointing the stream at the lip where the inner and outer guard are joined. Then inside the boot put your hand down the inner and see if there is any water. Mine leaked here both sides.
 
Reply
Old May 31, 2017 | 05:24 PM
  #1126  
orangeblossom's Avatar
Thread Starter
|
Veteran Member
Joined: Feb 2013
Posts: 17,809
Likes: 3,945
Default

Hi Warrjon

Cheers!

But its all done and dusted now, I've managed to get the rear Wheels off and the inside of the Wheel Arches were in need of a good clean.


Having finally managed to remove the rear wheels, it certainly looked like the Wheel Arches were in need of a good clean.

Having cleaned the Wheel Arches, I sprayed them with Waxoyl which is a great product which I have been using for years to prevent against rust.


Having cleaned out the Wheel Arches I Sprayed them with Waxoyl, to help prevent against rust.

She's really coming together now, so all that's really left to do is refit the Front Spoiler and the Under Tray.


Just got to fit the Front Spoiler and the Under tray, then take her for an MOT and hope that She will pass.
 
Reply
Old Jun 5, 2017 | 06:51 PM
  #1127  
orangeblossom's Avatar
Thread Starter
|
Veteran Member
Joined: Feb 2013
Posts: 17,809
Likes: 3,945
Default Injector Harness Problem does anyone know?

When I re-connected the Injector Harness to the Injectors

I forgot the order in which the last two go.

These are on the 'A' Bank Side

So please could someone tell me if I have got these on the right Injectors.

There is one with a Yellow and White Band and I put that on Injector 6 up near the Firewall on 'A' Bank.

The other one has a Blue and White Band and has 5 written on it so I put that on Injector 5 (again on 'A' Bank)

There is a metal clip in the way, so I can't see how they go.


Injector Lead with Yellow and White Band on Injector 6 on 'A' Bank.
Injector Lead with Blue and White Band on Injector 5 on 'A' Bank
 
Reply
Old Jun 6, 2017 | 04:59 AM
  #1128  
warrjon's Avatar
Veteran Member
Joined: May 2010
Posts: 4,638
Likes: 2,583
From: Vic Australia
Default

You could check with an ohm meter.

Injectors are grouped 1,2,3 and 2,4,6

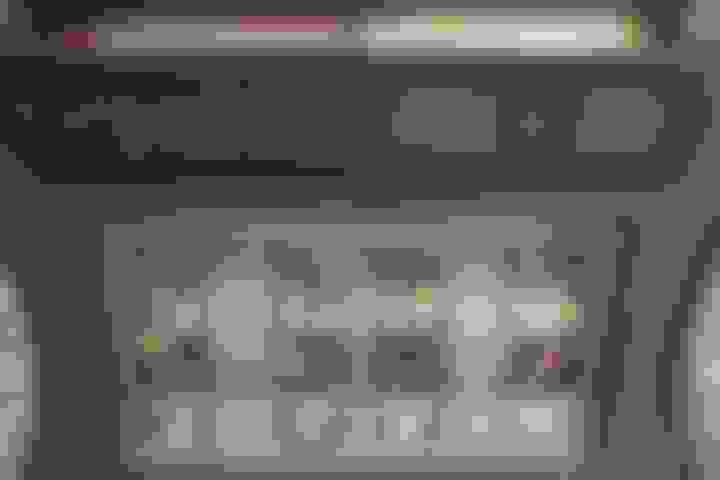
If you pull the connectors off 1A and 3A then the connector that goes to 5A will be open circuit to ground on the ECU side, and the connector that goes to 6A will have continuity on both terminals.

NOTE: You MUST pull the connectors off 1A and 3A for this to work.
 
Reply
Old Jun 6, 2017 | 05:04 AM
  #1129  
orangeblossom's Avatar
Thread Starter
|
Veteran Member
Joined: Feb 2013
Posts: 17,809
Likes: 3,945
Default

Hi Warrjon

Cheers!

That sounds a great idea!
 
Reply
Old Jun 6, 2017 | 06:16 AM
  #1130  
JigJag's Avatar
Veteran Member
5 Year Member
Liked
Loved
Community Favorite
Joined: Mar 2016
Posts: 1,333
Likes: 583
From: North Carolina
Default

Confirmed. White band on 6. Blue band on 5.
 
Reply
Old Jun 6, 2017 | 07:57 AM
  #1131  
orangeblossom's Avatar
Thread Starter
|
Veteran Member
Joined: Feb 2013
Posts: 17,809
Likes: 3,945
Default

Hi Jig Jag

Many Thanks

For doing that.

Although She runs with the Injector Leads on either one, She did seem to run a bit smoother with the Yellow and White on 6 and the Blue and White on 5.

All done now and ready for Her MOT!

Just got to wait for the Weather, its raining and blowing a Gale!
 
Reply
Old Jun 7, 2017 | 05:01 PM
  #1132  
orangeblossom's Avatar
Thread Starter
|
Veteran Member
Joined: Feb 2013
Posts: 17,809
Likes: 3,945
Default

Hi Guys

Today I made a Battery Strap and put the Under Tray and Front Spoiler on, together with the Finishing touches to get her ready for her MOT.


I used some perforated Strip to make a Battery Strap.


Next I cut it to size and bent it to shape.


Using 'Gaffer Tape' to insulate it and stop it slipping.


Battery Strap Fitted for the MOT
 
Reply
Old Jun 10, 2017 | 07:33 AM
  #1133  
paulyling's Avatar
Joined: Jul 2014
Posts: 6,356
Likes: 1,209
From: Queensland Australia
Default

O.B you never cease to inspire me....love this thread
 
Reply
Old Jun 10, 2017 | 06:23 PM
  #1134  
warrjon's Avatar
Veteran Member
Joined: May 2010
Posts: 4,638
Likes: 2,583
From: Vic Australia
Default

Good job there.

That original battery clamp is a very poor design and would be easy to short the battery terminals putting it on/off. I ditched mine and made a new one from a bit of hardwood similar to yours.
 
Reply
Old Jun 10, 2017 | 06:48 PM
  #1135  
Some Day, Some Day's Avatar
Veteran Member
Joined: Apr 2016
Posts: 2,047
Likes: 1,049
From: Japan
Default

This is some awesome work, OB. She's bound to pass the MOT - few cars going for it would have had as much attention given to them....
 
Reply
Old Jun 11, 2017 | 07:03 PM
  #1136  
orangeblossom's Avatar
Thread Starter
|
Veteran Member
Joined: Feb 2013
Posts: 17,809
Likes: 3,945
Default

Hi

Bro@Warrjon@Someday

No Magic Bullet, just Blood Sweat and Tears while life gets in the way and holds things up but as for passing the MOT.

I've done all I can do at my end and so now its really in the lap of the gods, where my only real concern is the Hand Brake.

Which although it works only has those tiny little brake pads, which can be all to easily ripped off, if applied for too long on the Rolling Road.

Which would mean dropping the IRS to replace them, although I did it without that once but it was the job from hell.

Ironically I do not know anyone who ever uses the hand brake in an Automatic Car.

All I do is to leave it in Park in the Shifter.
 
Reply
Old Jun 11, 2017 | 09:39 PM
  #1137  
JigJag's Avatar
Veteran Member
5 Year Member
Liked
Loved
Community Favorite
Joined: Mar 2016
Posts: 1,333
Likes: 583
From: North Carolina
Default

Originally Posted by orangeblossom
Hi

Bro@Warrjon@Someday

No Magic Bullet, just Blood Sweat and Tears while life gets in the way and holds things up but as for passing the MOT.

I've done all I can do at my end and so now its really in the lap of the gods, where my only real concern is the Hand Brake.

Which although it works only has those tiny little brake pads, which can be all to easily ripped off, if applied for too long on the Rolling Road.

Which would mean dropping the IRS to replace them, although I did it without that once but it was the job from hell.

Ironically I do not know anyone who ever uses the hand brake in an Automatic Car.

All I do is to leave it in Park in the Shifter.
over on the XJ6 boards it's a huge thing. Park brake while in neutral the put it in gear. Anything else can result in a car stuck in park when the tranny binds against the pin.

I have no idea if this is a real thing or not. But I always have done it that way regardless of vehicle. Autos that is.
 
Reply
Old Jun 11, 2017 | 10:42 PM
  #1138  
Some Day, Some Day's Avatar
Veteran Member
Joined: Apr 2016
Posts: 2,047
Likes: 1,049
From: Japan
Default

I always pull the parking brake in my car, because I've always used the parking brake in all my cars, which have mostly always been manuals, mind. However, I suspect that the level where the light comes on is a bit before the level where it actually holds the car (I tested it once on a hill).
 
Reply
Old Jun 11, 2017 | 10:59 PM
  #1139  
Daim's Avatar
Veteran Member
Joined: May 2014
Posts: 5,906
Likes: 2,182
From: Bremen, Germany
Default

Originally Posted by JigJag
over on the XJ6 boards it's a huge thing. Park brake while in neutral the put it in gear. Anything else can result in a car stuck in park when the tranny binds against the pin.

I have no idea if this is a real thing or not. But I always have done it that way regardless of vehicle. Autos that is.
Had that happen to me in my XJ8. Parked up on a slightly incline. Purvit in P and got out. Came back and I could barely get it out of P. As Ibdid, it crunched really badly. So I avoid that now...
 
Reply
Old Jun 13, 2017 | 03:17 AM
  #1140  
orangeblossom's Avatar
Thread Starter
|
Veteran Member
Joined: Feb 2013
Posts: 17,809
Likes: 3,945
Default Unexplained Rise In Oil Pressure!

As some of you who have been following my restoration of 'Cherry Blossom' may know, when I finally managed to get her Started.

The Oil Cooler broke but I managed to switch her off in time, though some time before that happened I took a photo of the Oil Pressure Gauge

(The Dash Barrel Gauge)

Where the reading looked fairly normal and also comparable to that of my Grey XJS and while those Barrel Gauges are not accurate.

Its something you get used to as to what is 'Normal' for your own Car.

Having had the Oil Cooler break, I decided to fit a by-pass pipe at least until She had passed her MOT.

As Oil Coolers for these Cars can be quite expensive if you go OEM which is something like Circa: £300 including the pipes.

The Following Photo was taken of the Barrel Gauge reading before the Oil Cooler broke.


Normal Oil Pressure for this Car as per the Barrel Gauge at idle which increases when driving.

Oil Temperature 110o/c 10/40 Semi Synthetic.


The Following Photo is of the Oil by-pass Pipe, which I had made up as a temporary measure.


My Temporary Oil by-pass Pipe

Same Oil and same recorded temperature 110/c

But look what inexplicably happened to the Oil Pressure reading on the Barrel Gauge!


With the by-pass Pipe fitted in place of the Oil Cooler, a sudden and inexplicable rise in the Oil Pressure!

I'm assuming this is a good thing but it did come as quite a surprise.
 
Reply


All times are GMT -5. The time now is 05:22 PM.