

Converting Indicators to LED


Thread Starter
|
Junior Member
Joined: Oct 2012
Posts: 11
Likes: 1
From: Minnesota
I thought I'd post this, since I'm pretty proud: I used a high-intensity LED strip to convert my X-Type's indicators to LEDs. I think it looks great, much more modern.
I wanted to post pictures of the process (fairly easy, but still a couple of hours), but the photos didn't turn out well...
Contact me if you have any questions.
I wanted to post pictures of the process (fairly easy, but still a couple of hours), but the photos didn't turn out well...
Contact me if you have any questions.
Thread Starter
|
Junior Member
Joined: Oct 2012
Posts: 11
Likes: 1
From: Minnesota
Ok, here you go...
FOR THE STRIP:
1.- This is the strip I used: https://www.superbrightleds.com/more...-x3/1465/3186/
When you buy one, make sure you check the lumens and power consumption, since they are not all the same, and depending on wattage you might or might not need to use a resistor (I did need one).
2.- Cut the strip into 6-LED segments (on the strip itself it's indicated where you can or cannot cut)
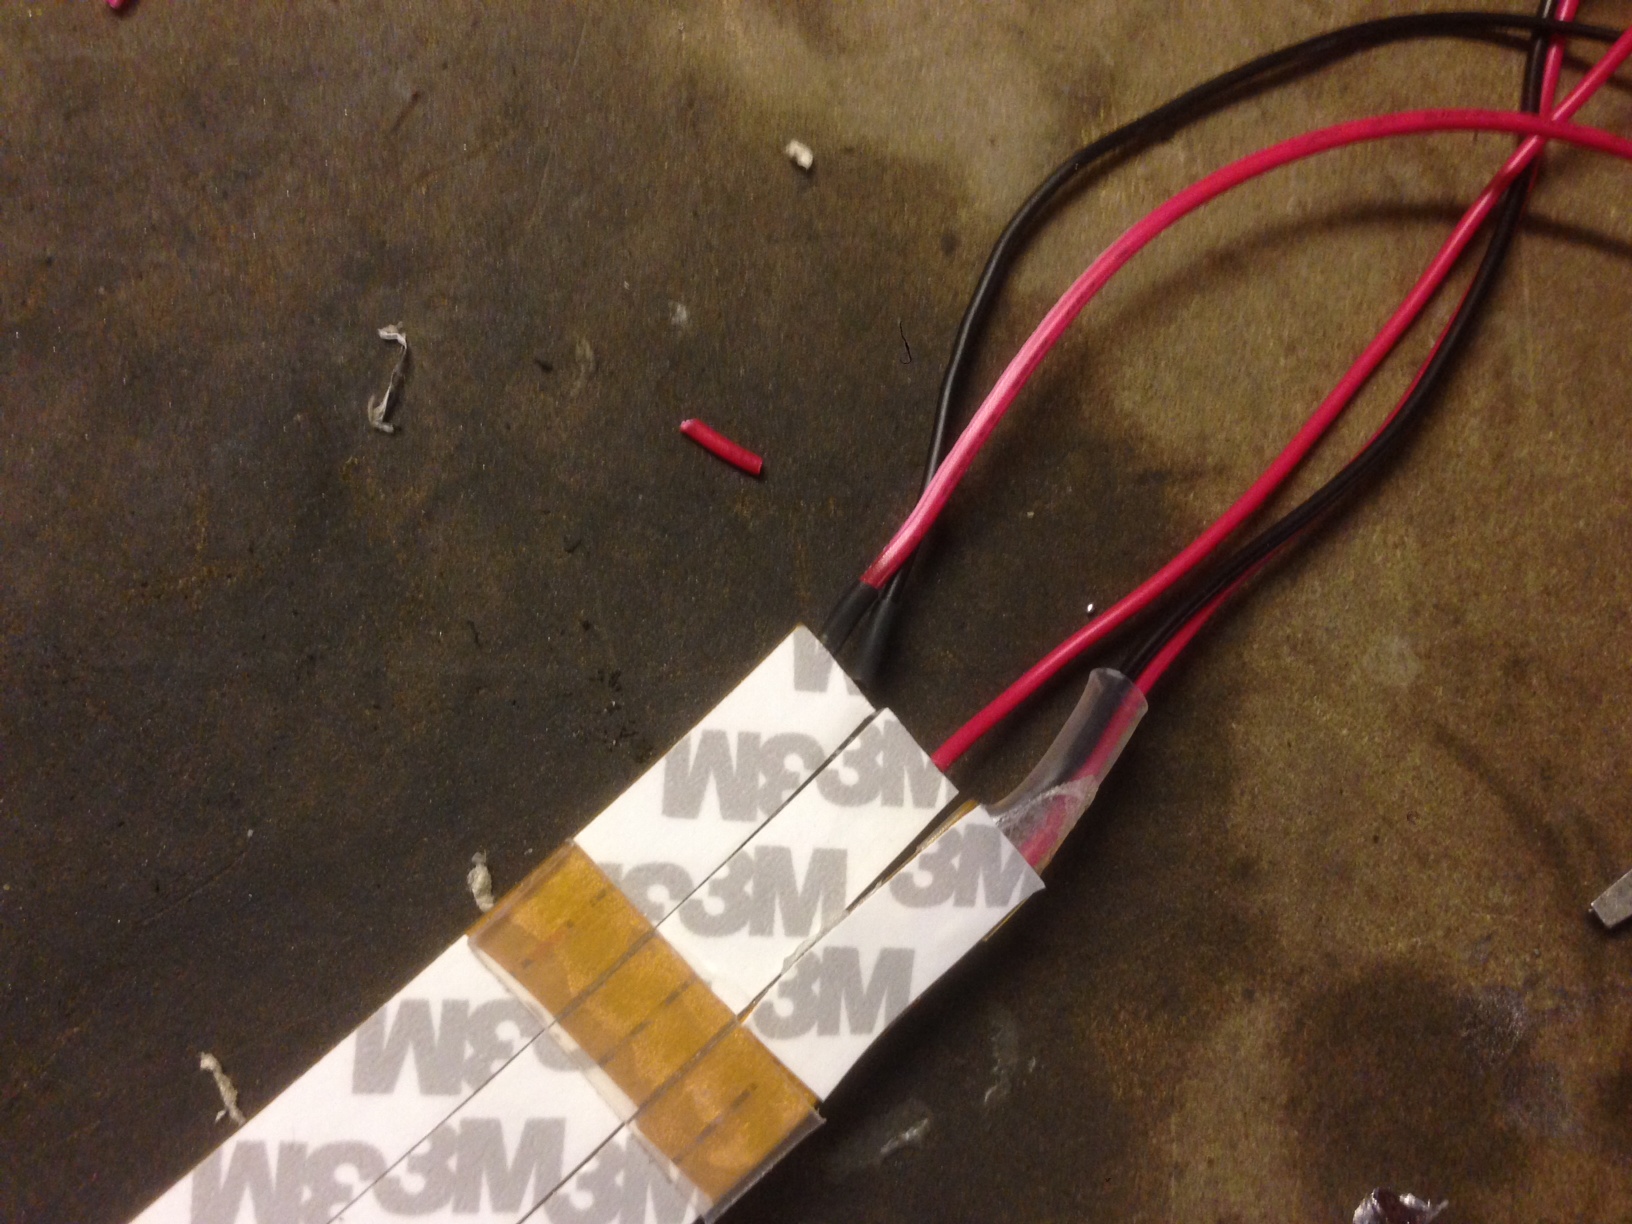
3.- Solder + and - cables to each segment

4.- The strips have an adhesive backing, so I used a little piece of plastic to make sure they all hold together
TO INSTALL IT
1.- Remove the rear light unit (very easy!)
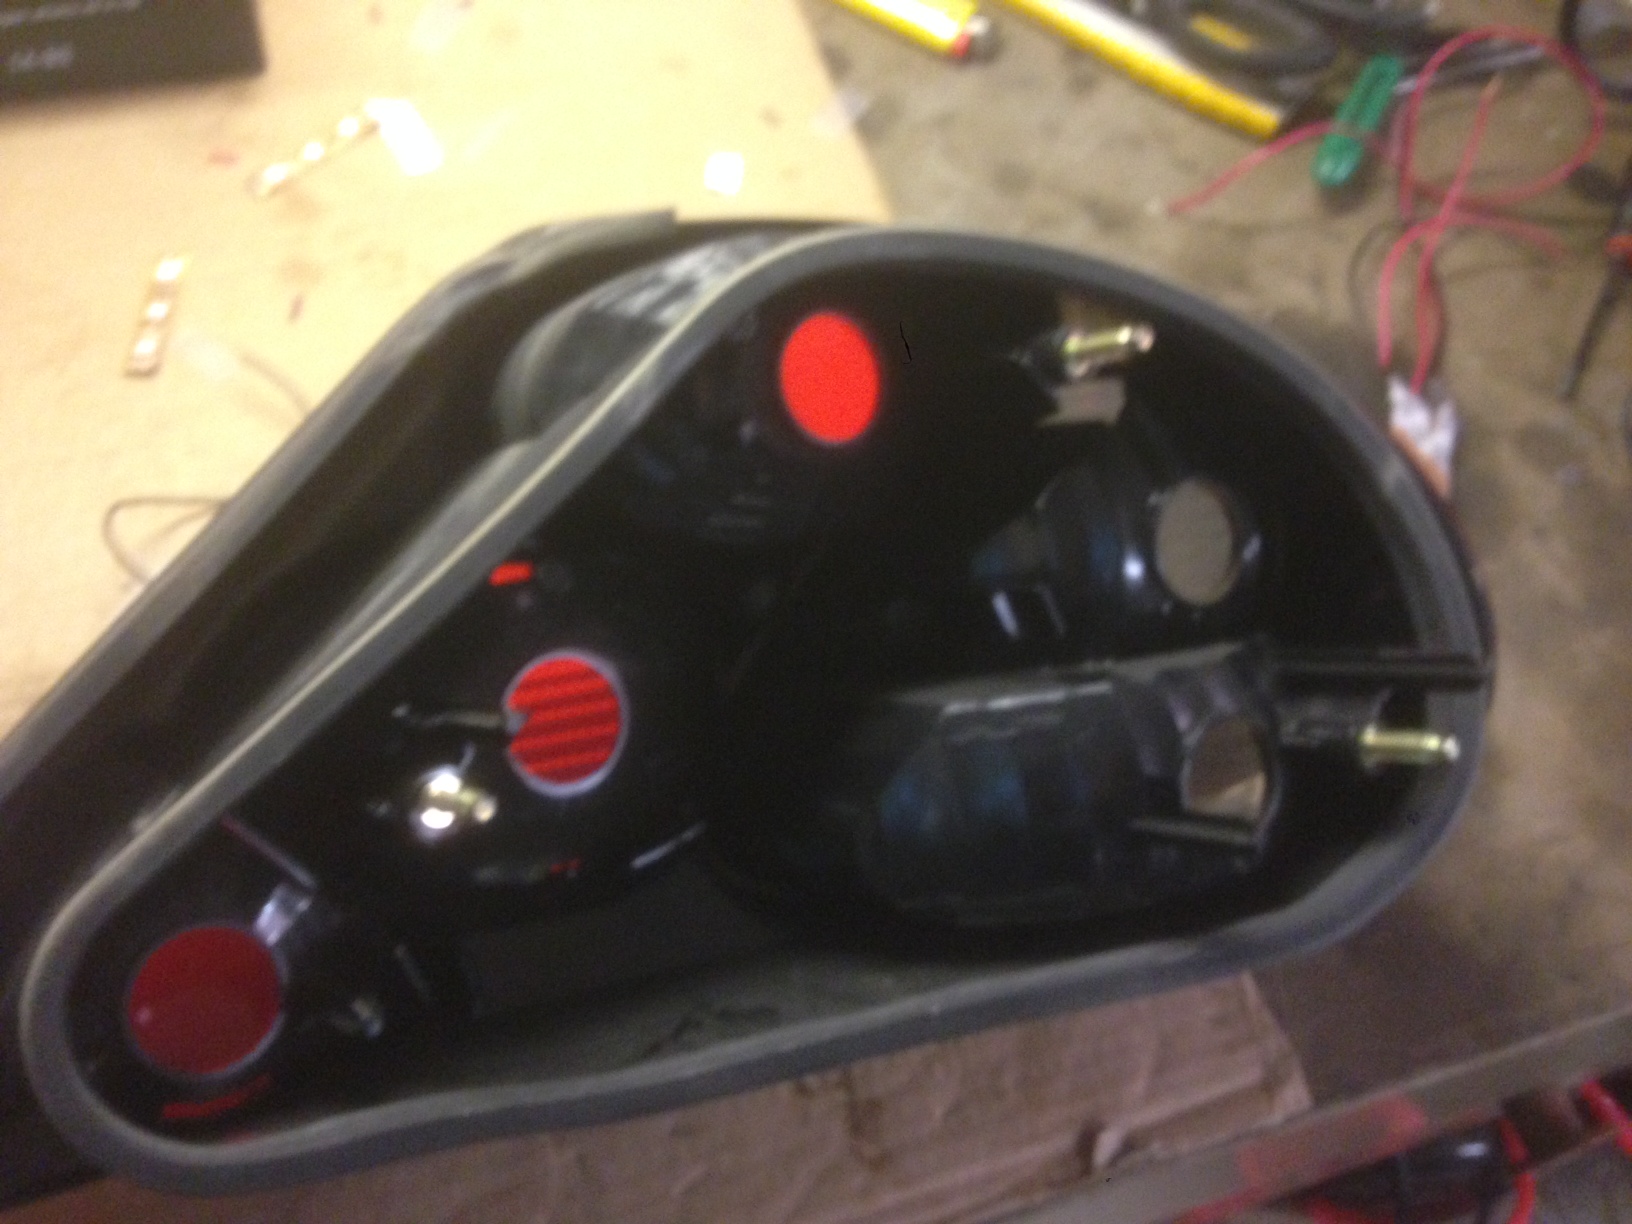
2.- Cut open a section to be able to fit the strip (tricky... but not critical)

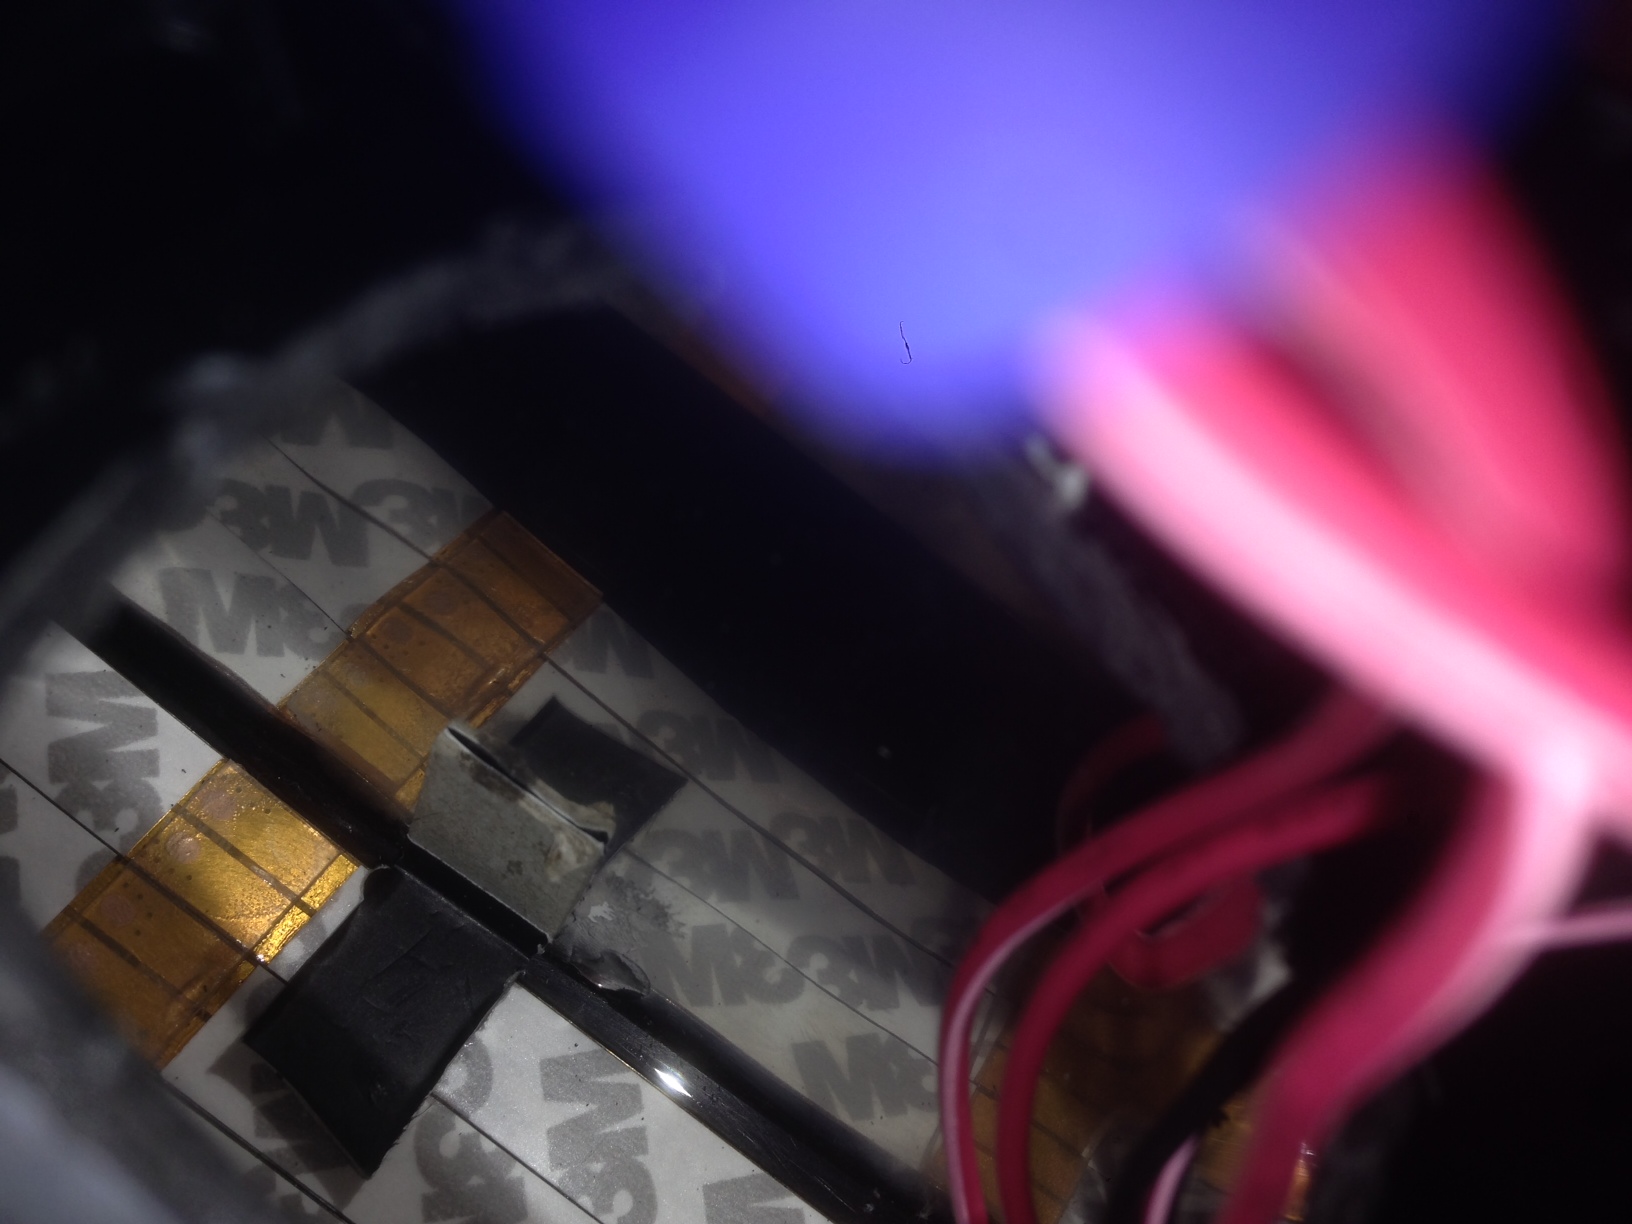
3.- Insert the strip. I had to make a little L-shaped bracket to make sure the strip stays in place
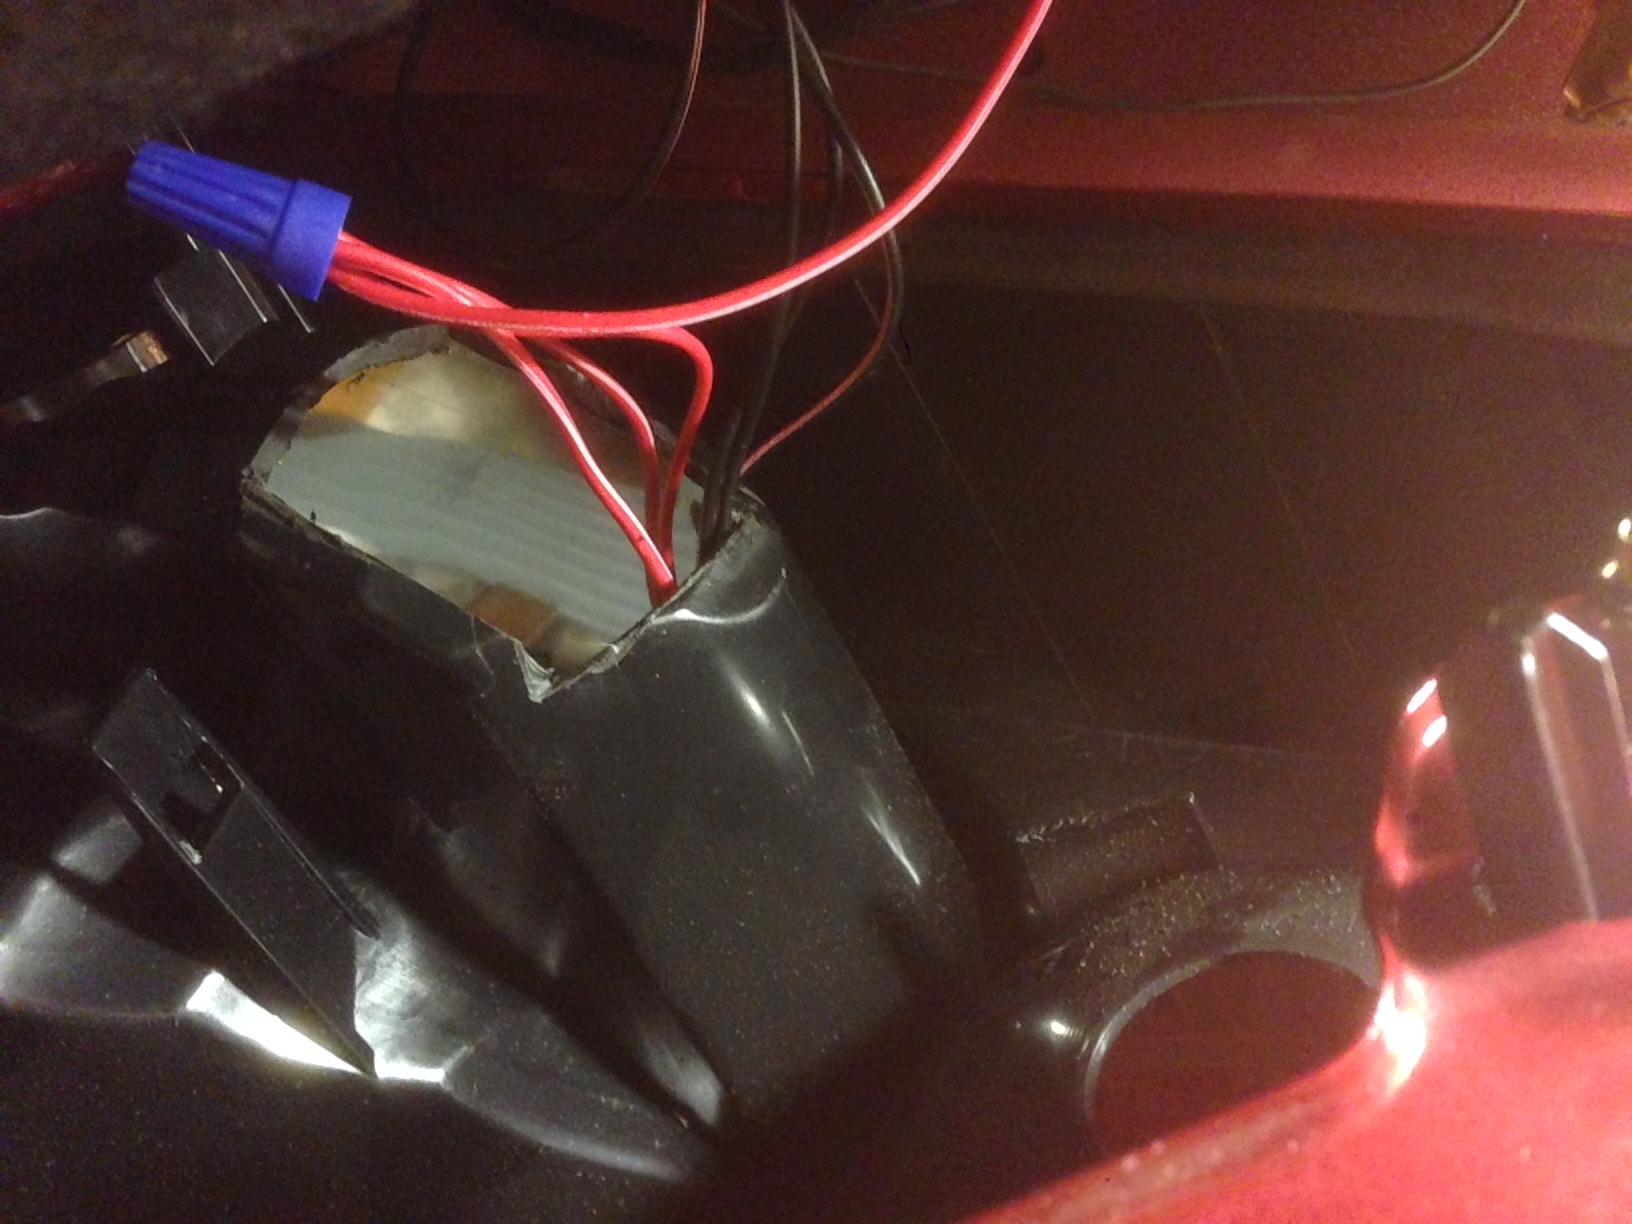
4.- Wire the three positives to the car's positive, the three negatives to the car's negative. Make sure you insert the resistor in the right place
5.- Voila! Now you have the strip in the right place, with the right size and ready to shine!
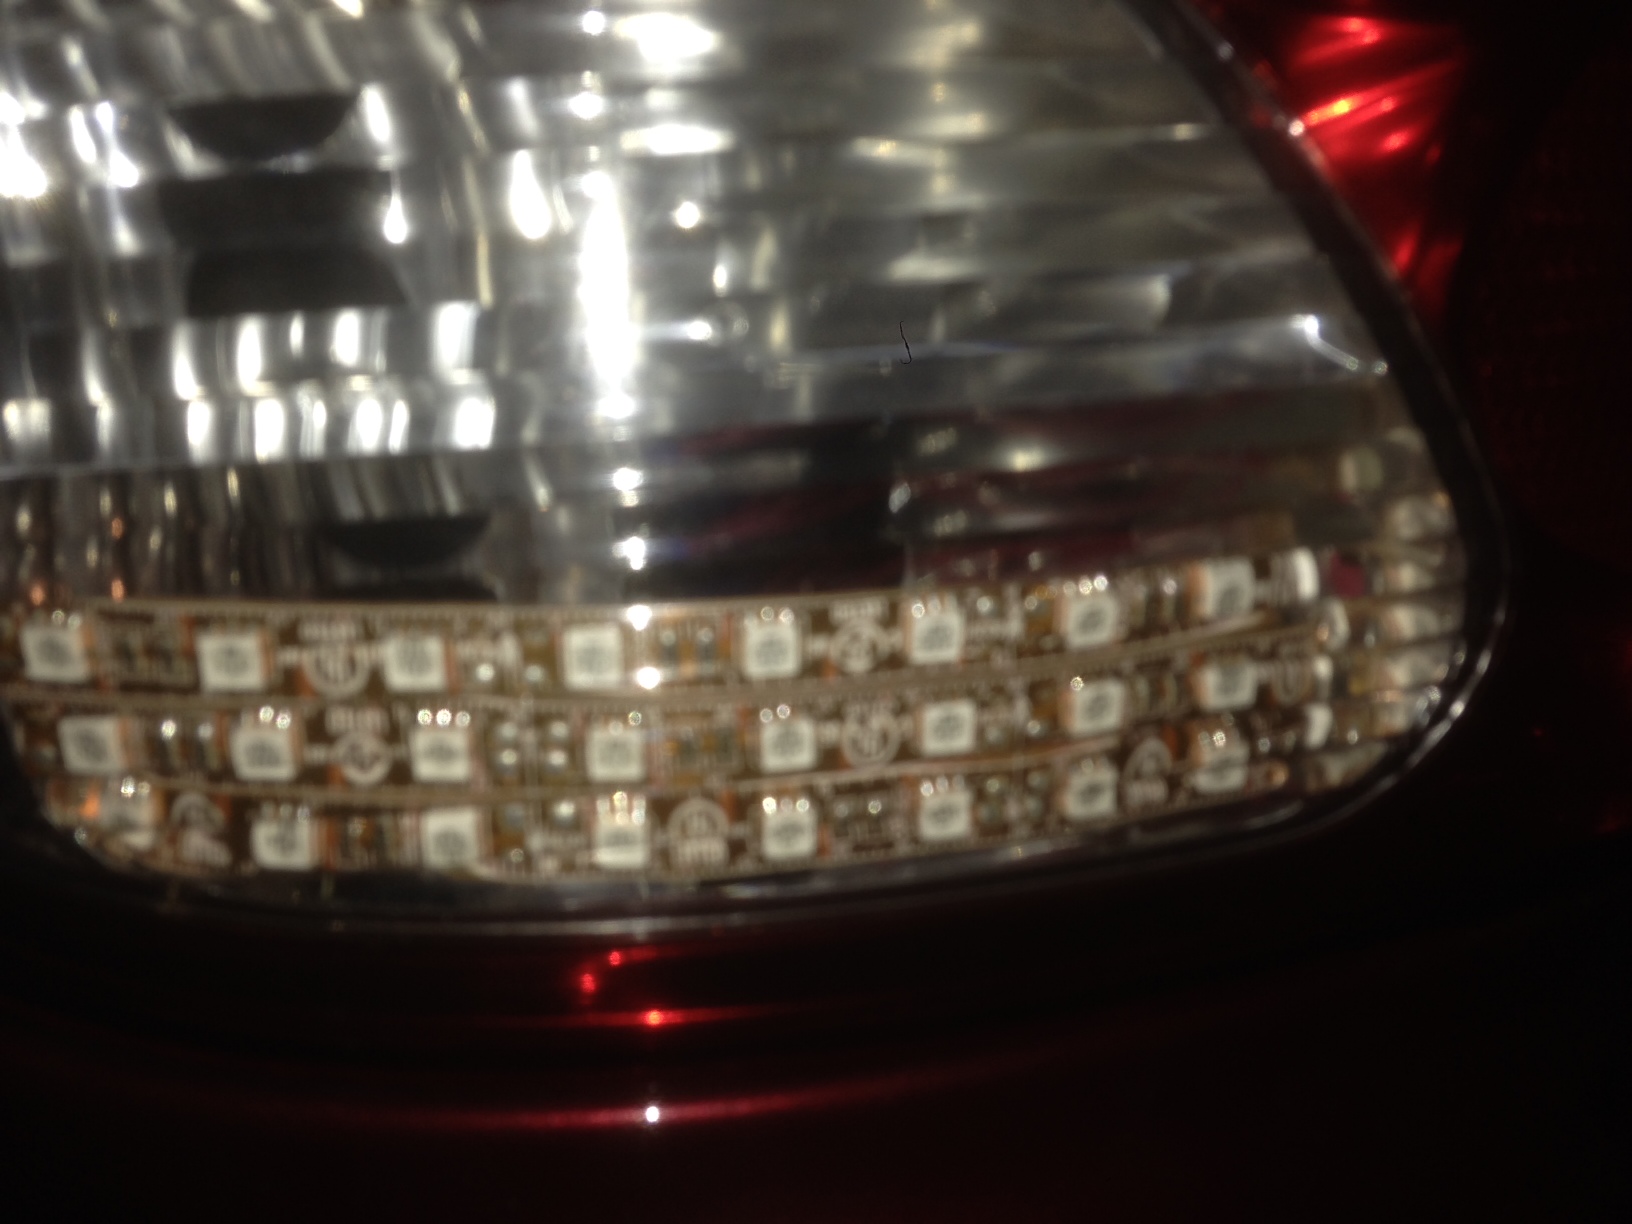
Questions? Let me know...
FOR THE STRIP:
1.- This is the strip I used: https://www.superbrightleds.com/more...-x3/1465/3186/
When you buy one, make sure you check the lumens and power consumption, since they are not all the same, and depending on wattage you might or might not need to use a resistor (I did need one).
2.- Cut the strip into 6-LED segments (on the strip itself it's indicated where you can or cannot cut)
3.- Solder + and - cables to each segment
4.- The strips have an adhesive backing, so I used a little piece of plastic to make sure they all hold together
TO INSTALL IT
1.- Remove the rear light unit (very easy!)
2.- Cut open a section to be able to fit the strip (tricky... but not critical)
3.- Insert the strip. I had to make a little L-shaped bracket to make sure the strip stays in place
4.- Wire the three positives to the car's positive, the three negatives to the car's negative. Make sure you insert the resistor in the right place
5.- Voila! Now you have the strip in the right place, with the right size and ready to shine!
Questions? Let me know...
Last edited by caseoane; Oct 29, 2013 at 11:11 AM.
Thread Starter
|
Junior Member
Joined: Oct 2012
Posts: 11
Likes: 1
From: Minnesota
Good luck! Let me know if I can help. My next project will be to turn the tail light/brake light into LED strips, too...

Thread
Thread Starter
Forum
Replies
Last Post
vinny jones
New Member Area - Intro a MUST
9
Oct 5, 2015 07:20 AM
Currently Active Users Viewing This Thread: 1 (0 members and 1 guests)