

Double din install how to


Thread Starter
|
Junior Member
Joined: Jan 2015
Posts: 22
Likes: 10
From: Durham
Thought I would do a quick how to for fitting aftermarket double din stereo.
TOOLS NEEDED
T25 SCREWDRIVER
T15 SCREWDRIVER
T27 SCEWDRIVER
8MM RATCHET
PHILIPS SCREW DRIVER
FLAT BLADE/BUTTER KNIFE
6M SPEAKER WIRE
MALE/FEMALE SPADE CONNECTORS
SCOTCHLOCK BLOCKS
ELECTRICAL TAPE
1. Firstly remove your gear surround, this simply pulls up, start from the front edge, open the ashtray and pull the edge of the gear surround, the rear will just pull up.
2. Next using a Philips head screw driver remove the two screws which hold the ashtray in place.
3. Remove the ashtray, there will be two wires which connect to the cigar lighter, remove these.
4. after removing the ashtray there is a little black panel, this can just be removed by gripping it and pull
5. this reveals two 8mm bolts, these also need to be removed.
6. remove the little panel above your heater controls, I used a butter knife to pop it off, this then reveals two t25 screws, remove these and the unit can then be slid forward.
7. remove all the connections, on mine with manual climate there was a white connector and a black connector, to remove these simply push down behind the plastic slide and then slide the action towards the passenger side, there are also two connectors on the hazard switch panel, one green and one grey, these simply remove by pushing in the little tab.
8. once all these are removed you need to remove the stereo harness, and another clip which I do not know the use of, I think it may be the original steering wheel control harness.
9. once all cables are removed you can remove the stereo complete with the climate controls.
10. now you need to remove the OEM stereo, there are two screws holding it in place into the cage, remove these and it can be totally removed.
I have attached a link to a video on youtube for Removal.
Now for the install of the new stereo.
Parts needed
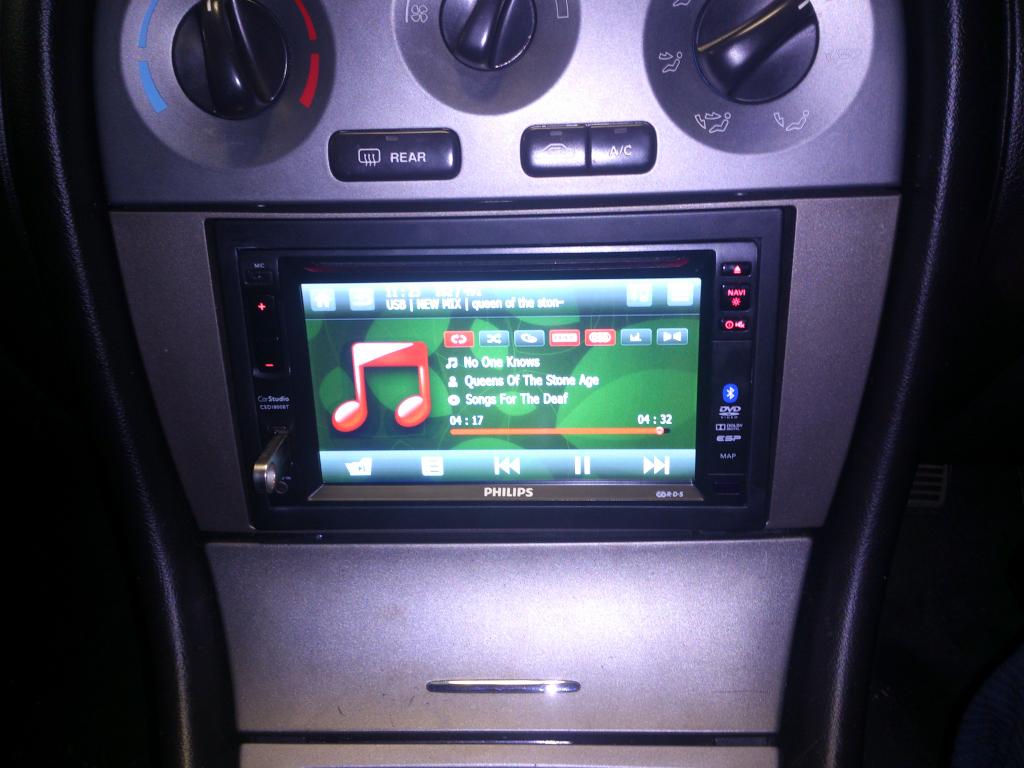
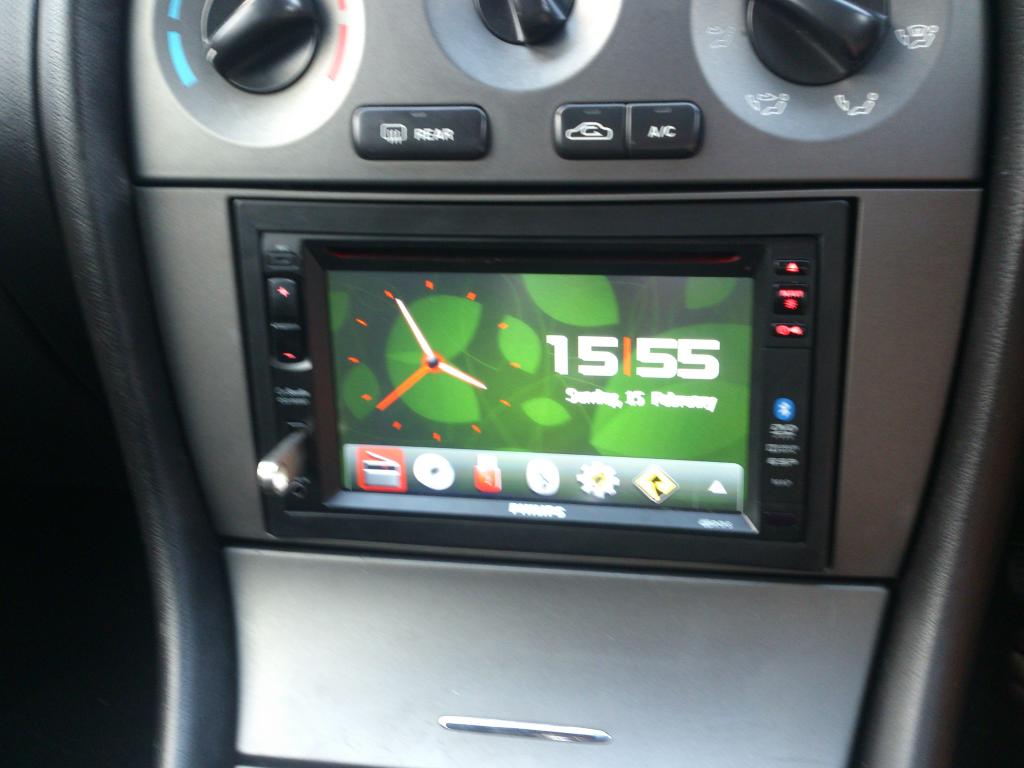
Aftermarket stereo, I chose a Philips ced1800bt �245 delivered from Ebay PHILIPS CED1800BT Double DIN Car DVD Stereo Headunit Bluetooth + GPS Sat Nav Kit | eBay
A facia plate for fitting, I chose Bass Junkies fascia plate, ISO lead and patch lead �49.99 DFP-14-01 Jaguar X-Type 02 Car Stereo Double Din Fascia ISO Steering Stalk Kit | eBay
You may need an additional cage, I did with my stereo, this one fits fine and gives a good secure fit, Universal stereo cage and fitting kit �12 Universal Double Din Car CD Fascia Fitting Kit CT23UN02 | eBay
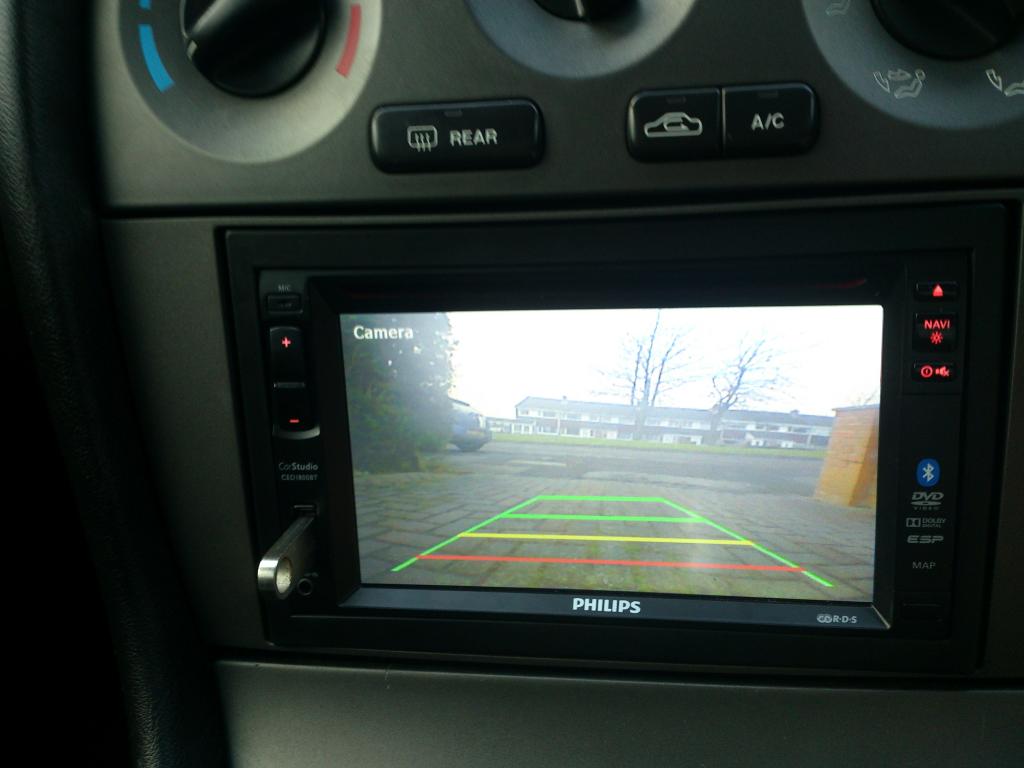
If You're fitting a reverse camera, choose which ever you fancy, I used this one �9.99 delivered Waterproof 170� PAL/NTSC Color CMOS Car Rear View Reverse Parking Camera E305 | eBay
To fit the stereo
1. Firstly you will need to adapt the recess for the new stereo, The area behind the stereo needs a little bit of a snip, there is a knuckle from the A/C duct which you cut off, this allows the unit to sit flush I only removed about 1/2 an inch from the knuckle. NOTE: my stereo measured 160mm depth, if yours is any deeper it may not sit flush, mine does with the knuckle trimmed.
2. Fit the cage and stereo into the original cage where you have removed the OEM stereo.
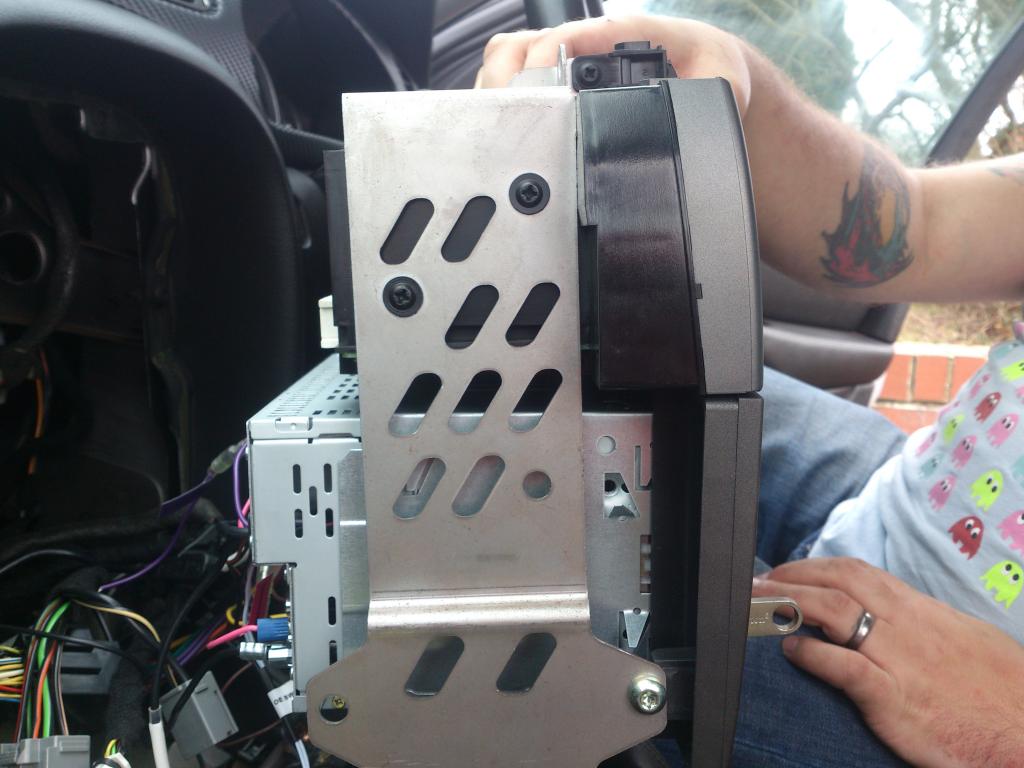
you can see in the image, the fasia plate secure by using the original screws from the OEM stereo, it has two little fixings at the top which go into two recessed areas below the heater controls to secure the top portion, Make sure when you fit the cage into the fascia plate that you get your stereo flush and secure with the little tabs on the cage.

3. once you have the stereo seated in the fascia flush and are happy with the fit you can then start attaching the ISO cable, my ISO cable came with the steering wheel controls, the one I was supplied with was a universal one, it had a orange loop and purple loop which you can configure for other brand stereos, my Philips only needed the green loop and the brown cable from the ISO connecting to the brown cable from the back of the stereo, Some brands may just use a Jack to connect if so the cable also had this, just plug it in.
4. attach the fakra aerial adapter to the Jaguar aerial and the ISO lead to the Jaguar ISO.
5. Connect your GPS antenna if you have one, I fitted mine and put the GPS antenna on the metal tube at the rear of the dash, if you are not fitting a camera , simply replace the unit into the recess and replace all screws/bolts and replace trim.
6. If you are fitting a reverse camera read on, you can see on the image below, I have connected all my wires, the Philips stereo has a AV lead (yellow) which goes into the AV slot marked CAM IN then I also have a purple lead, this is the trigger wire to tell the head unit to change display over to the reverse camera when reverse selected. To fit this wire I used speaker wire and crimped it onto the purple wire, and ran it and the AV lead into the boot area, the camera has a positive and negative wire, the positive from the camera and the new wire from the head unit (purple wire) both go to the GREEN/BLACK positive reverse wire, I spliced them in with a scotchlock, the negative of the camera went to ground.
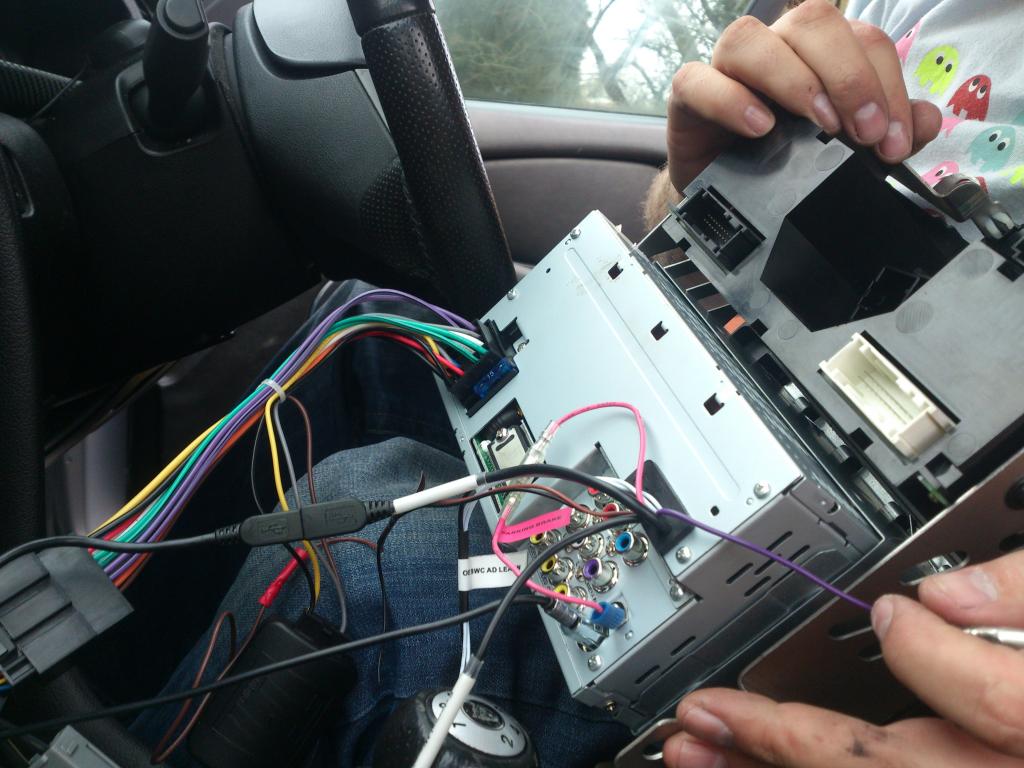
In the image above the purple wire I am holding is the trigger wire, connect a wire long enough to go into the boot and connect to GREEN/BLACK positive wire for reverse.
7. To run the wires I had to remove the Glove box, this is simply two t15 screws and two T25 screws at the rear of the glove box, once the screws are removed just give a sharp hard tug on the glove box and it should tilt forward and drop into the passenger foot well area.
8. To run the wire I just ran it down the passenger side and tidied it by pushing it up into the trim along the carpet area, to get the wire into the boot I used a metal coat hanger and taped the AV lead and trigger wire to it and pushed it between the rear seat and trim and fed it into the boot. Just to confirm, once you have your wires into the boot, connect your trigger wire, (the wire you ran from the purple lead on the stereo) and the positive wire from the camera to the GREEN/BLACK wire positive reverse wire.
Connect your negative wire from the camera to a good ground.
9. I fitted my reverse camera in the lower valance inbetween two of my parking sensors NOTE: MAKE SURE YOU CHECK THE CAMERA FUNCTION AND THAT IT IS THE RIGHT WAY UP BEFORE FULLY PUSHING THE CAMERA INTO POSITION
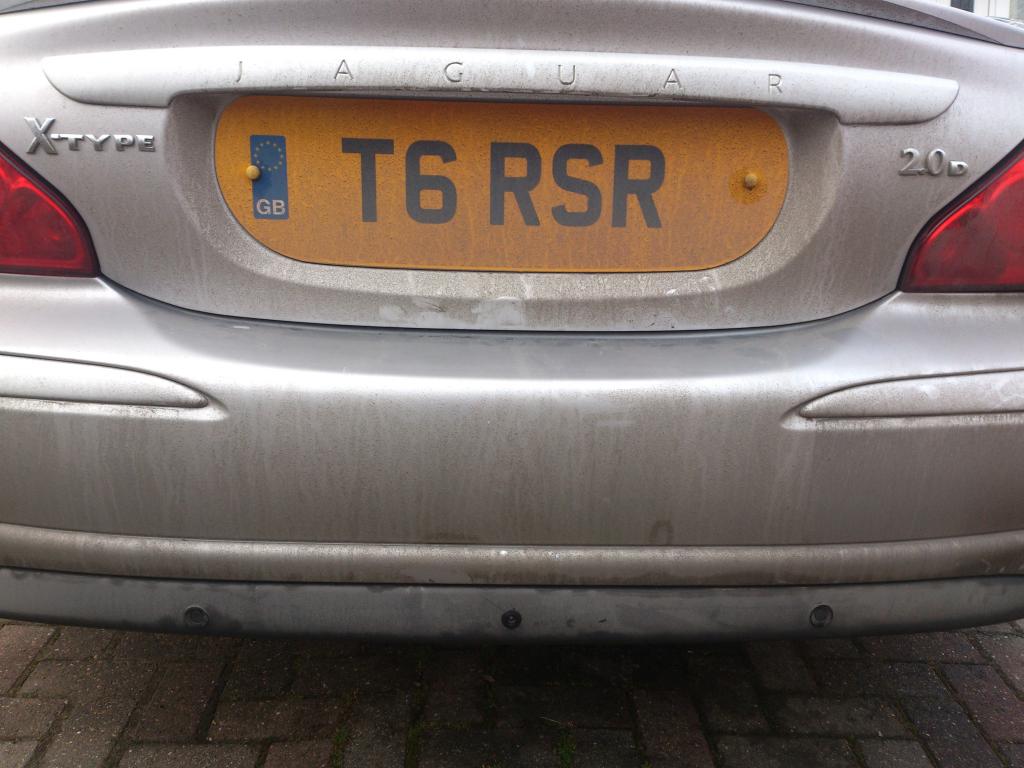
I know the car needs a wash
NOTE: BEFORE YOU SECURE THE CAMERA INTO THE VALANCE MAKE SURE YOU KNOW WHAT WAY IS UP/DOWN SO THE CAMERA DISPLAYS THE IMAGE CORRECTLY.
That's it, stand back and admire your work and have a cuppa.
NOTE : IF YOU WANT YOUR DVD PLAYER TO WORK WITHOUT THE HANDBRAKE ON THEN YOU NEED TO EARTH PARKING BRAKE/HANDBRAKE WIRE, ON THE 4TH PICTURE DOWN YOU CAN SEE A PINK WIRE, THIS IS EARTHED TO THE STEREO, THIS ENABLES YOU TO PLAY MOVIES WHILST ON THE MOVE, I WOULD NOT RECOMMEND THIS BUT I HAVE IT AS MY CHILDREN WATCH A MOVIE WHEN THEY ARE IN THE CAR, NOT ME AS IT IS DANGEROUS AND ILLEGAL
Thanks for reading.
TOOLS NEEDED
T25 SCREWDRIVER
T15 SCREWDRIVER
T27 SCEWDRIVER
8MM RATCHET
PHILIPS SCREW DRIVER
FLAT BLADE/BUTTER KNIFE
6M SPEAKER WIRE
MALE/FEMALE SPADE CONNECTORS
SCOTCHLOCK BLOCKS
ELECTRICAL TAPE
1. Firstly remove your gear surround, this simply pulls up, start from the front edge, open the ashtray and pull the edge of the gear surround, the rear will just pull up.
2. Next using a Philips head screw driver remove the two screws which hold the ashtray in place.
3. Remove the ashtray, there will be two wires which connect to the cigar lighter, remove these.
4. after removing the ashtray there is a little black panel, this can just be removed by gripping it and pull
5. this reveals two 8mm bolts, these also need to be removed.
6. remove the little panel above your heater controls, I used a butter knife to pop it off, this then reveals two t25 screws, remove these and the unit can then be slid forward.
7. remove all the connections, on mine with manual climate there was a white connector and a black connector, to remove these simply push down behind the plastic slide and then slide the action towards the passenger side, there are also two connectors on the hazard switch panel, one green and one grey, these simply remove by pushing in the little tab.
8. once all these are removed you need to remove the stereo harness, and another clip which I do not know the use of, I think it may be the original steering wheel control harness.
9. once all cables are removed you can remove the stereo complete with the climate controls.
10. now you need to remove the OEM stereo, there are two screws holding it in place into the cage, remove these and it can be totally removed.
I have attached a link to a video on youtube for Removal.
Now for the install of the new stereo.
Parts needed
Aftermarket stereo, I chose a Philips ced1800bt �245 delivered from Ebay PHILIPS CED1800BT Double DIN Car DVD Stereo Headunit Bluetooth + GPS Sat Nav Kit | eBay
A facia plate for fitting, I chose Bass Junkies fascia plate, ISO lead and patch lead �49.99 DFP-14-01 Jaguar X-Type 02 Car Stereo Double Din Fascia ISO Steering Stalk Kit | eBay
You may need an additional cage, I did with my stereo, this one fits fine and gives a good secure fit, Universal stereo cage and fitting kit �12 Universal Double Din Car CD Fascia Fitting Kit CT23UN02 | eBay
If You're fitting a reverse camera, choose which ever you fancy, I used this one �9.99 delivered Waterproof 170� PAL/NTSC Color CMOS Car Rear View Reverse Parking Camera E305 | eBay
To fit the stereo
1. Firstly you will need to adapt the recess for the new stereo, The area behind the stereo needs a little bit of a snip, there is a knuckle from the A/C duct which you cut off, this allows the unit to sit flush I only removed about 1/2 an inch from the knuckle. NOTE: my stereo measured 160mm depth, if yours is any deeper it may not sit flush, mine does with the knuckle trimmed.
2. Fit the cage and stereo into the original cage where you have removed the OEM stereo.

you can see in the image, the fasia plate secure by using the original screws from the OEM stereo, it has two little fixings at the top which go into two recessed areas below the heater controls to secure the top portion, Make sure when you fit the cage into the fascia plate that you get your stereo flush and secure with the little tabs on the cage.

3. once you have the stereo seated in the fascia flush and are happy with the fit you can then start attaching the ISO cable, my ISO cable came with the steering wheel controls, the one I was supplied with was a universal one, it had a orange loop and purple loop which you can configure for other brand stereos, my Philips only needed the green loop and the brown cable from the ISO connecting to the brown cable from the back of the stereo, Some brands may just use a Jack to connect if so the cable also had this, just plug it in.
4. attach the fakra aerial adapter to the Jaguar aerial and the ISO lead to the Jaguar ISO.
5. Connect your GPS antenna if you have one, I fitted mine and put the GPS antenna on the metal tube at the rear of the dash, if you are not fitting a camera , simply replace the unit into the recess and replace all screws/bolts and replace trim.

6. If you are fitting a reverse camera read on, you can see on the image below, I have connected all my wires, the Philips stereo has a AV lead (yellow) which goes into the AV slot marked CAM IN then I also have a purple lead, this is the trigger wire to tell the head unit to change display over to the reverse camera when reverse selected. To fit this wire I used speaker wire and crimped it onto the purple wire, and ran it and the AV lead into the boot area, the camera has a positive and negative wire, the positive from the camera and the new wire from the head unit (purple wire) both go to the GREEN/BLACK positive reverse wire, I spliced them in with a scotchlock, the negative of the camera went to ground.

In the image above the purple wire I am holding is the trigger wire, connect a wire long enough to go into the boot and connect to GREEN/BLACK positive wire for reverse.
7. To run the wires I had to remove the Glove box, this is simply two t15 screws and two T25 screws at the rear of the glove box, once the screws are removed just give a sharp hard tug on the glove box and it should tilt forward and drop into the passenger foot well area.
8. To run the wire I just ran it down the passenger side and tidied it by pushing it up into the trim along the carpet area, to get the wire into the boot I used a metal coat hanger and taped the AV lead and trigger wire to it and pushed it between the rear seat and trim and fed it into the boot. Just to confirm, once you have your wires into the boot, connect your trigger wire, (the wire you ran from the purple lead on the stereo) and the positive wire from the camera to the GREEN/BLACK wire positive reverse wire.
Connect your negative wire from the camera to a good ground.
9. I fitted my reverse camera in the lower valance inbetween two of my parking sensors NOTE: MAKE SURE YOU CHECK THE CAMERA FUNCTION AND THAT IT IS THE RIGHT WAY UP BEFORE FULLY PUSHING THE CAMERA INTO POSITION

I know the car needs a wash
NOTE: BEFORE YOU SECURE THE CAMERA INTO THE VALANCE MAKE SURE YOU KNOW WHAT WAY IS UP/DOWN SO THE CAMERA DISPLAYS THE IMAGE CORRECTLY.

That's it, stand back and admire your work and have a cuppa.


NOTE : IF YOU WANT YOUR DVD PLAYER TO WORK WITHOUT THE HANDBRAKE ON THEN YOU NEED TO EARTH PARKING BRAKE/HANDBRAKE WIRE, ON THE 4TH PICTURE DOWN YOU CAN SEE A PINK WIRE, THIS IS EARTHED TO THE STEREO, THIS ENABLES YOU TO PLAY MOVIES WHILST ON THE MOVE, I WOULD NOT RECOMMEND THIS BUT I HAVE IT AS MY CHILDREN WATCH A MOVIE WHEN THEY ARE IN THE CAR, NOT ME AS IT IS DANGEROUS AND ILLEGAL
Thanks for reading.


Thread Starter
|
Junior Member
Joined: Jan 2015
Posts: 22
Likes: 10
From: Durham
No the camera was easy, where I have installed the camera you just feed the wire into the rear of the car, remove the cover over the boot lock catch, 4/5 screws plastic type, then you see a rubber bung, remove the rubber gromet/bung and you should be able to hook the wire from the camera with a metal coat hanger then feed the wire into the boot area, you can then connect the live wire (red) from the camera to the green/black (live) wire on the reverse lights, and ground the black wire from the camera to the ground next to the rear light harness.
To feed the wire upto the headunit, i used the metal coat hanger to pass from the rear seats into the boot enabling me to then pull the cable through into the passenger cabin and run the cable along the carpet and stow under the plastic sill covers, then feed the rest behind the glove box and into the correct socket on the back of the stereo. Hope this helps.
To feed the wire upto the headunit, i used the metal coat hanger to pass from the rear seats into the boot enabling me to then pull the cable through into the passenger cabin and run the cable along the carpet and stow under the plastic sill covers, then feed the rest behind the glove box and into the correct socket on the back of the stereo. Hope this helps.
Member
Joined: Dec 2013
Posts: 56
Likes: 3
From: Porterville, Calif
Thanks for the write up. Very well done. I just finished installing my Kenwood but I'm not sure where to splice or attach the wire for the parking brake sensor. I'm not going to worry about people watching movies while I drive but I would like it to Watch while I'm parked. Any idea where the connection should be made? Thanks for your help.

Junior Member
Joined: May 2015
Posts: 1
Likes: 0
You said you shaved down the knuckle on the duct. What does this knuckle do and how deep did you shave it? I need about 3/4 inch and I REALLY do not want to buy another head unit.
Trending Topics
Thread Starter
|
Junior Member
Joined: Jan 2015
Posts: 22
Likes: 10
From: Durham
Hope this helps.
Junior Member
Joined: May 2014
Posts: 10
Likes: 1
From: Bucharest
Hi Paul, you said you took off about 1/2 inch from the A/C duct knuckle. You said your unit has 160 mm depth. Is this from the back to the front face of the front panel or from back to the front panel (as called "install size")? What is the knuckle made of? You used a knife? Thank you.
Thread Starter
|
Junior Member
Joined: Jan 2015
Posts: 22
Likes: 10
From: Durham
If you don't mind the head unit sticking out then no need to trim the knuckle I wanted mine to sit flush so I trimmed it to allow this.
Junior Member
Joined: May 2014
Posts: 10
Likes: 1
From: Bucharest
Thanks. One more question, regarding the steering wheel controls, the adapter you recommend works well according to yr experience with it. I see you don't have phone buttons on steering wheel. I do have, so do you know if this adapter will work fine? I see that Dynamic Sounds sell one type of adapter that specifies phone buttons, too (https://www.dynamicsounds.co.uk/jagu...tsjg002-2.html ). You know anything of it? Does the Phillips have also external microphone input, so I put the factory one in? Thank you. Traian
Junior Member
Joined: May 2014
Posts: 10
Likes: 1
From: Bucharest
Hi Paul,
Regarding the steering wheel controls you write:
"3. once you have the stereo seated in the fascia flush and are happy with the fit you can then start attaching the ISO cable, my ISO cable came with the steering wheel controls, the one I was supplied with was a universal one, it had a orange loop and purple loop which you can configure for other brand stereos, my Philips only needed the green loop and the brown cable from the ISO connecting to the brown cable from the back of the stereo, Some brands may just use a Jack to connect if so the cable also had this, just plug it in."
I purchased different adapter (https://www.dynamicsounds.co.uk/jagu...tsjg002-2.html ), I have phone controls, too. You say that for the Philips you only need the green loop, what you mean by that? My adapter comes with a patch cable with wires SW1 and SW2 if I rember. Could you advice? Thank you very much.

Thread
Thread Starter
Forum
Replies
Last Post
aholbro1
XJ XJ6 / XJR6 ( X300 )
18
Dec 29, 2024 06:46 PM
Currently Active Users Viewing This Thread: 1 (0 members and 1 guests)