

How to refurb your own alloys cheaply...


Thread Starter
|
Veteran Member
Joined: Oct 2006
Posts: 1,921
Likes: 65
From: UK
Last Oct I bought a cheap 2nd hand damaged alloy from the Jag spares day at Stonleigh in order to refurb it and the other 4 on the car so that I would have a full set of 5 when finished.This is how I did them for a total cost of around £35.
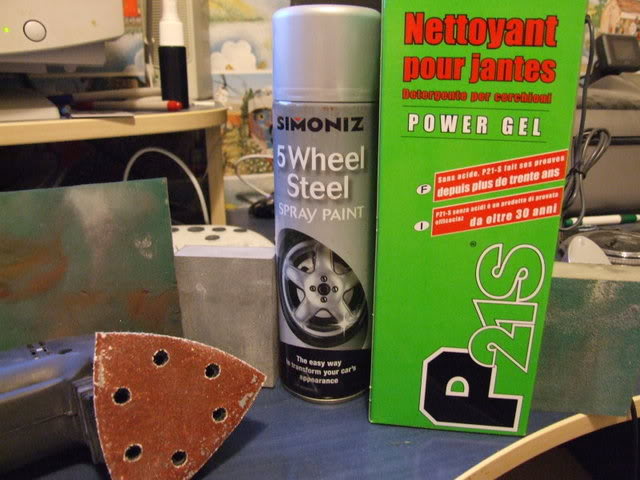
The materials I used:-
P21S Alloy wheel cleaner,
Autoglym Alloy Wheel seal,
The cheapest sander B&Q had
Some alloy wheel spray paint
A Medium/Coarse sanding block (Halfords)
A Medium/Fine sanding block (Halfords)
Fine Sanding sponge (Halfords)
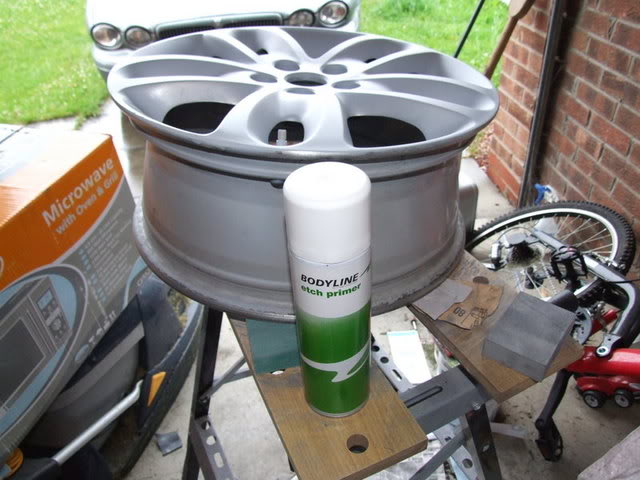
Bodyline etch Primer
An aerosol can of Lacquer that I had lying around.
First step..clean the wheels.I sprayed the wheel with the P21s and left it for 5 mins while I had a cuppa:-
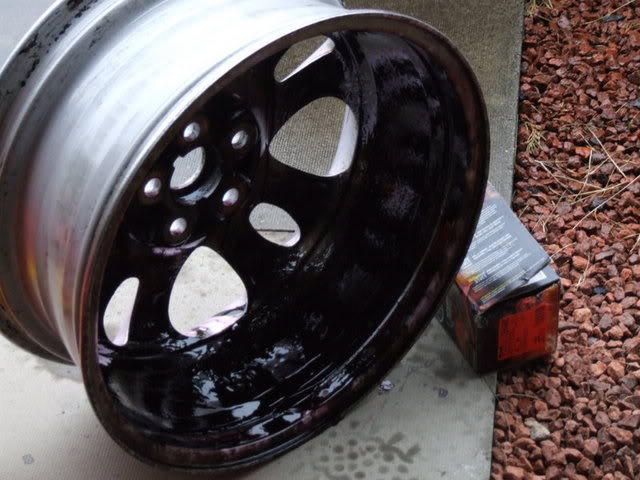
Then rinsed and dried it when I came back.
Next to the sanding:-

Sand the wheel with the electric sander with a rough grade sandpaper (came with various) to get rid of the worst areas.
Next fill the damaged areas with filler mixed according to the instructions on the box:-
After allowing the filler to harden sand down as before gradually using finer and finer sandpaper until the whole wheel is smooth.
For the harder to reach places I used the sanding blocks and sponges which bend around corners allowing a really nice smooth finish.
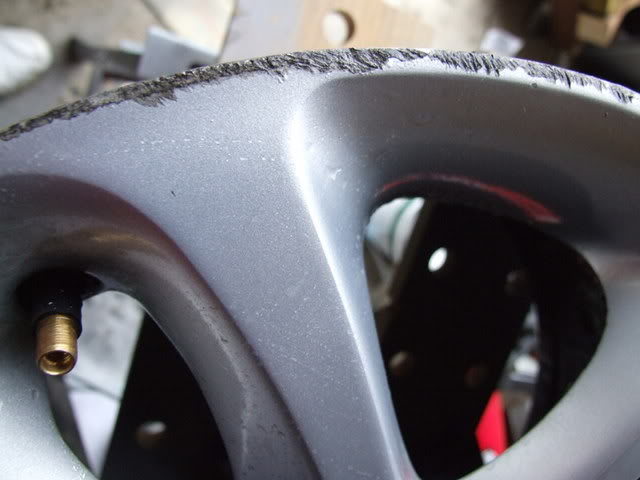
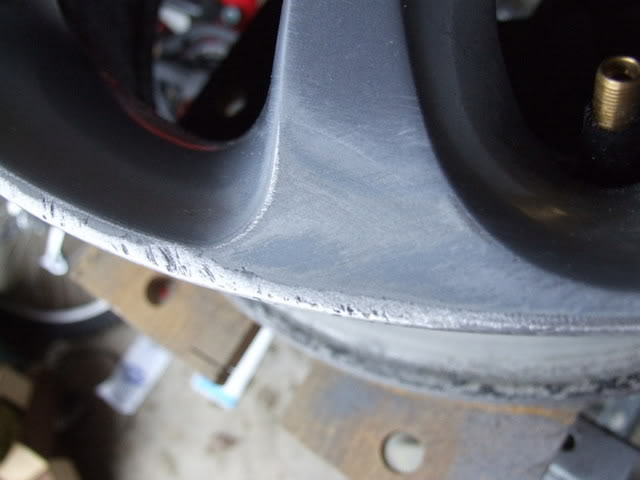
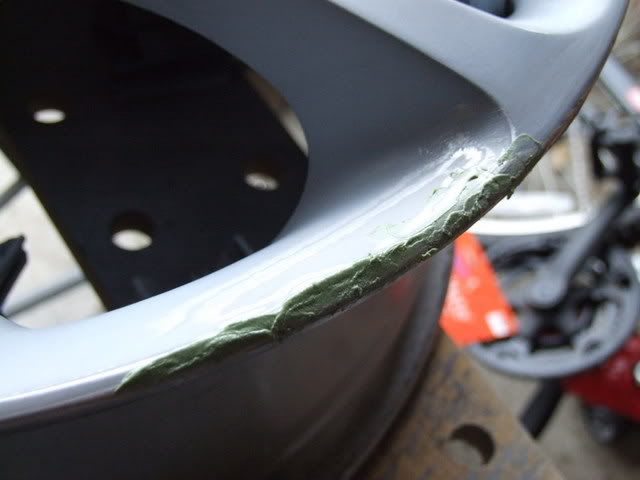
Next its time for the primer and its best to stand the wheel upright for this.Spray a coat of primer over the wheel and allow to set.
Get your fine sanding sponge and rub the primer smooth as possible
Spray another coat of etch primer and sand with a fine sandpaper (sanding sponge) to key it for the next stage:-
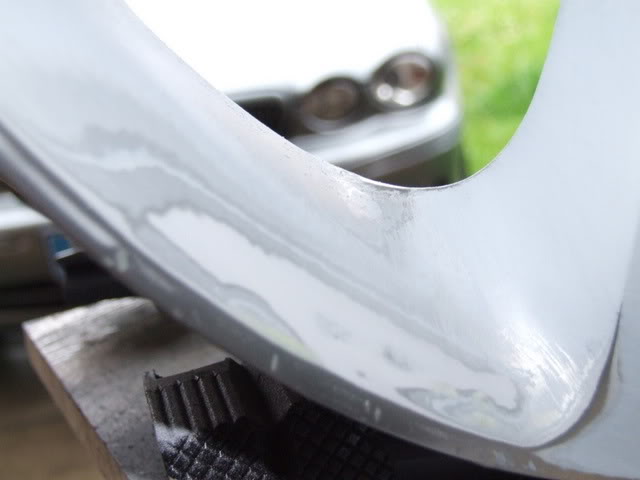
After drying the wheel is now ready for painting.
Stand the wheel upright and apply the 1st coat of paint as per the instructions on the can.Allow to dry.Then I smoothed again with fine grade sanding sponge and applied another coat and then smoothed and applied a 3rd coat (for extra protection?).
Allow to dry and cure for 24 hours.
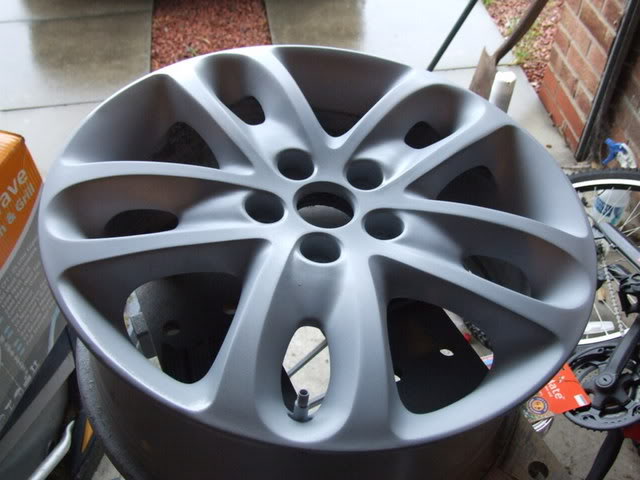
Next is the lacquer.I applied 2 coats of lacquer allowing each to dry.When dry thats it...all done.
Here are the results:-
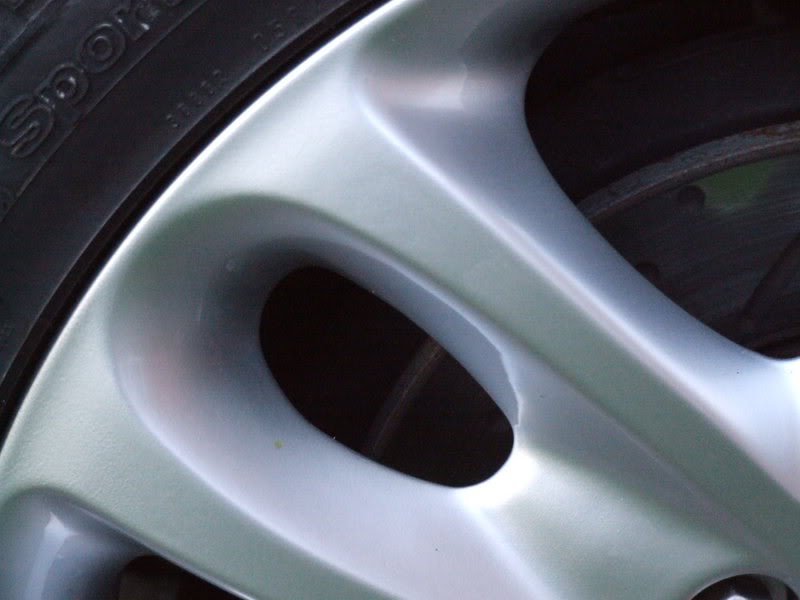
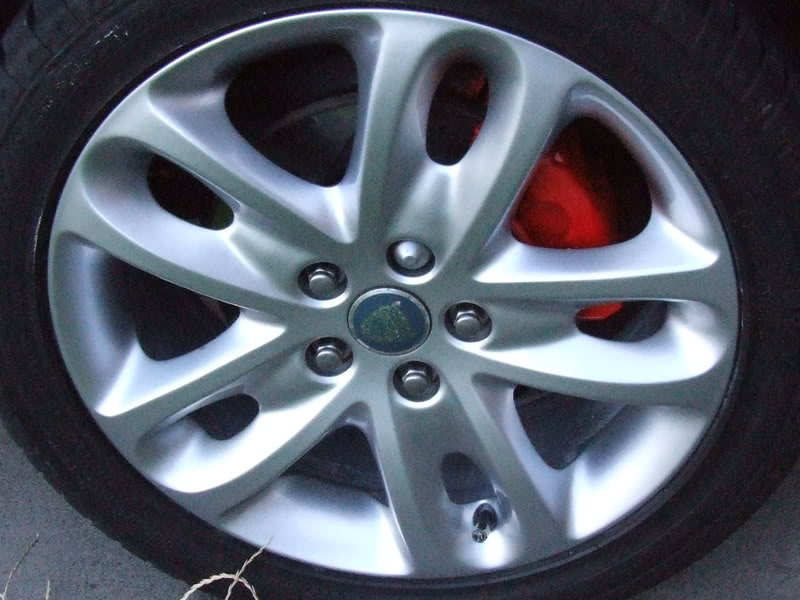
Last thing to do is spray on some alloy wheel seal to keep them looking good.
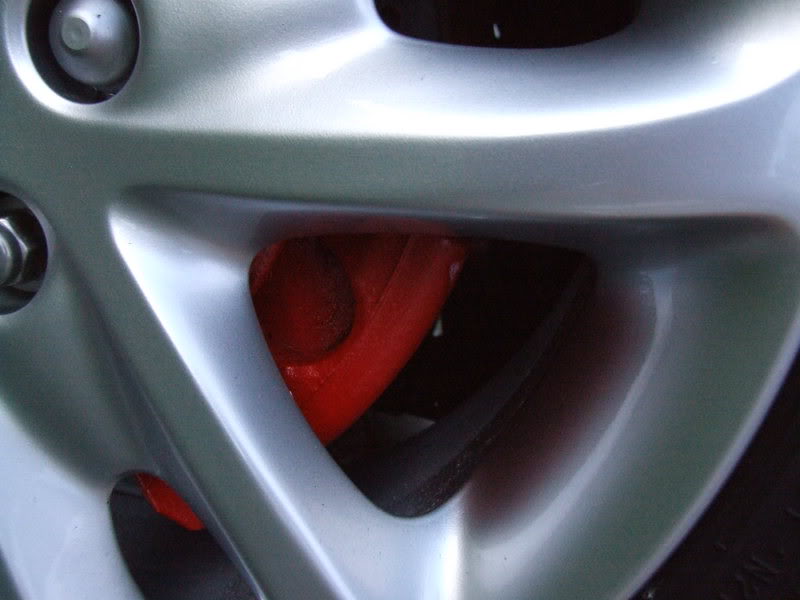
As you can see while the wheels were off I also coated the calipers with 2 coats of Red High Temp Paint (for Engines) and again a couple of coats of lacquer as it makes them a nice and shiny.
The materials I used:-
P21S Alloy wheel cleaner,
Autoglym Alloy Wheel seal,
The cheapest sander B&Q had
Some alloy wheel spray paint
A Medium/Coarse sanding block (Halfords)
A Medium/Fine sanding block (Halfords)
Fine Sanding sponge (Halfords)
Bodyline etch Primer
An aerosol can of Lacquer that I had lying around.
First step..clean the wheels.I sprayed the wheel with the P21s and left it for 5 mins while I had a cuppa:-
Then rinsed and dried it when I came back.
Next to the sanding:-
Sand the wheel with the electric sander with a rough grade sandpaper (came with various) to get rid of the worst areas.
Next fill the damaged areas with filler mixed according to the instructions on the box:-
After allowing the filler to harden sand down as before gradually using finer and finer sandpaper until the whole wheel is smooth.
For the harder to reach places I used the sanding blocks and sponges which bend around corners allowing a really nice smooth finish.
Next its time for the primer and its best to stand the wheel upright for this.Spray a coat of primer over the wheel and allow to set.
Get your fine sanding sponge and rub the primer smooth as possible
Spray another coat of etch primer and sand with a fine sandpaper (sanding sponge) to key it for the next stage:-
After drying the wheel is now ready for painting.
Stand the wheel upright and apply the 1st coat of paint as per the instructions on the can.Allow to dry.Then I smoothed again with fine grade sanding sponge and applied another coat and then smoothed and applied a 3rd coat (for extra protection?).
Allow to dry and cure for 24 hours.
Next is the lacquer.I applied 2 coats of lacquer allowing each to dry.When dry thats it...all done.
Here are the results:-
Last thing to do is spray on some alloy wheel seal to keep them looking good.
As you can see while the wheels were off I also coated the calipers with 2 coats of Red High Temp Paint (for Engines) and again a couple of coats of lacquer as it makes them a nice and shiny.


Veteran Member
Joined: Feb 2007
Posts: 3,780
Likes: 45
Hey bud, GREAT JOB! Sorry if I'm locking this up, but it's now an FAQ, and it should be kept short and to the point. Any Q's for buck, do so through PM's! Thank you bud!


Senior Member
Joined: Jul 2011
Posts: 967
Likes: 77
From: Brisbane, Australia
Howdy,
For those about to rock..... (into this project) then also have a look at this guys work;
http://forums.mg-rover.org/showthread.php?t=427081
Take it easy..... and do not rush the Job
For those about to rock..... (into this project) then also have a look at this guys work;
http://forums.mg-rover.org/showthread.php?t=427081
Take it easy..... and do not rush the Job
Last edited by Lcgi; Sep 28, 2012 at 03:24 PM. Reason: added correct URL

Junior Member
Joined: May 2017
Posts: 4
Likes: 1
From: Shropshire
Trending Topics

Veteran Member


Joined: Mar 2017
Posts: 4,769
Likes: 795
From: Utah
https://www.jaguarforums.com/forum/x...wheels-183334/
The metallic filler is a bear to sand though, be prepared. Nice part is that it's strong as heck.
The metallic filler is a bear to sand though, be prepared. Nice part is that it's strong as heck.


Thread
Thread Starter
Forum
Replies
Last Post
Currently Active Users Viewing This Thread: 1 (0 members and 1 guests)