When you click on links to various merchants on this site and make a purchase, this can result in this site earning a commission. Affiliate programs and affiliations include, but are not limited to, the eBay Partner Network.
I was genuinely interested, but I thought without needing to replace my brakes (pads at least), I'm not just gonna upgrade for the sake of it... Well a couple months later (June 29th, 2018, to be exact), I got the brake sensor warning light (while at the 1/4 mile track of all places).
So I started wondering, if I were to have the dealership, supply OEM pads and rotors, and do the labor, I would probably be in it for $2500 to $3500 (Canadian)... so why wouldn't I spend a bit more, and upgrade, and do the job myself, hardly the first time for me to work on brakes (first time on something this new...).
So the same day the warning light came on, I cam back from the track, logged onto Jag Forums, traced down the thread on the F-Type Forum and reached out to Paul at Wortec via email. I ordered front and rear brake sensors online (via RockAuto), ordered Front and Rear EBC Yellow Stuff pads (via TDOT Performance, Canadian distributor for EBC), and played the patient waiting game.
My car has less than 30,000kms... about 29,000kms (or ~18,000 miles), so I took this weekend to get started, and take my time. I watched a couple of youtube videos specifically for the Jaguar XF, but in all honesty I should have just referenced the sticky thread section, specifically this thread: https://www.jaguarforums.com/forum/x...job-how-85582/
My pads don't get hear to till mid next week, so I figured I would start dismantling everything, and have all four corners ready for the pads to go in, and then I could simply button up... Started Saturday (July 14th) afternoon
I jacked up the right side of the car, and placed on jack stands, and then did the same for the left side, so all for corners are up in the air and supported properly. Removed all four wheels
Started with the driver's side (Left) front brake first. Didn't reference any of the vids, or the how to guide, and was pretty straight forward. In all honestly, other than a slight lip on the rotor, I would say the front pads wouldn't have needed replacing at this time (probably could have gone another year, or ~10,000kms or ~6,000miles), in fact only due to my negligence did the wear indicator snap (plastic was very brittle).
Then moved along the driver's side (Left), and did the rear brakes, and quickly realized that it was my rear pads that had set off the wear indicator (not on this side), but the pads were extremely low, probably less than half the life of the fronts. Everything was going smoothly till I went to reset the rear caliper (these require a special tool, a simple C-Clamp will not work in depressing the piston, as you have to press and rotate at the same time for the rear calipers), this is when I referenced the "how to section", and realized I needed a special tool (the youtube video that I referenced did not mention this... but in all honesty I think the calipers were different, either older model, or not performance brakes that are on mine). Called it a day.
Rented the specialty tool on Sunday from one of my local auto parts stores. Again started at mid afternoon on Sunday (July 15th). Finished the rear left wheel, and with the right tool, it took seconds to reset the caliper to its fully recessed position.
Moved onto the rear right and did the same as the rear left.
Moved onto the front right and did the same as the front left
I should point out that only the front left and the rear right have wear sensors
With the right tools, I only spent two hours doing the remainder of the rear left, and the whole right side of my car...
Here are some pictures of the progress thus far:
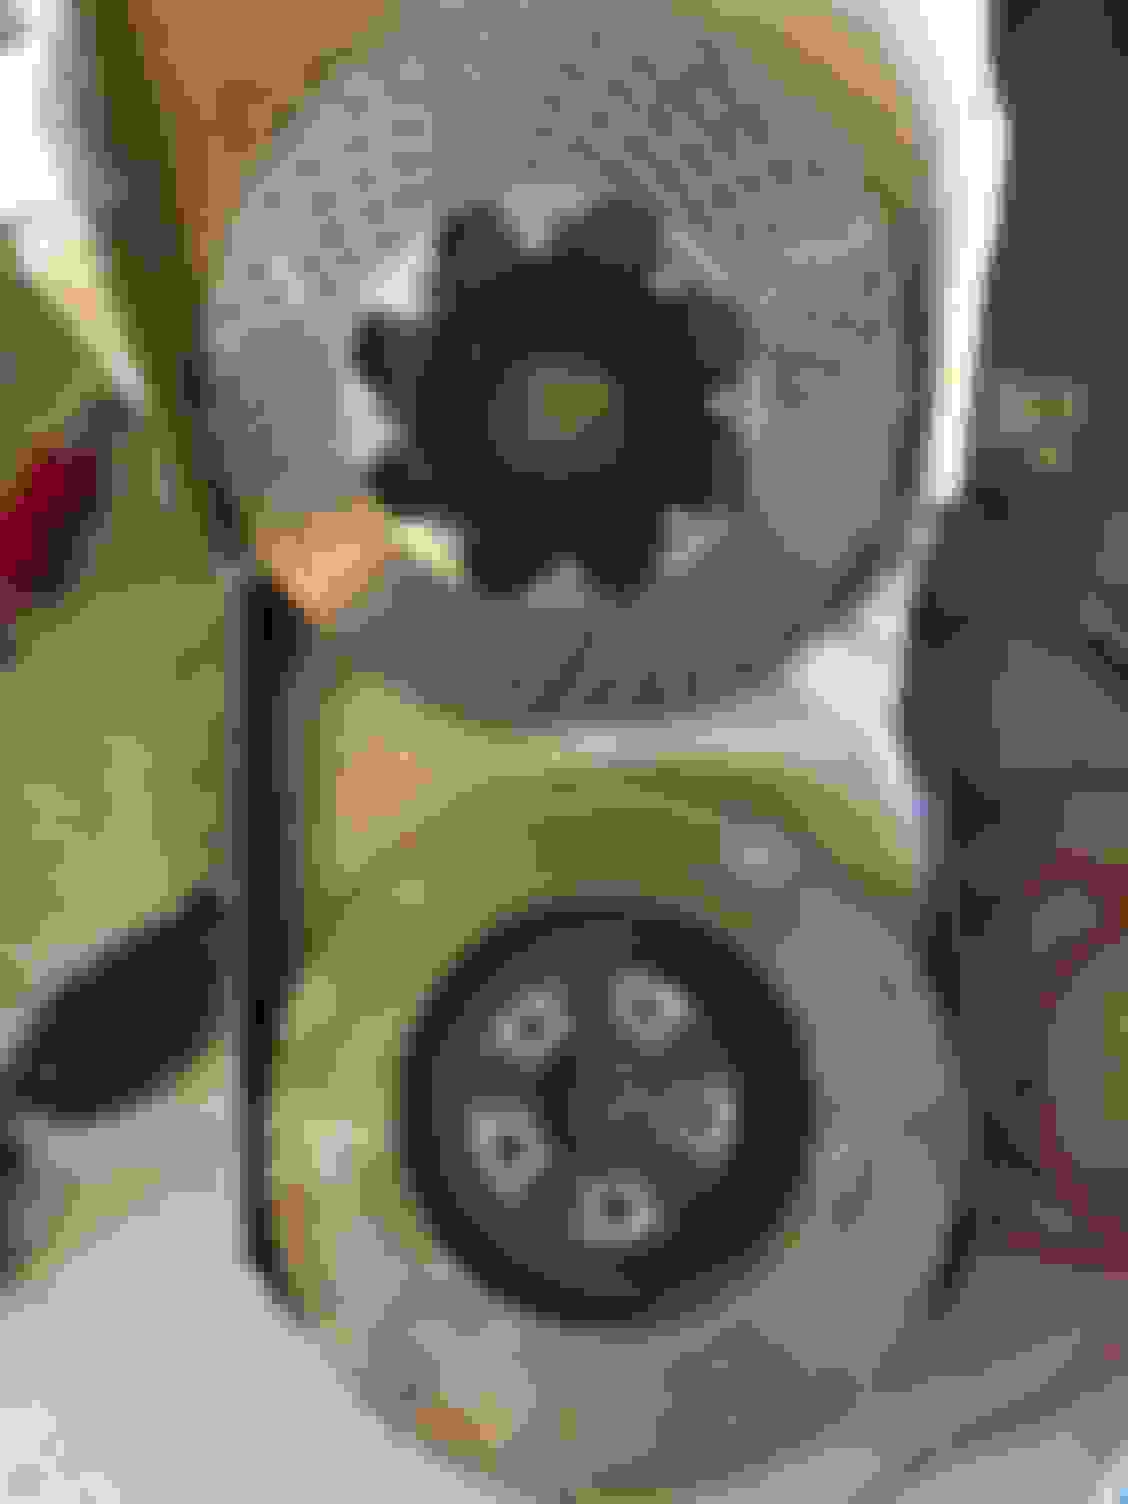
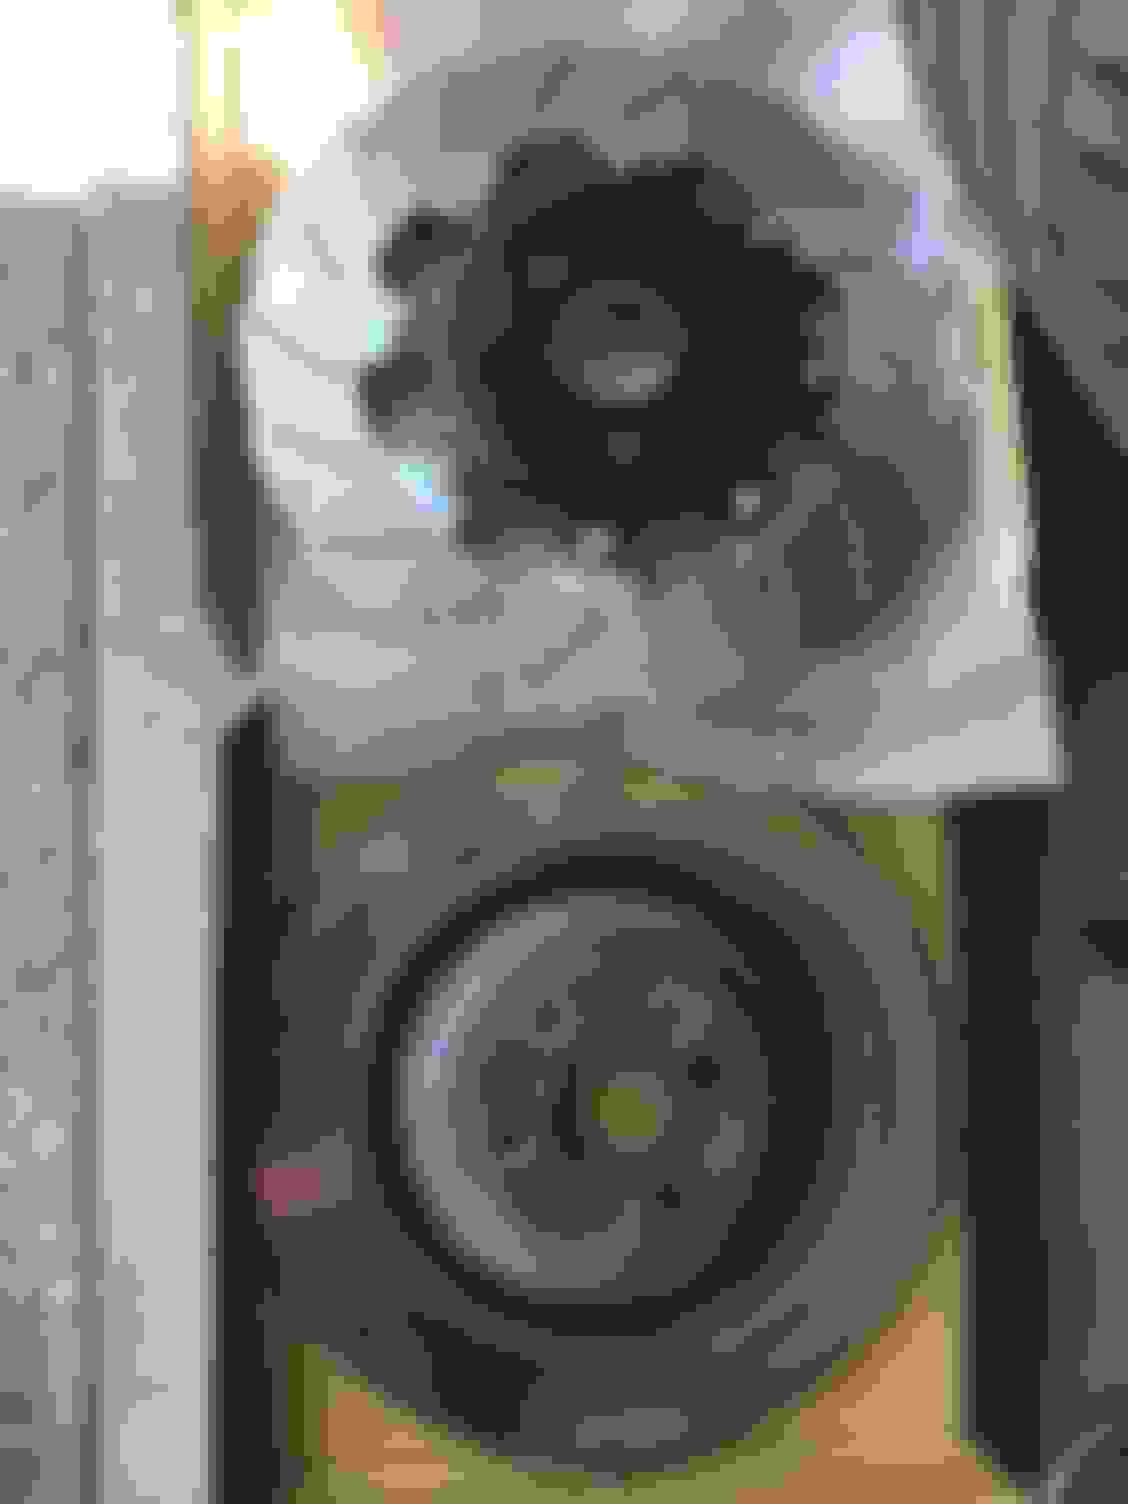
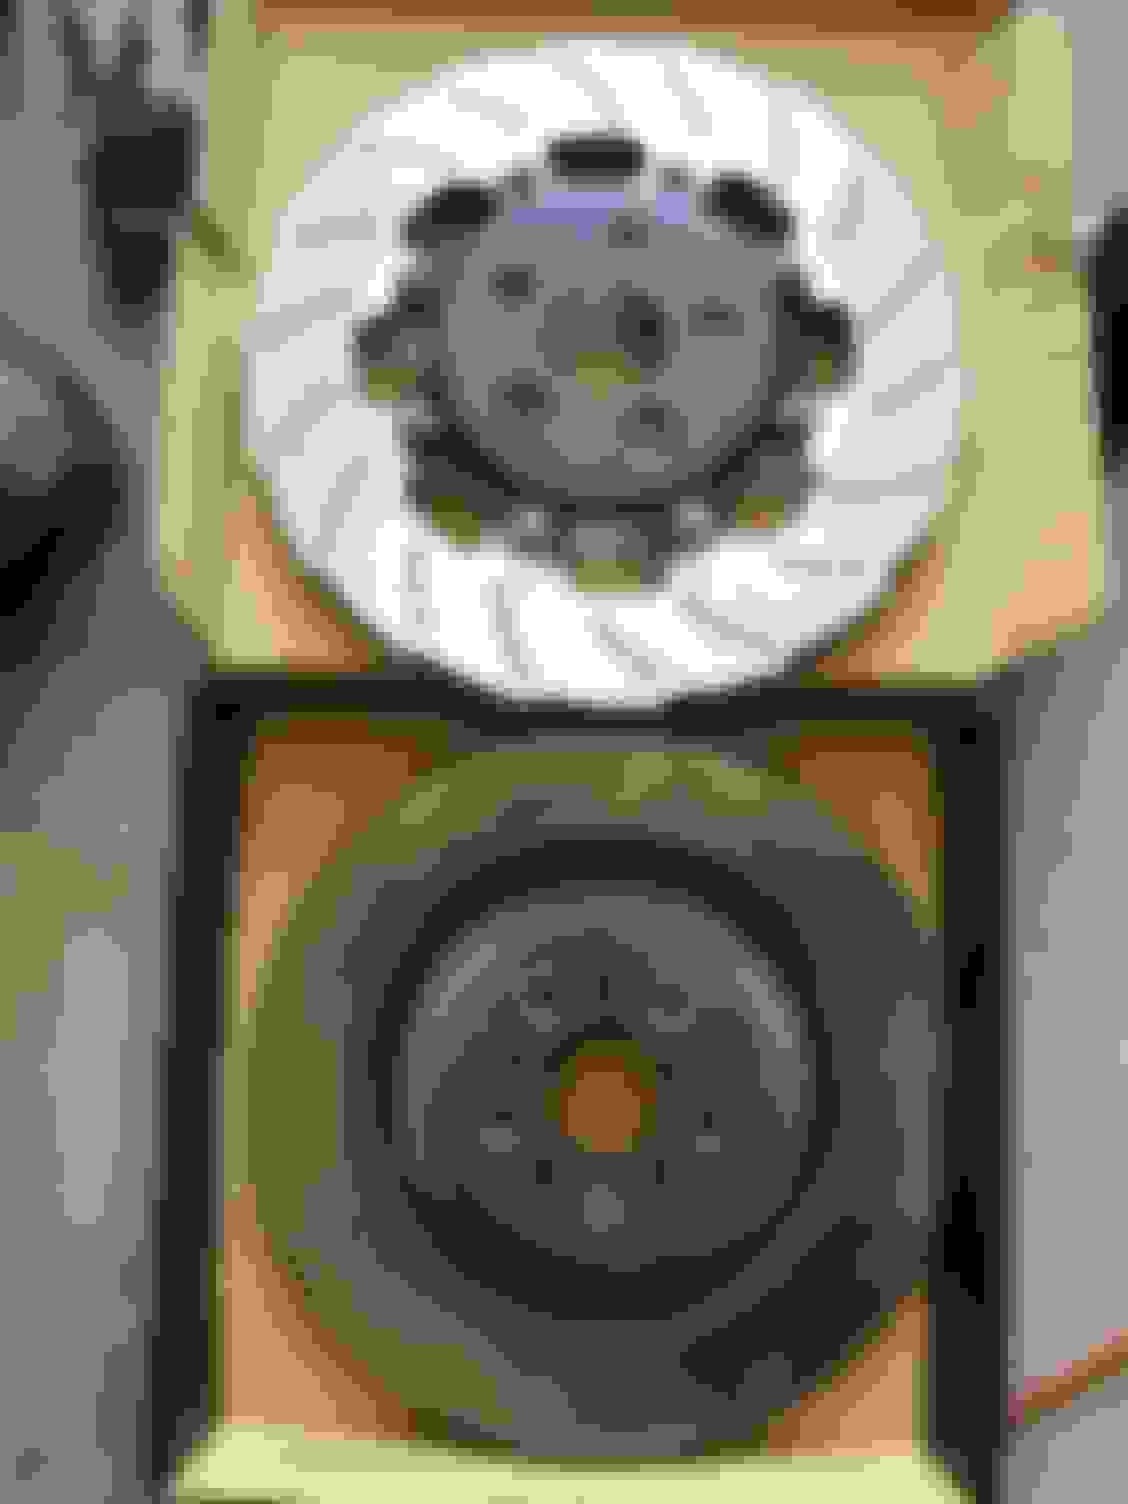
Front Left (driver's side) comparison of new rotor vs stock rotor:
Rear Left (driver's side) comparison of new rotor vs stock rotor:
Rear Right comparison of new rotor vs stock rotor:
Front Right comparison of new rotor vs stock rotor:
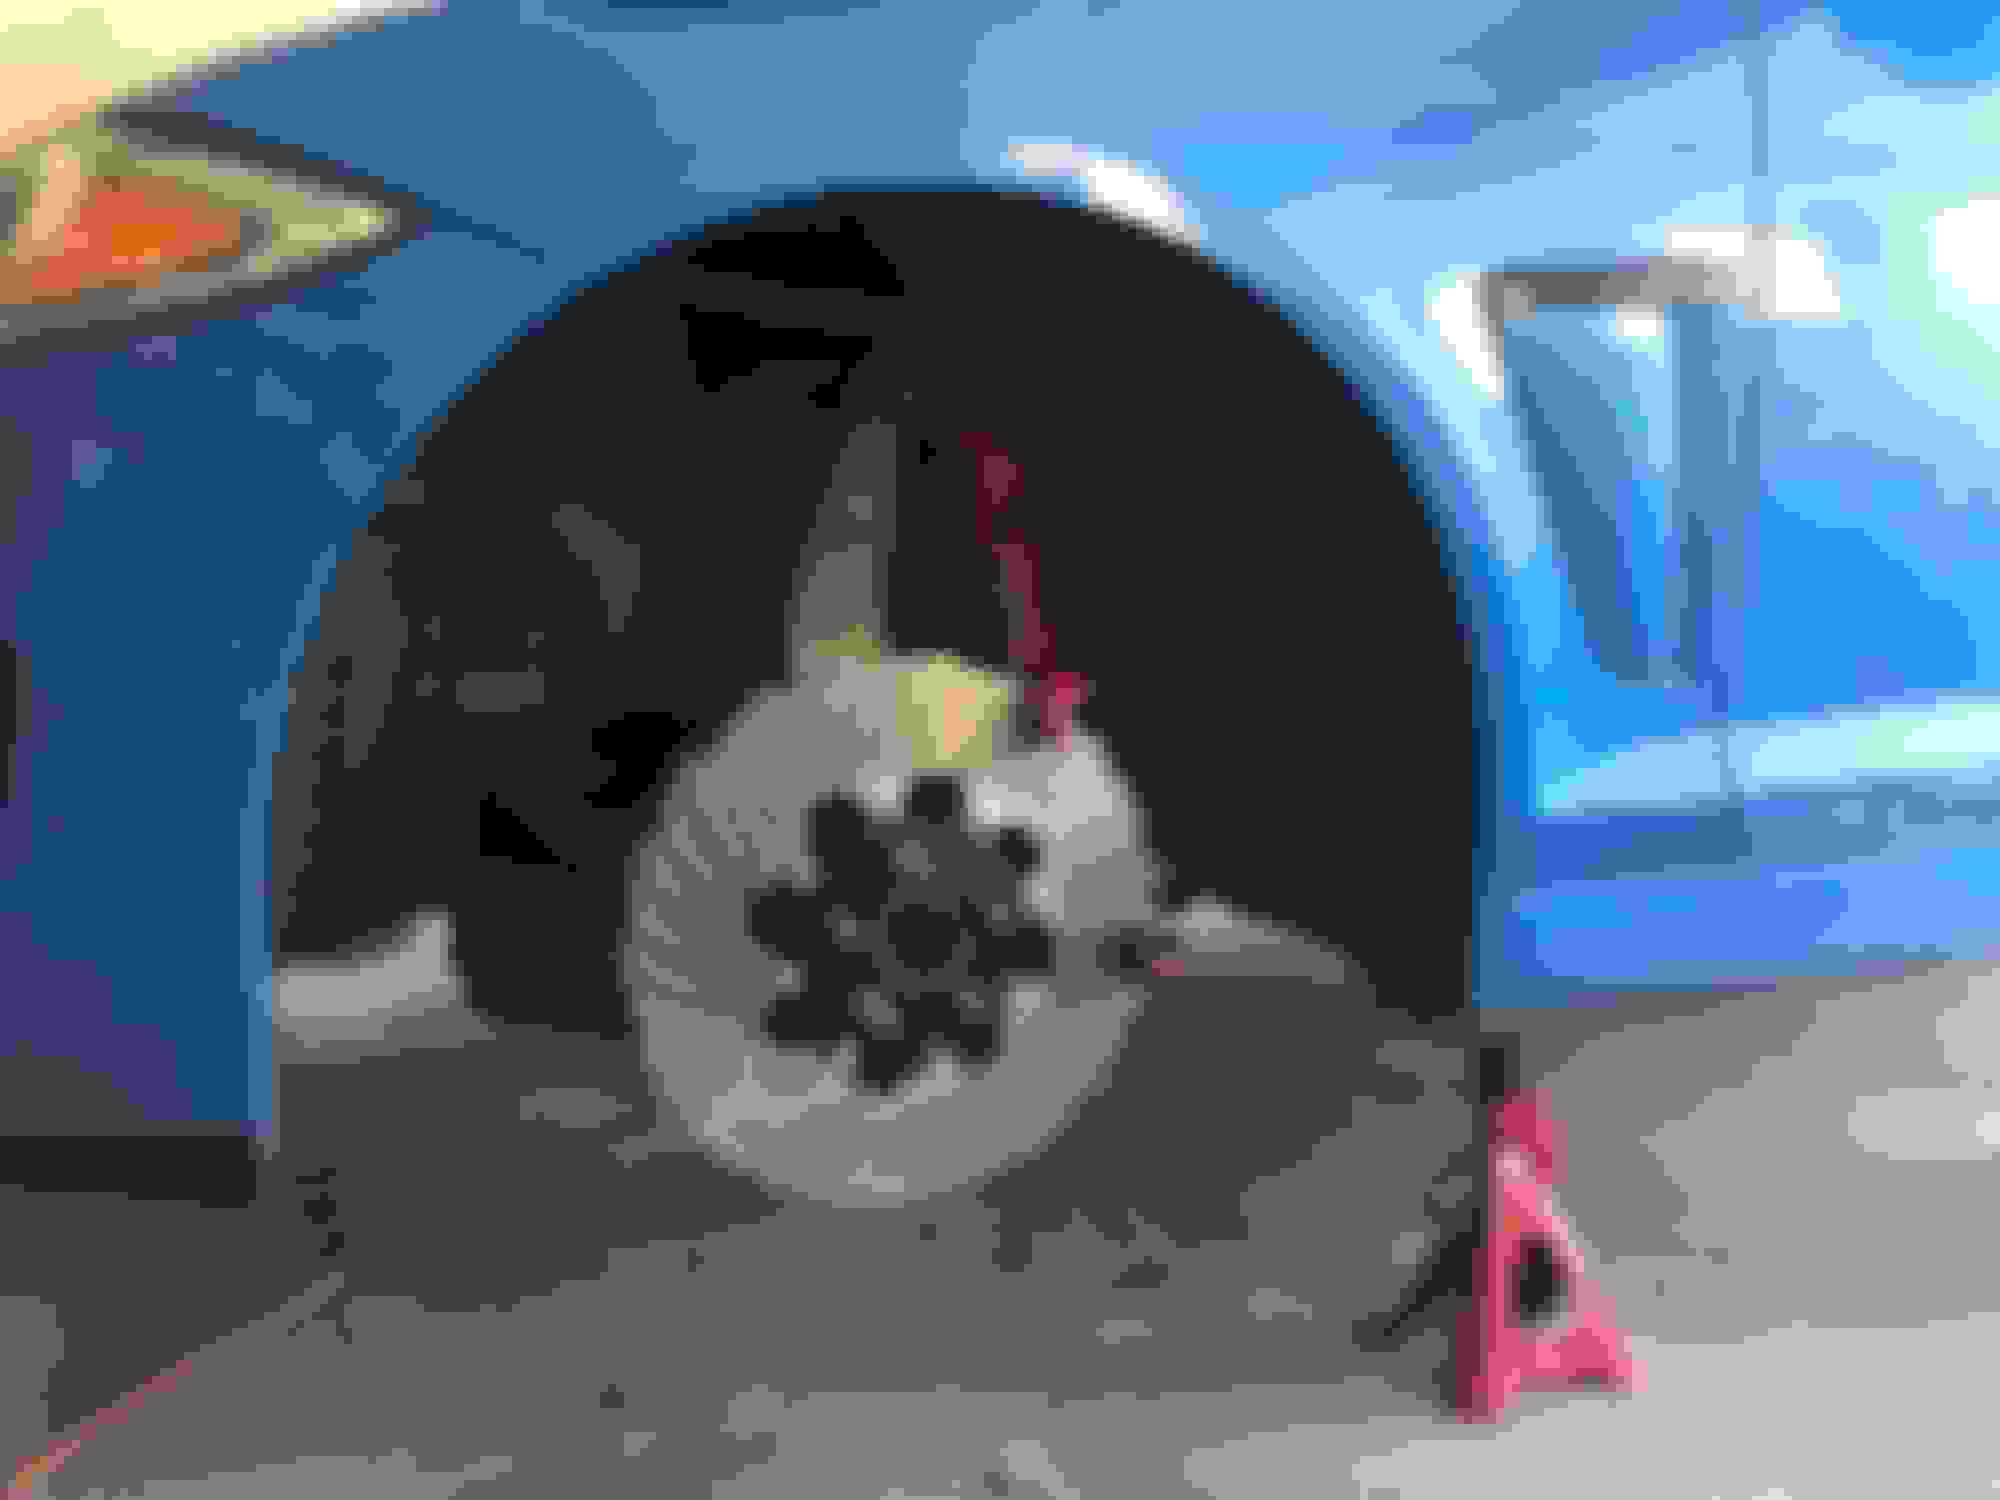
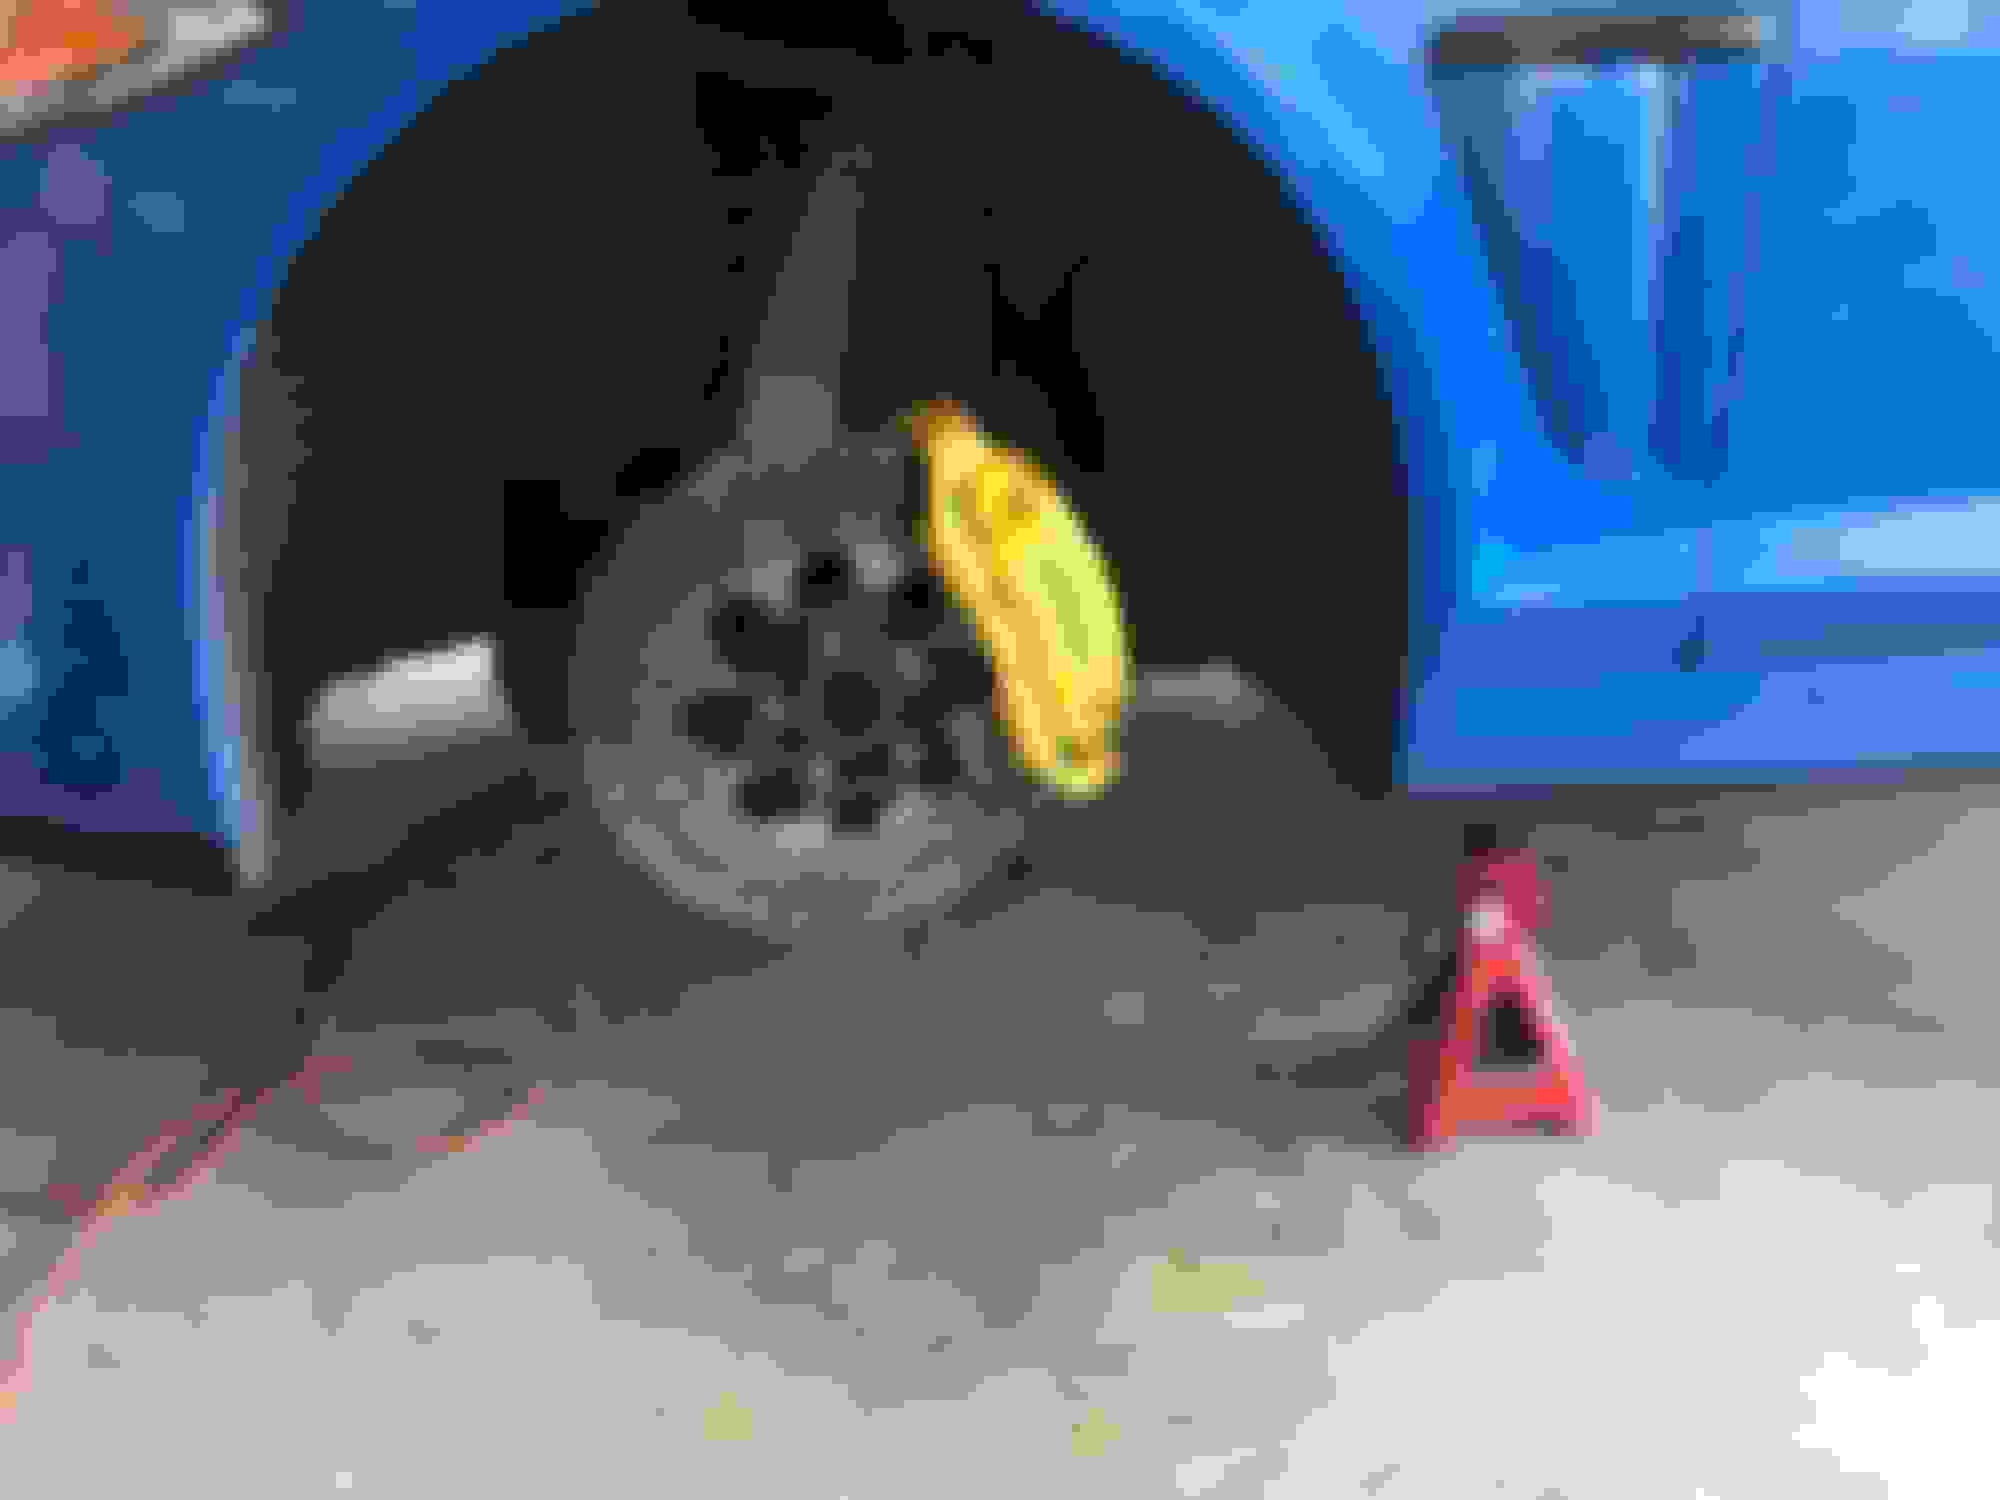
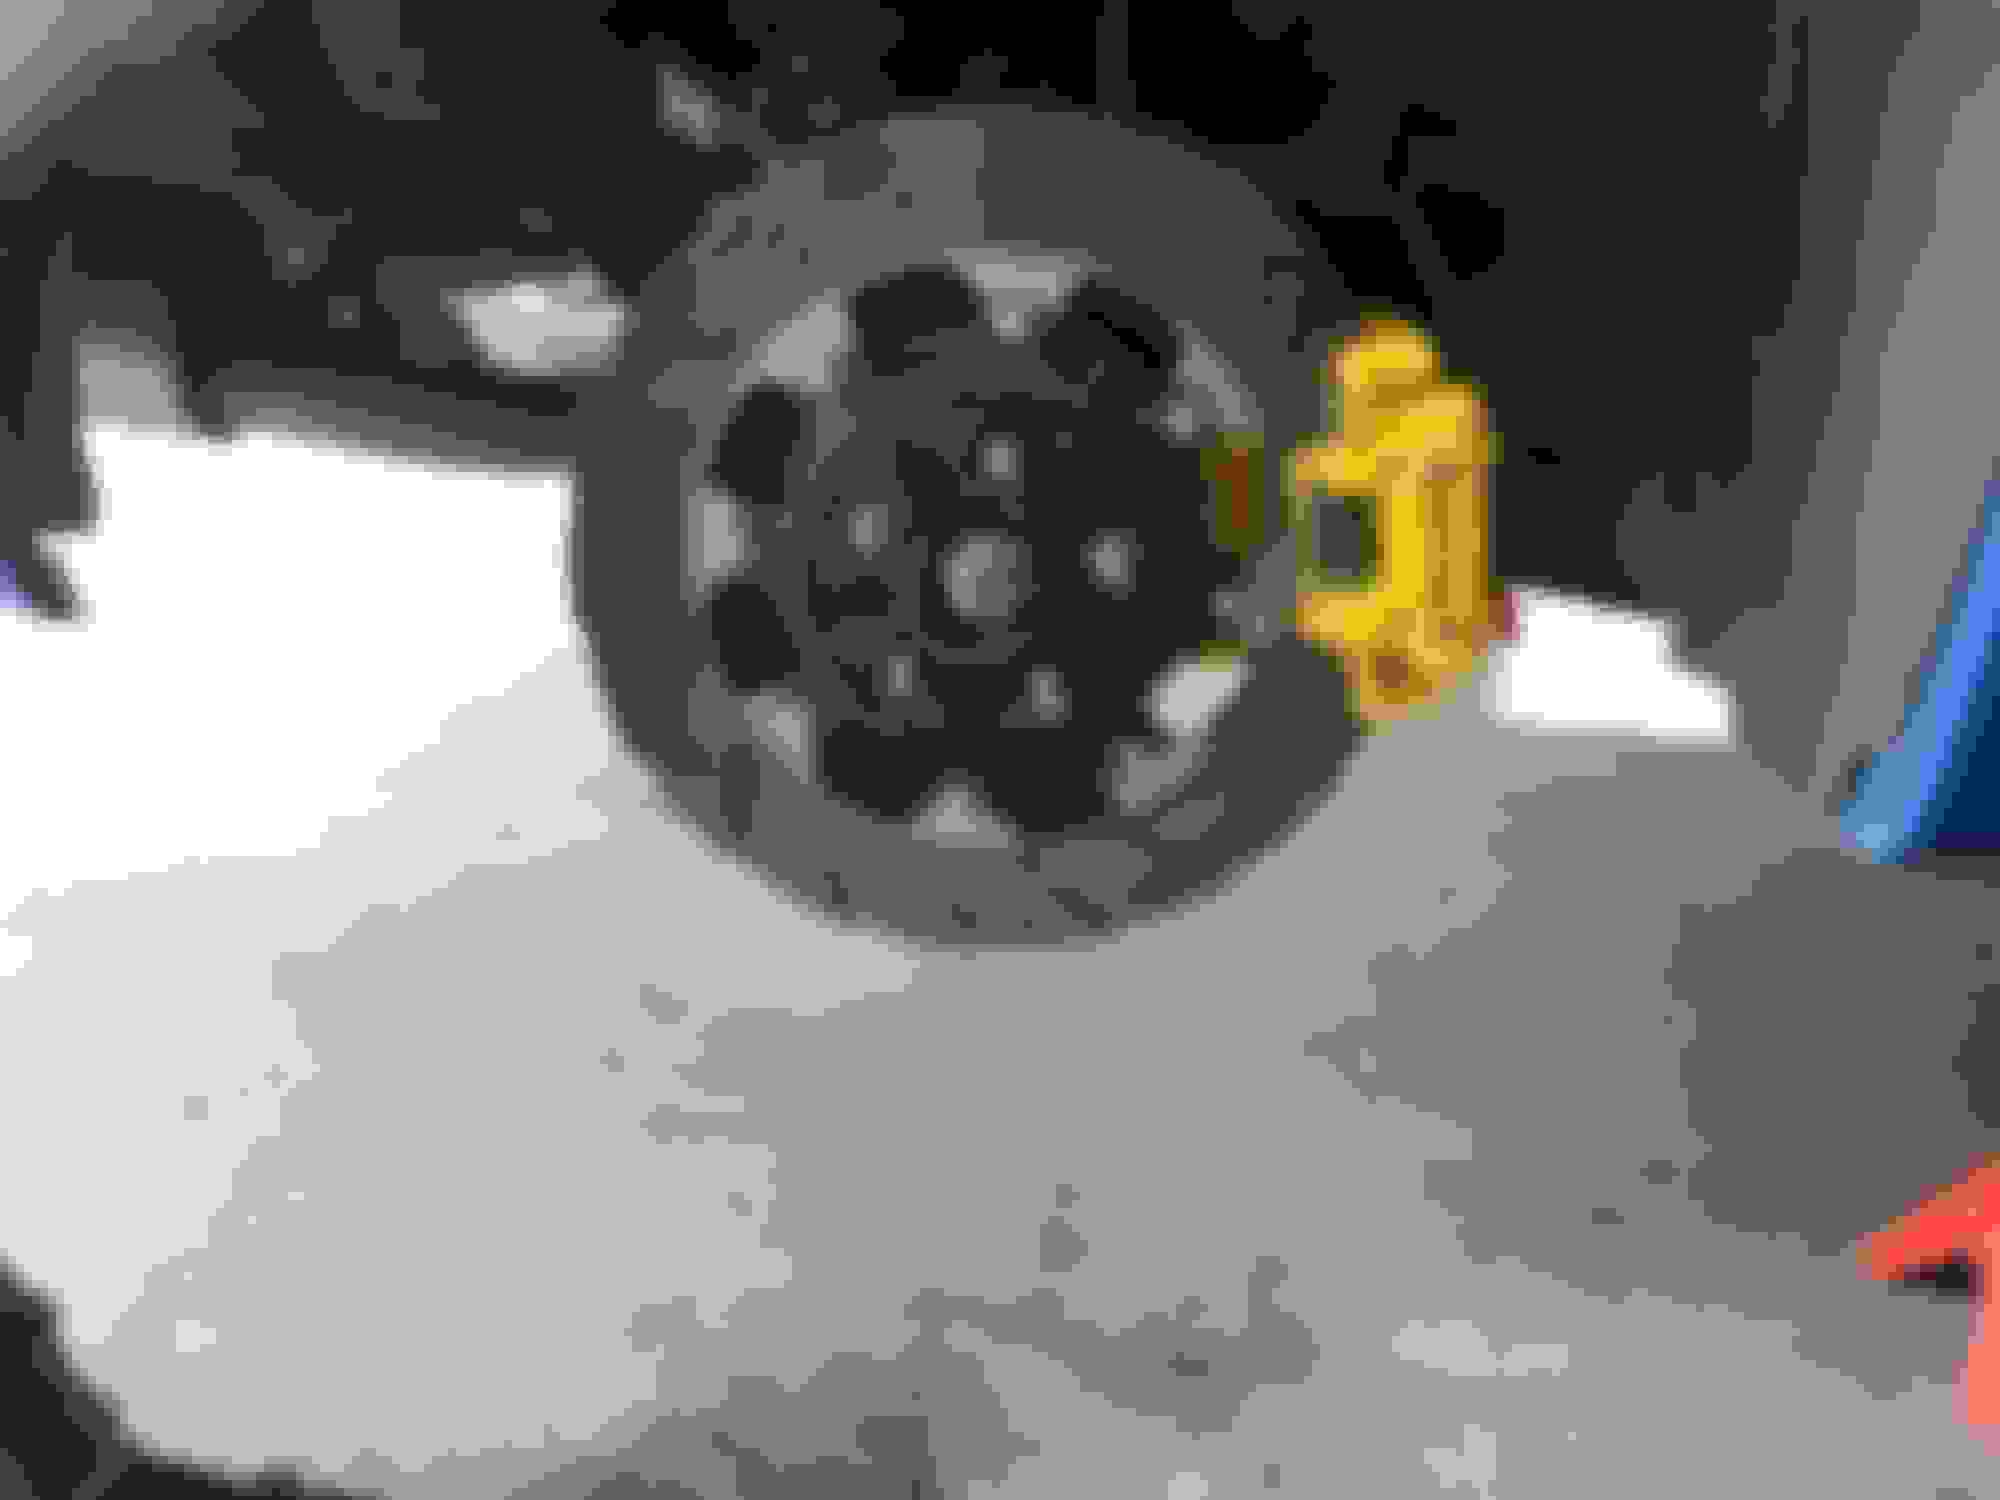
Some more photos of each wheel well showing the calipers zip tied out of the way, the new rotors and brackets in place (in the same rotation as above FL, RL, RR and FR):
Once pads come in, they will be installed, and properly bed in. I will provide updates on driving dynamics and braking feel with the new setup, once installed. Stay Tuned!!!
Good to see you got the rotors and put them all on pointing in the correct direction (as per the little arrows on them), saves you having to rip them off and swap sides!
Also, I presume you ordered rear pads for the XFR / XFR-S and not F-Type rear pads as they are quite different? The front pads are identical on XFR and F-Type.
Thanks OzXFR... And for the pads, I just used EBC's online parts finder, and came across Front Pads Part No: DP42076R. and the Rear Pads Part No: DP42059R for my XFR-S
I'm pretty sure they are different part numbers for EBC for front XFR-S and F-Type Pads, can't comment if they are the same fitment...
Pads arrived today, and the installation process was simply the reverse, with some exceptions:
The anti-rattle bracket on the front brakes was kind of a pain, but once I figured out a method for the front right, it became pretty straight forward when I got all the way around and did the front left.
Rear wear sensor was a pain to get in, but figured out the way to do it was to remove the spring, install the sensor, than install the spring and sensor together back into the pad.
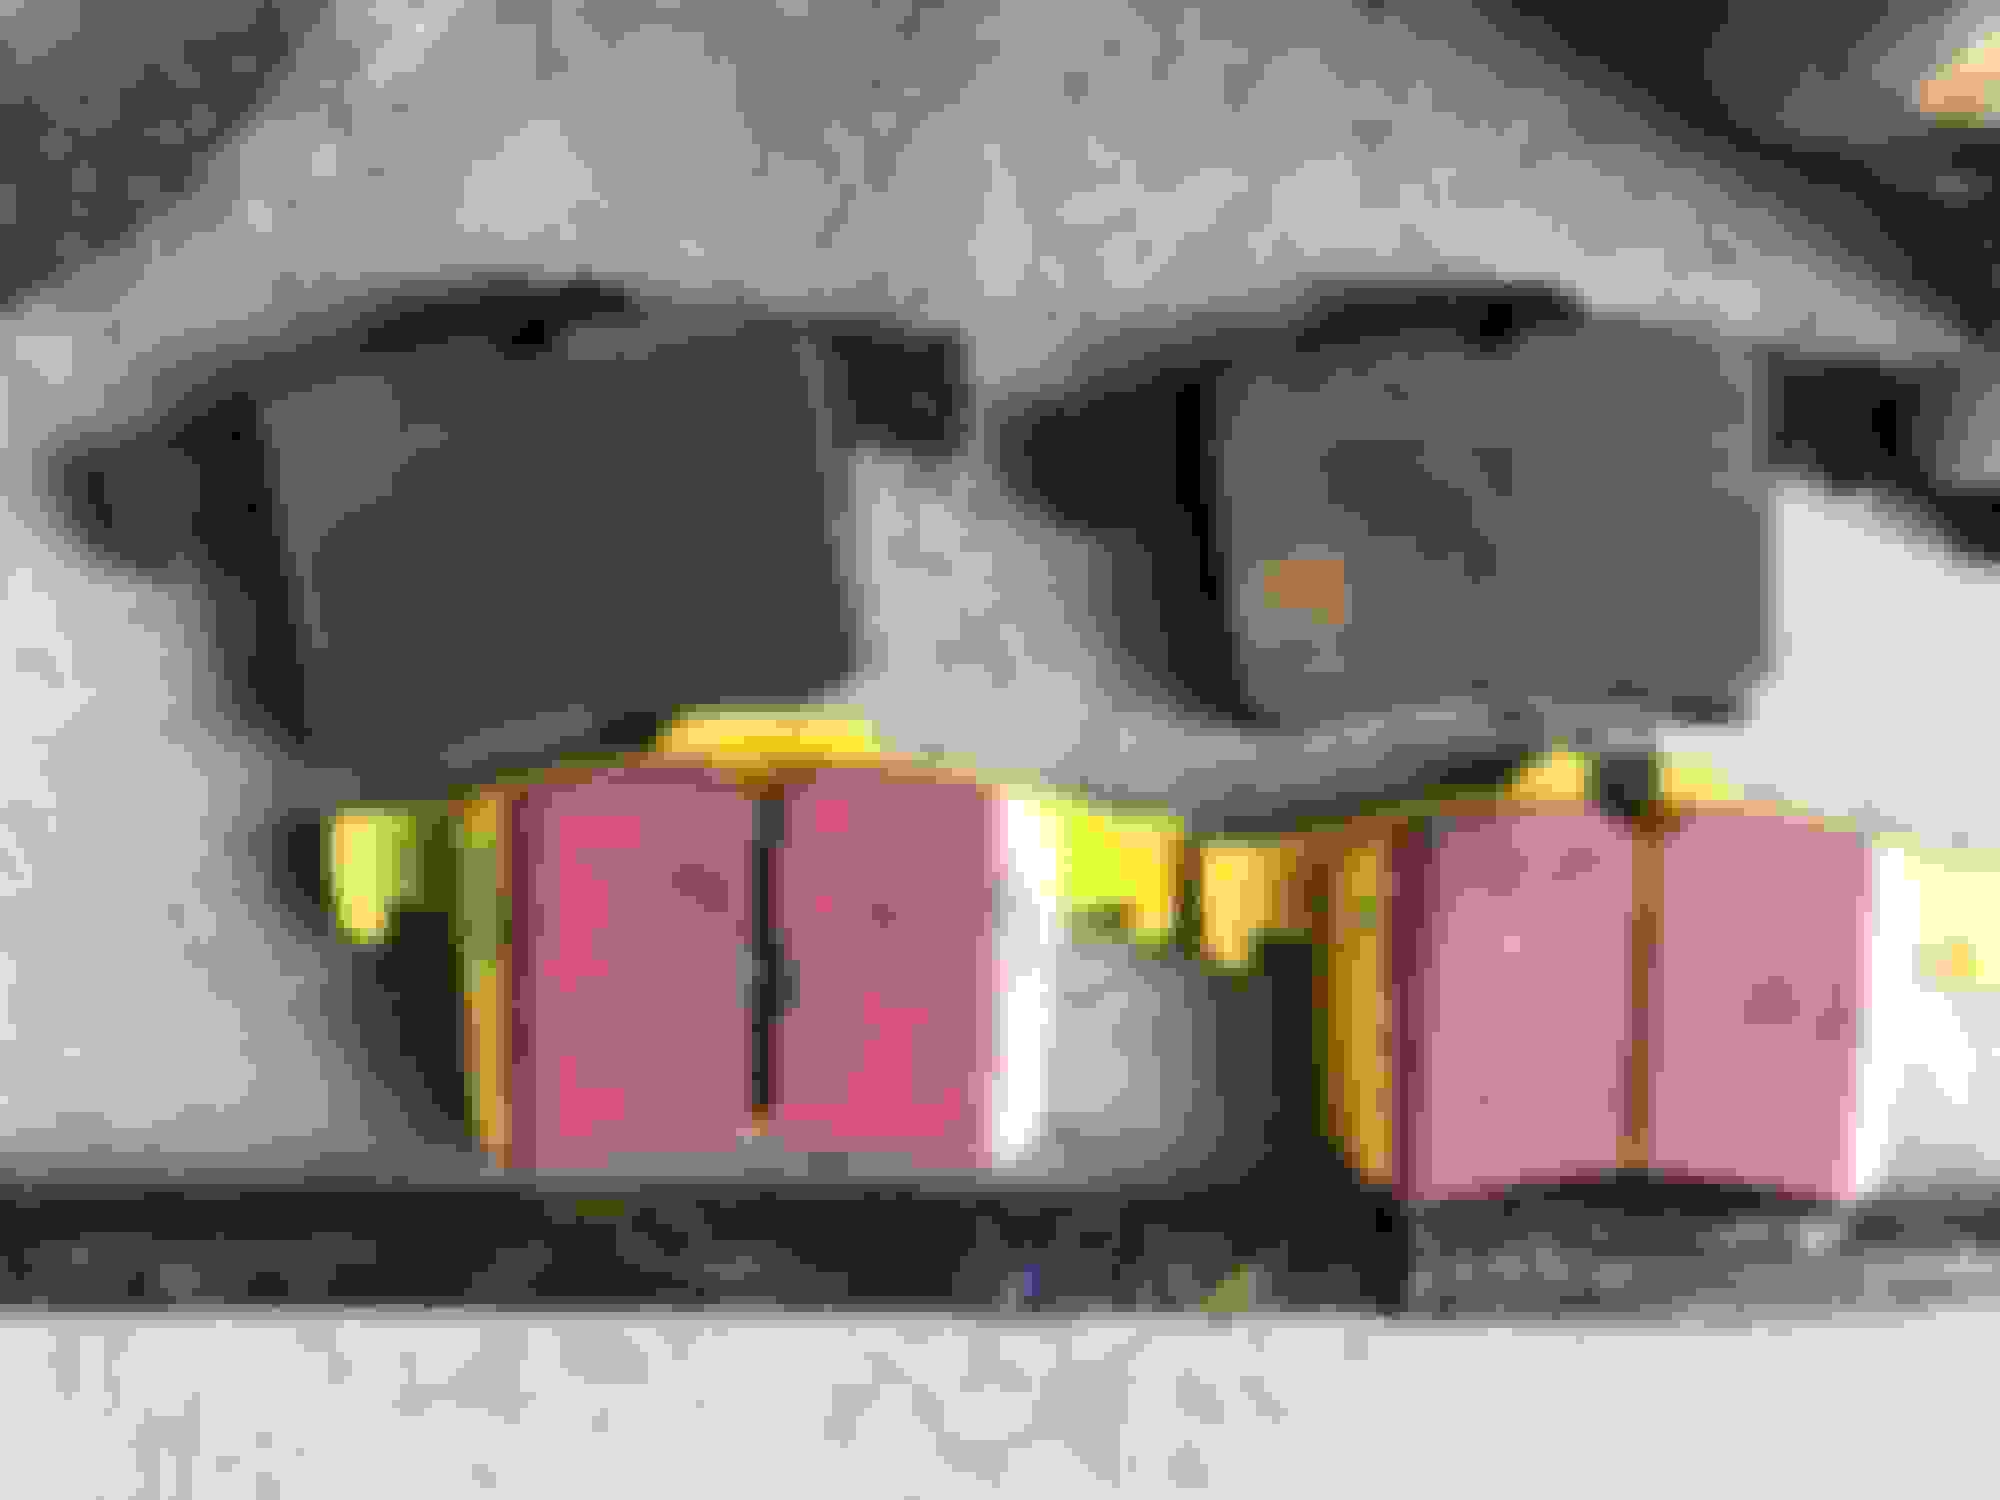
Some photos of the pads:
Rear worn pad vs new EBC Pad:
Front slightly worn pad vs new EBC Pad:
Comparison of new vs old pads:
Front Left:
Rear Left:
Rear Right:
Front Right:
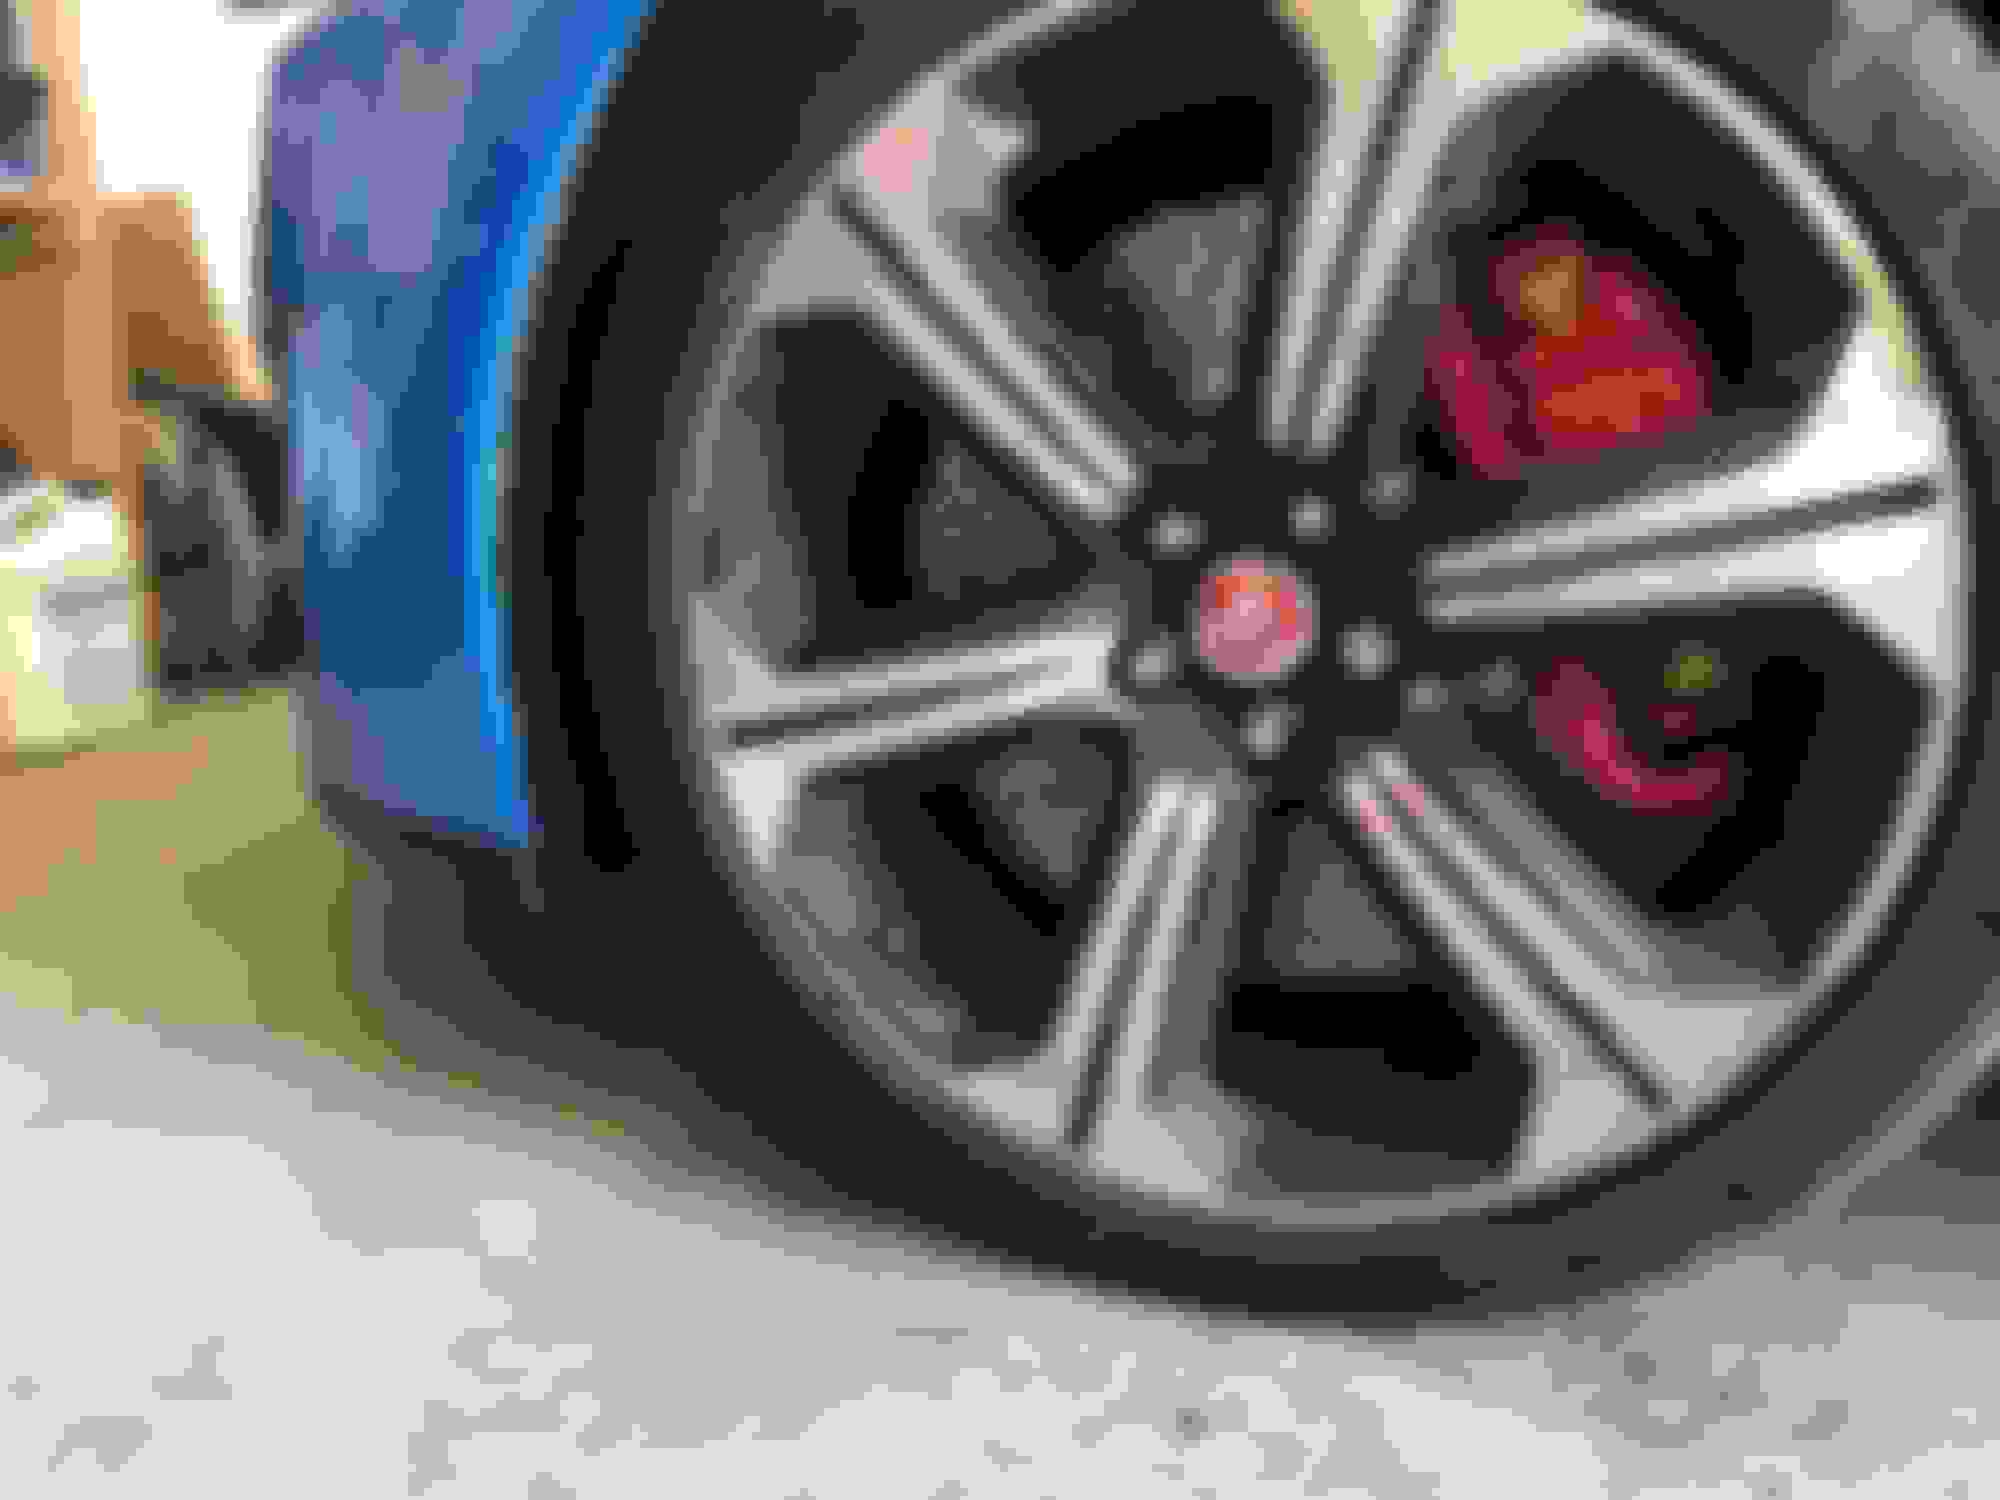
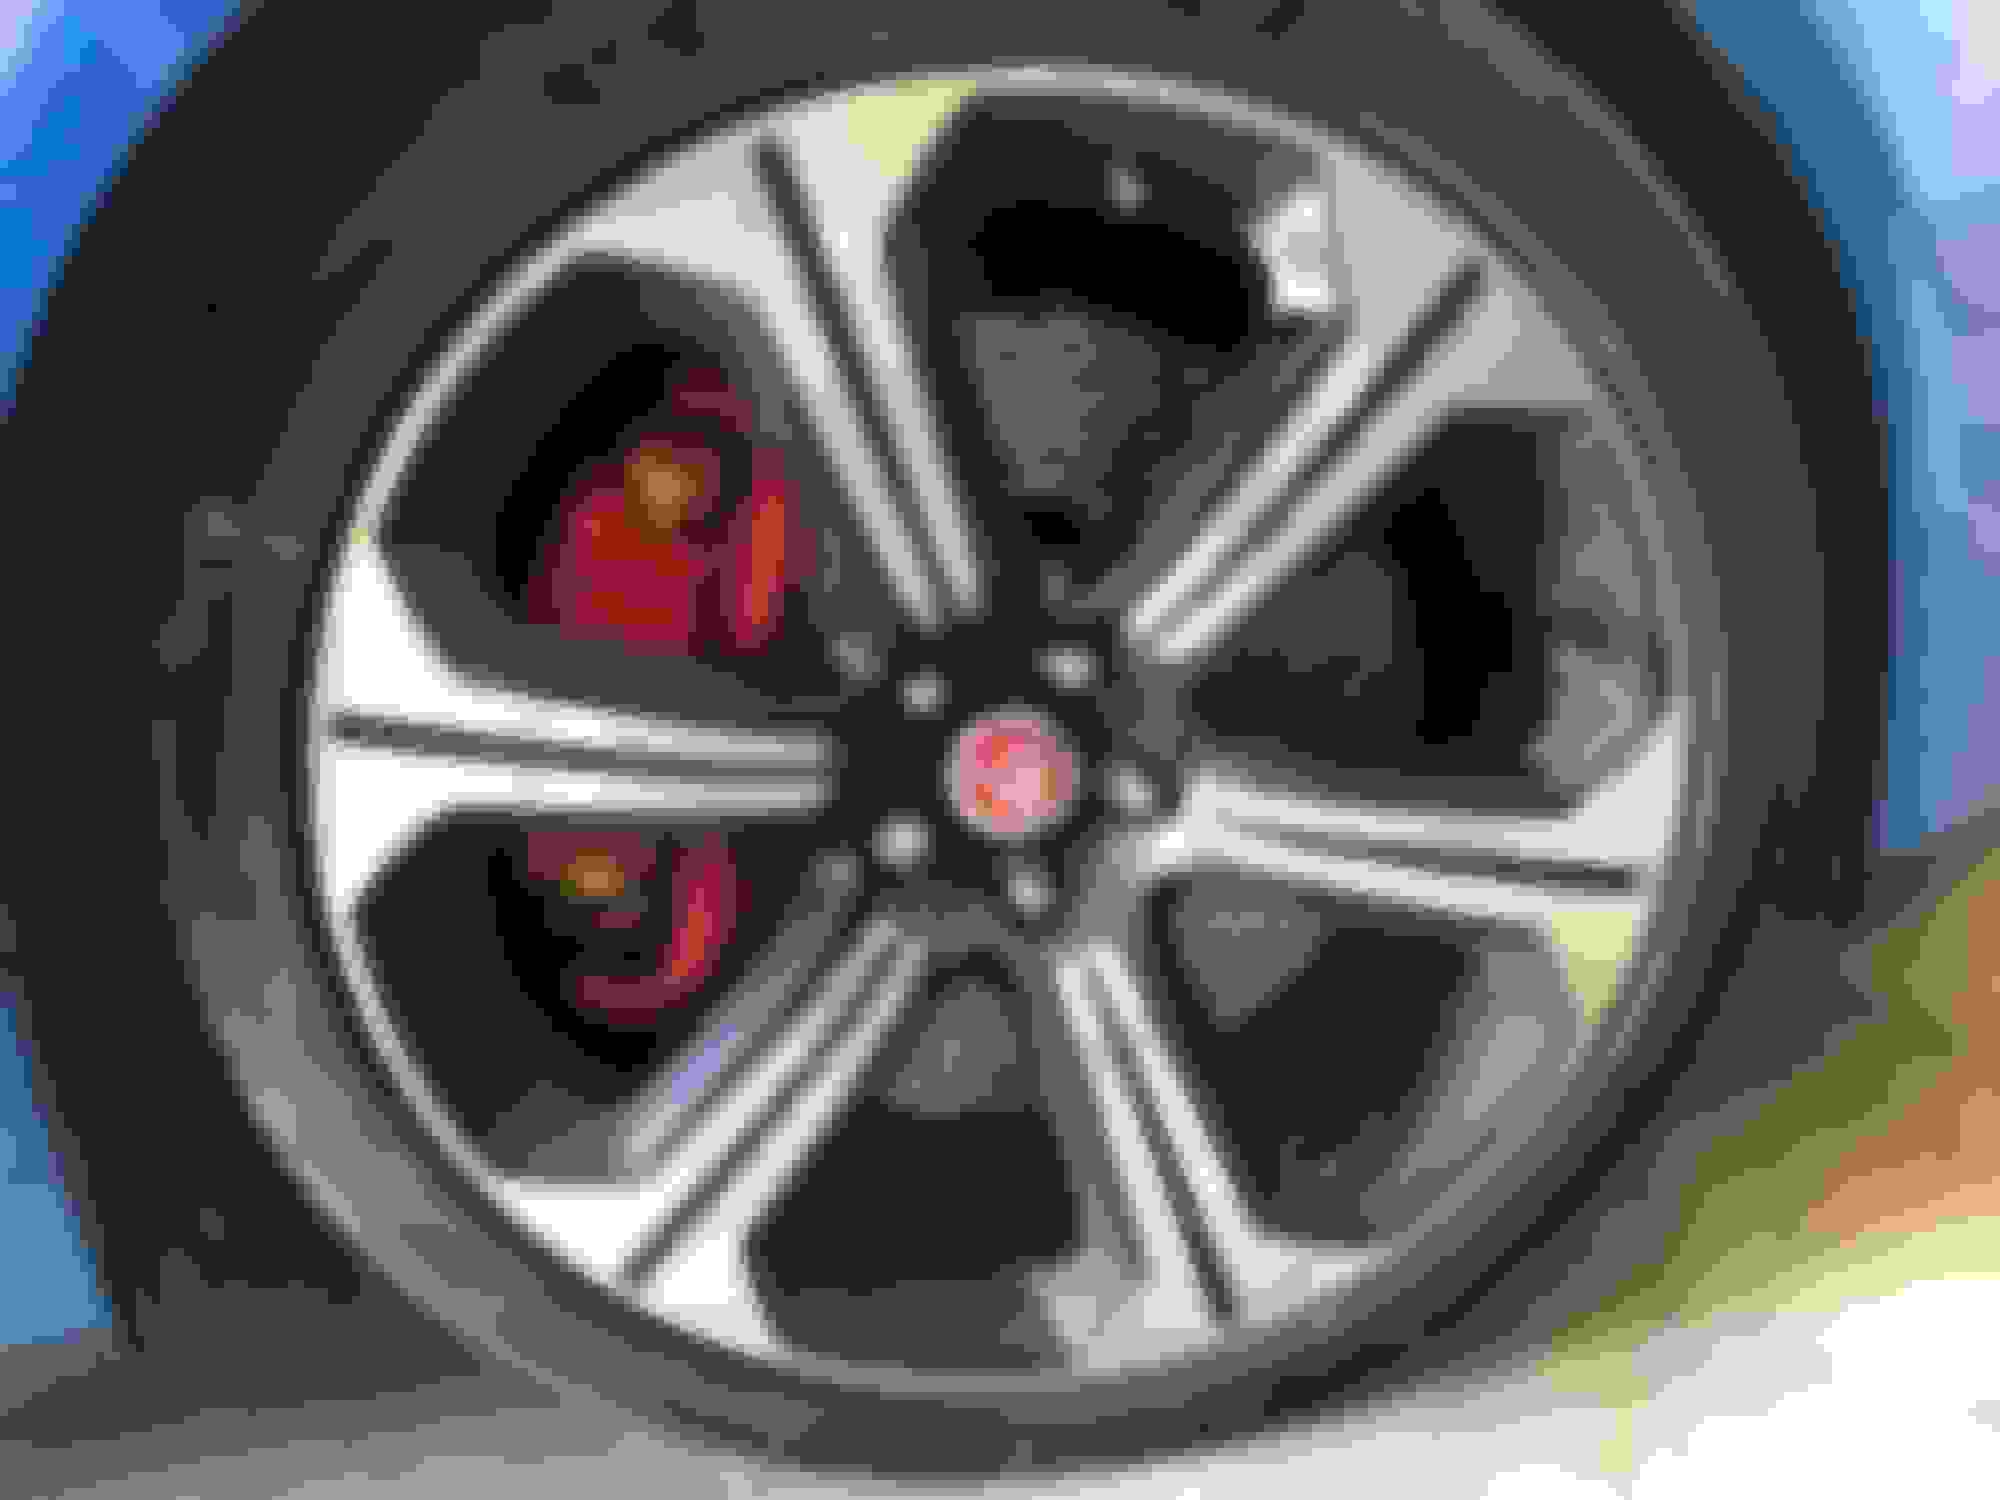
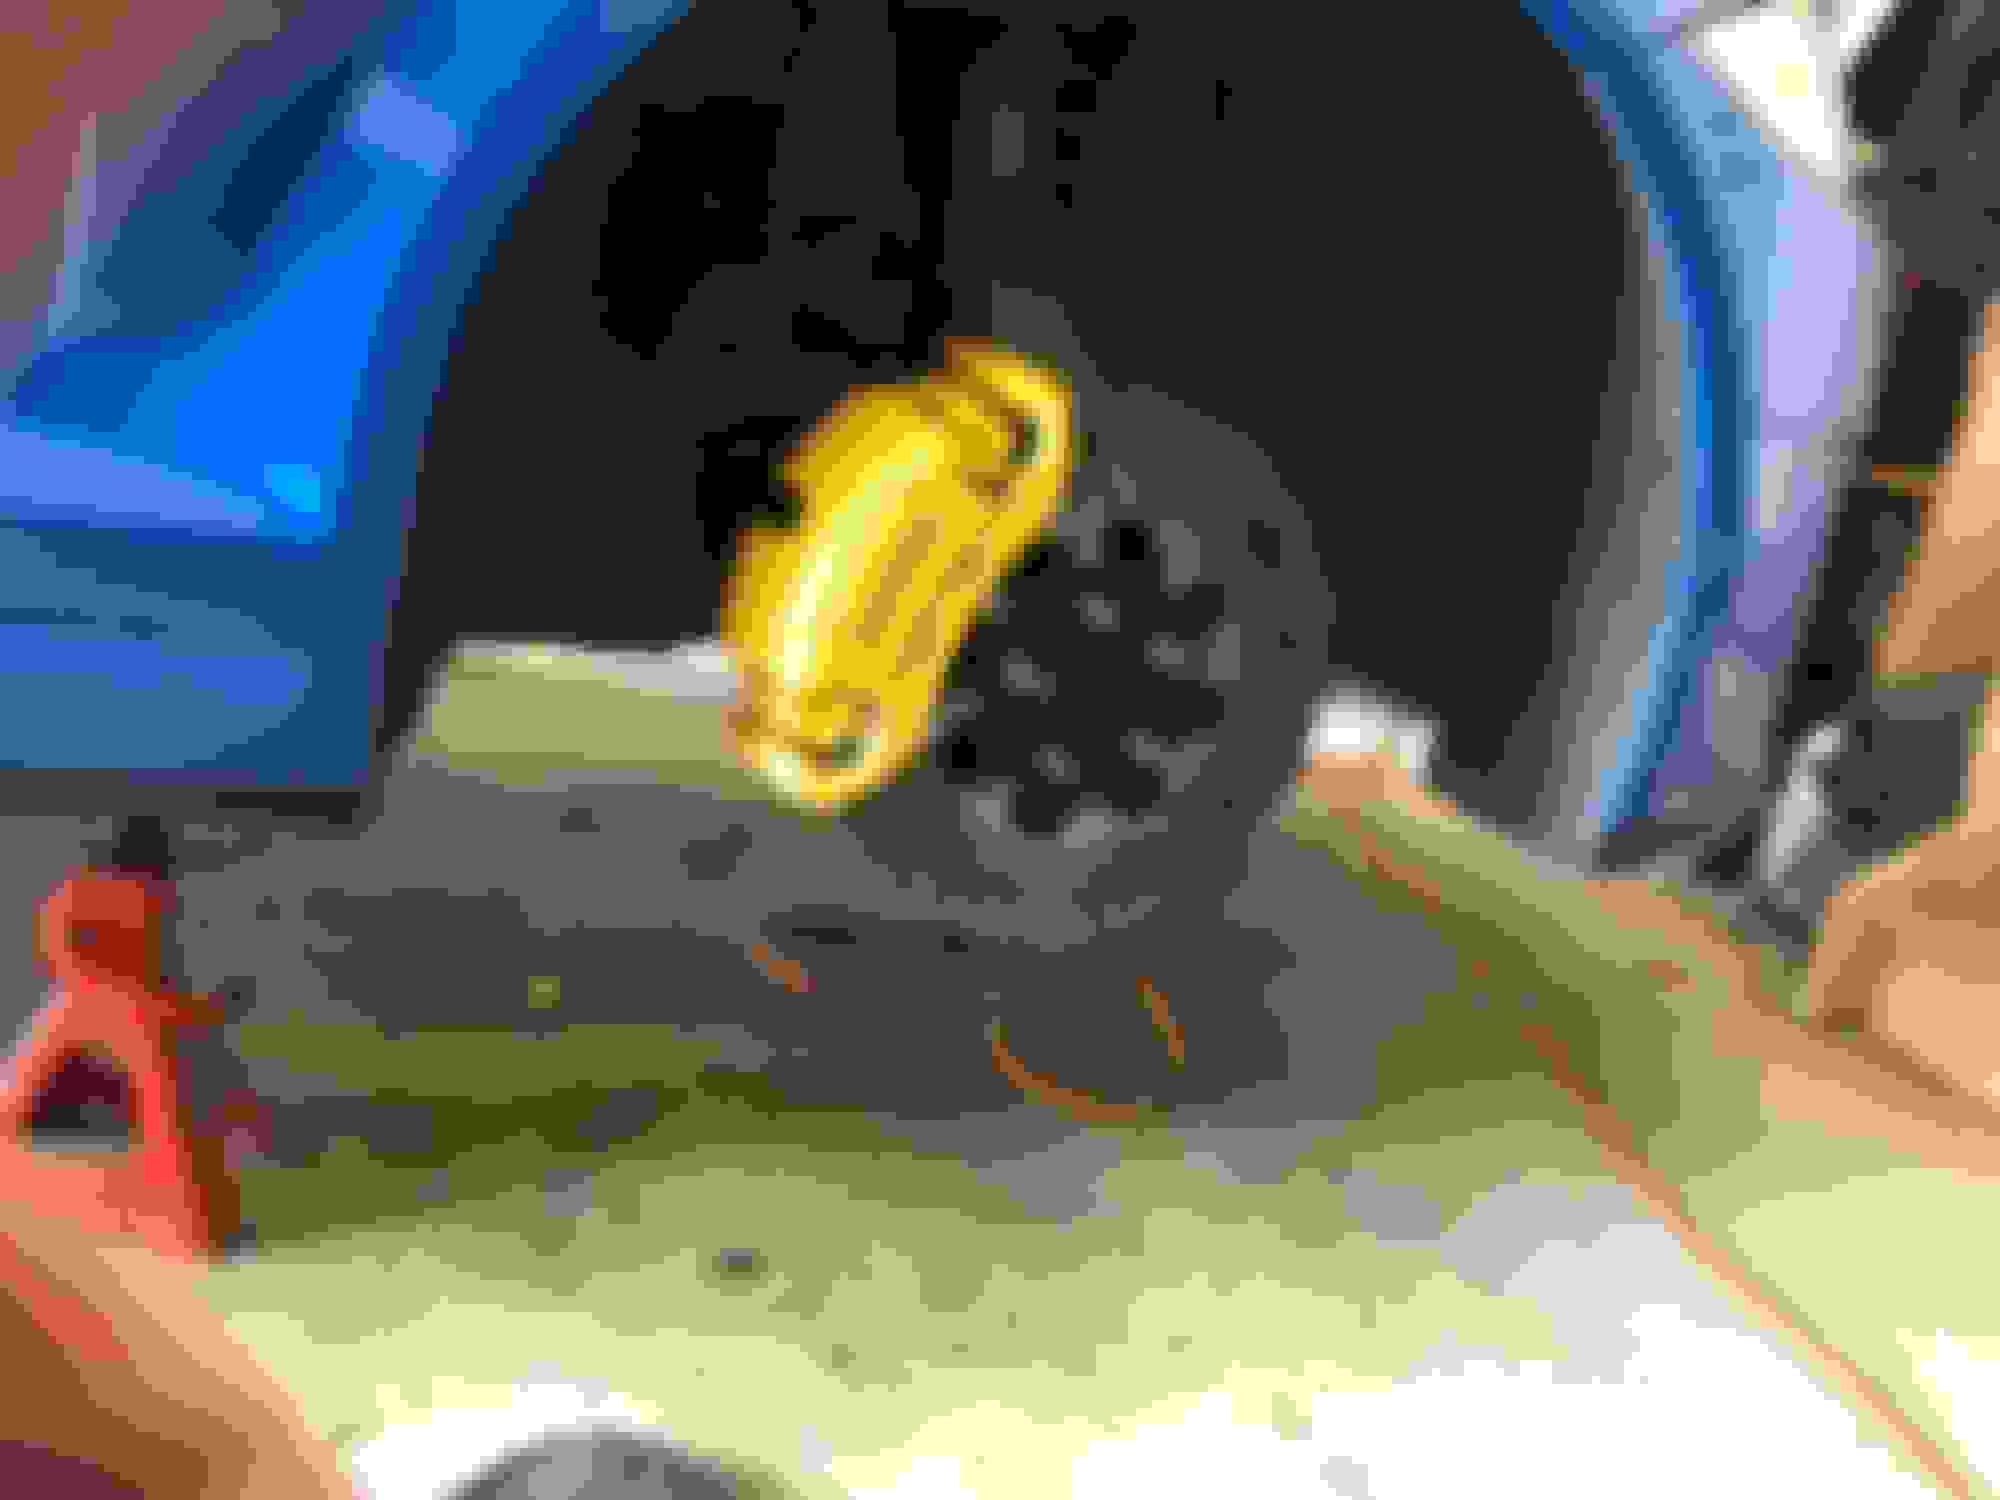
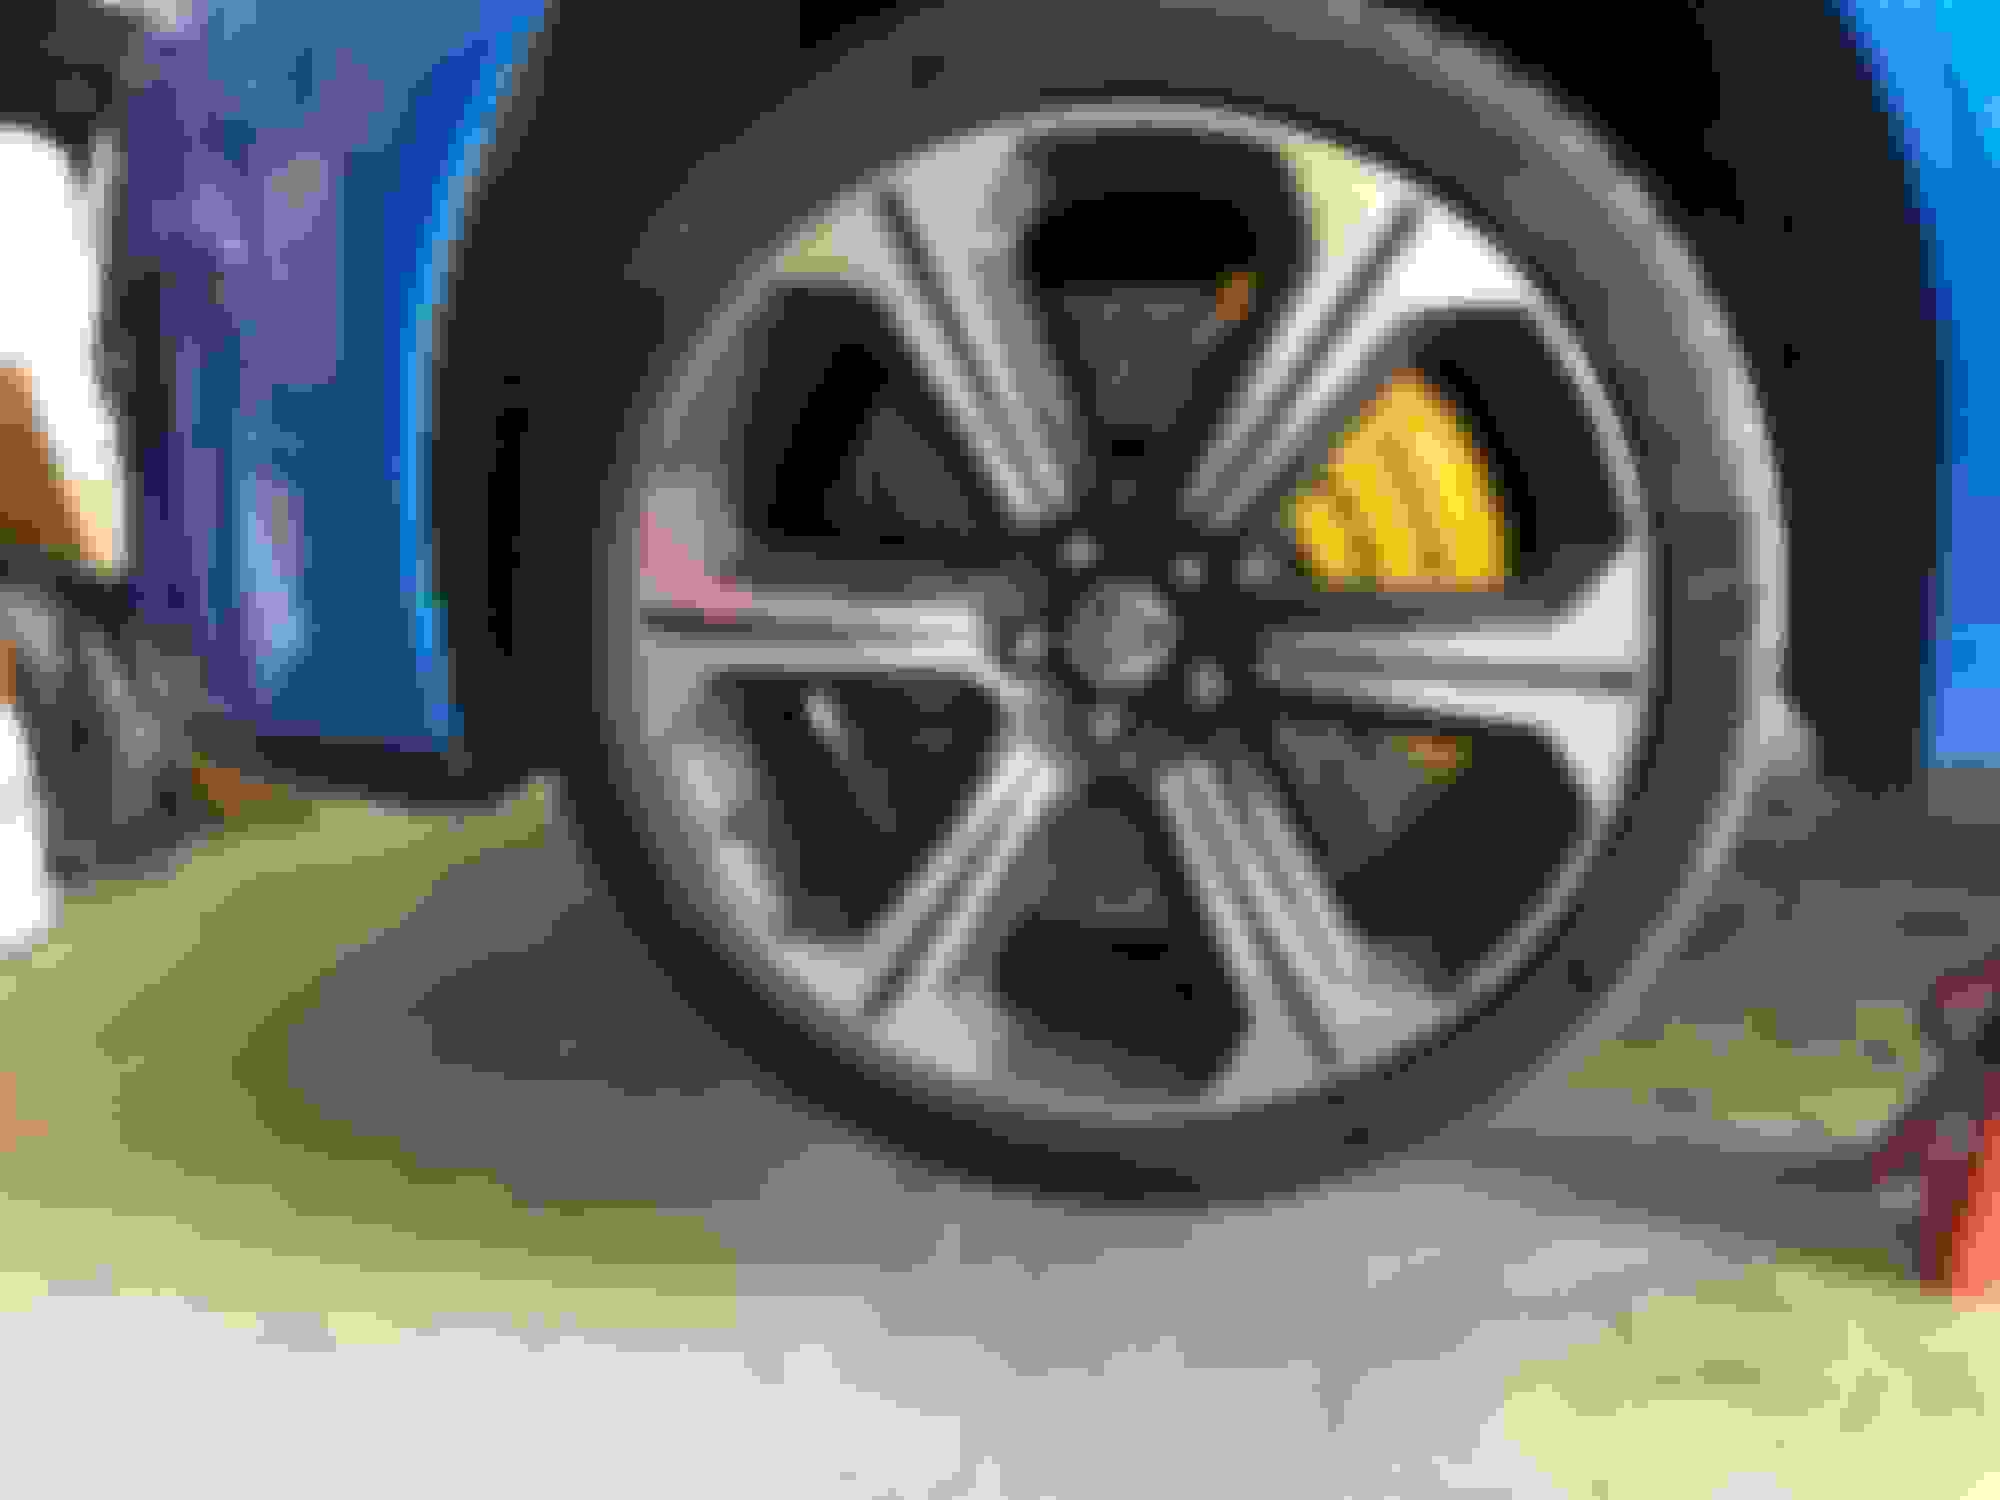
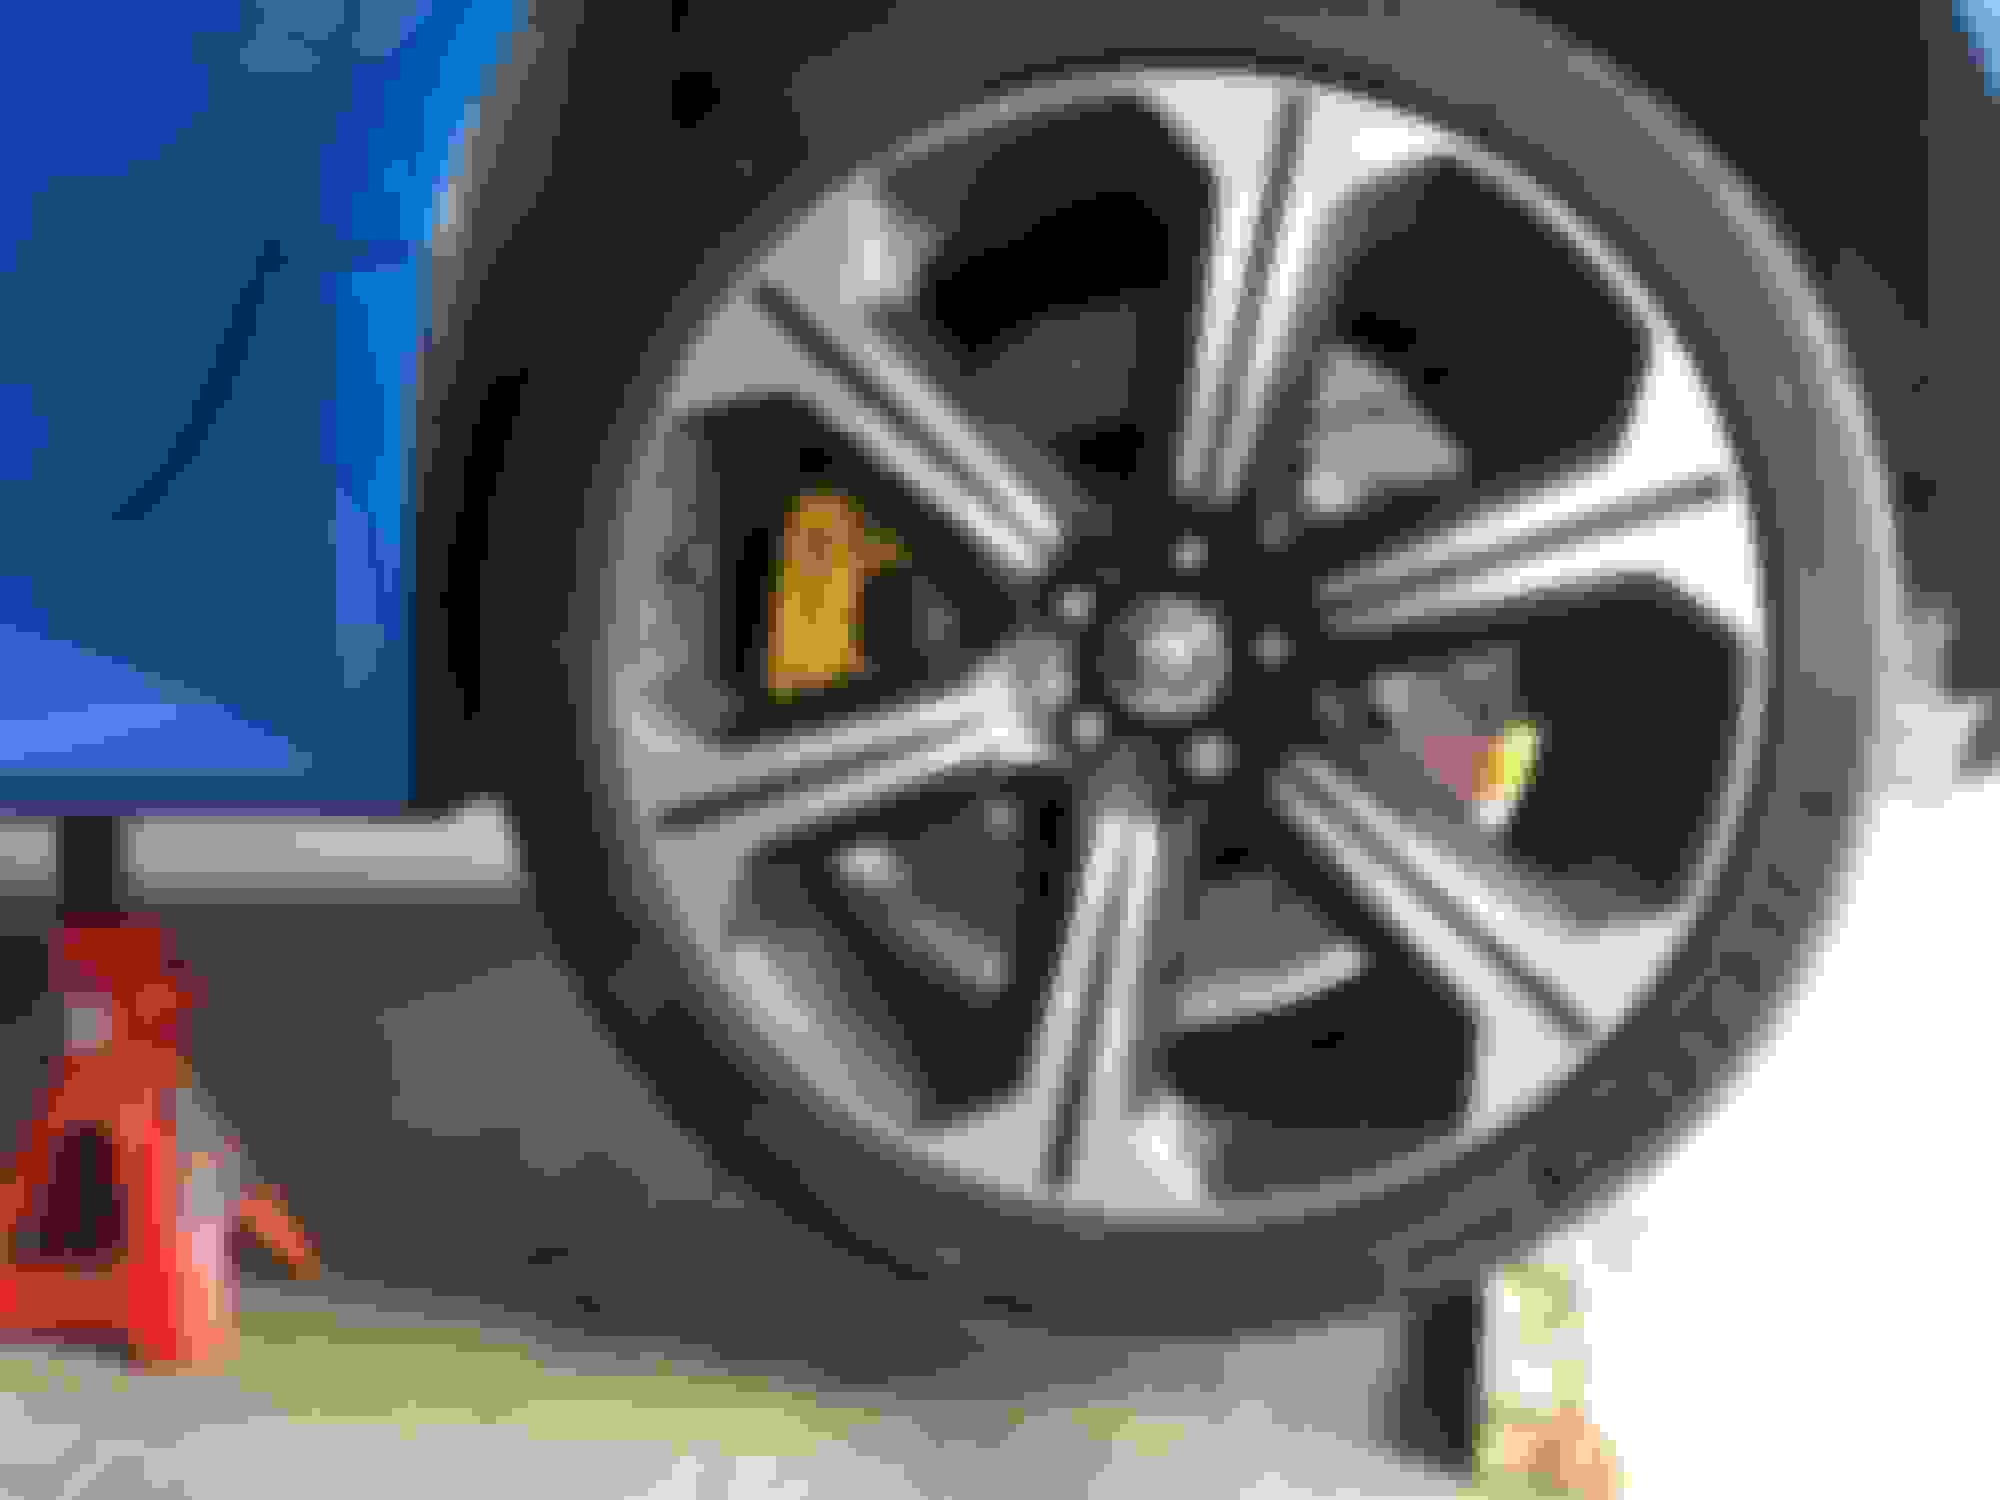
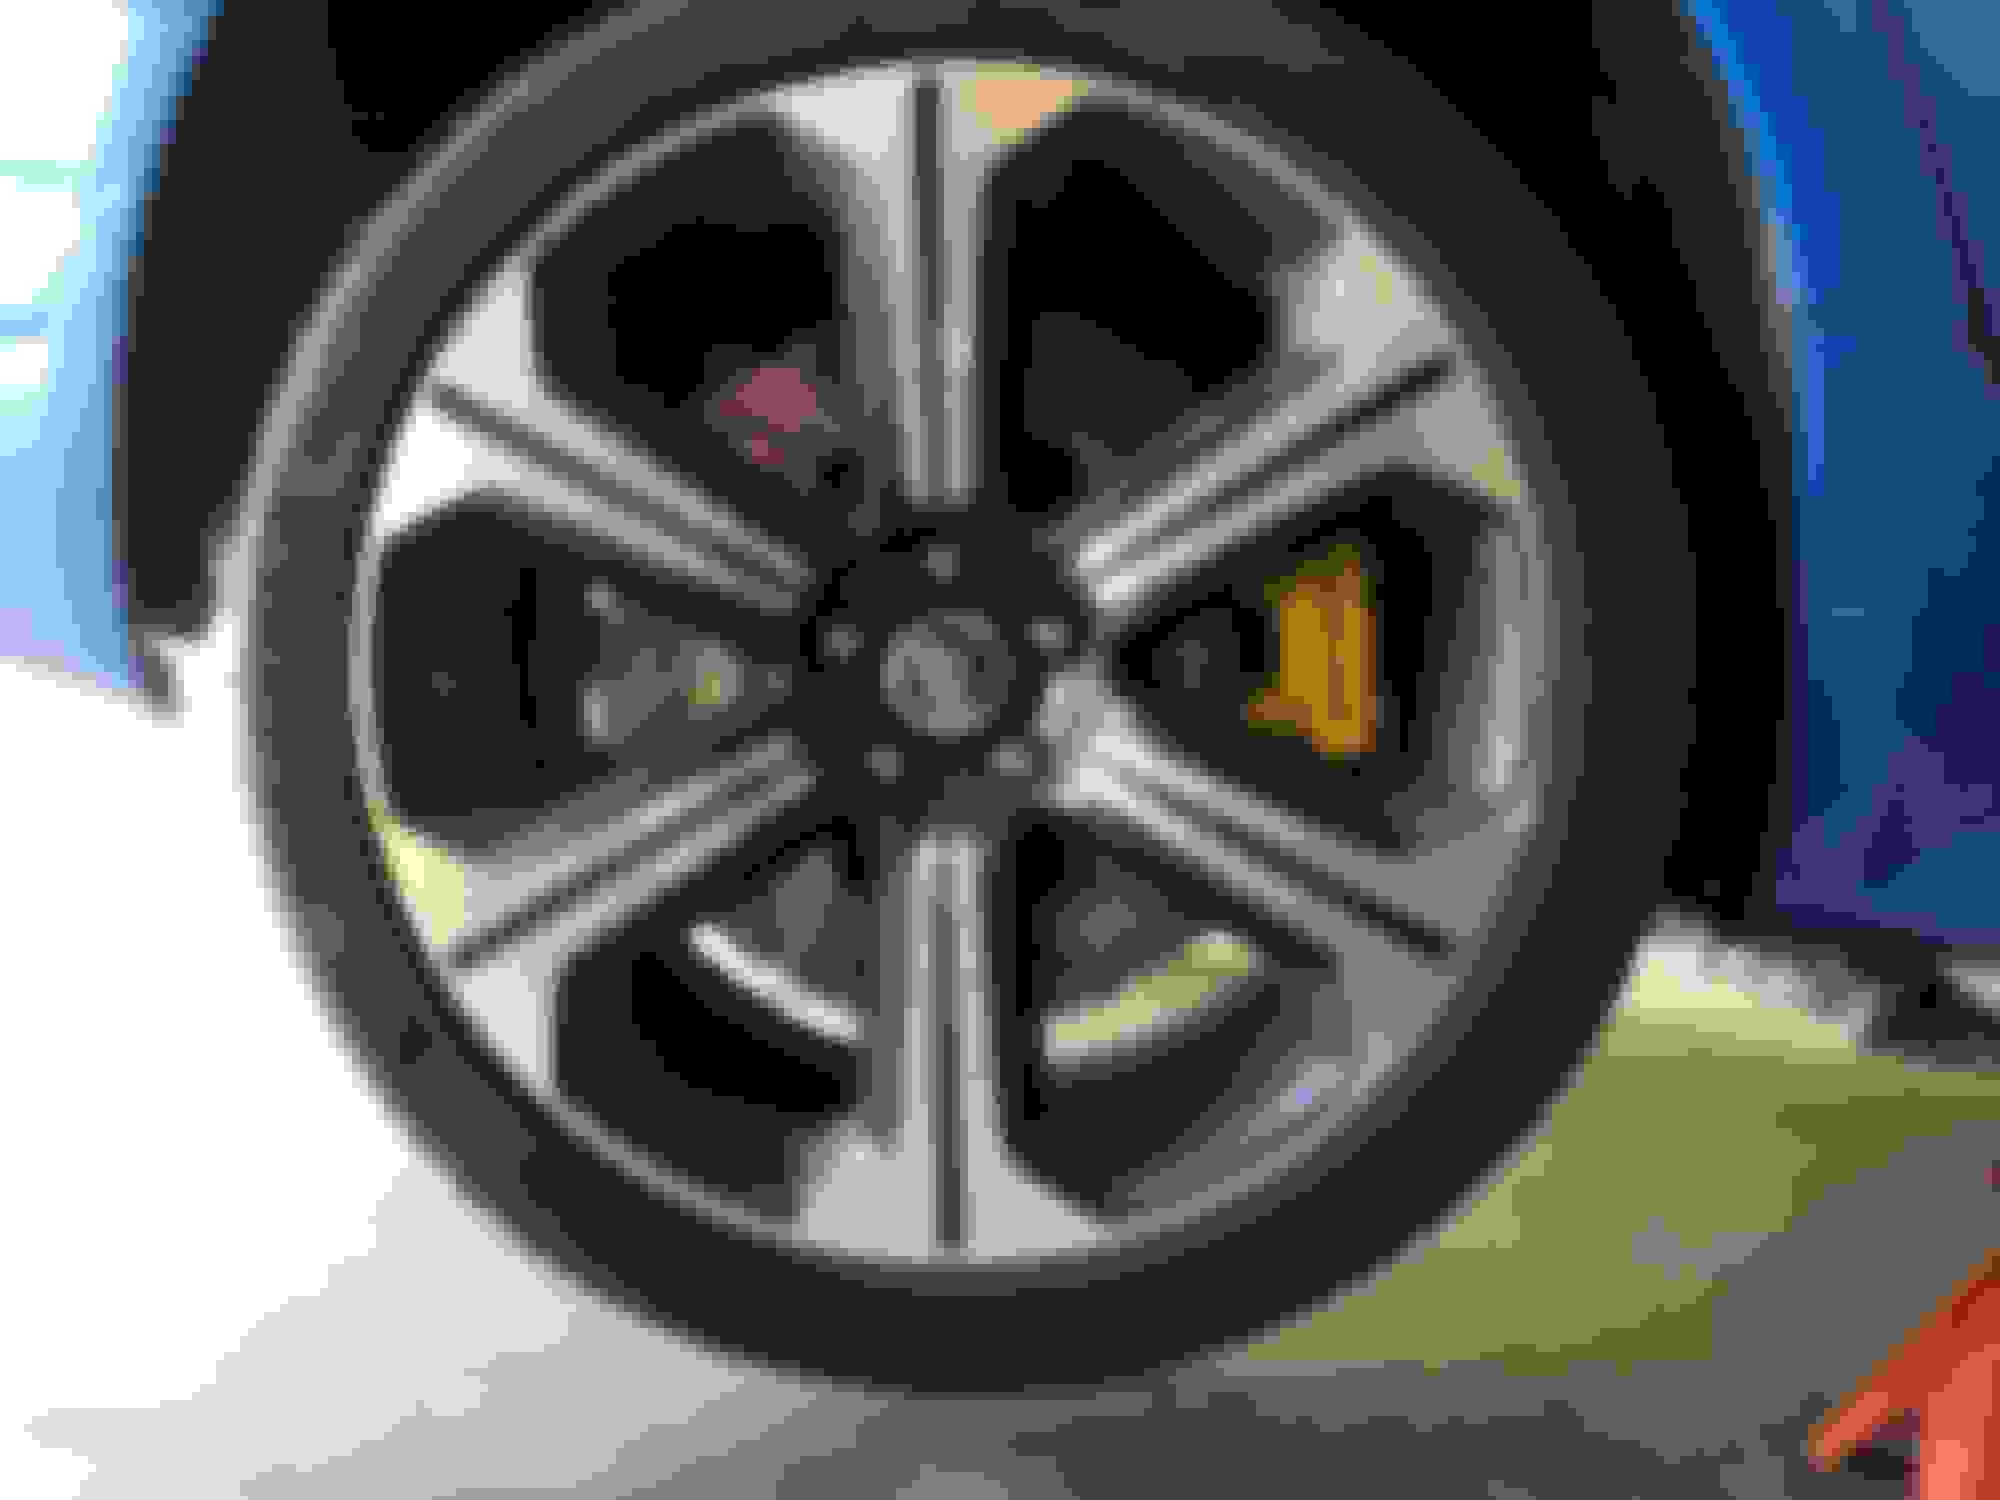
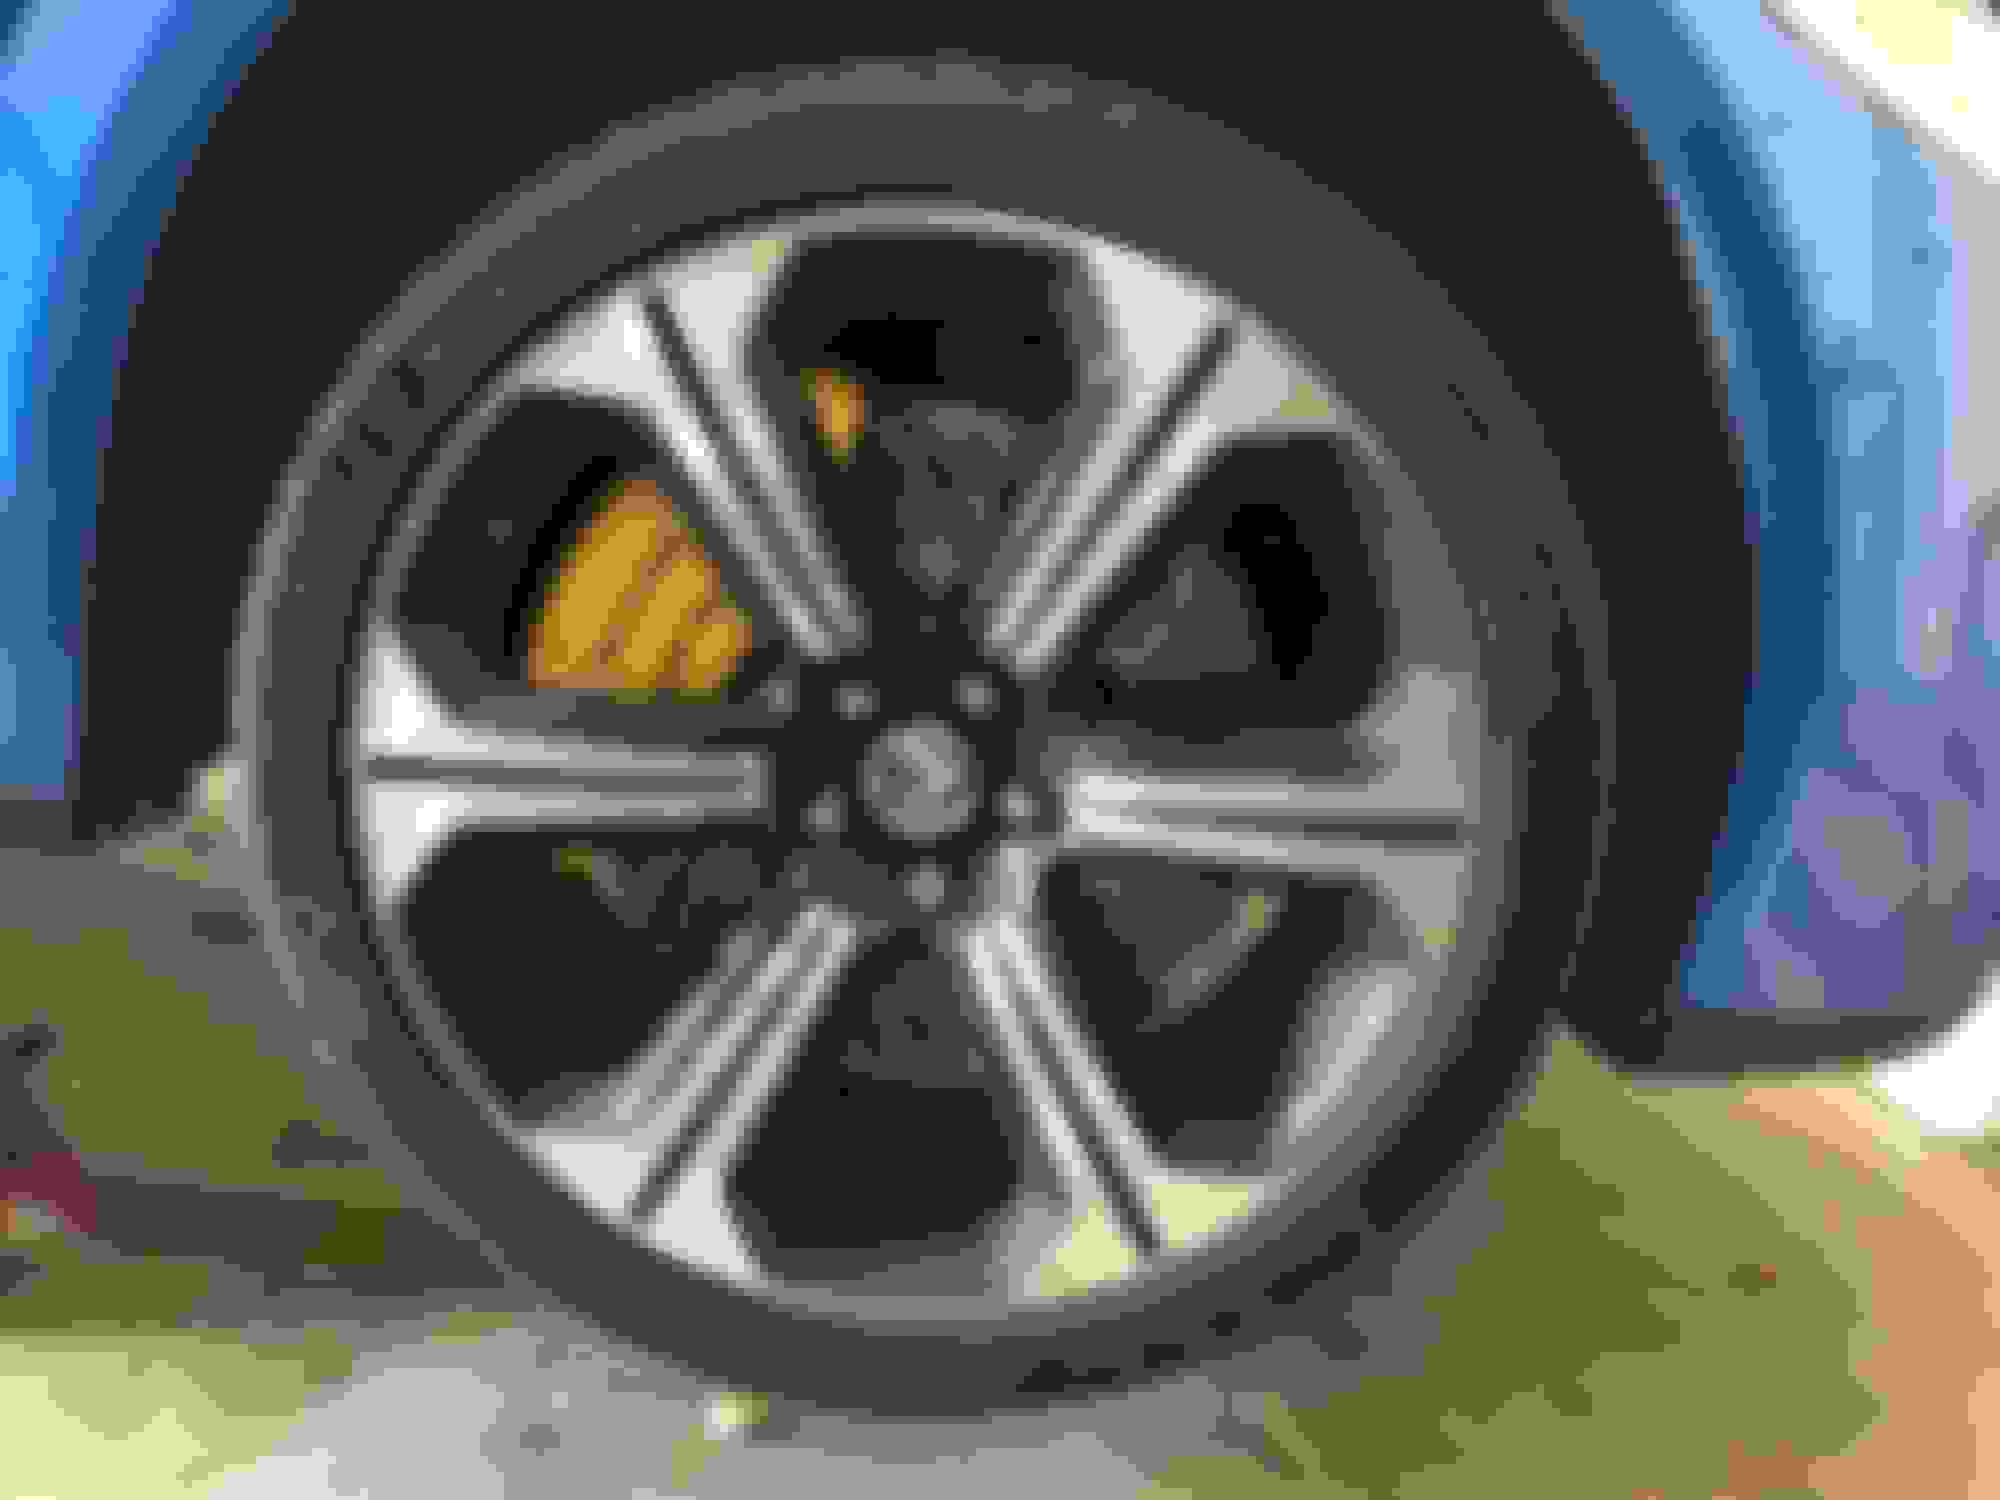
And the finished product:
FL:
RL:
RR:
FR:
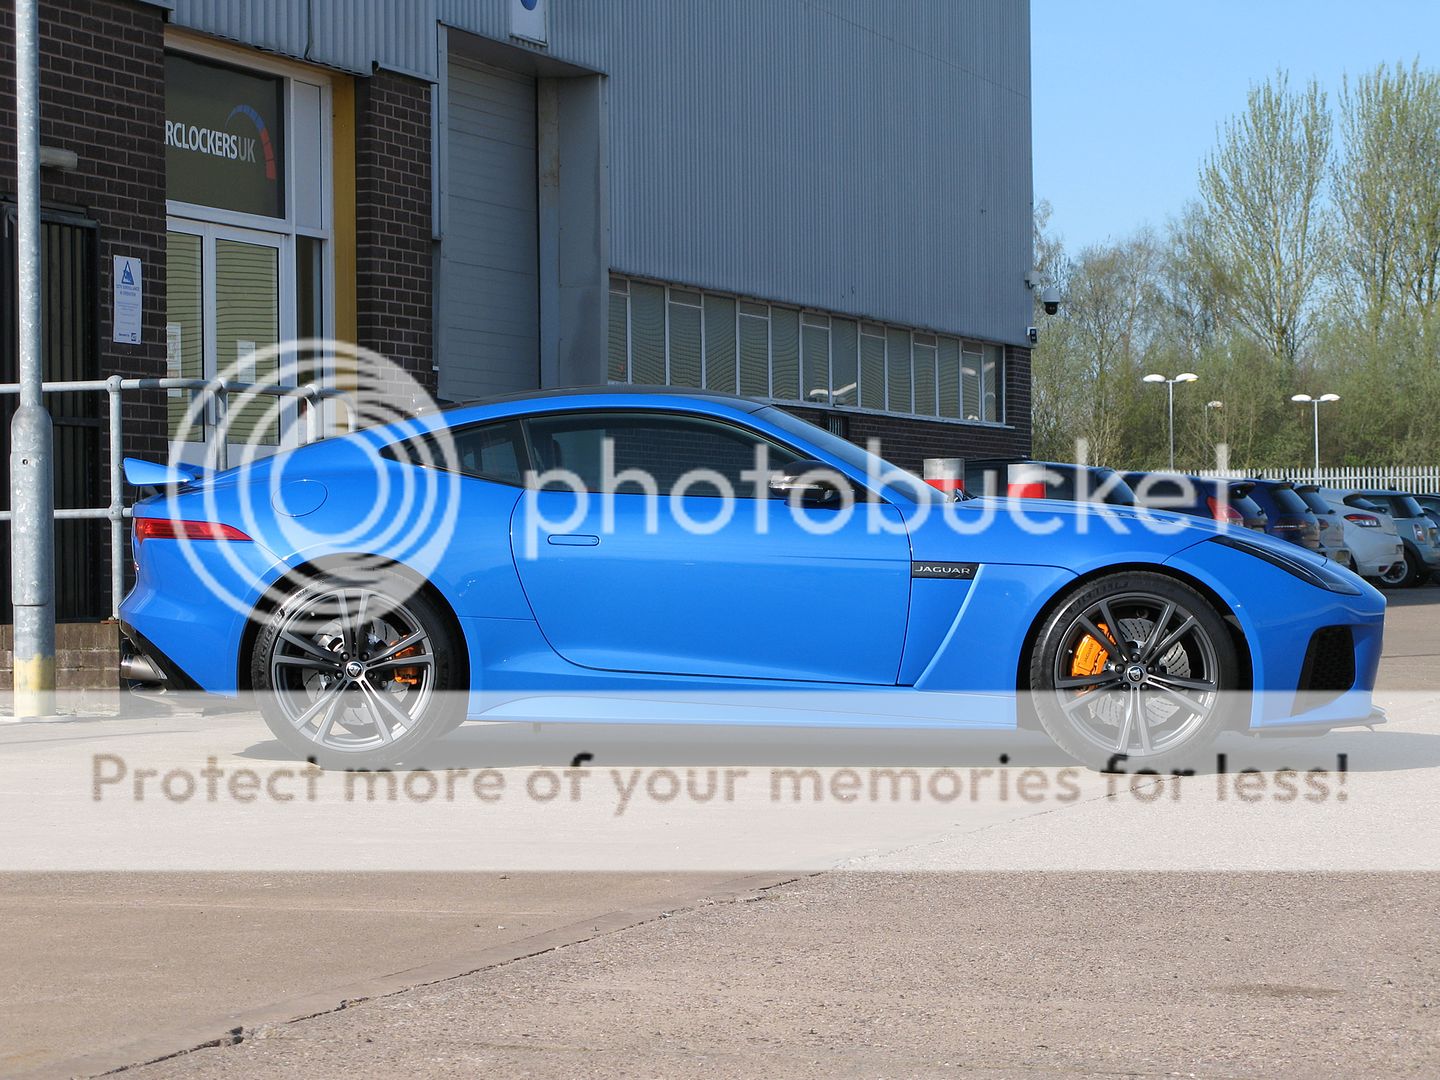
At one point I was considering painting or powder coating my calipers to a yellow color to offset the blue (instead of the current red calipers). I never did it this time around, might be something I do once she goes back in for winter storage in the fall.
I got everything torqued up, and ended up bedding in the new pads, and let it cool down for 20 - 30 mins. After that I really took it easy on the brakes, and the car has been sitting for probably 6+ hours, I will get to see how they hold up now (assuming weather is compliant).
First impressions during bed in, is they seemed to really have a much more aggressive initial bite, but that really could have been my overly worn factory brakes dulling the feeling or the fact that I have been driving my crossover (Acura ZDX), and the Jag always seems to accelerate and brake remarkably better, when I have been driving the "other car" for a few days, till I re-calibrate/ re-acclimate to how the Jag drives. Will provide more feedback, once I have logged some more time behind the wheel.
It's interesting that the front pads are made by Ate. Are the OEM calipers also made by them? I haven't really looked at mine that carefully, although I will once I'm able to install my Wortecs.
It's interesting that the front pads are made by Ate. Are the OEM calipers also made by them? I haven't really looked at mine that carefully, although I will once I'm able to install my Wortecs.
From all my checking over the years the various brake components for both the XF and the F-Type seems to be made by either ATE or TRW.
I know the rear 376 mm calipers I bought for the F-Type were made by TRW, not sure about the front calipers.
Pads arrived today, and the installation process was simply the reverse, with some exceptions:
The anti-rattle bracket on the front brakes was kind of a pain, but once I figured out a method for the front right, it became pretty straight forward when I got all the way around and did the front left.
Rear wear sensor was a pain to get in, but figured out the way to do it was to remove the spring, install the sensor, than install the spring and sensor together back into the pad.
At one point I was considering painting or powder coating my calipers to a yellow color to offset the blue (instead of the current red calipers). I never did it this time around, might be something I do once she goes back in for winter storage in the fall.
I got everything torqued up, and ended up bedding in the new pads, and let it cool down for 20 - 30 mins. After that I really took it easy on the brakes, and the car has been sitting for probably 6+ hours, I will get to see how they hold up now (assuming weather is compliant).
First impressions during bed in, is they seemed to really have a much more aggressive initial bite, but that really could have been my overly worn factory brakes dulling the feeling or the fact that I have been driving my crossover (Acura ZDX), and the Jag always seems to accelerate and brake remarkably better, when I have been driving the "other car" for a few days, till I re-calibrate/ re-acclimate to how the Jag drives. Will provide more feedback, once I have logged some more time behind the wheel.
Sorry, I should have given you some tips about fitting the front anti-rattle clips and the rear brake wear sensor, I have done both a few times now and I could have saved you some time and hassle!
The yellow edges of the new pads just don't look right to me with the red calipers, and repainting the whole lot yellow or gold would IMHO look really good as those colours suit the French Racing Blue very well.
And funny about the braking difference between your two cars, the first time I let my son drive my XFR he repeatedly tried to throw me through the windscreen as the XFR brakes bit a helluva lot harder than his car's brakes (2014 Mazda 3)!
That's a pretty crazy rotor design. Probably suits a Polaris Slingshot more than an Jag. You should definitely have painted those pads with some high temp black paint. Having the ketchup and mustard color scheme on the brakes with the black and silver wheels combined with light blue body is just way too many clown car colors going on at once.
I feel orange works better with blue compared to red or yellow.
I can still say the brakes are absolutely superb, done lots of hard driving on them now, over 5000 miles infact as I use my car as a daily and vastly better than stock setup in both performance and aesthetics. No noise and dust seems not much worse than stock if any worse.
Looks a lot better without all the colors going on. The wheels being one color, the brakes being one color, and the non-red center caps all work well together.
Given that the rear brakes are embarrassingly small, I would do the calipers in a silver or black so as not to emphasize that fact.
Thanks to everyone's positive (and not so positive) comments and feedback.
So I have decided to paint the calipers Yellow.
I have shopped around (different automotive shops in and around where I live), and in the end I have decided to take this on myself. The thing I am struggling with is the "decals"
Here is the paint I am going with (bought 2 cans, should be more than enough):
Thanks to everyone's positive (and not so positive) comments and feedback.
So I have decided to paint the calipers Yellow.
I have shopped around (different automotive shops in and around where I live), and in the end I have decided to take this on myself. The thing I am struggling with is the "decals"
Not sure if anyone else has taken this on themselves, but which decals were used (or have you had luck with), and where were they sourced from?
Thanks in advance
Having done this (repainted the calipers and/or applied decals and/or clear coated over the top) several times now I have a few tips for you:
1. Do not use different brands or types of colour/base and clear as there is a good chance the clear will melt the base and make a horrible runny mess all over your nice new freshly applied decals. Don't ask how I know this!
If I were you I would scrap the PlastiKote caliper paint and get the VHT in yellow or gold instead.
2. Thoroughly clean and prep the calipers before you apply any paint - use brake cleaner and rags.
3. Mask off the brake rotors either side of the calipers, but no need to go nuts as long as you are careful with the spraying.
4. Apply two or three thin coats of base/colour, allowing the drying time between coats recommended on the can.
5. Clean off overspray/excess with a rag soaked in turps.
6. Leave the final coat of base/colour for at least 24 hours before you stick any decals on, to allow plenty of time for the base/colour to be fully dry, set and cured.
7. Leave the decals for a couple of hours before you apply two thin coats of clear.
8. You don't really need the clear anyway, I have done without it a couple of times now and the decals haven't faded/chipped/deteriorated at all after many months.
9. Those decals you link to are good, I have used the exact same ones with no problems.
10. The smaller "Jaguar" decal is still too long for the rear caliper cover plate (the bit that is held on by two screws) and it fits better on the caliper itself (just above the plate). But that part of the caliper has a ridge on it right where the middle of the decal goes, your best bet is to file/Dremel that ridge off before you repaint the caliper.
11. Very often those after-market centre caps are a loose fit, the solution is to give the fitting tangs one round of insulation tape before you press them into place.
Greatly appreciate the detailed response... I took some of your advice but not all...
Originally Posted by Kenika65
I love how everyone has an opinion, haha!
My opinion, HELL OF A JOB!!!
Wish I could afford your set up!
Hats off for trying this.
As for Colors haha whoptie do, your brakes should outperform any other, period!!!
Respect!
Thanks for the kind words, and appreciate the feedback.
Time for an update...
So the items listed in this thread a couple of posts earlier, arrived on Friday, and made it seem like I was going to have a busy weekend, on top of my usual "to do's" on the weekend.
I can honestly say the most painful part was removing all the dirt and built up gunk off the calipers. The trick to this was to use a stainless steel bristle brush with everything dry... then use a dry rag to wipe everything off, then use soap and warm water in a spray bottle to spray and then wipe everything down, then brake cleaner, spray and wipe everything down... then use sand paper to scuff up the original paint and remove anything that might have been left over...
Its Monday, and I haven't finished up the job (yet), but it should be done before the end of today, so I figured I would post up some "Progress Pics"
These pics are from end of day Saturday...
Front Left, with Clip removed, and caliper taped and bagged anything I didn't want to get covered in paint:
Rear Left, with the rear brakes I completely disassembled (the caliper design is to cumbersome to spray evenly while it's in place), hence its not done, since I needed to re-rent the specialty tool that resets the rear brake calipers:
Rear Right:
Front Right:
Rear Brake Caliper Brackets:
Front and Rear Clips/ Covers:
These pics are from end of day Sunday...
Front Right, with tape and plastic removed, just have to re-install the front clips:
Rear Left, with all tape and plastic removed, and bracket re-installed. Just need to reset the caliper so the caliper can be re-installed over top of the fairly new pads:
Rear Right, same as above:
Front Right, from a couple of different angles, still need to install the front clip:
Will update later today or tomorrow of what the finished product looks like.
No need to rent a rear caliper reset tool (AKA a brake piston wind in tool), you can buy a universal brake piston wind in tool for cheap and possibly less than it costs you to hire one.
Most of them come with at least two "winders" and a range of fittings such that one of them will fit the two holes in the brake piston.
That way you have one forever if/when you need to work on the rear brakes again.
When I say rent, I should clarify... It costs me nothing but a deposit (and my time to drive there and back) that I get back in full once I return the tool kit in the same condition as I borrowed it in.
I was thinking of buying but when I realized that I would be doing this once every 3 years, and the location isn't that inconvenient (for now), I opted not to buy one.
 07-15-2018, 08:10 PM