When you click on links to various merchants on this site and make a purchase, this can result in this site earning a commission. Affiliate programs and affiliations include, but are not limited to, the eBay Partner Network.
I wanted to change the chrome blade on my 1996 Jaguar X300. With your help, i managed to get the bumper off in the end. But one of the bolts (3) is spinning, so i had to remove the three screws (19), holding the bracket (1).
Because the bolt has some play in the z-axis, my guess is, that the nut which is pressd into the plastic beam (9), is loose and turning. Does anyone have an idea, how to fix that nut so I can remove the bolt?
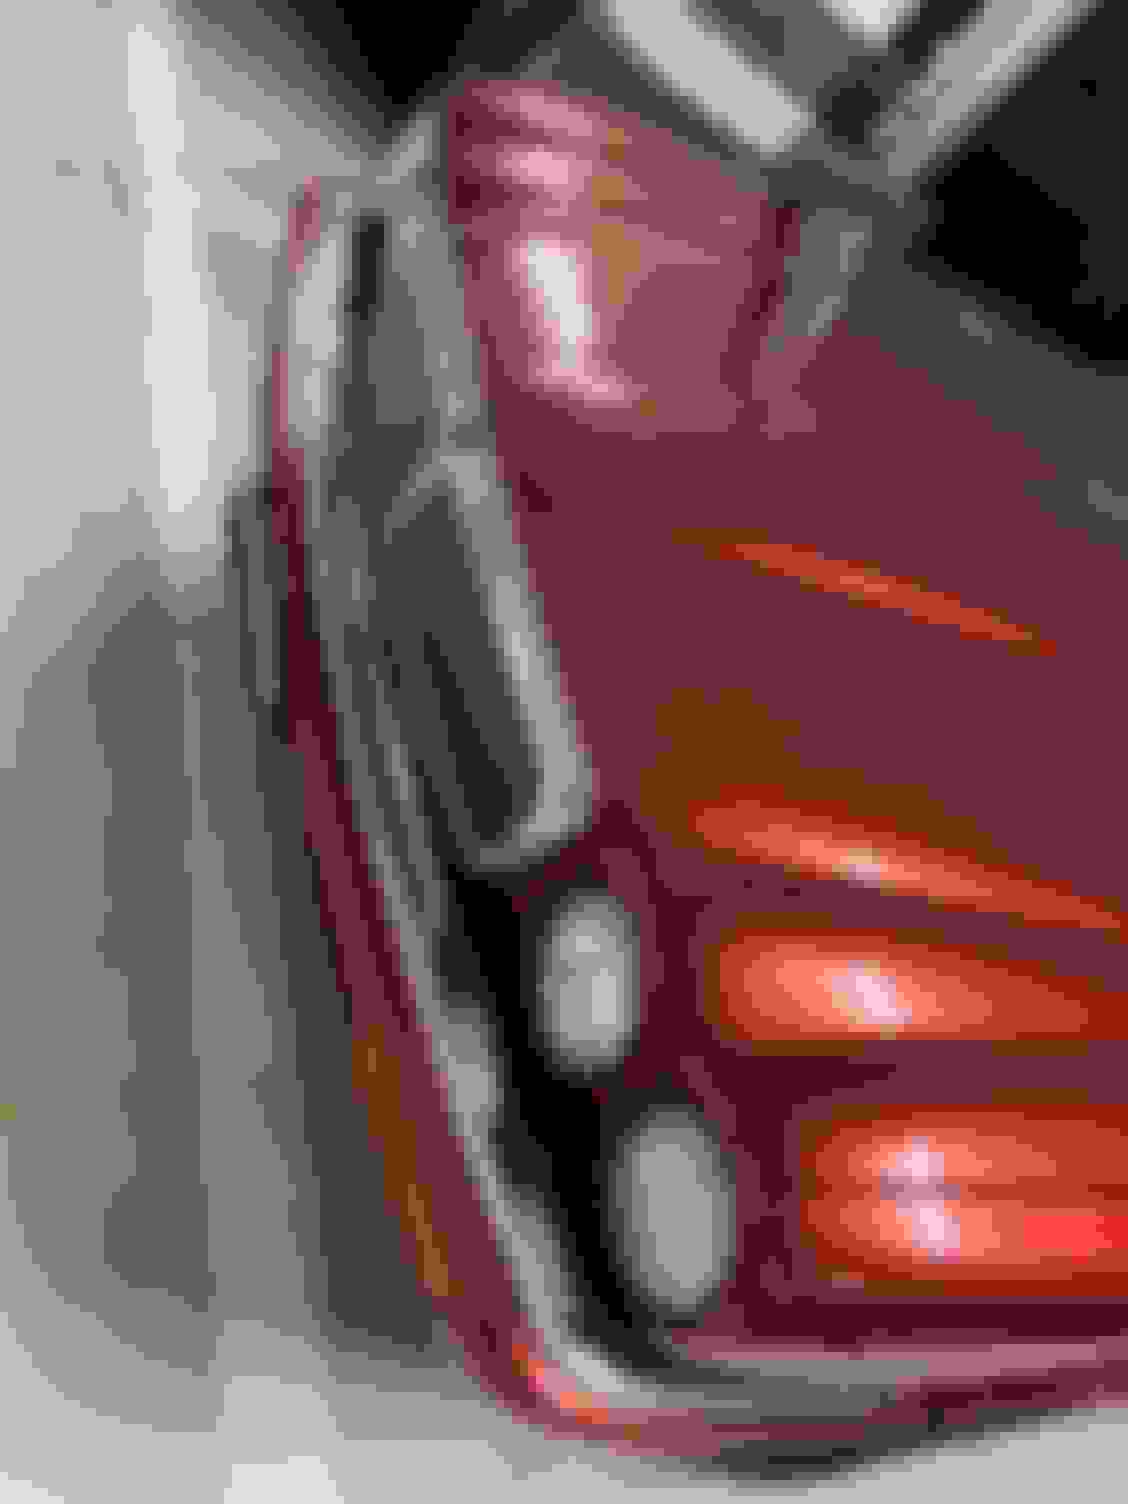
Second question: Is the chrome blade (5) held in place with plate screws only? I see a lot of rusty screws and some rivets.
I changed a scratched X300 rear bumper centre chrome many years ago but recall it was only secured with the stainless steel Retention Clips (item 8) and their screws which I also renewed. No reason the front should be any more complicated.
With European specification vehicle, you have the plastic Bumper Beam. There is a brass nut bonded into these and the bolt seizes into it. When the bolt is turned in an attempt to remove it, the nut bonding fails and it simply rotates in the Beam. With the similar design on the XK8 the only solution is to break the Bumper Mounting Bracket. If it's possible to access the Mounting Brackets on the X300, it would be an alternative to such drastic action.
GGG is exactly correct, and despite many hours trying to figure out an alternative solution, I ended up cutting through the plastic body of the mounting, destroying it. The marginally good news is that the front mountings are less expensive than the rears, and the very good news is that you managed to remove one of them successfully! Not one of the X300s better designs.
The front is way more complicated than rear when replacing bumper chrome blade. You're correct in saying that there is a small brass or copper nut in the bumper plastics and when forced out it will break and spin in the plastic preventing you from getting it out. That said, you have to actually make sure its that little nut that is spinning and its not seized up spacer around the bolt(2). If its the nut then you can still undo the bolt by removing the undertray and pushing various screwdrivers/crowbars in the hole in there and pushing against/blocking the nut itself(I've managed to undo a number of them that way). It may initially look like there is no access in there but get your hand in there and you'll find a sweet spot to get that nut blocked and then bolt itself out.
The blade itself is secured with tiny bolts and metal clips. Don't bother getting these bolts out as they'll be rusted completely and wont be reusable as holes in the blade itself will be too large now too, simply cut them all off. Instead, use rivets to secure it to the bumper, much easier and holds blade well.
As for fixing the bumper nut again in place, clean the bolt with a thread die, screw either original or bigger nut at the end of it, heat it up and push/melt it back into the plastic, I've further used epoxy to secure it and of course lots of grease later to protect threads from further corrosion, no issues afterwards.
Finally I had some time & could devote to the bumper.
When the chrome blades are removed, you can see the top of the nut, which causes all the troubles. Unfortunately, you can not simply fix them with pliers. The solution was to drill two holes & fix the nut with small screws. Then the fixing screw could be removed without cutting the plastic console. Use loads of copper paste for the assembly, so that the mounting screw can be easily removed in the future. New middle chrome blade 🤩 without the holes for the headlight washing system.
Thanks for the offer. Im not 100% sure, which plug you mean. A picture may be helpful.
Otherwise, it should be said that the conversion has proved successful. I had to dismantle the front bumper only once because a turn signal plug was loose.
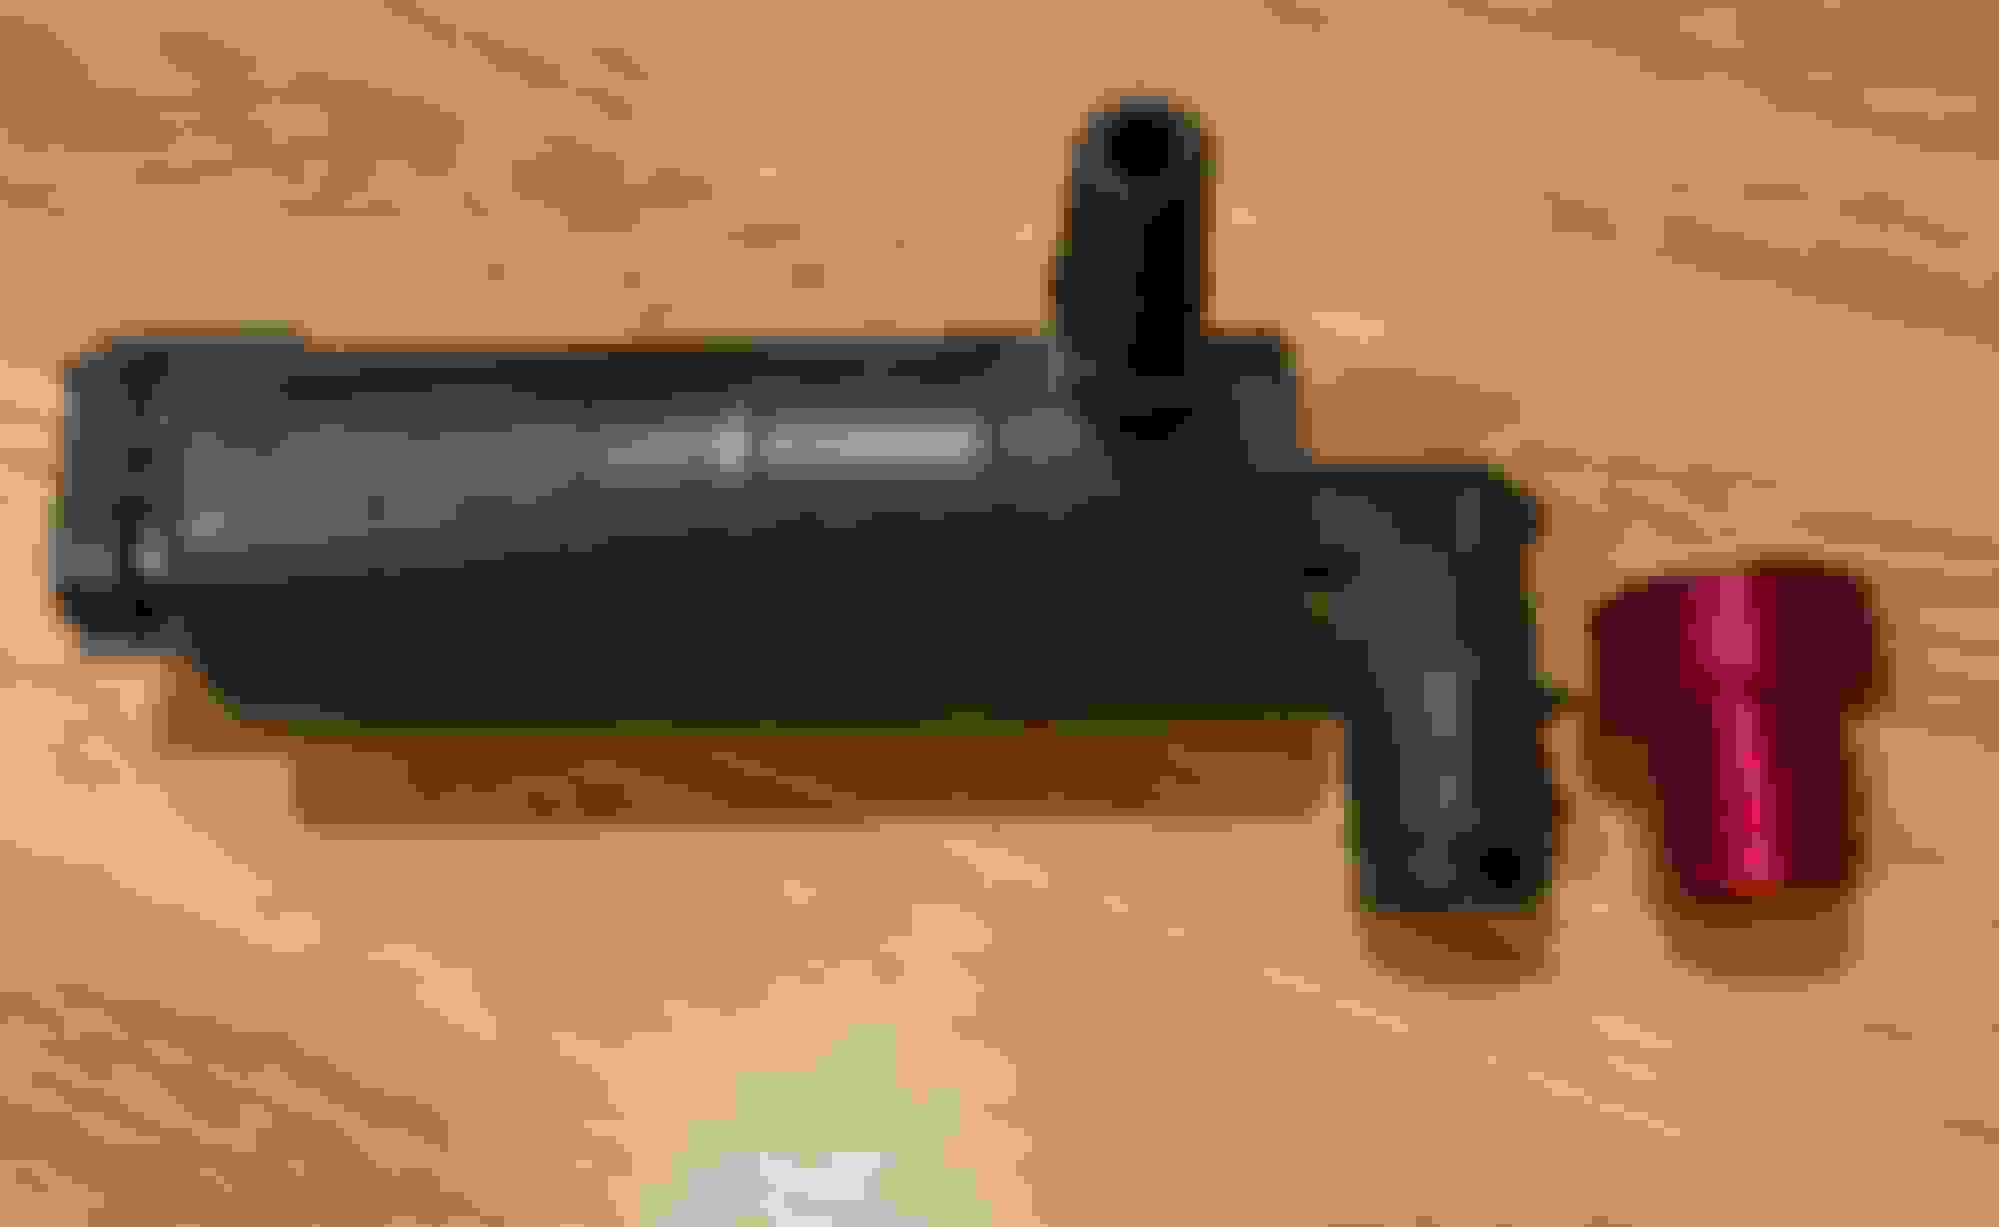
I mean to plug the hole where the powerwash pump was installed. Or did you replace the washer bottle for one with a single pump? I don't have a picture of the plug right now, a friend is printing it for me. This picture shows a washer bottle without headlight powerwash.
Hi Daniel, this is what the 3D-printed plug looks like. You can have one, my friend printed two! It even matches my carnival red paintwork
Originally Posted by Jag Daniels
Hi Ivar
Thanks for the offer. Im not 100% sure, which plug you mean. A picture may be helpful.
Otherwise, it should be said that the conversion has proved successful. I had to dismantle the front bumper only once because a turn signal plug was loose.
Man, you guys with these 3D printers. Maybe we need to start a sticky with all the 3D plans instead of reinventing the wheel. I guess it is time for me to get one.
I have been wondering the same thing, it would take a reasonable investment in time and money.
There are free and paid design applications which you need to learn and master, then you have to get yourself a suitable 3d printer with as fine a print nozzle (layer height) as you can afford. Then get a suitable printer filament, I would suspect that would depend on the application, but the ability to print ABS (PETG is a possible option) would be useful.
Then it will come down to some trial end error with the design and how it prints out, which can take some time to refine.
I was able to test a design with a friends 3D printer but would need to borrow time on that and get the right printer filament. This was for the vent fin clip which I linked in another post.
If you are able to produce the design and are confident it will fit, the there are online 3D printing services available, but I haven't tried any yet.
Definitely a good idea to have a 3D design sticky on the forum. It could help a lot with those brittle and broken pieces I'm sure we all have.