When you click on links to various merchants on this site and make a purchase, this can result in this site earning a commission. Affiliate programs and affiliations include, but are not limited to, the eBay Partner Network.
One of the reasons I made this was because I didn't find any threads on it and I was replacing my bad one anyways. Symptoms....., slight hesitation, chugging/bucking and restricted performance under hard acceleration and finally the hard code solid check engine light which took about 4 days to reveal itself.
This is probably the easiest of the 4 oxygen sensors to replace. But nonetheless for those intimidated by such projects (or just because its a Jaguar) others consider simple, hopefully this will put your mind at ease to tackle this. It literally took me longer to put this together (about 90 minutes) than to do the work (about 20-30 minutes).
First thing, and this is a must unless you like hot areas and burnt knuckles....do not start your car beforehand or you will discover why you need to tie back the lead wire. You'll be working by the CAT and it gets very hot.
Once completed, use your code scanner to clear your codes. You'll probably have to do it twice. Once for the 1647 and again for the 1000, then test drive. Mine drives like a scalded dog again....wooohooo!!
I originally thought I was going to have to access this from underneath. Previous experience with US vehicles. But after jacking it up and looking I discovered my error and proceeded per the following pictures.
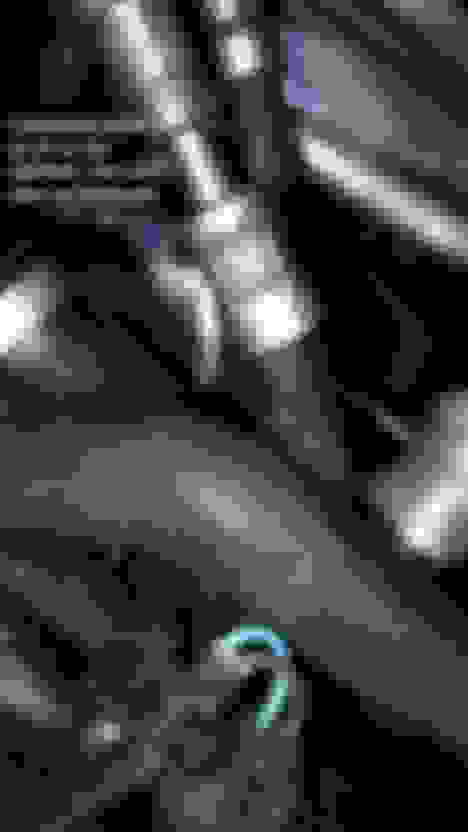
Before starting this and as you go, take pics for reassembly. There are 3 spacer washers (2 on the 3 screw heat shield mount and 1 on the small heat shield stud mount) and a 2 piece heat shield that only go in certain positions. Its not difficult if you pay attention as you go. Be sure to have your tools and sensors ready before starting. You usually have to order the upstream one, I easily found the downstream at O'Reilly's.
Ok, so now the hard side, the left bank. I replaced both since it would be inevitable the downstream would go south in a month. Look at yours and you'll probably agree. You will need to move the reservoir and surrounding tubing about at some point at different times. When doing so remember to be careful, you have older plastic connectors and they can and may crack/break. So don't force things, work with them and you'll save spending more money than you have to.
This is not a fast job, for a semiskilled mechanic and the correct tools ready, it will take you a good part of the day, barring the condition of your parts your removing.
Also, I did not mention this in the pics, but I did remove the throttle cable clip, at the throttle body, from its seat just to push it over out of the way.
The stud that broke, ...broke on removal, not install. I failed to clarify that in the pic.
After getting the penetrating fluid onto the nuts and having applied a couple good wacks...you will begin loosening the nuts. This may seem simple, but as you loosen, it will being to tighten from scaling. You then reverse a turn and loosen...repeating this until you get the nut off. I didn't need to, but you may have to apply more penetrating fluid as you go. This is especially true for the nut behind the head. Since you can't give it a wack to assist breaking the seal, this will be important here. That process is the most tedious of the whole job, next to jacking the car up and putting it down and jacking it up....etc. Be safe, you stands...never rely on a jack alone, besides, it gets in the way here. I used the spring cup for my jack stand seat.
I wholeheartedly welcome any input from this family of Jag owners to improve this process. I did this strictly from a ignorant view and thus why I wrote and annotated this to help others.
Last edited by Highhorse; Jan 22, 2018 at 08:15 PM.
Thank you for the excellent tutorials! Your photos and clear explanations will help countless others in the future. I've added a link to this thread in the HOW TO quick links section on the home page of this X308 forum.
The passenger side is easy. I did the driver side from above after removing the overflow tank ..... tight fit and it took a while (Saturday morning on and off)
liquid wrench is a must ..... doing from above the long handle O2 wrench was needed to knock it free .. Then needed a small one to remove.
Get the exact fit sensor so all the connectors match ..... was your sensor a Bosch? My memory was the OE was ford sourced .. so Japanese
Hints for changing left side O2 sensor from the top
Tools used. Thin 3/8" ratchet with swivel head, 3/8" fuel line disconnect and socket style 02 tool. The socket style works better than the other style because all the torque stays axial.
Remove the throttle cable and left side fuel line. This gives much more of an angle to work through as seen in the pictures below.
Code 1647 remains and about to tackle this little repair this weekend. However I am confused on how this code is reading. First, is this drivers side or passenger side? Bank 2, sensor 1. I have no value for the other sensor either. Same bank. 0000 on both from reader. Common for upstream and downstream to both crap out together? I don�t believe in coincidences, as a rule.
The problem lies in the heater circuit of the 02 sensor. From the sensor side of the connector (disconnected), there�s 2 black wires. Using an ohm meter, probe the 2 black wires. If you�re on the correct connector that�s attached to the bad 02 sensor, it�ll likely be an open circuit.
Ok, but which side of the car? Drivers or passenger on US model. ?
Hi Bbeck1118,
Don't worry too much about the lack of signal from the downstream O2S for now. Early OBDII Jaguars like your X308 are not particularly good at providing Live Data. Autel scanners are very good at reading available data, so for now I would worry about the known issue with the upstream sensor. That doesn't mean the downstream sensor hasn't failed. It is certainly possible that both sensors could be damaged by a malfunction in Bank 2, such as severe misfires, the head gasket leaking coolant into the exhaust, etc., but you would likely have other symptoms and DTCs if that were the case.
Bank 2 or B is on the left side of the engine as viewed from the driver's seat (U.S. driver's side). Here is the cylinder numbering diagram:
This chart is from the document you can download at the link below:
your information and response is greatly appreciated sir. you mentioned that i would have many other codes in your statement, and i actually had up to 12 to begin with. since purchasing this beauty, I have gone thru these codes, slowly and religiously and when convinced that the readings were right, i purchased and installed all the new items. 8 new coil packs, and new plugs. new air filter, and both knock sensors. I have also put new tires all around, a professional tint on the windows (this is florida),and a new MAF sensor was put on the car before i bought it, but the previous owner had to splice a new plug in also, and i believe he crossed up at least two wires doing this. I get po103 and po112 still and these tell me that IAT is not functioning with any temp recorded, and the fixing for this will follow my P1647 code we are discussing. I am not discouraged with any of this, but i know many would have said quits by now. I am doing all my mechanical work, as it is rewarding. I own and maintain my 1997 Cadillac Sedan Deville D'elegance and its my first love for now. This Jaguar will be my wifes pride, and she is usually side by side with me as i cuss and holler my way thru the roadblocks. we have a blast.
Thank you Addicted! I am making progress. I have seen in other posts on here concerning the replacemnt of the these sensors that an X type sensor is identical and works the same, except it has a little longer wires. And it costs half as much.. I cant help but entertain the idea of spending less for the same results. Is this truth, or not?
I have no idea. For my own cars, I just buy the correct sensor for it that way there�s no guessing. Some people on here may say, �an oxygen sensor is just an oxygen sensor or an air fuel ratio sensor is just a air fuel ratio sensor.�
Thank you Addicted! I am making progress. I have seen in other posts on here concerning the replacemnt of the these sensors that an X type sensor is identical and works the same, except it has a little longer wires. And it costs half as much.. I cant help but entertain the idea of spending less for the same results. Is this truth, or not?
Denso is the oxygen sensor OEM for both the X308 and the 3.0L X-Type, and the downstream oxygen sensors are now listed as the same Denso part number, 234-4798. The Jaguar part numbers for the two cars are very different, but it seems possible that Denso has consolidated the downstream sensors for both cars into one part number with a longer harness that will fit both cars.
But the upstream sensors are different Denso part numbers and the prices are very different. For a 2000 X308 the part number is 234-9016 and the direct price from Denso is $168.26 (a little less at Rock Auto). For a 2002 3.0L X-Type, the part number is 234-9029, and the direct price from Denso is $96.22.
Personally, I highly recommend that you use the correct Denso upstream O2S. Since the upstream sensors provide the ECM with a primary reference for determining engine fueling, even minor deviations from specification can lead to suboptimal fueling. The downstream sensors just monitor the efficiency of the catalytic converters, so it is more likely that you can get away with using cheaper third-party sensors.
So. Started after work with wife right beside me. Tools, flashlight and out of reach items for me are her priority. Lol. Eventually, she even had to try to release a hose clamp since satan put it on the hose upside down facing the ground. Finally released the reservoir, and gave me some room. 3 hours just to get to this point. I bought the socket set for 02 sensors and the long chrome socket will be used tomorrow. Spent another hour removing heat shield,(frozen screws), but penetrating spray finally work and no screw ups. There it is! I see it! First sideways type socket(black) was too long as room is at a premium here. Tried the shorter black one, but being offset, I can not break the sensor loose. Bleeding, bruised, smashed right index knuckle, and all flashlights finally dead, I have to stop. Cannot get the penetrating spray any where close to sensor to help free it. Breaking bars, attachments, different wrenches, extensions, and I have to call it a stalemate. 6 hours into it. I will buy the long thin ratchet wrench to use the chrome socket with tomorrow. It was ordered at same time as sensor (Bosch 15627), and the socket set but it is still a week out. Hoses, and complete lack of space are the main culprits. Wife still loves me, and no misplaced wrenches to the next field, so far. I will not be the disappearing info grabber, but y�all have to put up with my long winded updates, so deal with it 🤣.
In my post, I list using a secret weapon, ...a straw and tube (as pictured), to extend the range and directly place the penetrating fluid. Sorry to hear you fought it so much. Are trying to get to the driver side upper O2 from the top? My explanation states to do it from underneath...way easier and more visible. The passenger side is very doable from the top.
I use a 1/2� drive, long ratchet
(craftsman) with swivel head and one of those 02 sensor sockets as well. I have also cut the wires off at the 02 sensor and put a 7/8� closed end wrench on it and used a larger wrench as leverage like this. These are not the correct sizes pictured below, just an example.
Yes am trying from the top, and yes the drivers side top 02 sensor. From the bottom, would be complete removal of the Cat, like you showed, and I�m not replacing bottom sensor and hoped for a better response from this car, but she doesn�t give in easy. Without cat removal, I can not even put my arm up from bottom to touch the sensor. From the top, I have been able to place the sockets, and wrench�s where they need to go, but very little room to break it loose. I will soak it good with the straw attached before I head to harbor freight. (I forgot what you had stated) about secret weapon. Also, there is an attachment nut below the reservoir that I hadn�t read about, on that bracket. Tomorrow I will slow down a little, as today I was up against daylight leaving quickly. I may also pick up the lower sensor while I�m out, as they are half the price of the upper. Best price I found for the Bosch was $118 and the lower is about $55. I just want this cat to purr again. As always,
thanks to everyone as I lose some skin and gain humility.