When you click on links to various merchants on this site and make a purchase, this can result in this site earning a commission. Affiliate programs and affiliations include, but are not limited to, the eBay Partner Network.
Hello all,
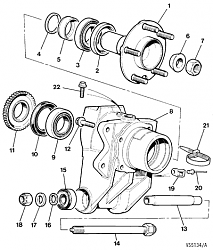
I had some play in my rear wheels and decided to replace the hub/pivot pin/fulcrum bearings - part # CAC4610. Unfortunately while i was replacing it, i decided to check out the diff shaft and it turns out i think the play is from my output shaft bearing. Was a pretty simple job and since i haven't found a write up for it...here it is.
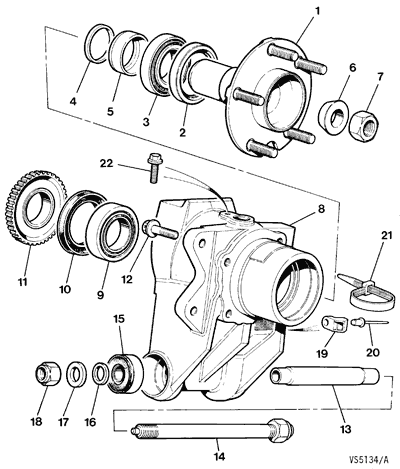
Number 15 is what i changed out.
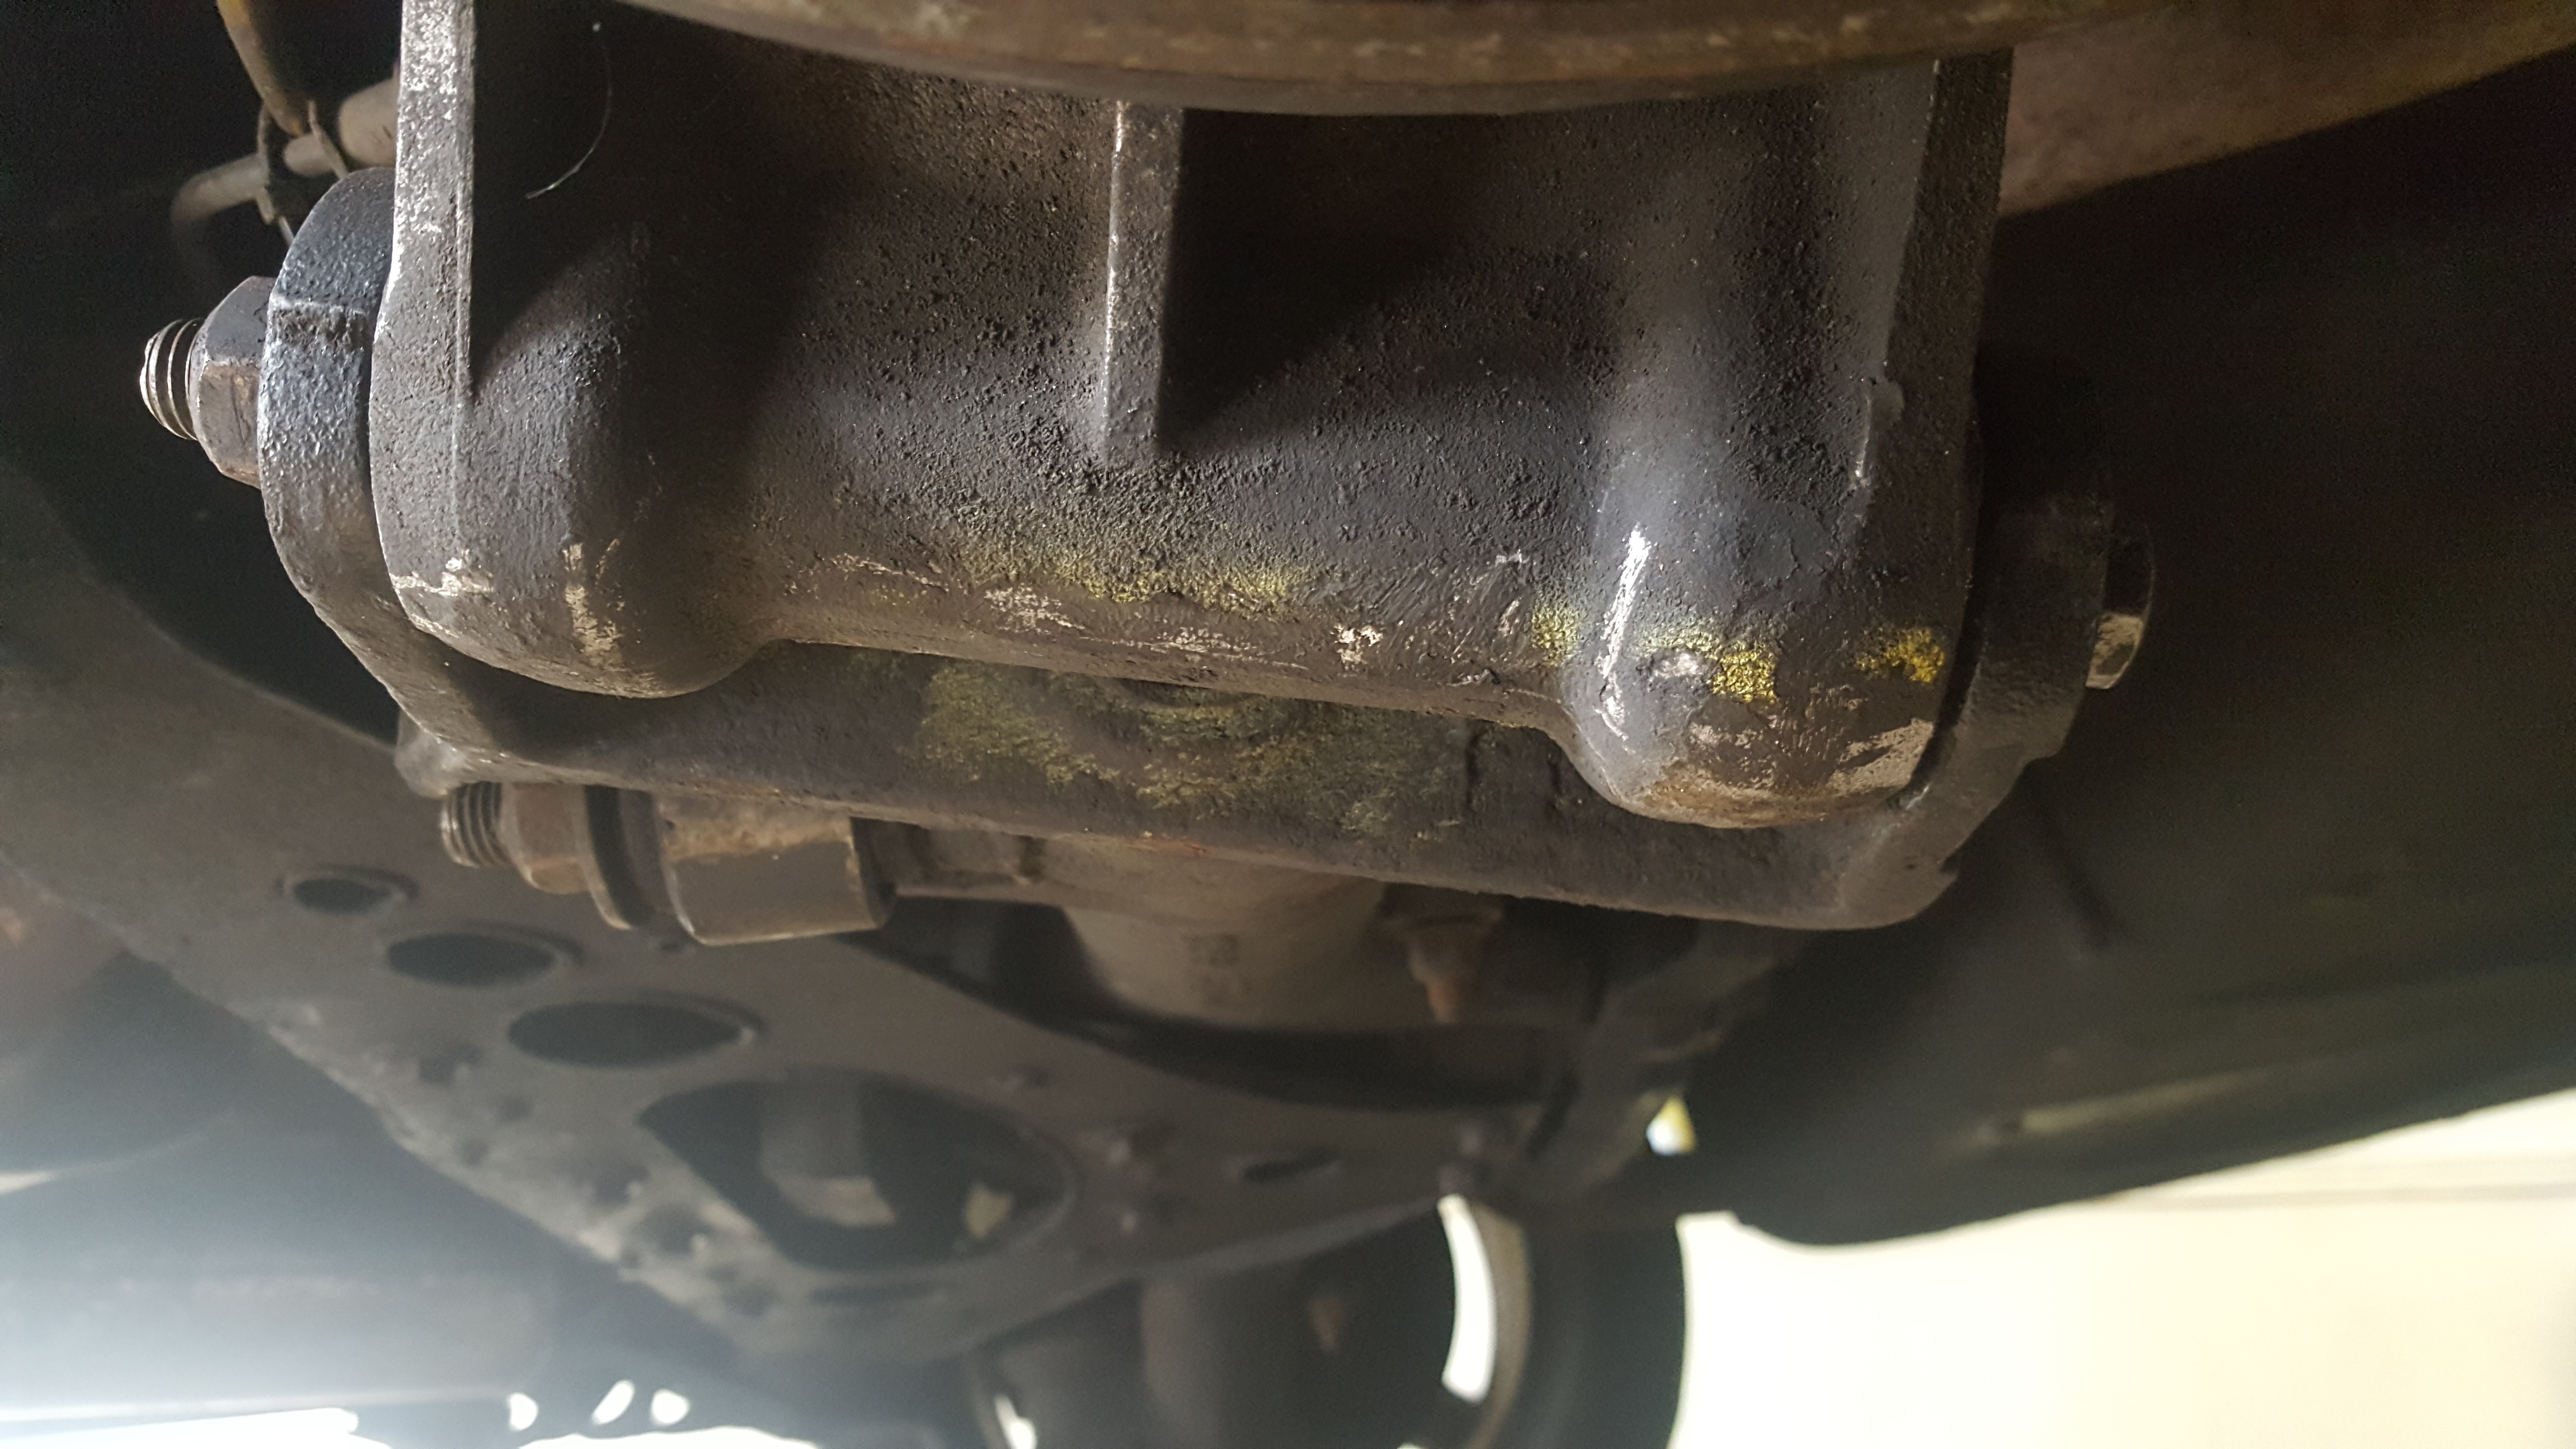
1.Remove wheel and remove the hub/control arm bolt(mark the bolt before removing so that when you install it later your alignment doesn't suffer)
2.Once you remove the bolt you will want to support the hub to do all the work...i just used a floor jack.
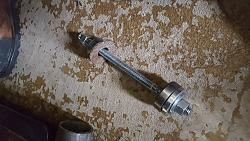
3.With the bolt out you can just put your finger into the bearing and pull it out along with the sleeve. REMEMBER DO NOT LOSE THE SHIMS(little washers) THAT ARE ATTACHED TO THE OUTSIDE OF THE SEAL. You will need to reinstall these shims to ensure your alignment(camber) doesnt get screwed.
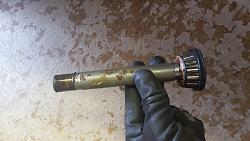
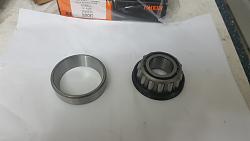
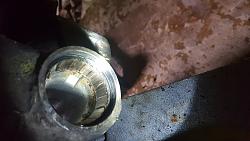
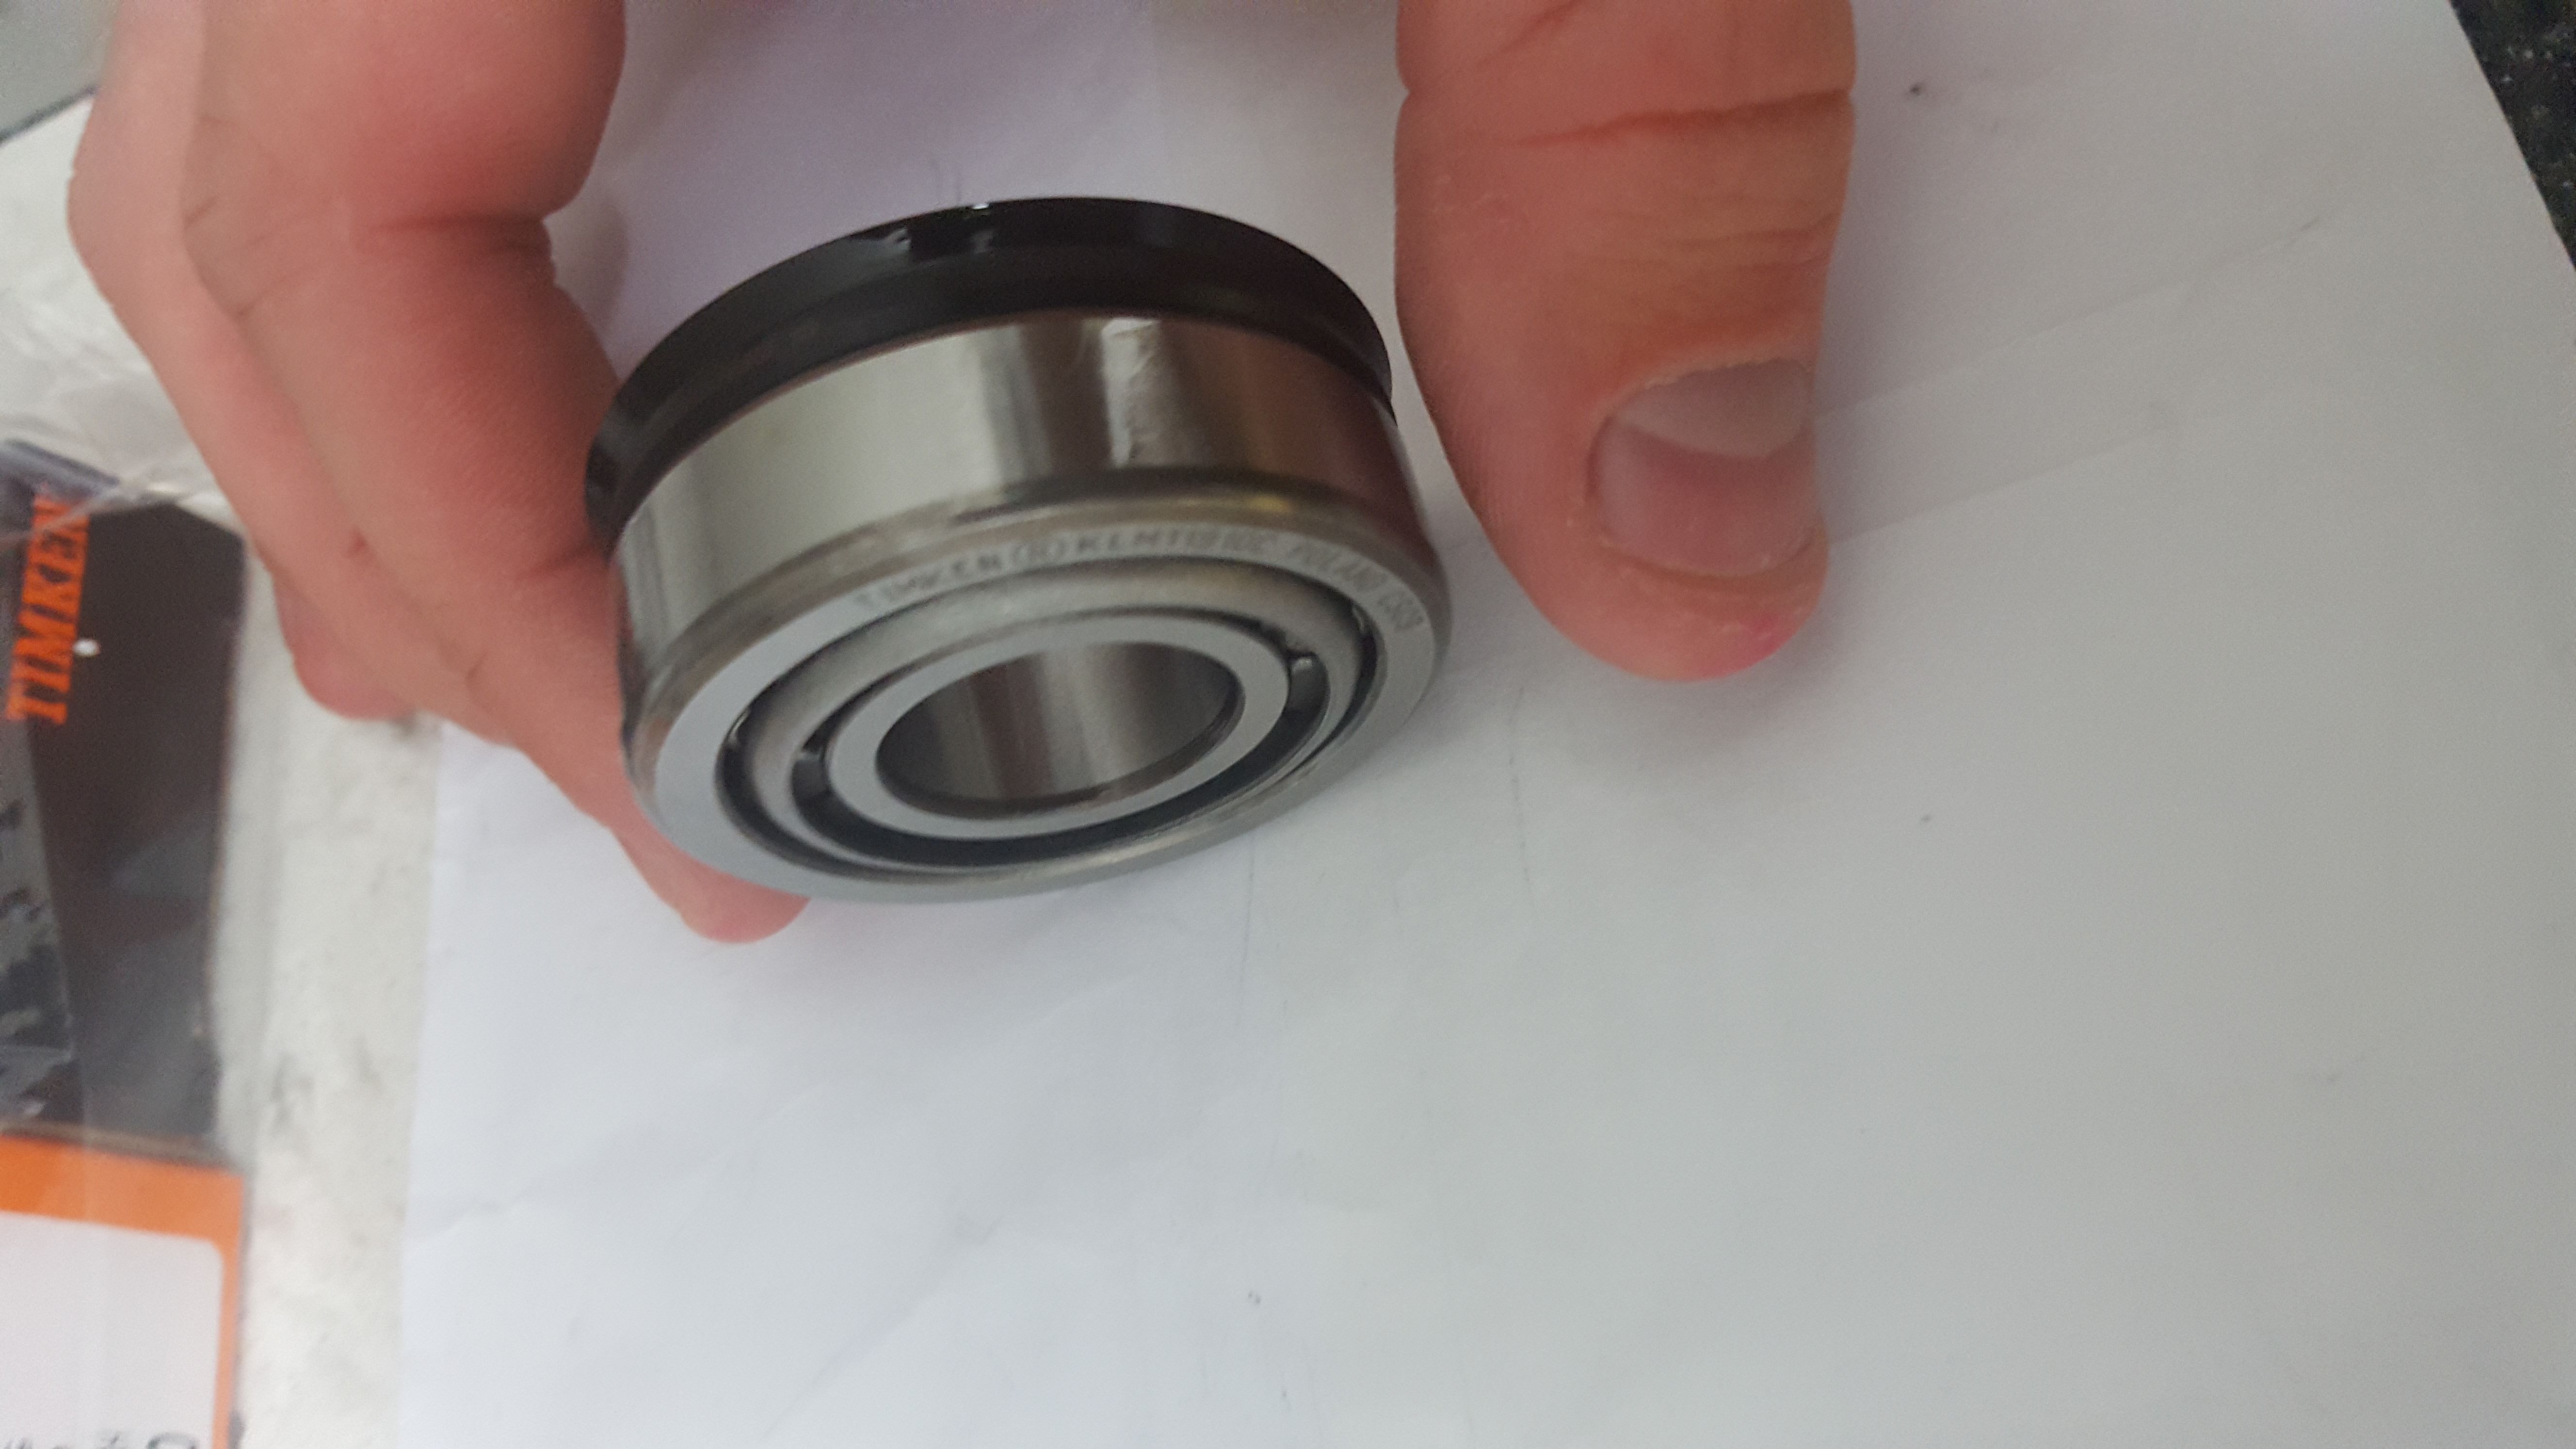
4.The bearing comes in 2 pieces, the taper roller part with the seal and the race that needs to be pressed in. There are two bearings per hub.
5.Now you will have to remove the old bearing race, which is pressed in. There is a little lip on either side of the bearing to help you remove it.
6.I used a seal puller tool i had to hook onto the lip and then hammer from the opposite side of the hub with a socket extension. It came out pretty easily. I tried to use a screwdriver but because of the lip position i couldnt get enough contact with the bearing race, maybe if you bent the screwdriver shaft it could work well.
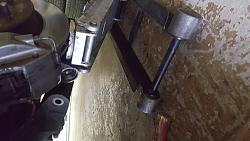
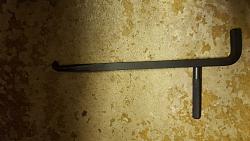
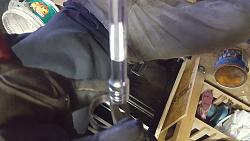
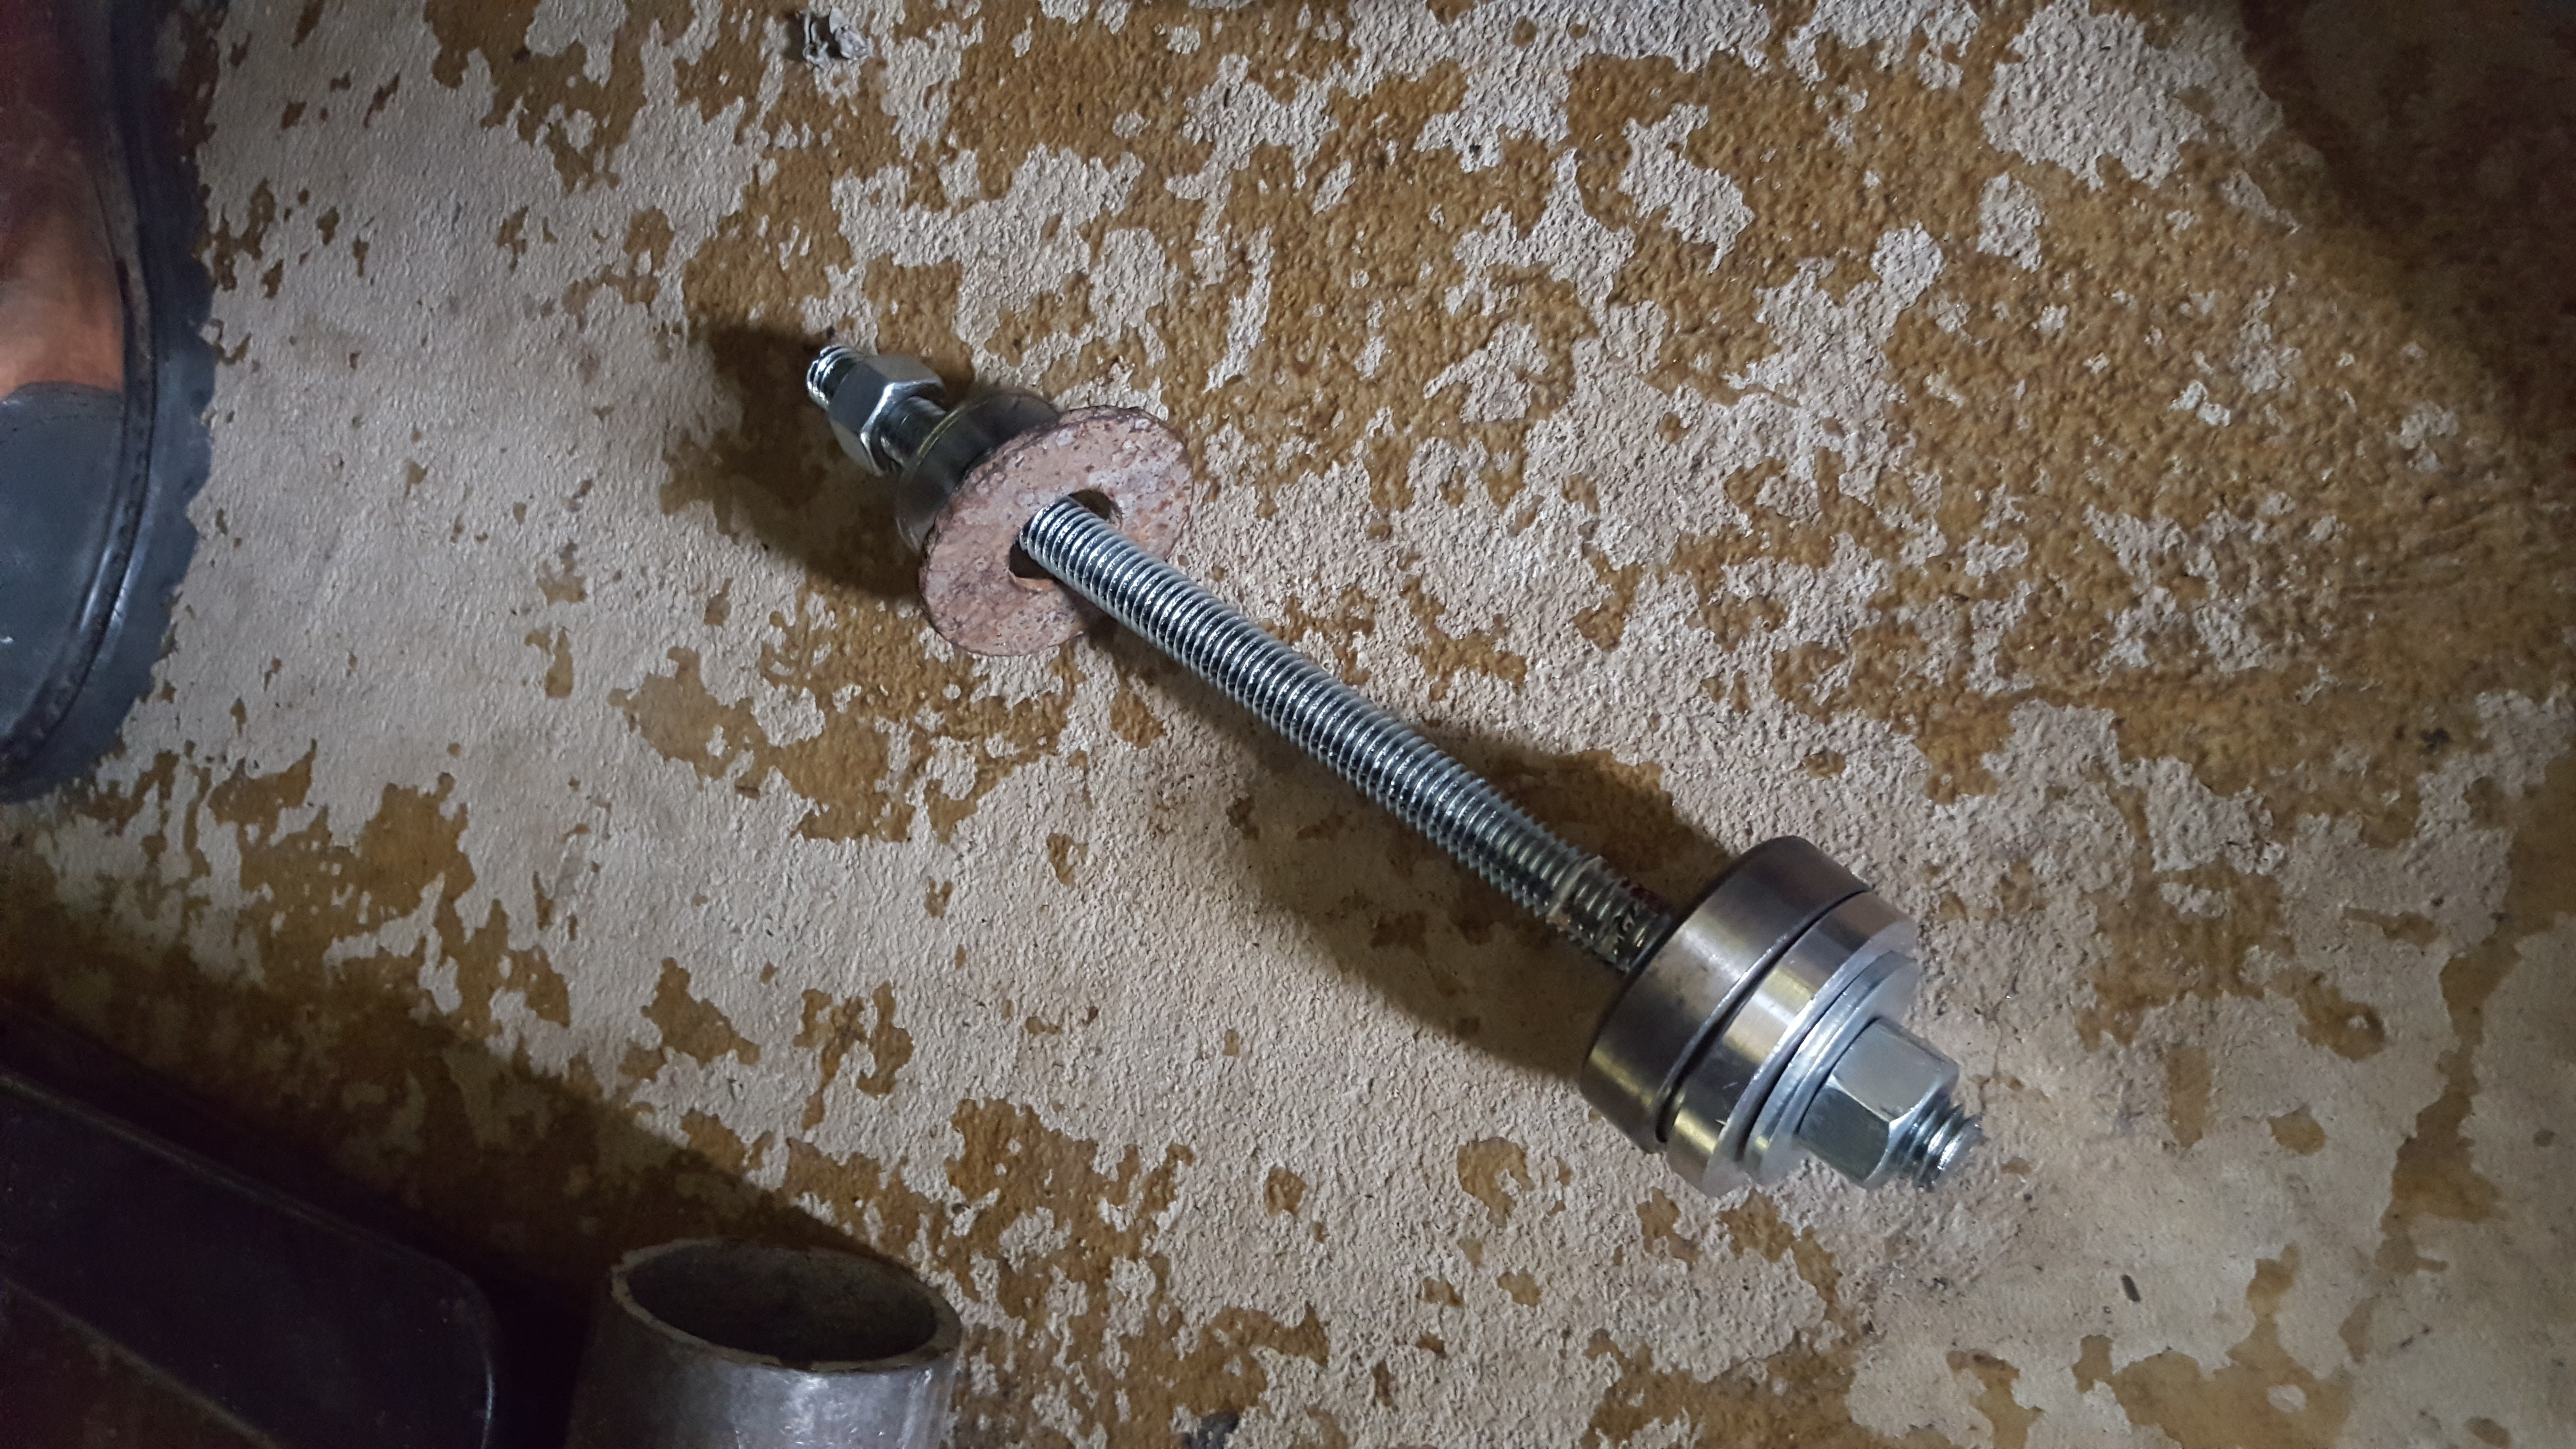
7.To install the new bearing races, i used a 1/2" threaded rod with some washers and nuts to press it in. I had a fitting that is specially used to press in bearing races, however i think a suitable size socket or pipe would have worked fine. It went in pretty smoothly, didn't even have to crank on the wrenches.
8.Then all you have to do is grease up the new bearings, manual calls for Shell Retinax A (which doesnt exist anymore). I used shell-gadus-s3-v220c-2, which is a high temp, high pressure lithium grease.
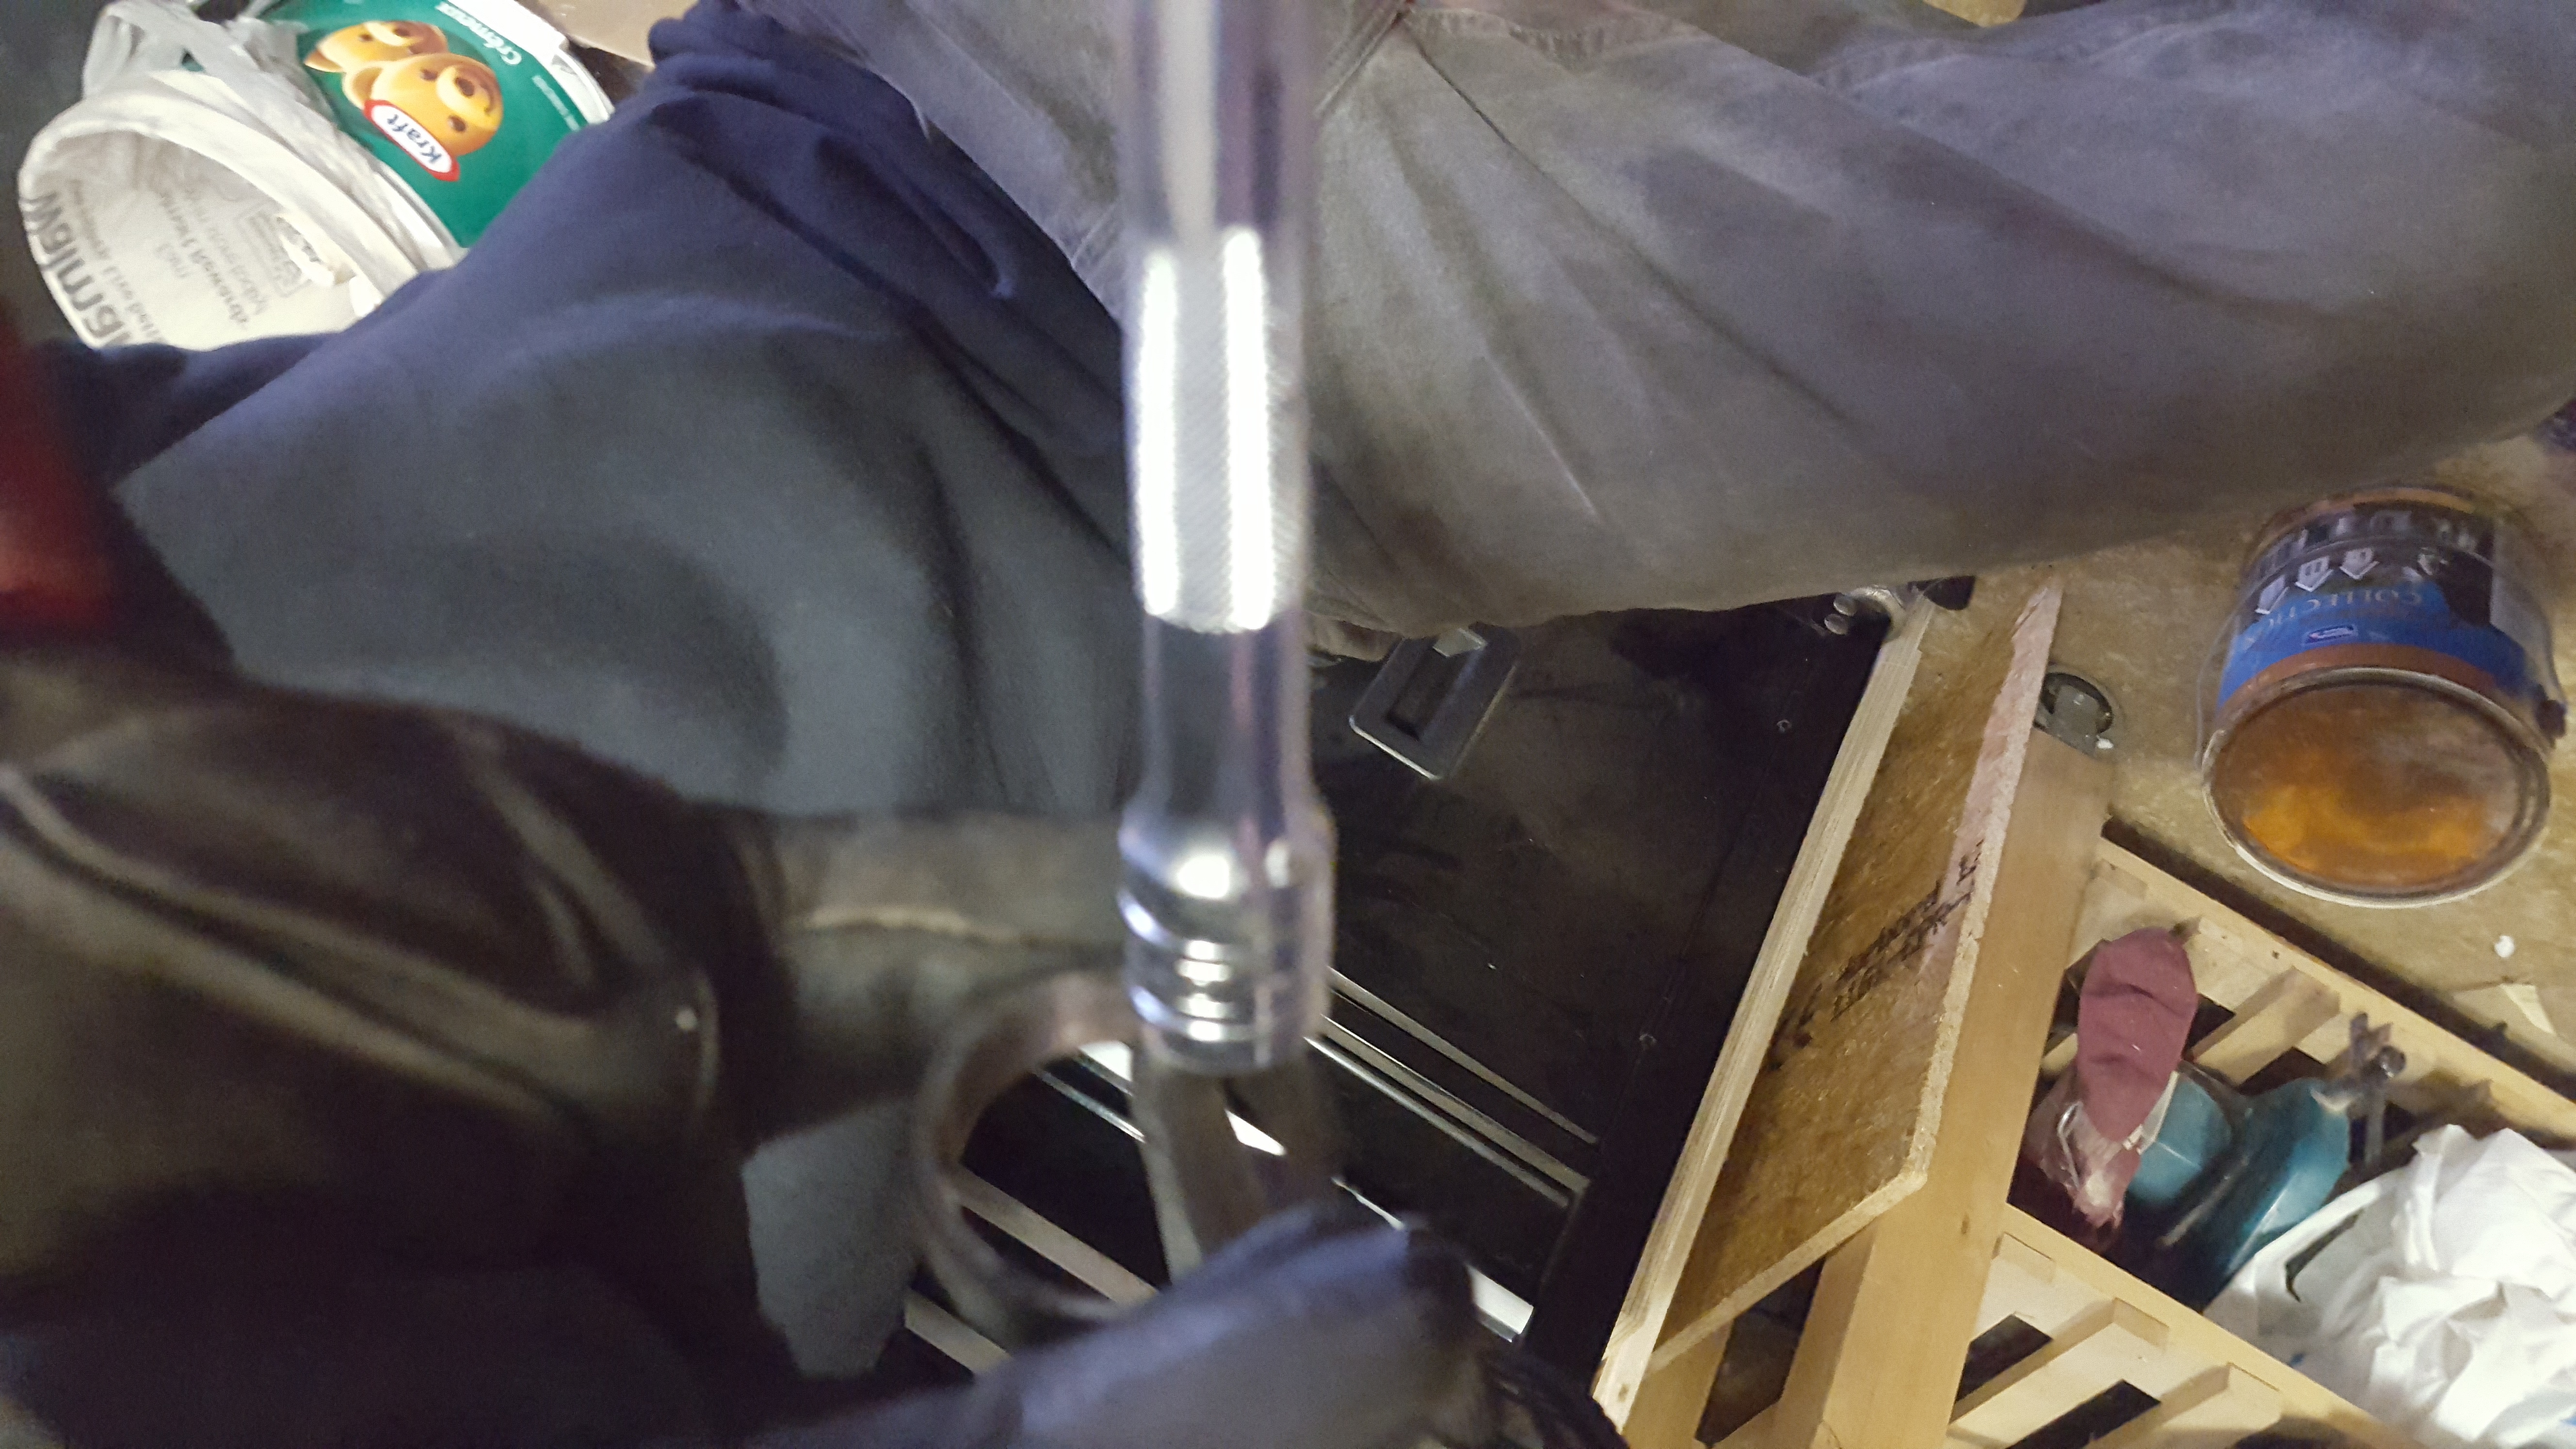
9.Reinstall the bolt using your previous marks and torque to 80-85 ft-lbs.
Hope this helps someone out there. If you have any questions send me a message.
Well at first i used a crowbar under the wheel and noticed some up and down movement...kind of a clunking sound. Then as i lifted on the crowbar i pushed on the upper part of the wheel towards the differential. That's when the clunking gets really obvious. For me i just assumed it was the hub bearings....only to find out its the diff bearing. The bad side must be more than a 1/2 inch of movement, and the other wheel seems to be more normal. I believe the spec for differential output flange movement or "float" is >0.15mm to replace the output shaft bearing.
Hope this helps
First, I'd like the thank Robert Go for this informative post.
I have had a slight intermittent vibration that I've been chasing for a couple of years and have asked when its on the rack to see if they can find it. I asked at my indy, alignment shop or wheel balancing place (had the wheels road force balanced which helped some). Even after having shocks, bushings and ball joints replaced for normal wear, it was still there. Well, after a recent alignment, the tech said the right camber adjustment was maxed and I was looking at a shim kit in the future though I was still on the very edge of tolerances.
Well, after reading this nicely done write up....I decided it was a cheap repair ($11 ea bearing) and I had the time, so why not. So, I completed the replacement of the bearings, had it realigned (still on the edge of tolerances though), but to my surprise (so far), the vibration has gone away, especially at highway speeds. What follows is what I found upon disassembly and a bit more elaboration on the process and the tools I used for removal. One note, a 3/8" extension (the ratchet attachment end) is perfect for tapping out the carrier from the bearing. Assembly was pretty much the same as Robert Go. Though, when I did the driver side first, my old parts were mostly clean like the OP's. It was the passenger side that wasn't that nice. If you want to know what happens when grease breaks down, this is it. Sorry the pics and writing inserts didn't come out better, they looked good after I did them.
Last edited by Highhorse; Nov 11, 2016 at 09:56 AM.
I replaced my rear shocks last week with new KYB gas shocks (BTW, What a difference)and noticed the same play in my XJ8.
When I was inspecting the suspension, I figured that while I was in there, I might as well just do all of it at one time.
I'm about to do this inner/outer rear bearing replacement tomorrow. Along with replacing the Rotors, calipers, pads, emerg brake shoes, hardware/springs.
Mine was about 2.5-3 hrs per side because I was taking my time and taking calls from my subs. Roughly said, with all tools out ready to go, ...about 2-2.5 hrs a side.
You mean that one listed in Post #1 in the first sentence?....lol ....and I bet it looks like this.... https://www.welshent.com/Jaguar-Bear...er-P25044.aspx ...though you can probably find it cheaper on Parts Geek.
Pardon lol, factor in recent Lasik & this tiny screened device I'm feeling Mr. Magoo-ish. The shop isn't gung-ho on reusing the spacers. When I research I see multiple sizes listed for it , what is the correct part # for that.
You MUST use the original spacer SHIMS or at least shim sizes. I would suggest using ALL the original spacers and shims as the preload has already been setup for THAT hub from the factory.
Setting the preload can be expensive and tedious. The shims must be ordered and I doubt the dealer will take back the ones you don't use.
When I find a hub that is beyond just simple bearing replacement (as in spun bearings and galled hub) I simply call a salvage yard and get a COMPLETE used replacement to change the bearings in IT. Sometimes I get the axle halfshaft still in the hub!! (bonus)
The setup is for each individual hub and there is no 'one-size-fits-all' spacer/shim setup. Don't make it anymore complicated than it has to be!!!!!!!!!!!!!!!
Please PRE-PACK the bearings with grease and NOT install DRY!!!!!!!!!!!!! (I hope the bearings get enough from the way the guy added grease)
If you use the original spacer shim setup, there is really no need to go through the painstaking process of setting the 'endfloat' (preload) because the guy in the video ended up using the same dimension shim as the ORIGINAL!!!!!!!!!!!!!!!!!!!!!!!!!!!!!!!!!!!!!!!! DUH!!!!!!!!!!!!!!!!!!!
bob
Yeah I noticed that as well, still a decent visual aid for me to see how they physically go together etc.
Edit :
Do you think it's overkill to get the pivot bolt sleeve/MNE4520AA ?! I mean I don't want any extra parts not being utilized ordered.
Last edited by King Charles; Aug 8, 2019 at 09:24 PM.
Hello, thank you for a great post. Could you please clarify what you mean by (mark the bolt before removing so that when you install it later your alignment doesn't suffer)? I'd line to understand the connection between this bolt and the alignment, so any additional explanation will be appropriated
It's a camber bolt, meaning it has a cam lobe design to dial in the wheel alignment. Being these are independent rear suspensions, they work individually like the front. So you clean the surface so you can use a marking pen of some type, grease pencil, marker or score it...so when you put it back together, your alignment should be true to what it was before disassembly. If not, and you aren't going directly to the alignment shop, your *** end could be pulling and cause significant tire and bearing wear if left alone afterward. Even when the work is completed and your on the marks, be sure to get it in and have it checked shortly thereafter.
Since you'll have your marks applied, once you loosen the assembly, if you want to see how much it moves, now is the time to play. You'll see how the hub kicks in and out as you rotate it.
Thank you, HIghhorse for the explanation - I think I got it - one wouldn't want to turn/rotate the bolt from its original position, would be another way to put it.


 ....and I bet it looks like this.... https://www.welshent.com/Jaguar-Bear...er-P25044.aspx ...though you can probably find it cheaper on Parts Geek.


