
1984 XJ6.0


Senior Member


Joined: Sep 2017
Posts: 697
Likes: 281
From: Lincoln Ontario
Darren, Are they Dayton wheels? If so what size tires are you running and what is the clearance between the inner fender lip and the tire - One finger, two fingers? Are the gaps equal on both sides? I'm having a heck of a time here in Canada finding the right size tires (205-70-15) that don't have great big white lettering - that just looks tacky in my opinion. Ian

Veteran Member


Joined: Mar 2014
Posts: 26,788
Likes: 10,320
From: Tehama County, California, USA
^^^
Have them mounted turned around.
Lettering on the Inside.
I've done that and it worked well.
Tire guys look at you like you've lost it but Who Cares what they think? Yer paying the bill.
(';')
Have them mounted turned around.
Lettering on the Inside.
I've done that and it worked well.
Tire guys look at you like you've lost it but Who Cares what they think? Yer paying the bill.
(';')
Last edited by LnrB; Nov 10, 2022 at 03:20 PM.
Senior Member
Joined: Apr 2017
Posts: 444
Likes: 324
From: Western Massachusetts
A dishwasher also does a great job on the cam covers. A lesson learned a long time ago, don't use a dishwasher to wash very dirty/greasy parts if it has a plastic style tub as the grease will stain the tub. All of my dishwashers since have had a stainless-steel tub. Have washed many wheels in them.

Thread Starter
|
Senior Member
Joined: Jan 2022
Posts: 151
Likes: 162
From: WNY
Yesterday was a fun day. I started by playing musical chairs with fuel.
Pour the old dirty unknown pump fuel that came in the Jaguar's original tanks from the gas can into a sealed 5 gal bucket for lawnmower/snowblower use.

Siphon clean fresh 93 out of the fuel cell into the gas can.

Do that 3 times, redistribute all the 93 into the rest of the fleet

Drive to gas station 10 mins away and fill up the gas can with 5 gallons of E85.

Come home, put E85 in the Jag. Flash new tune with ethanol modifiers. Drive Jag to gas station again to fill up rest of the way with E.

The car is super fun on only 8psi. Immediate issues are that the driveshaft is still hitting the tunnel under hard acceleration, but I have a plan for that. The front outer tie rods are totally smoked, one side has about an 1/8" play so it's very sketchy. I bought new ones 6 months ago to replace them but of course they're the wrong size since apparently they changed the design somewhere around my production year.
I can't wait to turn up the boost and fix the axle wrap, it'll be a blast. The Terminator makes it so easy to dial in the required timing and AFRs. I think my favorite feature is that it's easy to pull spark and richen the mixture as boost comes in, but not to the point where it's laggy or a dog. My Crown Vic with the same exact motor and turbo, with 3.27 gears, was a dog off the line probably due to lazy timing.
Couple shots just cruising the car around last week.


Pour the old dirty unknown pump fuel that came in the Jaguar's original tanks from the gas can into a sealed 5 gal bucket for lawnmower/snowblower use.
Siphon clean fresh 93 out of the fuel cell into the gas can.
Do that 3 times, redistribute all the 93 into the rest of the fleet
Drive to gas station 10 mins away and fill up the gas can with 5 gallons of E85.
Come home, put E85 in the Jag. Flash new tune with ethanol modifiers. Drive Jag to gas station again to fill up rest of the way with E.
The car is super fun on only 8psi. Immediate issues are that the driveshaft is still hitting the tunnel under hard acceleration, but I have a plan for that. The front outer tie rods are totally smoked, one side has about an 1/8" play so it's very sketchy. I bought new ones 6 months ago to replace them but of course they're the wrong size since apparently they changed the design somewhere around my production year.
I can't wait to turn up the boost and fix the axle wrap, it'll be a blast. The Terminator makes it so easy to dial in the required timing and AFRs. I think my favorite feature is that it's easy to pull spark and richen the mixture as boost comes in, but not to the point where it's laggy or a dog. My Crown Vic with the same exact motor and turbo, with 3.27 gears, was a dog off the line probably due to lazy timing.
Couple shots just cruising the car around last week.
Veteran Member


Joined: Oct 2010
Posts: 2,449
Likes: 1,274
From: Orlando Florida
Darren, Are they Dayton wheels? If so what size tires are you running and what is the clearance between the inner fender lip and the tire - One finger, two fingers? Are the gaps equal on both sides? I'm having a heck of a time here in Canada finding the right size tires (205-70-15) that don't have great big white lettering - that just looks tacky in my opinion. Ian
Without hijacking the thread,,, my tires are 215 70 15, no rubbing anywhere, but only about a finger between rear tires and fender lip
Veteran Member
Joined: Mar 2007
Posts: 9,142
Likes: 2,664
From: Florida
Iramphal
Walmart has that size all weather tire. 205/70/15.
I have purchased tires in my local Walmart including white walls for the S type. They're not Dunlops or Pirellis but are decent tires.
I sent you a link via email.
Walmart has that size all weather tire. 205/70/15.
I have purchased tires in my local Walmart including white walls for the S type. They're not Dunlops or Pirellis but are decent tires.
I sent you a link via email.


Thread Starter
|
Senior Member
Joined: Jan 2022
Posts: 151
Likes: 162
From: WNY
I'm back. Brought home the Jag from storage to start chipping away at the little driveability and old car things before getting into performance/tuning.
Steering feel was horrible. Vague and loose. Outer tie rods had about 1/8" of play each, and the rack could be moved a bit on its mounts with a prybar. At the recommendation of a Jag IFS swapper I picked up some poly mounts for the rack and got to pulling out the old ones.


I think the top pinion was leaking, so I ordered the seal for it and will install while the rack's out. This was the easiest rack I've ever removed from a car...took about 15 mins.
The next project was actually started last fall. Under anything more than moderate acceleration the rear end would wrap up and the driveshaft would contact the tunnel. A well known issue on the Jag IRS, some folks have constructed torque arms of varying designs. I wanted to keep it simple and came up with a couple of 1.25" square bars mounted to the bottom of the diff. The bumpers are from a late model Silverado application.


The bumpers are preloaded against the body slightly, but they're still a bit squishy. Driveshaft still contacts the body under hard acceleration. I have an idea to fix that with a harder bushing/mount system - more to come.
Steering feel was horrible. Vague and loose. Outer tie rods had about 1/8" of play each, and the rack could be moved a bit on its mounts with a prybar. At the recommendation of a Jag IFS swapper I picked up some poly mounts for the rack and got to pulling out the old ones.
I think the top pinion was leaking, so I ordered the seal for it and will install while the rack's out. This was the easiest rack I've ever removed from a car...took about 15 mins.
The next project was actually started last fall. Under anything more than moderate acceleration the rear end would wrap up and the driveshaft would contact the tunnel. A well known issue on the Jag IRS, some folks have constructed torque arms of varying designs. I wanted to keep it simple and came up with a couple of 1.25" square bars mounted to the bottom of the diff. The bumpers are from a late model Silverado application.
The bumpers are preloaded against the body slightly, but they're still a bit squishy. Driveshaft still contacts the body under hard acceleration. I have an idea to fix that with a harder bushing/mount system - more to come.


Veteran Member
Joined: Jan 2012
Posts: 14,617
Likes: 10,820
From: France
I think that looks smart and is an elegant solution to the problem. I do like the yellow bush idea to keep vibration at bay and to make the resistance progressive.
If I may make two suggestions:
If I may make two suggestions:
- I think it might be a good plan to use all 8 under-diff tie plate bolts to secure the bars. Welding on some tabs would do it; on a really hard start those little threads will be under quite some load.
- I wonder if the bending loads on the bars, forward of the diff tie plate, can be adequately resisted by those square section tubes, given a really hard start? It might be worth welding some flat bar along each vertical side of the tubes to strengthen them in their vertical bending resistance?
Thread Starter
|
Senior Member
Joined: Jan 2022
Posts: 151
Likes: 162
From: WNY
While waiting on parts for the steering rack, I removed the trailing arms and set about getting rid of the bushings. Most likely original, and ready for replacement. The rears (small) were far worse than the fronts.


Although the car is remarkably rust free for living in WNY its whole life, as the previous owners were considerate enough to store it during the harsh winters, there were some small areas on the exhaust to attend to.
The sheet metal was very thin, so I took my time building up the weld pool. I'm not a welder, but that should hold fine


And off we go


Although the car is remarkably rust free for living in WNY its whole life, as the previous owners were considerate enough to store it during the harsh winters, there were some small areas on the exhaust to attend to.
The sheet metal was very thin, so I took my time building up the weld pool. I'm not a welder, but that should hold fine
And off we go
Thread Starter
|
Senior Member
Joined: Jan 2022
Posts: 151
Likes: 162
From: WNY
Took the car out for a 50 mile spin around the city, probably the longest single trip I've taken in it since finishing the swap. No major issues, mechanically the car is really solid and ran well with no leaks and without getting hot. The car cruises nicely now that the exhaust leaks are fixed, although I did still get those whiffs of oil smell coming to a stop. That should be fixed with the new PCV system. Top things to attack next:
Slight vibration under decel - thinking pinion angle is moving (down) due to worn subframe mounts. I'm also still getting driveshaft rub despite the traction bar setup, so I think adding some stiffness to the traction bars will help both issues by reducing pinion movement in both directions. Thinking of notching the bars at the front of the reinforcement plate and angling them upwards, then bolting them to some poly bushings that are hard mounted to the floor.
Figure out HVAC - on high, the fan blows warm air, but the feet vents blow COLD (ambient) air. Makes for a fairly uncomfortable experience on the highway. This might just be a vintage Jag thing...
Get rid of the boring Kent wheels and install the mesh T/A 16s.
In the meantime, some glamour shots.
Last edited by nsogiba; Mar 7, 2023 at 12:51 PM.
Thread Starter
|
Senior Member
Joined: Jan 2022
Posts: 151
Likes: 162
From: WNY
The bump stops actually didn't work out. Way too soft, and the arms were bending a bit too. Driveshaft still hitting the tunnel. So, I spent some time yesterday on my day off modifying the arms. I notched the arms in a few locations to angle them upwards and intersect some plates bolted to the center support bearing mount holes. Painted over the scrape marks on the driveshaft, welded it up, took it out, and....


Where I'm pointing is where the contact was, and the paint is still intact indicating no contact. The bending force has been partially converted into compression where the square tubing is much stronger. I beat the thing up pretty hard especially in the lower gears where the torque applied to the subframe is highest, and it's locked down.


Great success! Time to turn the boost up!
Where I'm pointing is where the contact was, and the paint is still intact indicating no contact. The bending force has been partially converted into compression where the square tubing is much stronger. I beat the thing up pretty hard especially in the lower gears where the torque applied to the subframe is highest, and it's locked down.
Great success! Time to turn the boost up!
Thread Starter
|
Senior Member
Joined: Jan 2022
Posts: 151
Likes: 162
From: WNY
Been driving the car around here and there just melting tires on the street. It developed a slight miss when cold which got worse to the point where it felt like it was on 7 cylinders all the time. I had some worries that the head gaskets were leaking since some coolant was disappearing, but that turned out to be a loose radiator cap that only leaked under high rpm (higher water pressure). Keep in mind, the heads have never been off this motor as far as I know...
Since the Terminator X doesn't have any misfire detection system, I had to diagnose it the old school way...according to an IR temp gun, Cylinder #4 was a couple hundred degrees cooler than the rest. Long story short, I had the injectors cleaned and flowed, replaced the plugs and wires, and still had no cylinder 4. Narrowed it down to a spark issue, and found that the coil harness had some green crusties growing in it.
Terminator side of ignition harness:

Coil pack side (probably original and 20+ years old).

Cleaned up the terminals with some sandpaper and dielectric grease, and she's back to laying stripes...
I don't plan to change much more on this thing at least this season. Might look into a water/meth injection system to see if it helps with IATs as I really don't want to deal with shoving in an A2A or A2W.
The warm weather is finally here so I plan on spending as much time as I can doing HPDE's in my other fun car.


Since the Terminator X doesn't have any misfire detection system, I had to diagnose it the old school way...according to an IR temp gun, Cylinder #4 was a couple hundred degrees cooler than the rest. Long story short, I had the injectors cleaned and flowed, replaced the plugs and wires, and still had no cylinder 4. Narrowed it down to a spark issue, and found that the coil harness had some green crusties growing in it.
Terminator side of ignition harness:
Coil pack side (probably original and 20+ years old).
Cleaned up the terminals with some sandpaper and dielectric grease, and she's back to laying stripes...
I don't plan to change much more on this thing at least this season. Might look into a water/meth injection system to see if it helps with IATs as I really don't want to deal with shoving in an A2A or A2W.
The warm weather is finally here so I plan on spending as much time as I can doing HPDE's in my other fun car.

Thread Starter
|
Senior Member
Joined: Jan 2022
Posts: 151
Likes: 162
From: WNY
Been fighting an annoying oil leak on the Jag motor. I thought I had this fixed when I had this motor in my Crown Vic but apparently not.
Up on the lift, use 4 cans of brake clean to get everything nice again

After 10 mins of running on the lift, saw some evidence


I have an oil cooler gasket and galley plug kit on the way, hopefully that's all it is.
I also found the rack was pissing a bit after sitting for a while, but that's just old car stuff.

If anyone can offer insight into replacing the o-ring under that lock nut it would be appreciated. Really hoping I don't have to drop the rack.
Up on the lift, use 4 cans of brake clean to get everything nice again
After 10 mins of running on the lift, saw some evidence
I have an oil cooler gasket and galley plug kit on the way, hopefully that's all it is.
I also found the rack was pissing a bit after sitting for a while, but that's just old car stuff.
If anyone can offer insight into replacing the o-ring under that lock nut it would be appreciated. Really hoping I don't have to drop the rack.
Thread Starter
|
Senior Member
Joined: Jan 2022
Posts: 151
Likes: 162
From: WNY
Oh and more Cars and Coffee. I'm not really a car show guy, I prefer to be driving or wrenching, but it's a great way to spend time with the kids and expose them to the hobby. Made a friend while there...blown SBC '85


Thread Starter
|
Senior Member
Joined: Jan 2022
Posts: 151
Likes: 162
From: WNY
I took the car out for a long ride around the city last week. Gorgeous night for a drive with air temp in the 80s, but beating on the car on the thruway I was seeing 240F IATs at the end of a pull. Even cruising for extended periods as the evening cooled down they never went below 120. I realized I was spending a ton of time staring at the handheld worrying about IATs, so I decided it was time to do something about it.
The reason I never installed an A2A in the first place was a lack of space, and mostly me using the parts I had laying around. The truck water pump worked but needed a bunch of adapting to fit. Old FEAD setup: Truck accessories/WP, bunch of 90s and hose splices to route the top rad hose under the turbo outlet. Overly complicated and took up a bunch of space.

The LS3 (2010 Camaro) water pump has the outlet in the front with truck spacing, but was about the same price as buying an LS1 Camaro pump, new Camaro top hose, new tensioner, 2 sets of gaskets, and the water pump spacers (.700"). So...

Tore it all apart, removed some of the plastic bumper shrouding between the hood and the bumper. Made up some new tabs to mount the bottom of the radiator isolators. The whole radiator/fan assy got shifted back 2-3". The radiator was previously mounted dead center (fore/aft) on the lower rad cradle, whereas now the front of the rad is flush with the rear face of the crade.


Few more shots showing the movement. It's best visible looking at the cutout for the rad filler cap.

The other issue is that the belt now rubs ever so slightly on the bottom of the intake coupler at the throttle body. I can probably find a smaller tensioner pulley in a catalog to bring the belt away.

I'll have to figure out something for the header panel, chop out the middle section or something. The plan is to throw in one of these now that I have room:
3" aluminum charge piping will run up and over the top of the radiator.
Plenty of room now:

The reason I never installed an A2A in the first place was a lack of space, and mostly me using the parts I had laying around. The truck water pump worked but needed a bunch of adapting to fit. Old FEAD setup: Truck accessories/WP, bunch of 90s and hose splices to route the top rad hose under the turbo outlet. Overly complicated and took up a bunch of space.
The LS3 (2010 Camaro) water pump has the outlet in the front with truck spacing, but was about the same price as buying an LS1 Camaro pump, new Camaro top hose, new tensioner, 2 sets of gaskets, and the water pump spacers (.700"). So...
Tore it all apart, removed some of the plastic bumper shrouding between the hood and the bumper. Made up some new tabs to mount the bottom of the radiator isolators. The whole radiator/fan assy got shifted back 2-3". The radiator was previously mounted dead center (fore/aft) on the lower rad cradle, whereas now the front of the rad is flush with the rear face of the crade.
Few more shots showing the movement. It's best visible looking at the cutout for the rad filler cap.
The other issue is that the belt now rubs ever so slightly on the bottom of the intake coupler at the throttle body. I can probably find a smaller tensioner pulley in a catalog to bring the belt away.
I'll have to figure out something for the header panel, chop out the middle section or something. The plan is to throw in one of these now that I have room:
3" aluminum charge piping will run up and over the top of the radiator.
Plenty of room now:
Thread Starter
|
Senior Member
Joined: Jan 2022
Posts: 151
Likes: 162
From: WNY
Update - Still had the issue with coolant escaping the radiator cap under boost, but I don't really think it's the headgaskets. I pulled all the plugs and scoped the bores, all pistons had a nice buildup of carbon and didn't seem to have evidence of steam cleaning.
That's not entirely conclusive since it seems my "headgasket leak" would have been pressurizing the cooling system and forcing coolant out the radiator cap, rather than allowing coolant to get into the combustion chamber. To confirm that, I pressurized each cylinder with shop air (100psi) and let it sit for a few minutes, looking for evidence of bubbles coming out the radiator cap or surge tank cap - nothing. I also did a compression test, with all 8 coming in with at least 170-175psi.
So, I pulled out the F-body radiator and installed a new C5 radiator, which is the same design/footprint, just without the integral radiator cap. F-Body fans slip right in, no modifications needed. While the system was drained I also swapped the thermostat for a Motorad with a 160F opening temp, and changed the fan temps to come on sooner (#1 - 190F, #2 - 200F).
The old thermostat on the left was a mystery truck unit that came out of one of the half dozen spare truck water pumps I have. It had a 187F opening temp and the design looked a bit different than the new one I installed.


Result - no more coolant loss (at least externally). Runs usually around 180-185, if it sits for a minute at a light it'll sneak up on 190-195 and fans bring it back down quick. Haven't logged coolant temp during a long pull yet.
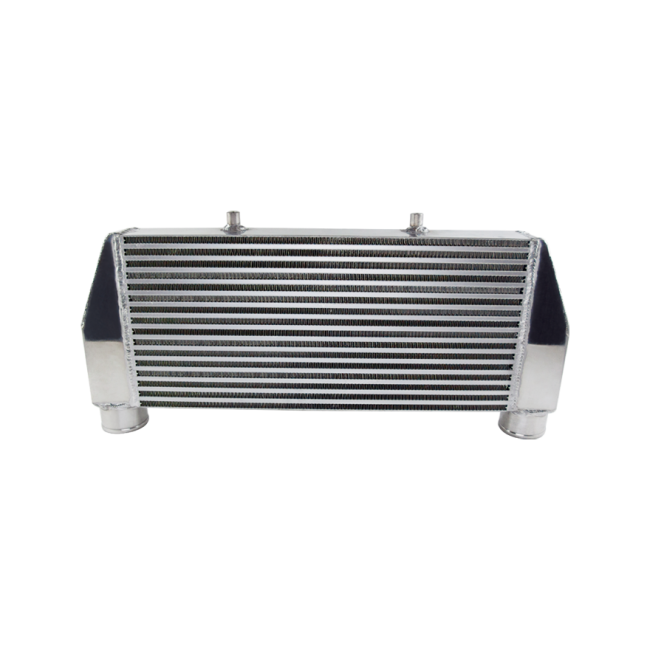
I also finished up the intercooler install. IATs are now nearly ambient (perhaps 20F above, after a pull) rather than 240F.


Wrapped the pipes (mostly cosmetic, maybe keeps some heat out).


Laying some stripes on my 35th birthday for durability testing
https://youtube.com/shorts/FumOtGFOf_g?feature=share
I run pump ethanol all the time. Even though there's a station 15 minutes from my house, it's out of the way, so I'll head out there every other week and stock up.

Slowly getting my little guy (19 months) into cars. He will see my M3 or Jaguar and yell "DADDDAAAAAAA"

Went for a cruise a while back.


Rerouted some items under the hood to add the Corvette engine beauty covers. Yes, the motor in the car is a plebian iron 6.0 and not an aluminum 5.7, but the covers came off my personal C5 FRC that I owned from 2016-2020, so they have sentimental value.

And finally, hit the local Cars and Coffee with an old acquaintance in his all original 1970 Series 1 XJ6.


That's not entirely conclusive since it seems my "headgasket leak" would have been pressurizing the cooling system and forcing coolant out the radiator cap, rather than allowing coolant to get into the combustion chamber. To confirm that, I pressurized each cylinder with shop air (100psi) and let it sit for a few minutes, looking for evidence of bubbles coming out the radiator cap or surge tank cap - nothing. I also did a compression test, with all 8 coming in with at least 170-175psi.
So, I pulled out the F-body radiator and installed a new C5 radiator, which is the same design/footprint, just without the integral radiator cap. F-Body fans slip right in, no modifications needed. While the system was drained I also swapped the thermostat for a Motorad with a 160F opening temp, and changed the fan temps to come on sooner (#1 - 190F, #2 - 200F).
The old thermostat on the left was a mystery truck unit that came out of one of the half dozen spare truck water pumps I have. It had a 187F opening temp and the design looked a bit different than the new one I installed.
Result - no more coolant loss (at least externally). Runs usually around 180-185, if it sits for a minute at a light it'll sneak up on 190-195 and fans bring it back down quick. Haven't logged coolant temp during a long pull yet.
I also finished up the intercooler install. IATs are now nearly ambient (perhaps 20F above, after a pull) rather than 240F.
Wrapped the pipes (mostly cosmetic, maybe keeps some heat out).
Laying some stripes on my 35th birthday for durability testing
https://youtube.com/shorts/FumOtGFOf_g?feature=share
I run pump ethanol all the time. Even though there's a station 15 minutes from my house, it's out of the way, so I'll head out there every other week and stock up.
Slowly getting my little guy (19 months) into cars. He will see my M3 or Jaguar and yell "DADDDAAAAAAA"
Went for a cruise a while back.
Rerouted some items under the hood to add the Corvette engine beauty covers. Yes, the motor in the car is a plebian iron 6.0 and not an aluminum 5.7, but the covers came off my personal C5 FRC that I owned from 2016-2020, so they have sentimental value.
And finally, hit the local Cars and Coffee with an old acquaintance in his all original 1970 Series 1 XJ6.