When you click on links to various merchants on this site and make a purchase, this can result in this site earning a commission. Affiliate programs and affiliations include, but are not limited to, the eBay Partner Network.
I have stuck rear brakes and am considering dropping down the rear suspension so I can better access the brakes. The car had a good amount of corrosion going on, and I have been wire-brushing, scraping, wiping down with gas, and spraying PB Blast on the bolts which I "think" need to be removed. The Jag Shop Manual is not written with much specifics, and I believe it states "remove sheet metal screws". When inspecting further, I only see the small bolts which support the rubber shock pads as the bolts which keep the suspension mounted to the cat's bottom. Doesnt seem that strong of a design if you ask me.
Here are some pics:
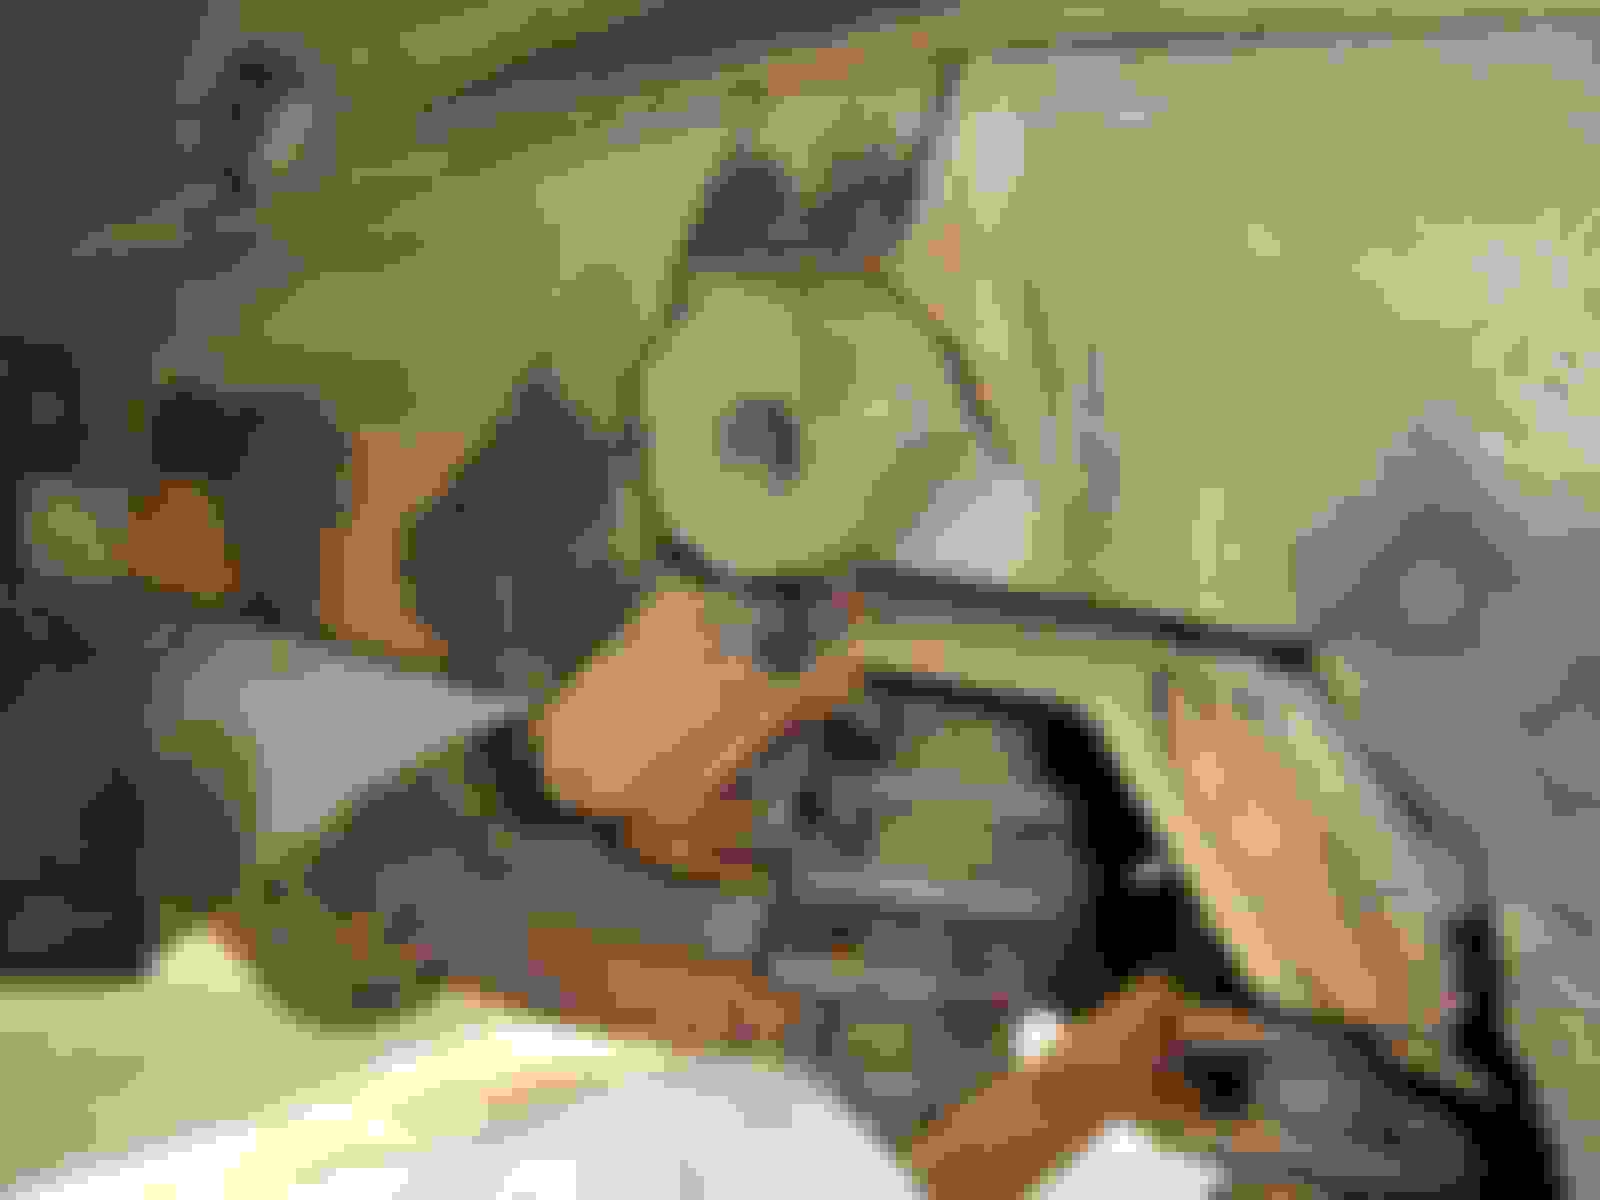
In this pic, you see those 4 bolts that appear to mount the suspension to the car's chassis/trunk area:
(Look above the shocks). There are also smaller bolts a bit lower and closer to the shocks, but appear harder to get to. So, is it best to remove those 4 larger bolts on each side of the suspension?
With a floor jack supporting the suspension "Box", the tail pipes, driveshaft, brake line, and parking brake cable unhooked, is it just these 4 outter bolts that need to be removed? Also, is it best to completely remove that low radius arm before lowering the "box"?
Thanks for any input, or a link showing the detailed process.
disconnect brake line on left side under rear door
see my post on HF transmission jack or similar, get it well supported on the plate underneath
disconnect exhaust pipes - they run thru the rear end
undo four bolts on propshaft to rear end
disconnect radius arms under body (use the walking stick end of large prise bar to remove cup.)
slowly and carefully lower rear end - it's v heavy and wants to tip forward
disconnect handbrake cable
...and drag heavy rear end out from under car
start cleaning all the gunk off it with oven cleaner
Thanks Doug and Oliver for the tips. So, sounds like the best plan is:
1. To remove the "cage to mount fastners" and leave mounts attached to the car.
2. Radius arms.....since I want to do a thorough clean and repaint, is it much harder to remove the radius arms first, and get them out of the way?
3. Brake line......good tip, just disconnecting under the right side door, and leave rest in-place.
4. I was planning on using two hydraulic floor jacks with a piece of plywood on top. I will read your post under "HF transmission jack", and use what tips I can....thanks.
5. Exhaust pipes.....will disconnect or cut thru the rusty critters.
6. Handbrake cable.....that can be disconnected after the cage is lowered down?
After removing and installing, do either of you think those small bolts are strong enough for this job? Seems like a weak design to me....especially after rust sets in. As Niel Young would say, "Rust never sleeps".
Then the fun begins.....degreasing the gunk (oven cleaner, old gas, gunk, or mystery fluids). Then hoping the brake calipers are rebuildable and dont bust apart when doing the autopsy.
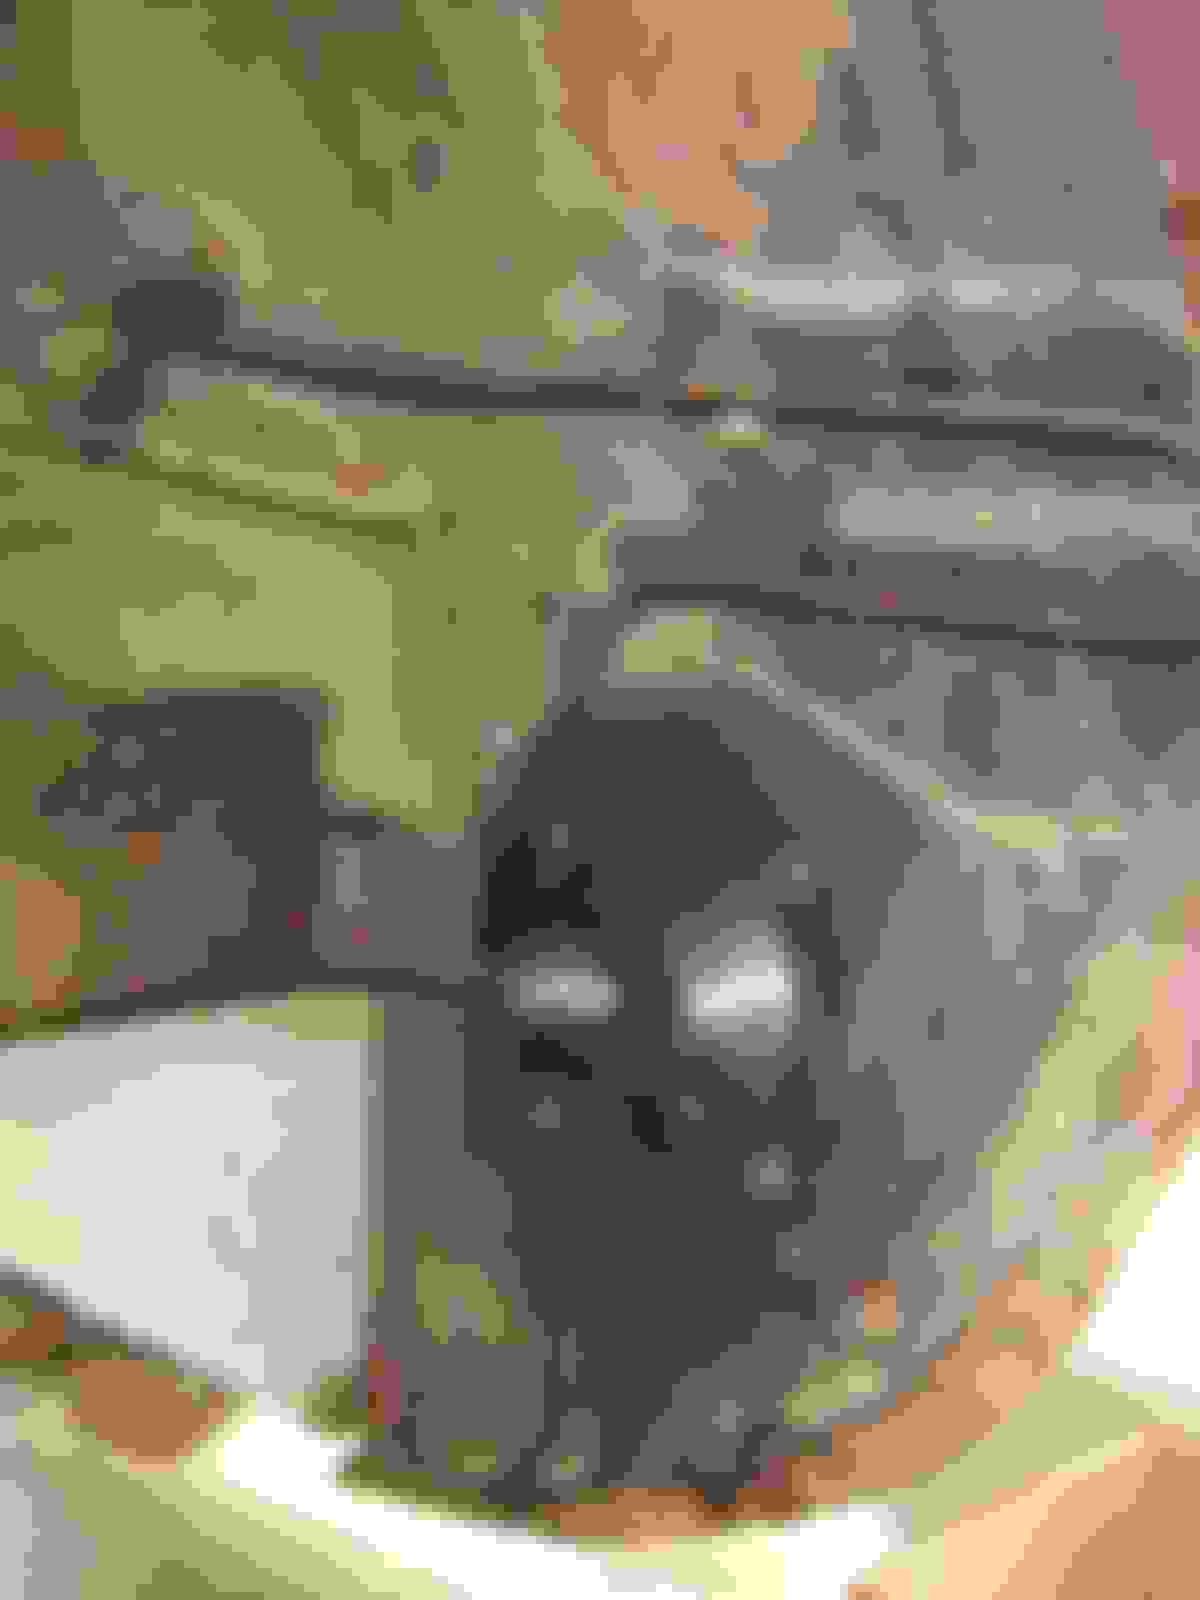
Curious question: Why does this line make this long "U" behind the rear driver's wheel? Seems like it should have just run along the inner edge, and would have been shorter and not prone to bursting from flying rocks and lizzards:
Thanks Doug and Oliver for the tips. So, sounds like the best plan is:
1. To remove the "cage to mount fastners" and leave mounts attached to the car.
2. Radius arms.....since I want to do a thorough clean and repaint, is it much harder to remove the radius arms first, and get them out of the way?
Radius arms are relatively easy to remove. Your call on this but you are likely to need new metalastic seals when you replace them
Originally Posted by 1977JagwireXJ6
3. Brake line......good tip, just disconnecting under the right side door, and leave rest in-place.
4. I was planning on using two hydraulic floor jacks with a piece of plywood on top. I will read your post under "HF transmission jack", and use what tips I can....thanks.
5. Exhaust pipes.....will disconnect or cut thru the rusty critters.
6. Handbrake cable.....that can be disconnected after the cage is lowered down?
Yes probably easier doing it this way
Originally Posted by 1977JagwireXJ6
After removing and installing, do either of you think those small bolts are strong enough for this job? Seems like a weak design to me....especially after rust sets in. As Niel Young would say, "Rust never sleeps".
As long as the integrity of the holes they sit in is good the bolts are definitely strong enough if in good shape and the original gold grade 8 fasteners. The car floats on the 4 rubber bushing mounts which is what gives such a great ride, they take a lot of strain.
Originally Posted by 1977JagwireXJ6
Then the fun begins.....degreasing the gunk (oven cleaner, old gas, gunk, or mystery fluids). Then hoping the brake calipers are rebuildable and dont bust apart when doing the autopsy.
Curious question: Why does this line make this long "U" behind the rear driver's wheel? Seems like it should have just run along the inner edge, and would have been shorter and not prone to bursting from flying rocks and lizzards:
Last edited by olivermarks; May 2, 2018 at 09:56 PM.
Oliver.....Thanks. I counted 6 of those small bolts for each side of the suspension box. I wire-brushed and used a pic to clean the rust from the threads and am soaking with PB Blast....hopefully they come off without pain and suffering. I will try to put new ones in. Will send more pics as the project continues.
I have had excellent success with PB Blast. Also a little heat from a hand held propane torch always seemed to help. Goes without saying - but not around gasoline.
I did this myself with on jack and piece of plywood. Getting the old exhaust pieces loose (ended up cutting them with saw) was the hardest part. But, I have no rust...
be sure to replace the rubber brakes line all around...
Picture of finished unit and piece of plywood used. Car must be up high and front wheels properly blocked from rolling either direction.
Roger.....thanks for the pic.....you did a great job. Question for you: When I look at the top of the "suspension box" that you repainted, I see what looks like square threaded holes......Are there screws that bolt into the top of this box, maybe located inside the trunk? Or, is it just those 6 small bolts on each side which I mentioned already? Thanks.
Also, did you place the new curved exhaust pipes into the "supsension box" before you re-installed it, or can you manage to fi-naggle them thru the box after it is installed?
Yachtman......Yea, and if ole PB Blast and propane torch fails to do their job, I suppose its time to strap on a few pounds of dynamite and light the fuse. Maybe you will see an old Jaguar XJ6 passing that weasely Tesla convertible on its way to the Sun......ha ha.
I just took it all to my local muffler shop and had them weld it back up. Next big job is to make all new stainless stuff from the front and use V clamps at needed joints for disassembly of the trans and rear end and will run it under the IRS ala Corvettes.
Did this exhaust under the IRS on my '72 XJ with LT1/700R.
Roger......Thanks for the info.....ok, no bolts on the top of the "box"...good. Your gonna try running the pipes under the IRS Box.....I saw a thread where someone else did this, but it seems that "the sparks are gonna fly" if you hit a speed bump too fast.
Hey, I found some great videos on Youtube of others removing the IRS Box, and I tell you, one guy did a total rebuild and put it back like a museum piece....amazing. In removing the IRS Box from the chassis, he removed those 4 larger bolts on each side as I mentioned before. In my case these are not as cancerous as those other 6 smaller bolts, and I might go this route instead. True, I will have to jack the car up even higher so I can pull it out toward the rear, but thats no problem. I am raising the front and putting blocks under the front jack points, and also the rear.....so the *** end isnt point skyward with the front tires on the ground.....too much temptation for those gremlins to convince the cat to move forward whilst I am wrenching underneath.
PJ profilli......10-4 on the top heavy IRS Box. I was thinking of strapping it onto the plywood and jack. Today I bought an el cheapo motorcycle lift (1500 lbs) that I will use to ease the IRS down. I also tinker on old bikes, and buying a bike lift will come in handy both for this cat, and the bikes.
Sanchez......Good to know.....maybe I will take the Low Road rather than that curvey High Road with the pipes. By the way, if those catrotrosphic converters were to accidently "disappear" while new pipes were being installed, do you think there would be need to do any other tuning to the motor due to the lessened back-pressure? Im sporting a V12, and had a dream that the pipe guy lost the catastrophic converters, and he only put on a pair of thrush mufflers with the roadrunner on them.......I went to the local gypsie palm reader and fortune teller in my area and she said my cat would get meaner, leaner, and nastier........so, Im thinking this dream is gonna come true. What say you?
On my '72 XJ with a V8, I only used Magnaflow mufflers in the rear resonator spots..no other mufflers. I never hit anything going over any bumps or driveway.
Sounds like a 80's Corvette
Last edited by Roger Mabry; May 4, 2018 at 08:11 PM.