
1989 XJ-S Resto-Thread - or "my Iron Lady"


Thread Starter
|
Veteran Member
Joined: May 2014
Posts: 5,906
Likes: 2,183
From: Bremen, Germany
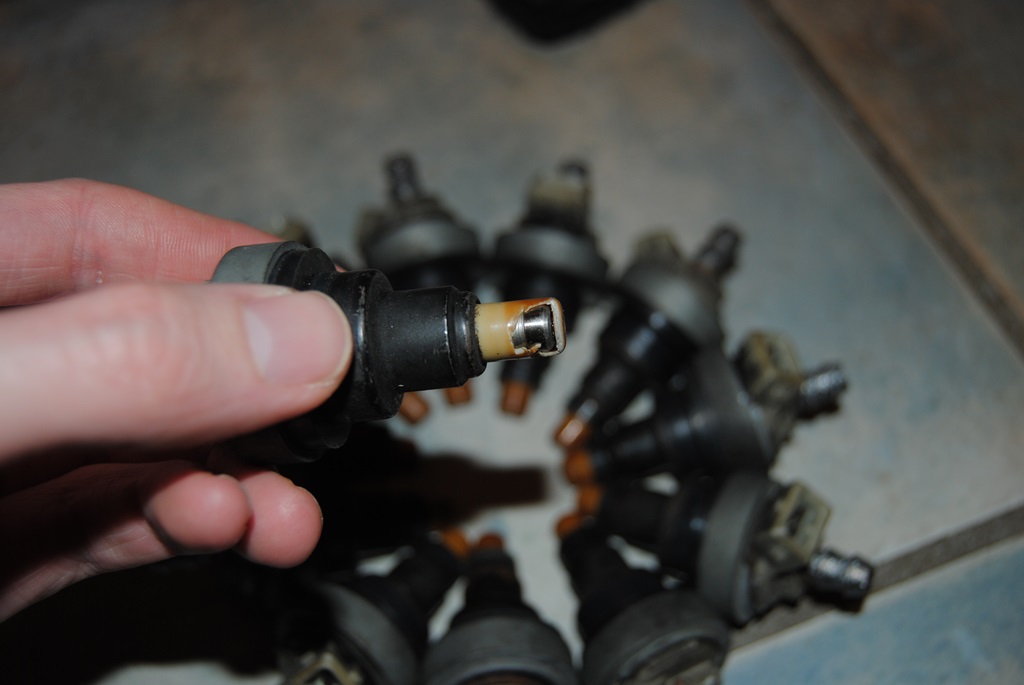
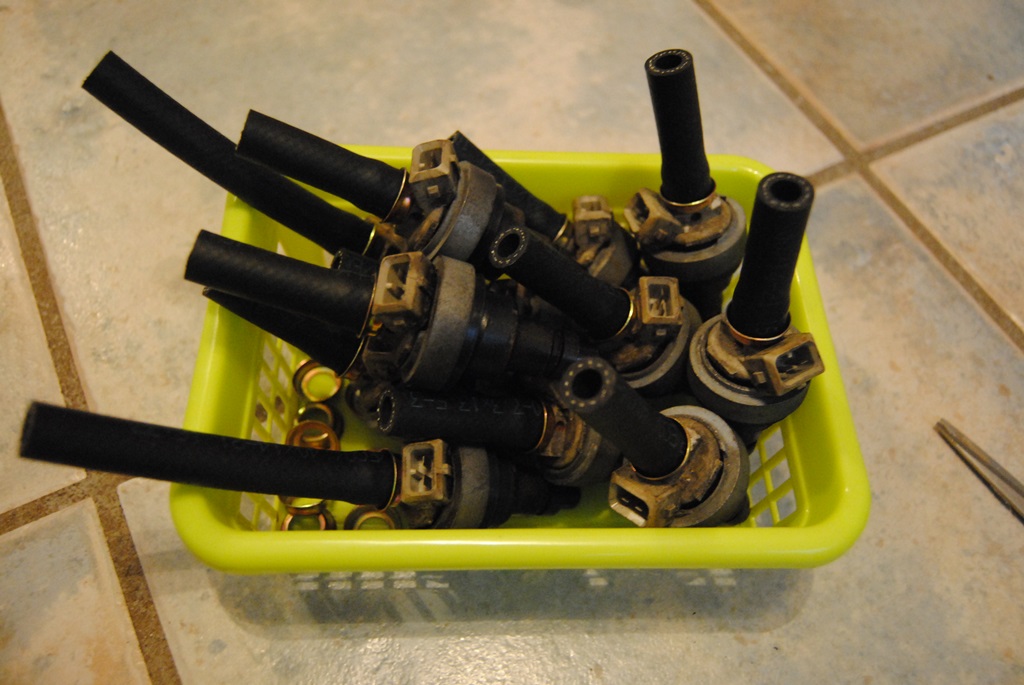
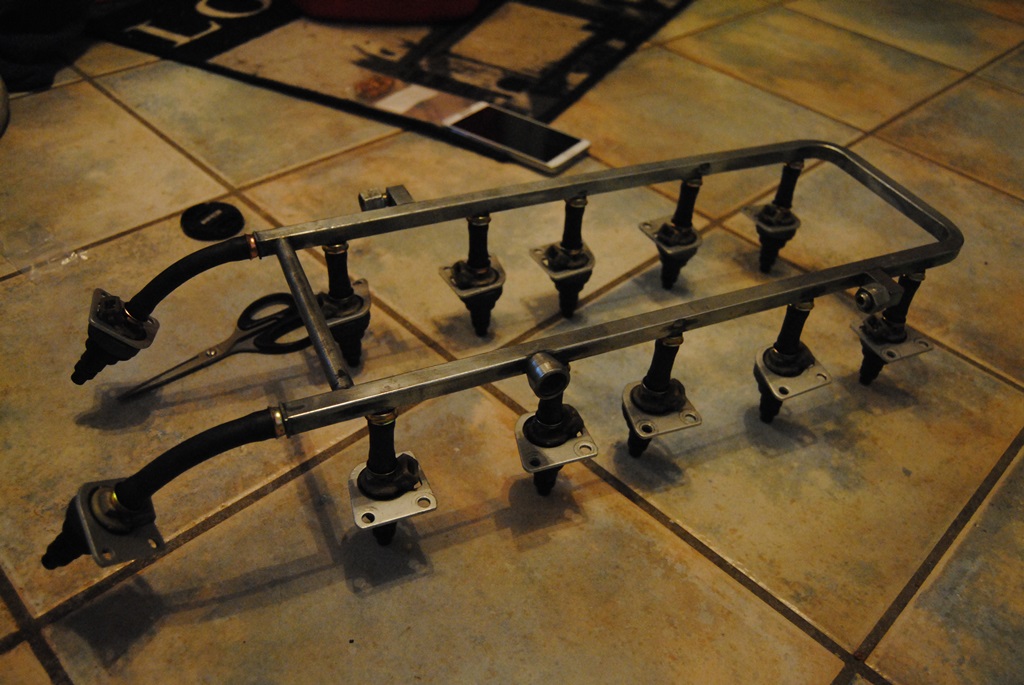
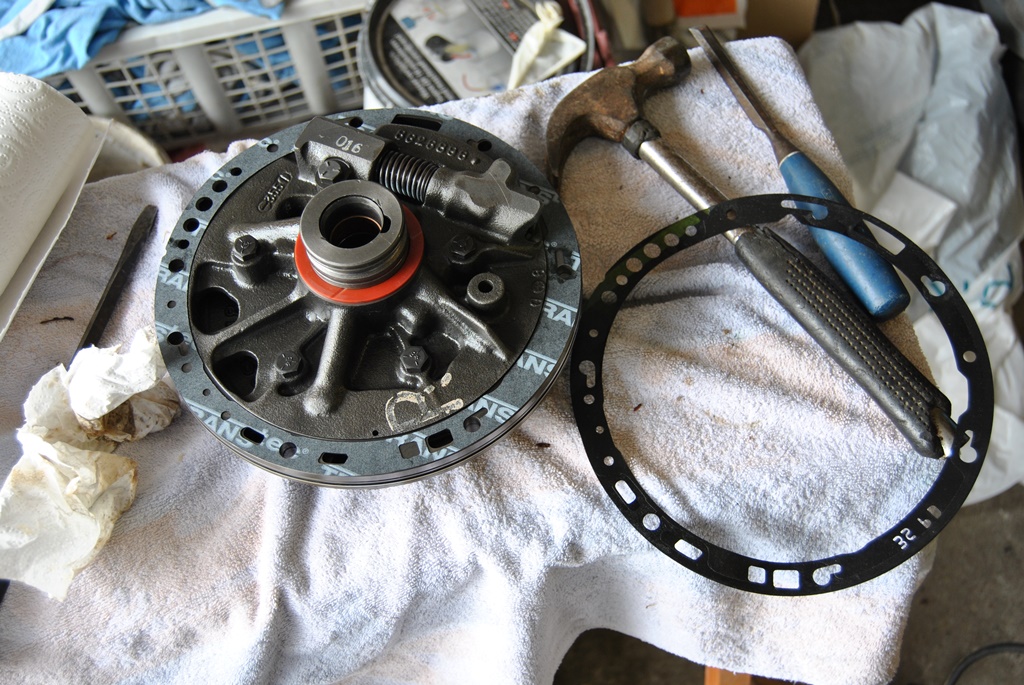
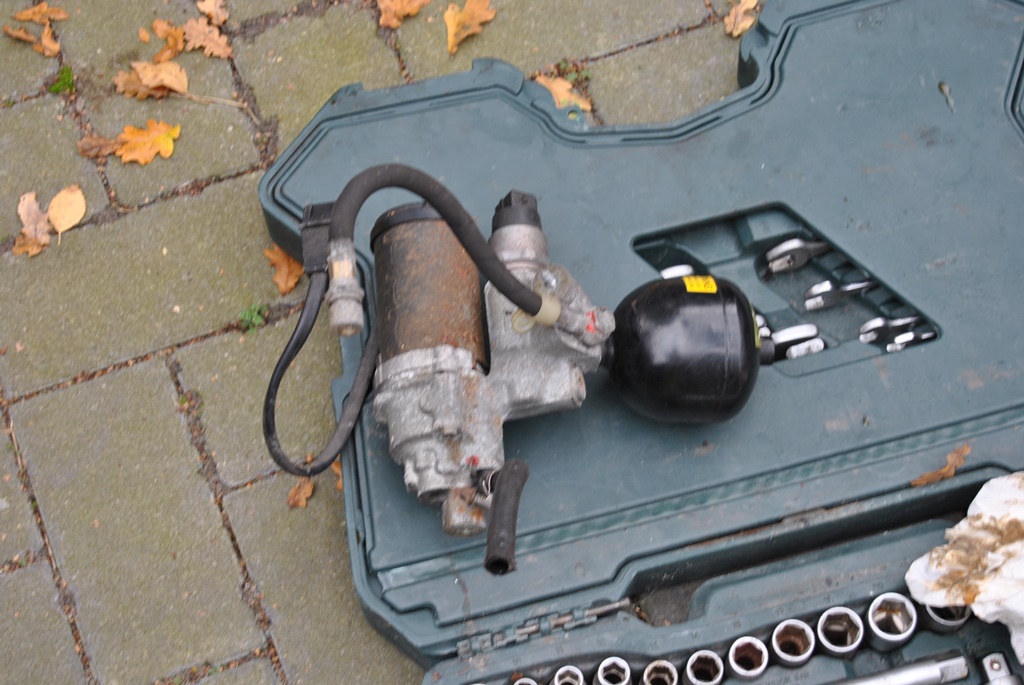
Injector system is now ready for installation. Took a while to get hold of all the parts needed. Who would have thought, that the black plastic caps (formerly beige) would be next to unobtainable? Now I've got them, I could finish it all 

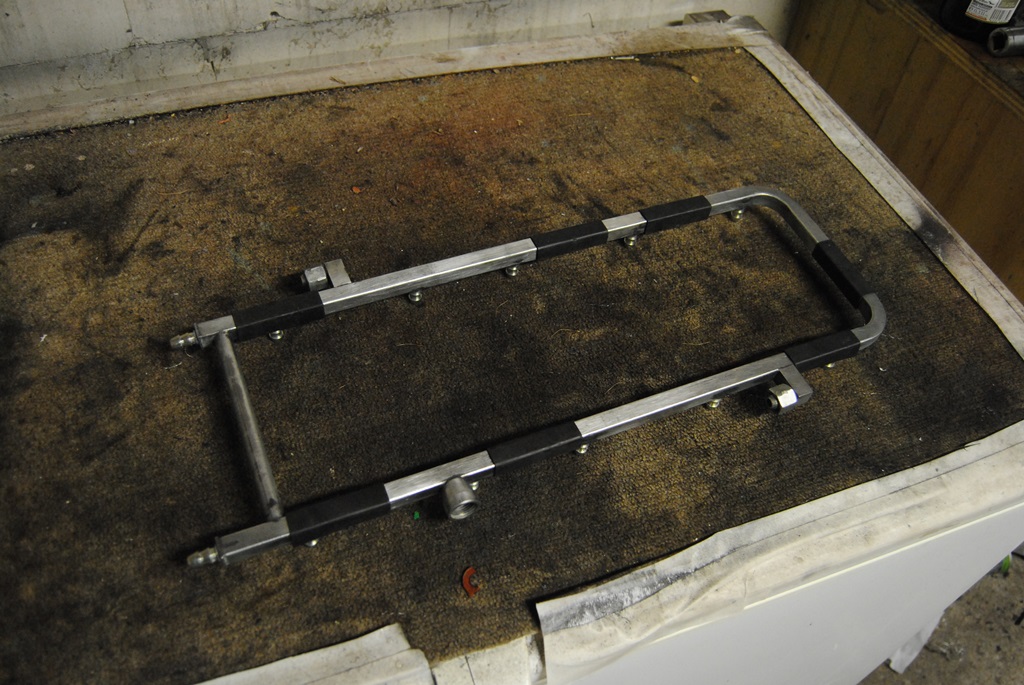
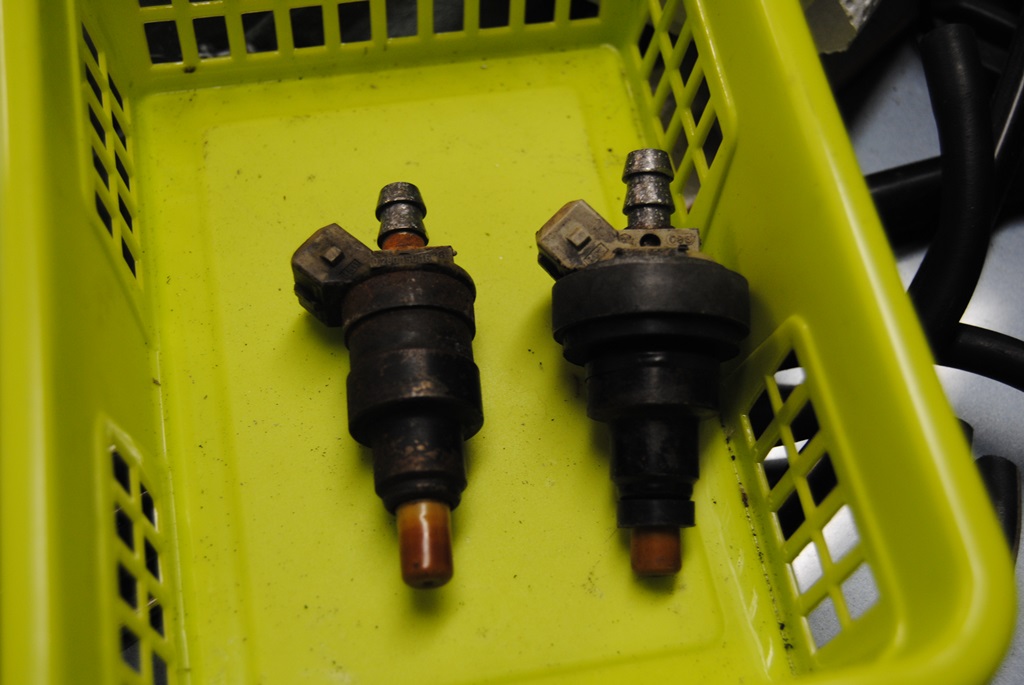
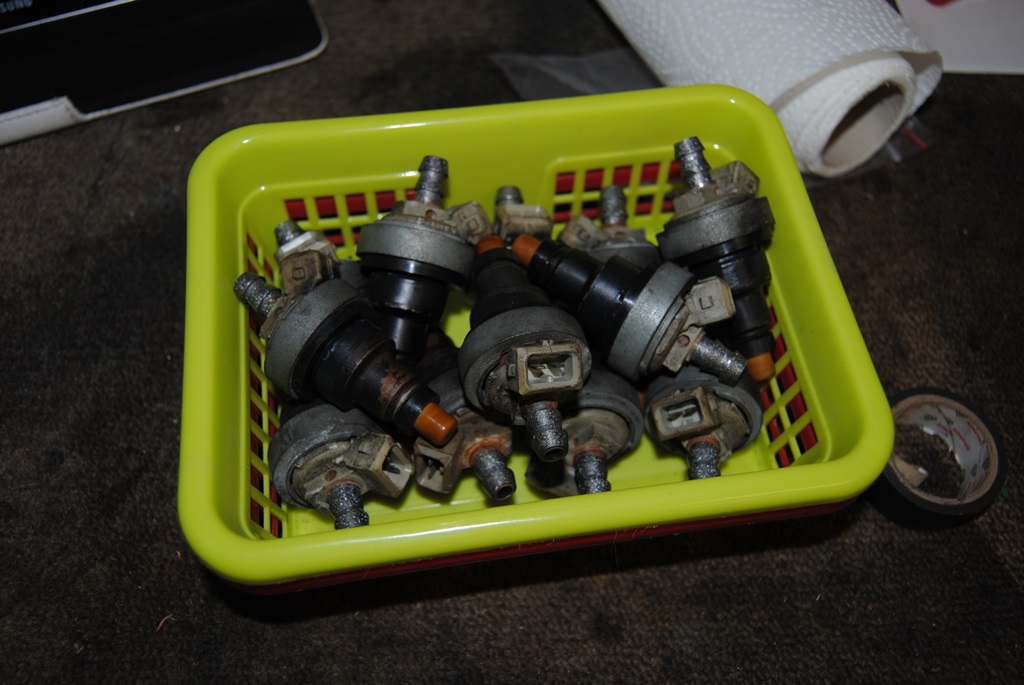
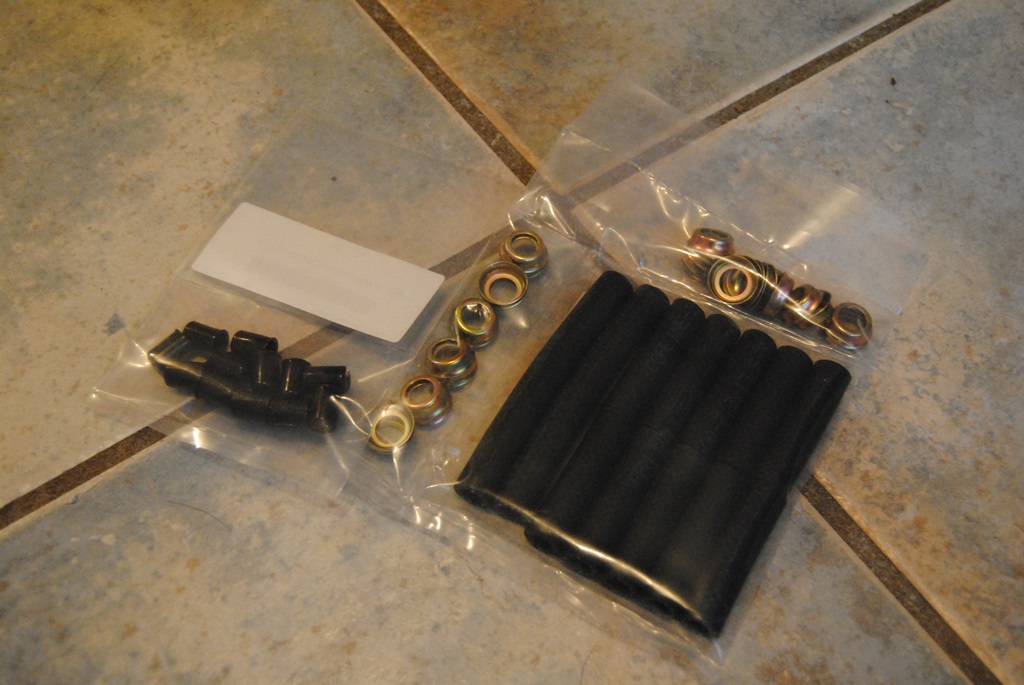


Another step closer to the start Maybe 2014? 
Btw.: I can recommend "mr injector uk" (google) for the parts. Really good stuff and great service!
Another step closer to the start
Maybe 2014? Btw.: I can recommend "mr injector uk" (google) for the parts. Really good stuff and great service!
Thread Starter
|
Veteran Member
Joined: May 2014
Posts: 5,906
Likes: 2,183
From: Bremen, Germany
Wow, I forgot I started this thread and started "spamming" in the "what did you do ..." thread. Crud! Well, I'll shorten a long story...
After having an accident 2015 I was limited in working on my old lady. This year I was able to and had to check on what had happend in the last ~18 months so I know what to do. Body was still fine, had a few little rust spots but nothing bad. But some mice decided to live in my engine bay and poop all over my then freshly blasted intakes and a bad batch of coolant had reacted with the other coolant (even though I flushed the system thoroughly) and caused loads of damage to some gaskets and the water pump.
So I thought "Heck, I'll start to clean that mess up". This resulted in the removal of the entire aircon system under the bonnet (compressor, condenser and hoses) followed by a clean up.
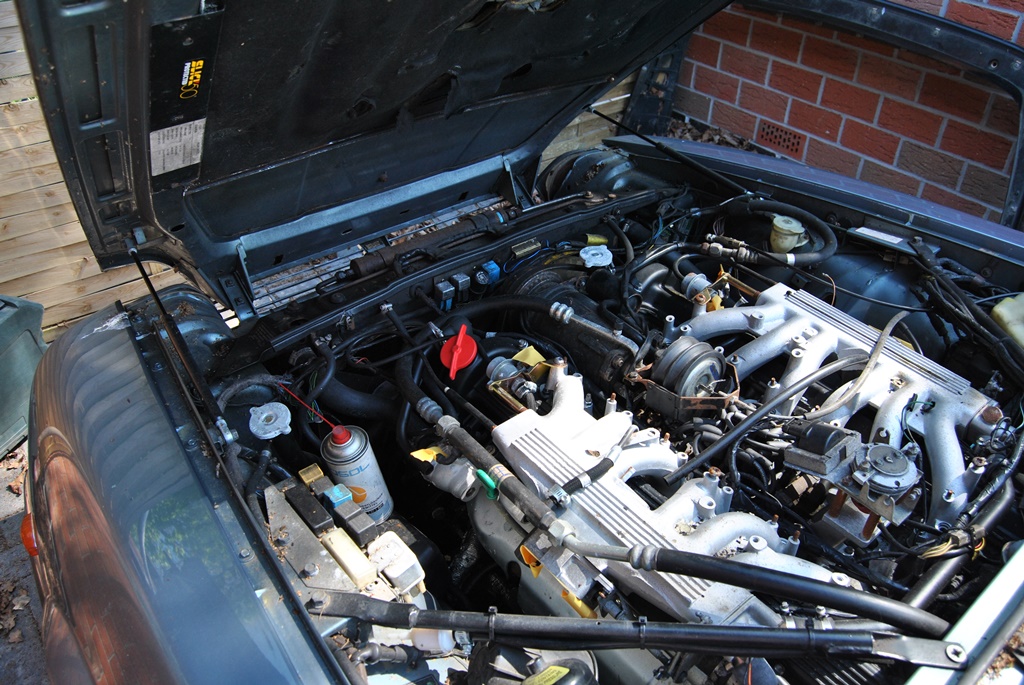
With that out, I could see a huge mess of what looks like 27 years of oiling seals... Never mind! I started to clean it...
Though I couldn't get the (even worse looking) sides done. As there were loads of gaskets to change, I needed to move to more desperate measures: engine removal!
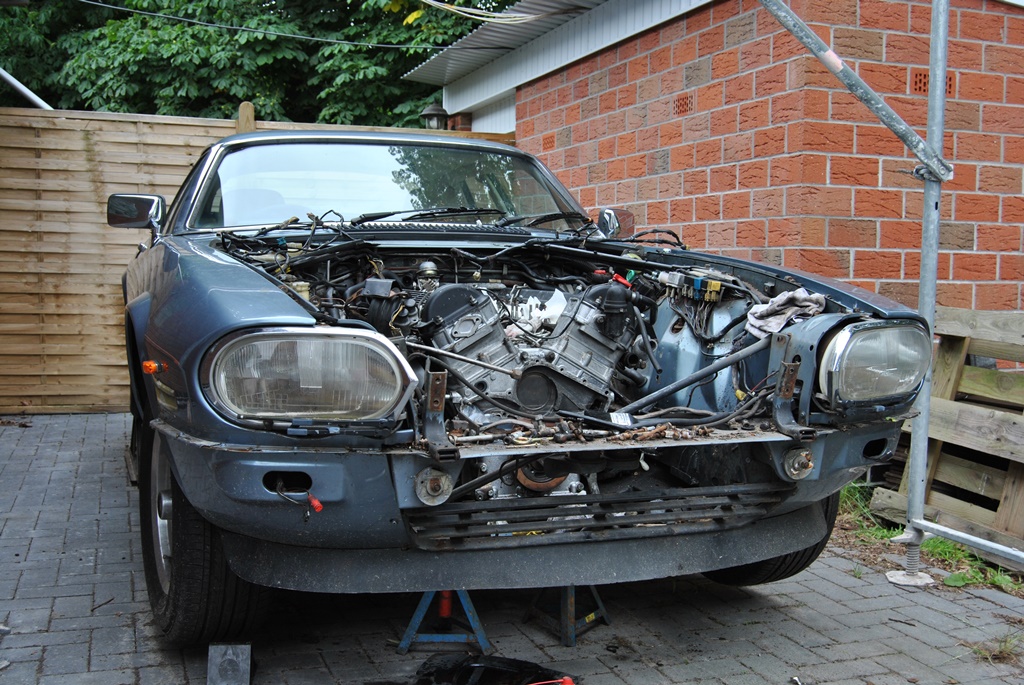
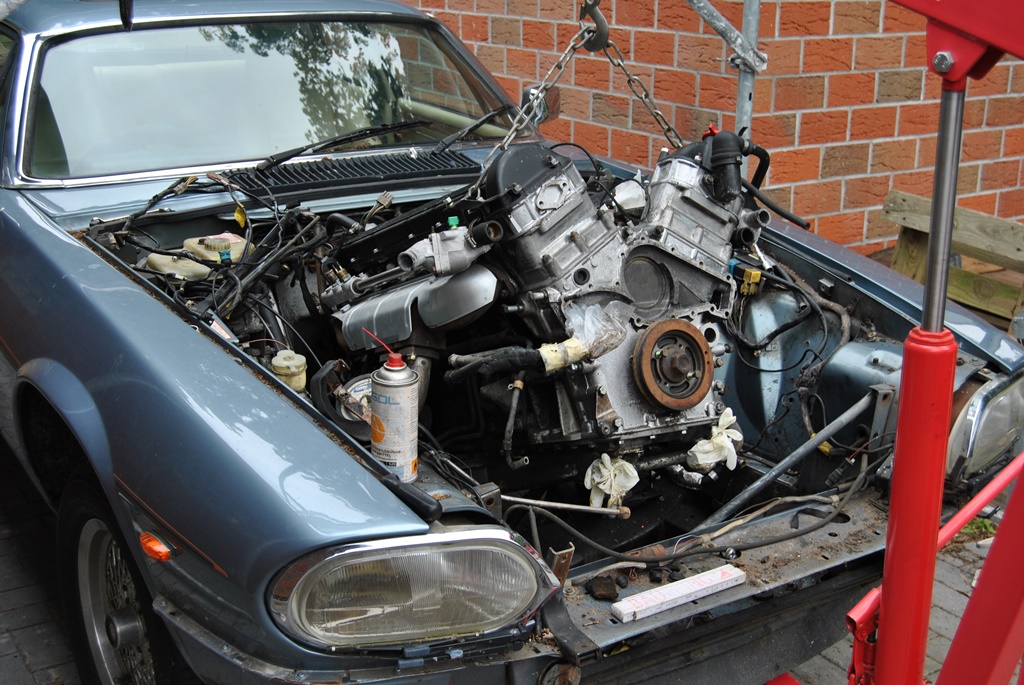
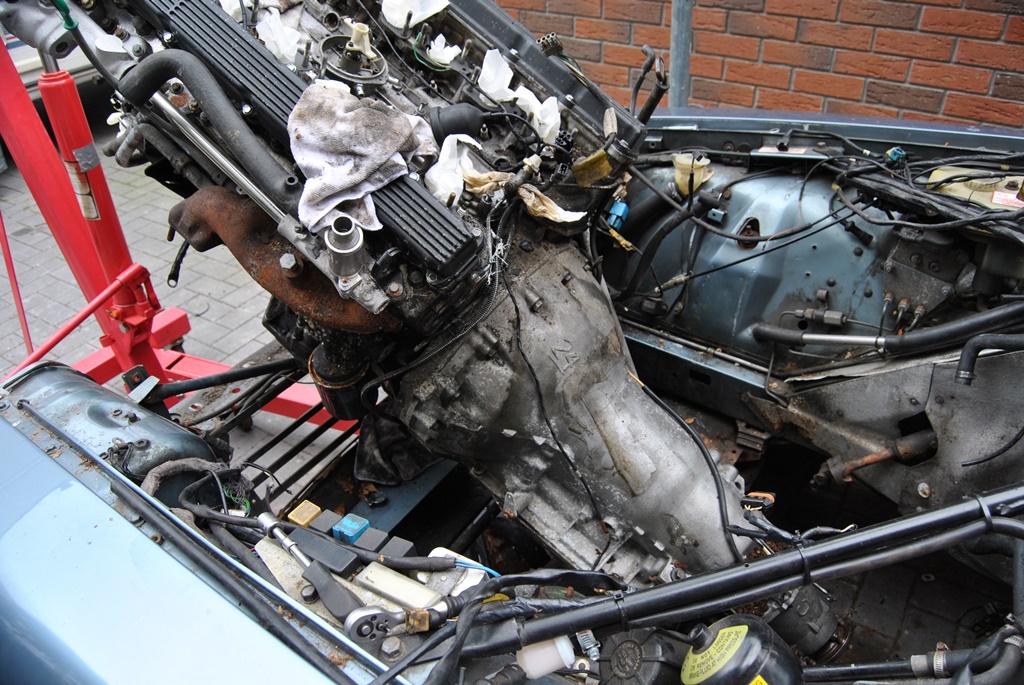

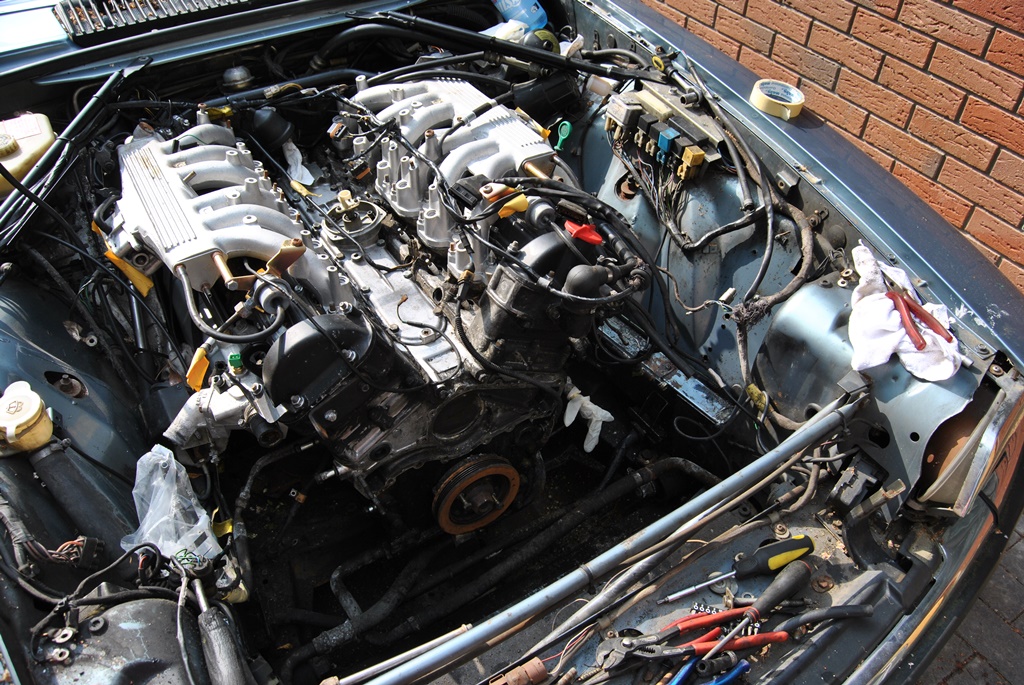
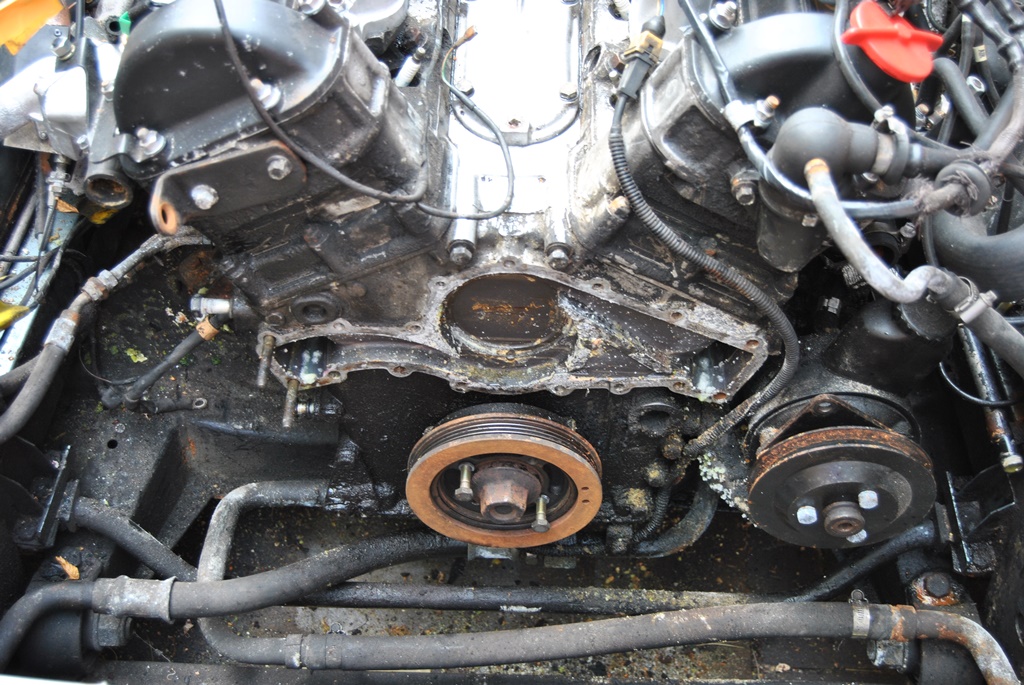
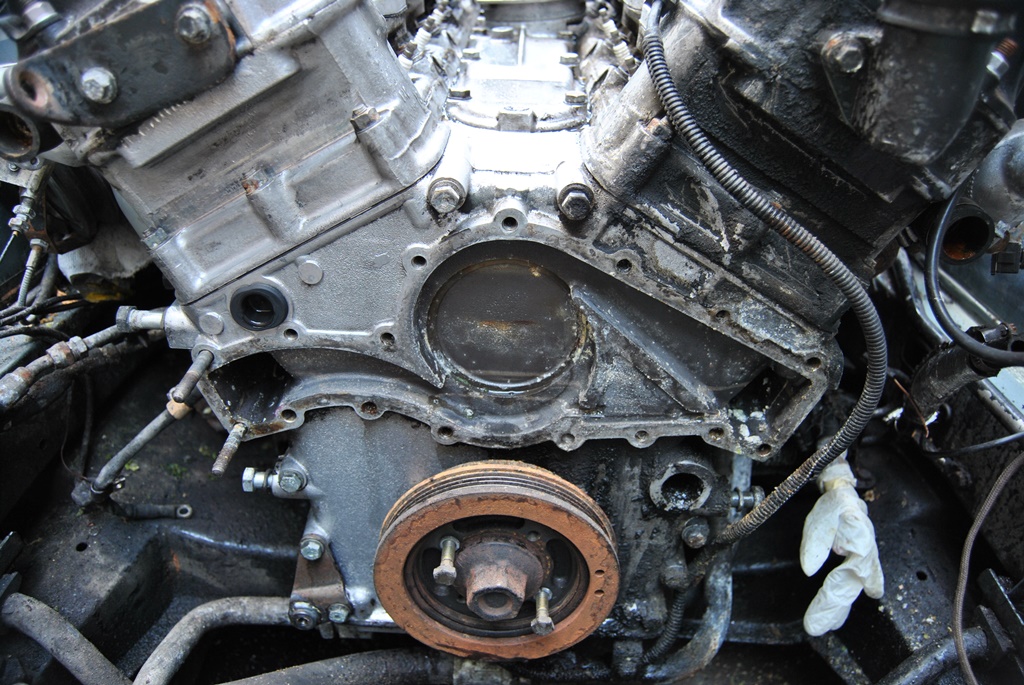
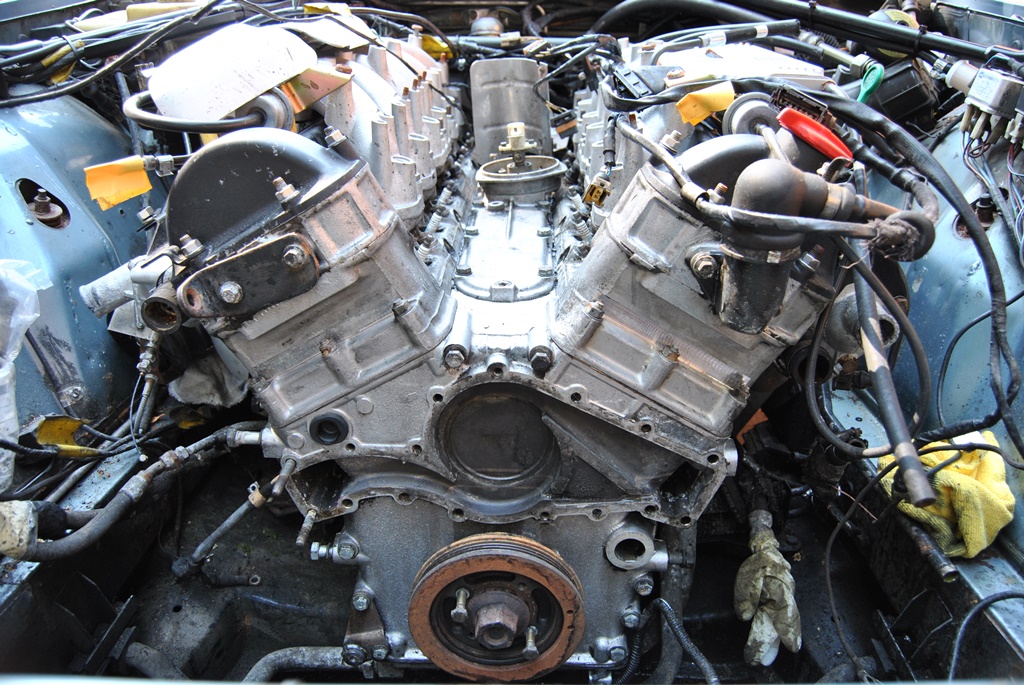
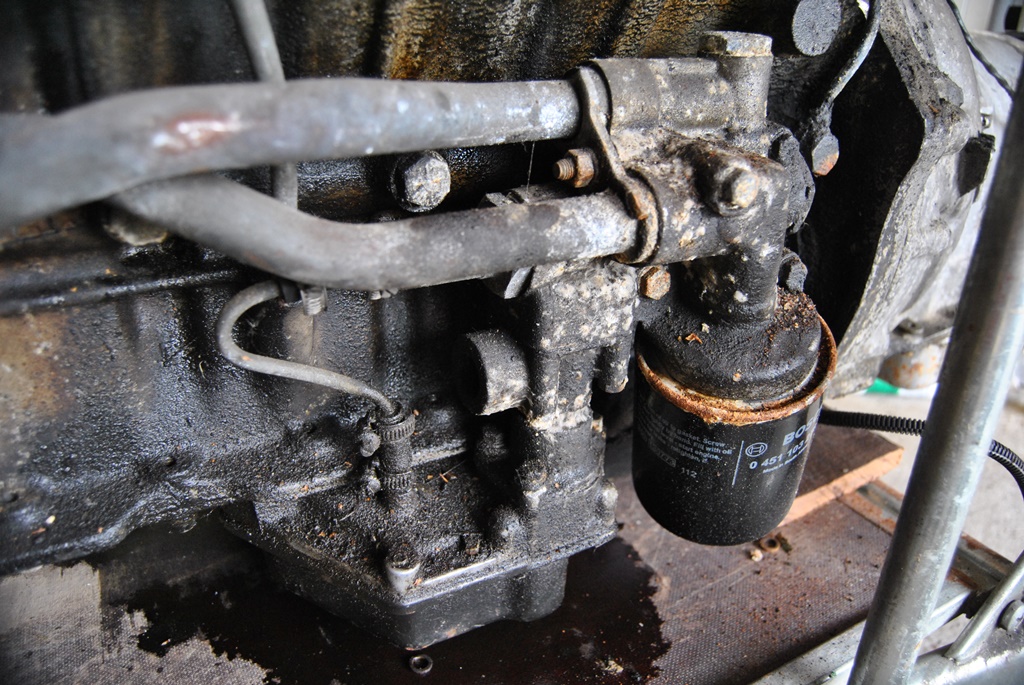
With the engine out, I could see all the problems and leaks I'd be having to work with... Not really loads but first thing was to get that old engine (even though it is a great one and really well cared for oil- and servicewise) a little up to my standards... Which means a clean engine! A little sweat is okay, that is honest, but this engine is coated in oil and grime. So out come the paintbrushes and on goes the cleaner! I also replaced the studs, as they were getting a little rusty and the water rails were removed to be blasted (again). The exhaust manifolds too were sandblasted but not treated afterwards. I want them to go red again (little rusty red, not rust flakey red!). Last but not least, the camshaft carriers received a little bead of high temperature engine silicone to avoid it leaking from there again (thanks Greg for your tip! Hope this holds a while!)


(more pictures here: https://www.flickr.com/photos/288642...57669008788445)
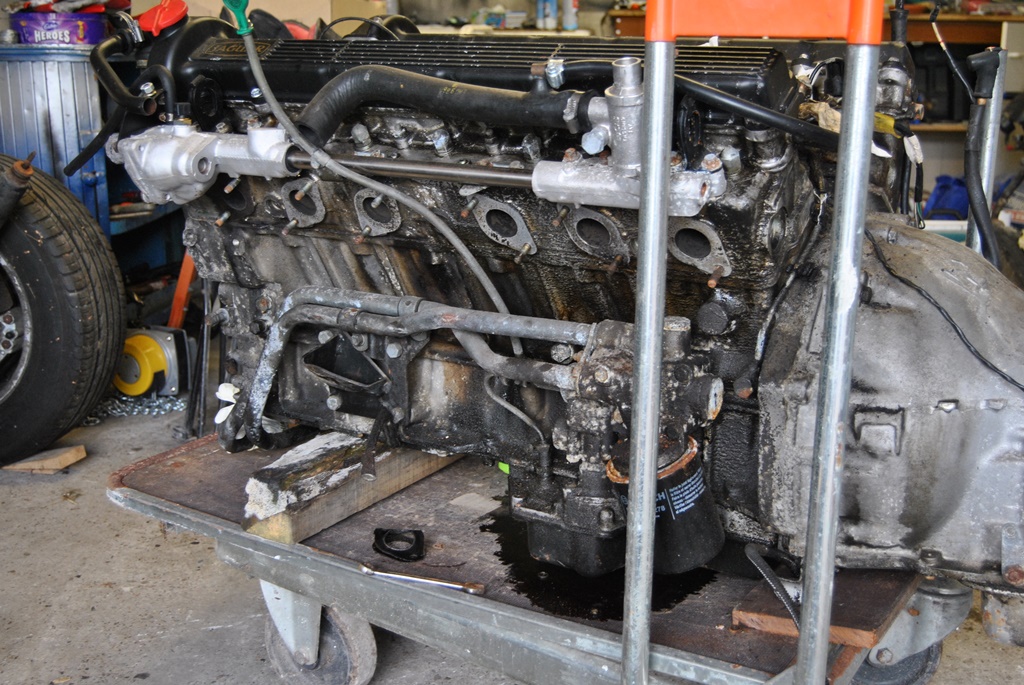
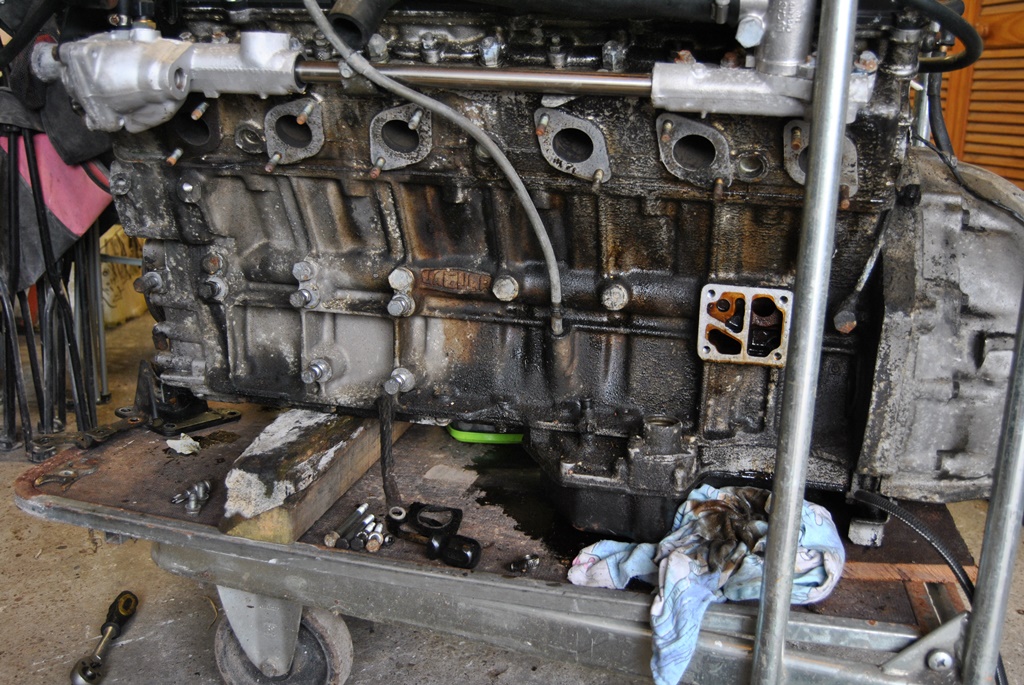
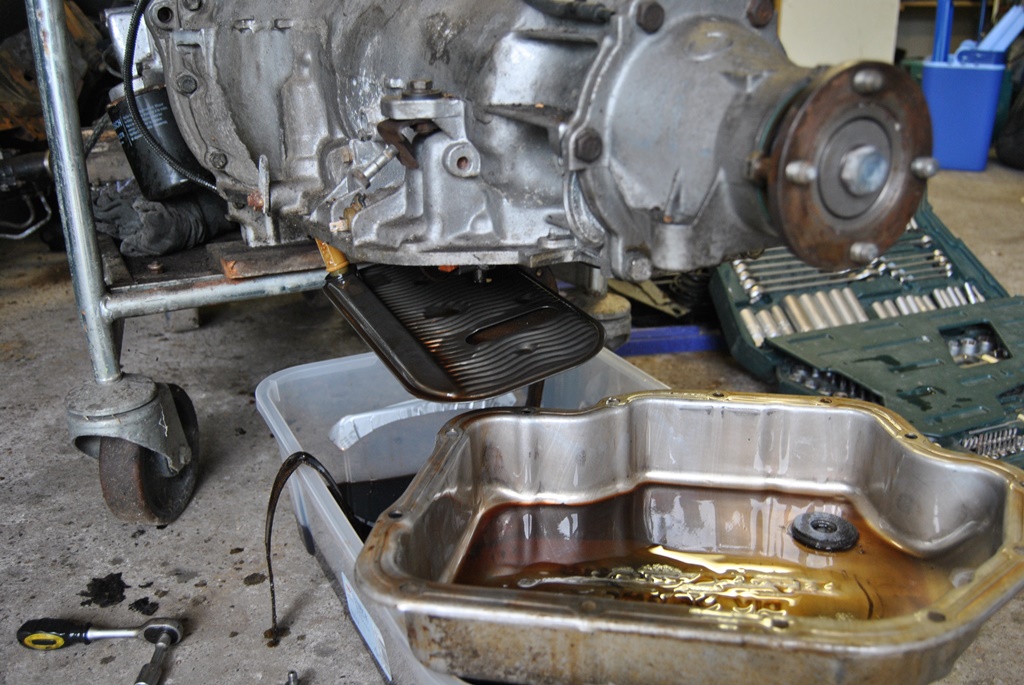
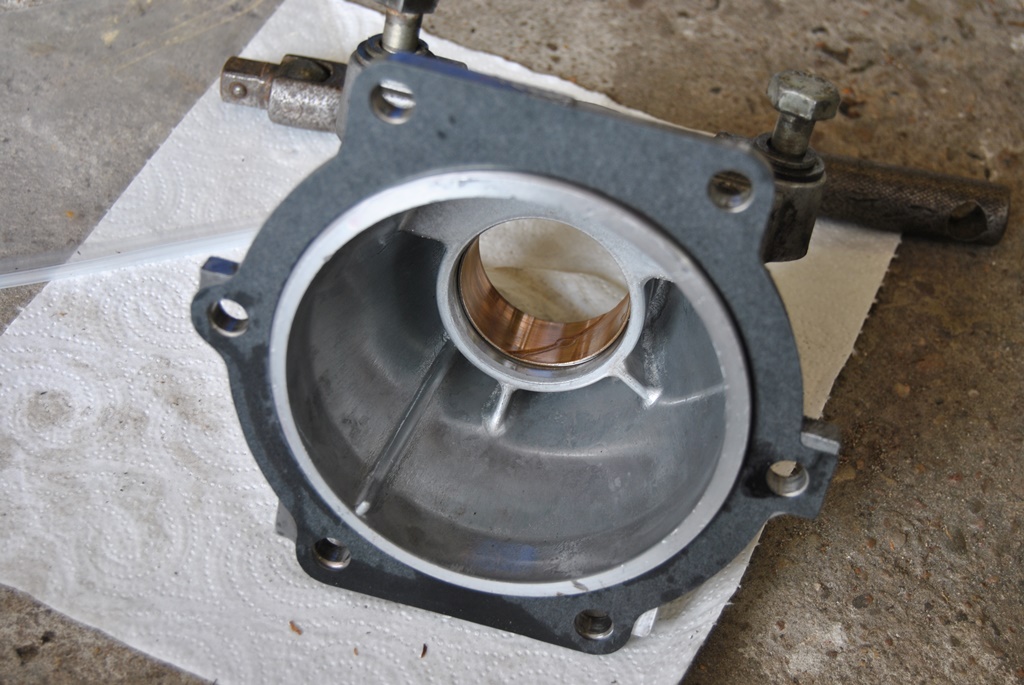
The lower gaskets (like sump gasket, sandwich plate gasket and the rear seal) were also replaced, but not much need to show that. The tranny received all gaskets and seals required to make it oil tight. As the TH400 was available in many applications, with larger, thinner, stronger, weaker, etc. shafts and co, to get the right seals can be an annoying task. I ordered one seal wrong, but that was my own fault, as I didn't measure it...

(more pictures here: https://www.flickr.com/photos/288642...57668783695203)
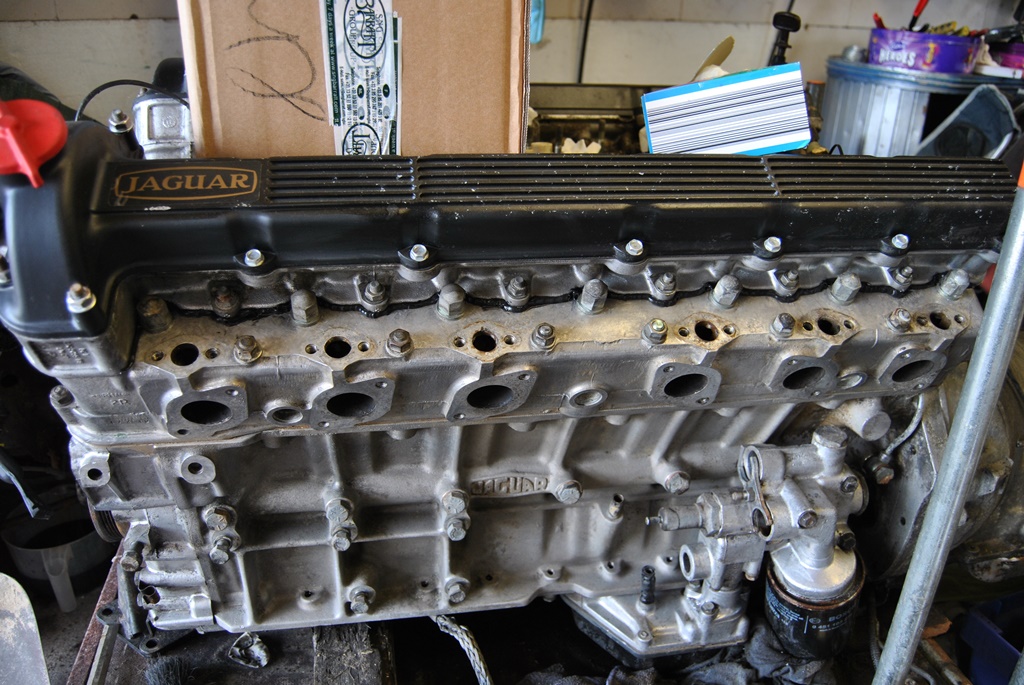
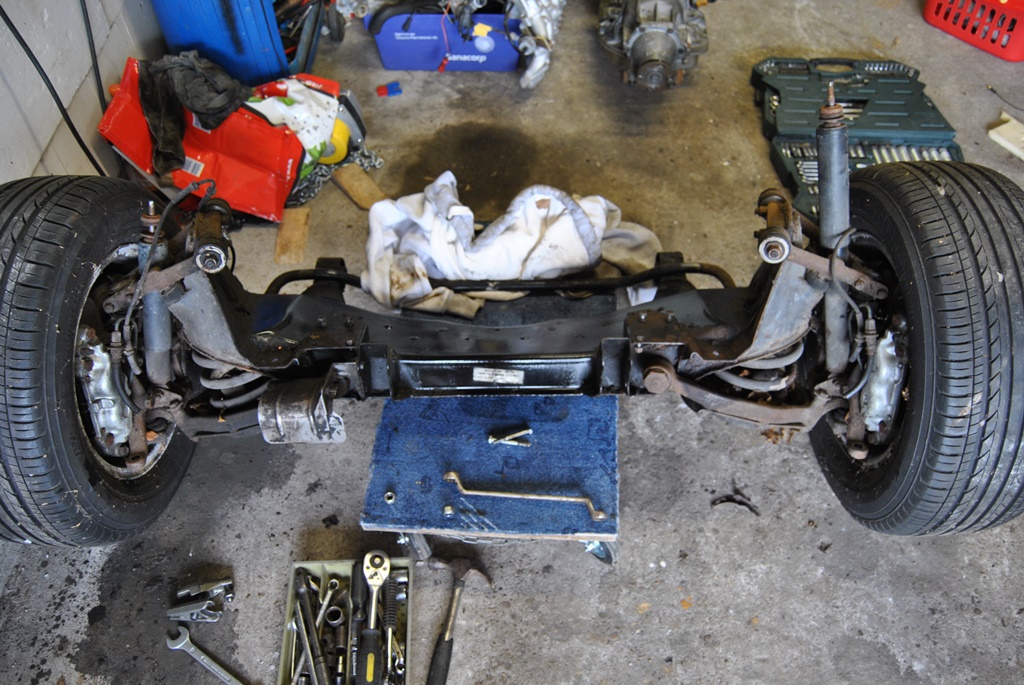
Currently the engine and tranny are mounted back together again and are awaiting further assembly. Some more parts are ordered and I hope to carry on with some nice new parts mid-November (in that case "Movember"). Some little other jobs had been done, like the starter cleanup and greasing, and co. But the current "big job" is getting the front axle done.
As I had the engine out, it was a logical step to remove the front subframe and work on that. Especially since it was coated in oil and had rust in certain areas... So out it came and it was taken to pieces. The subframe would be repairable but at a high cost! It was ditched and an older frame from a 1976 XJ6 Series II was bought (it is the same). All sandblasted and all parts then coated with POR15 and fitted with some new rubbers... All to look nice again and stand up to rust a little longer!
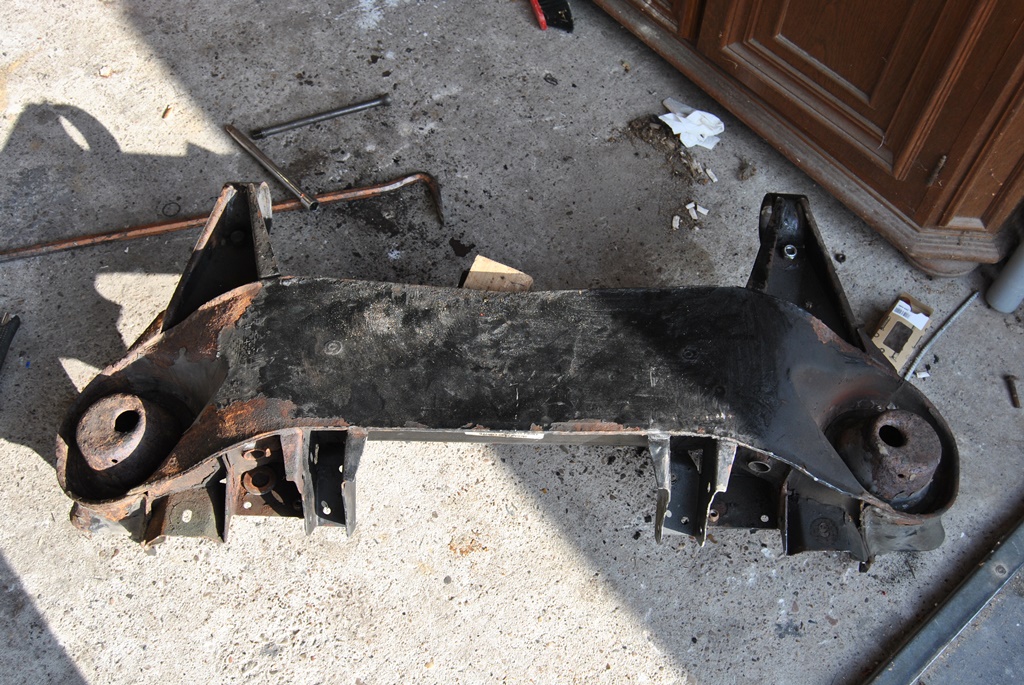
(more pictures here: https://www.flickr.com/photos/288642...57671215146702)
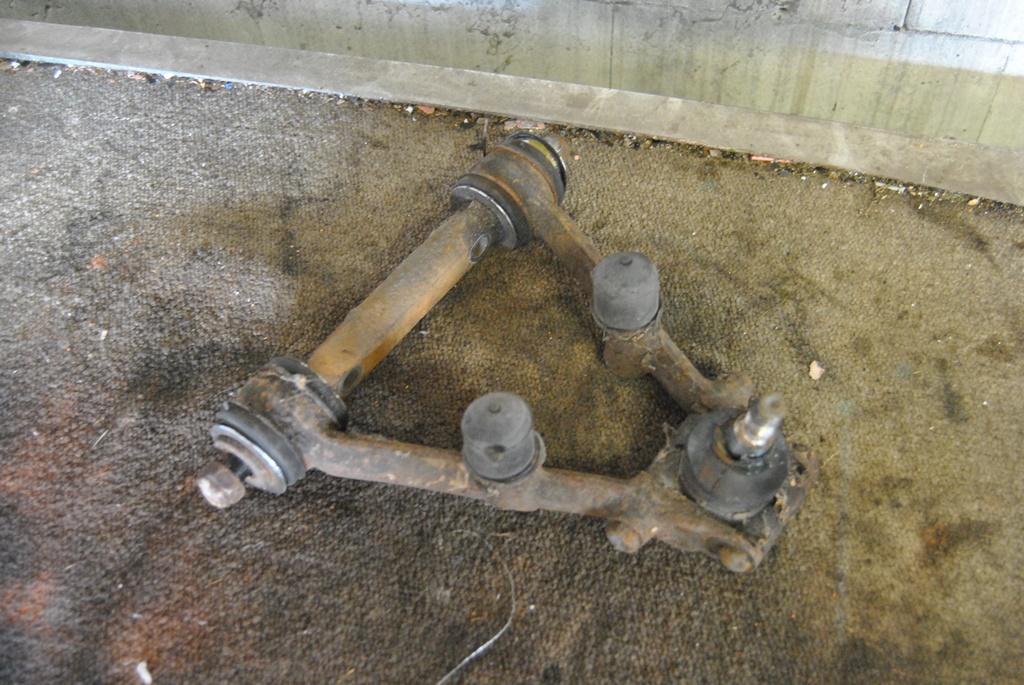
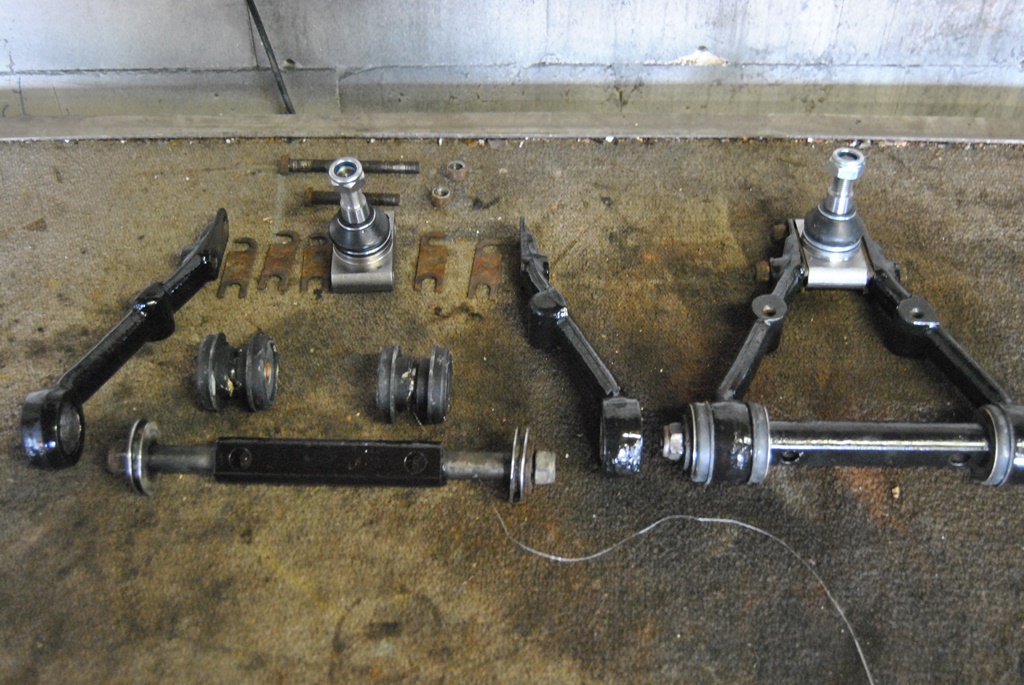
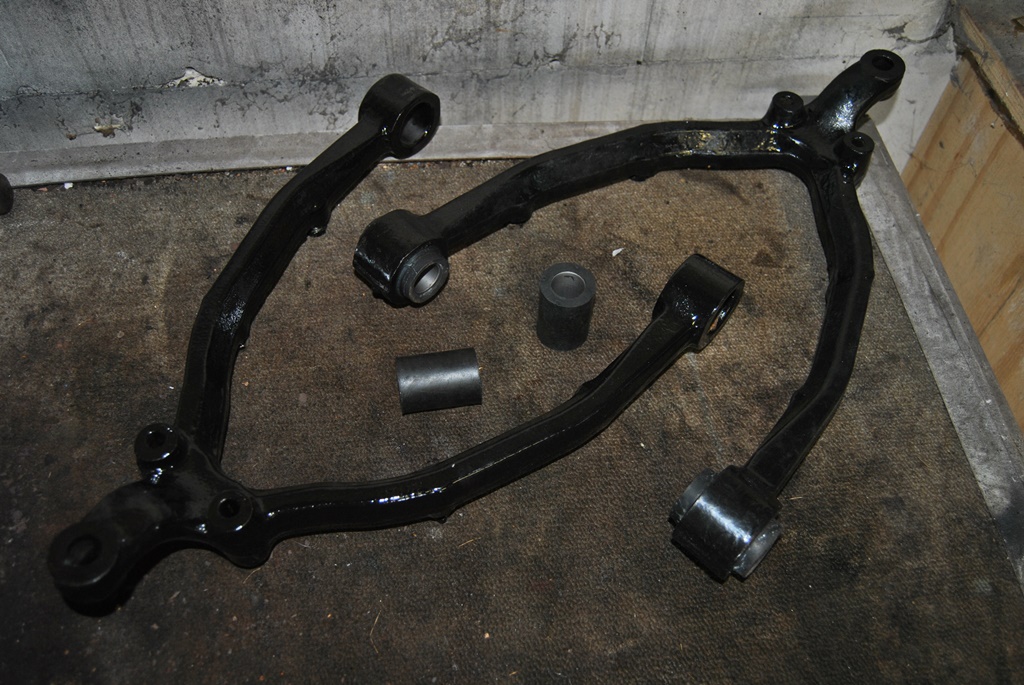
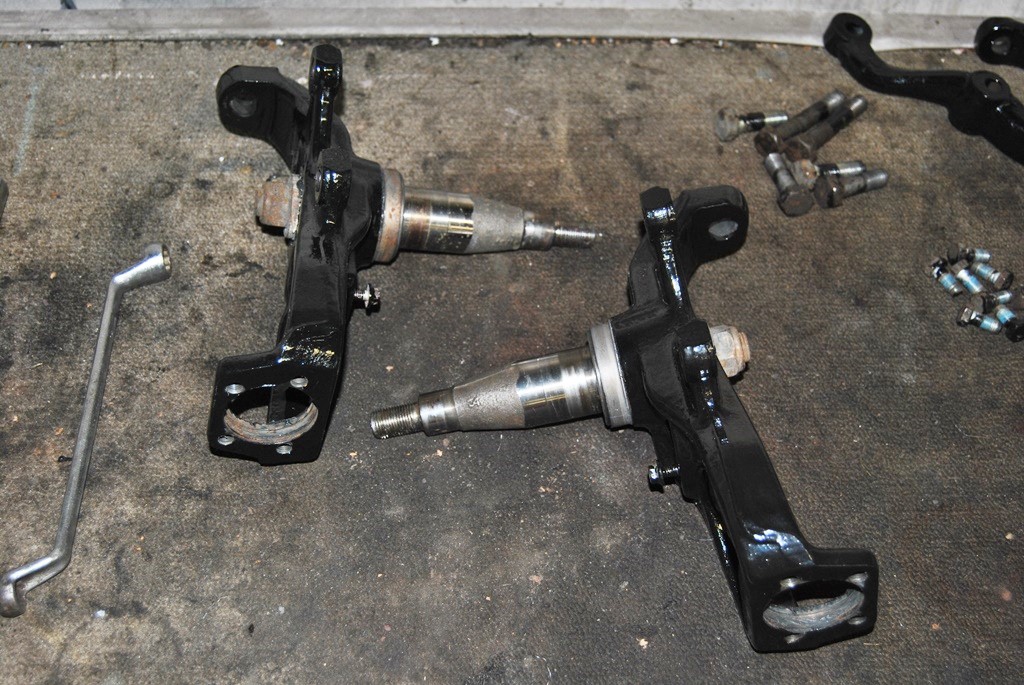
(more pictures here: https://www.flickr.com/photos/288642...57672258600372)
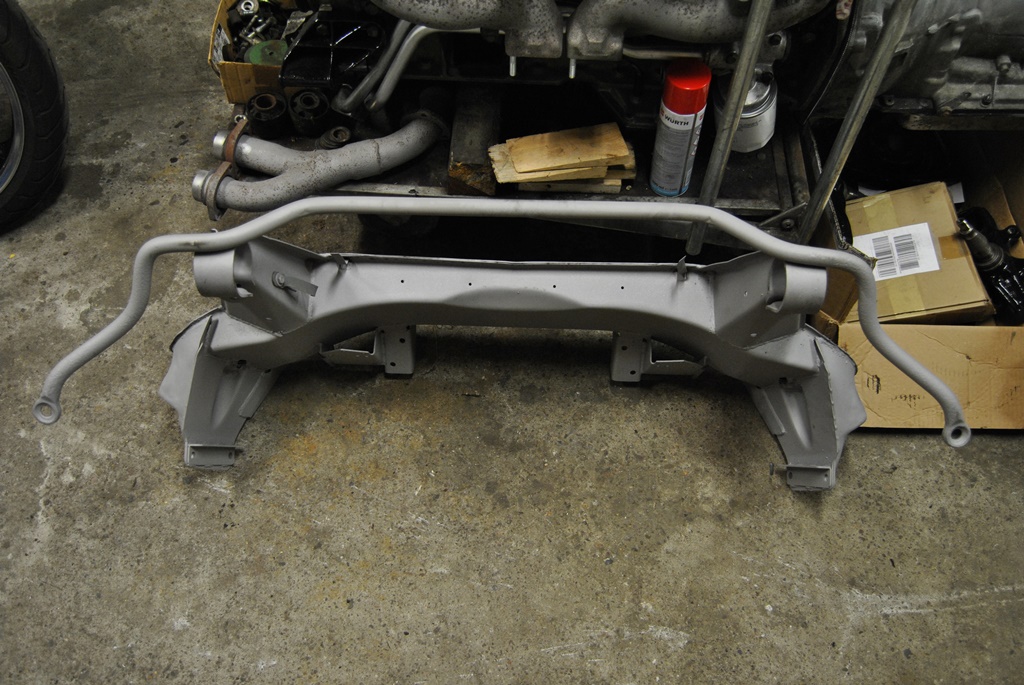
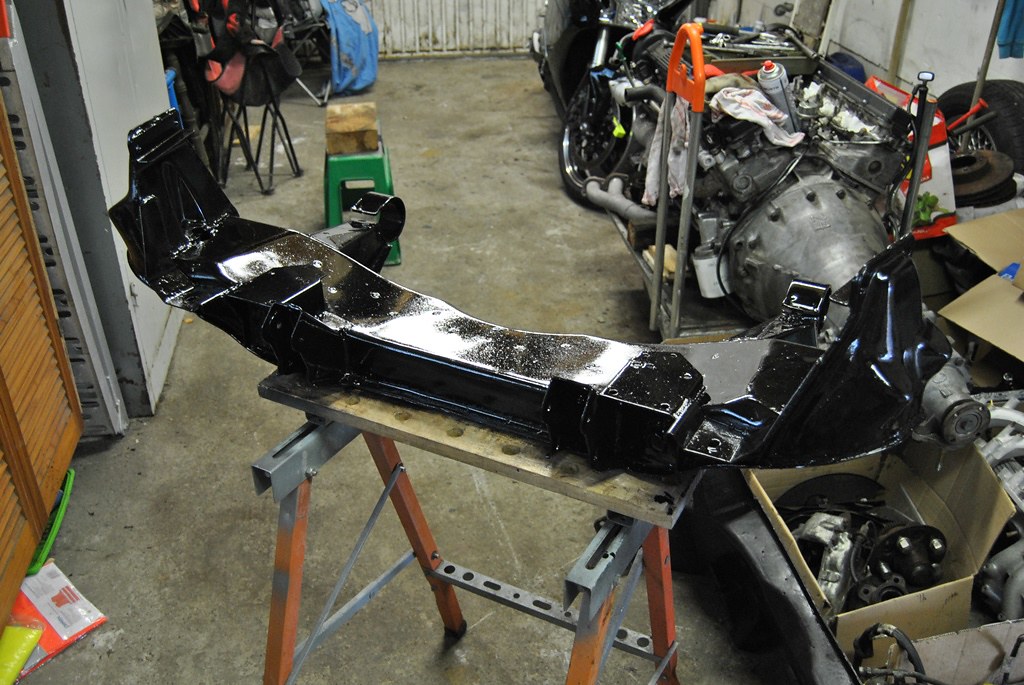
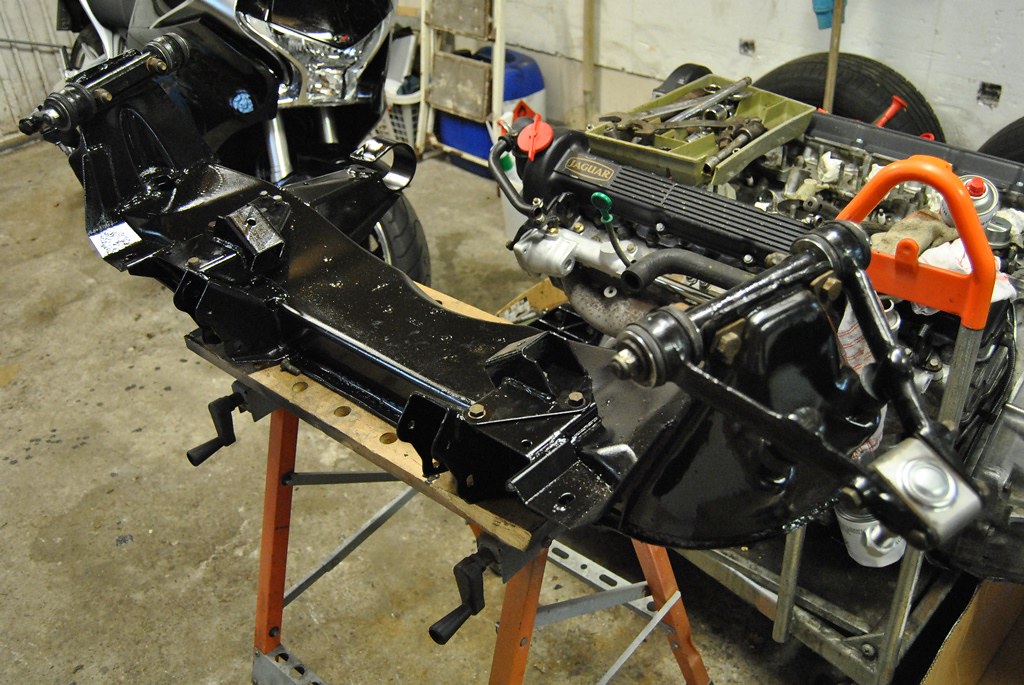
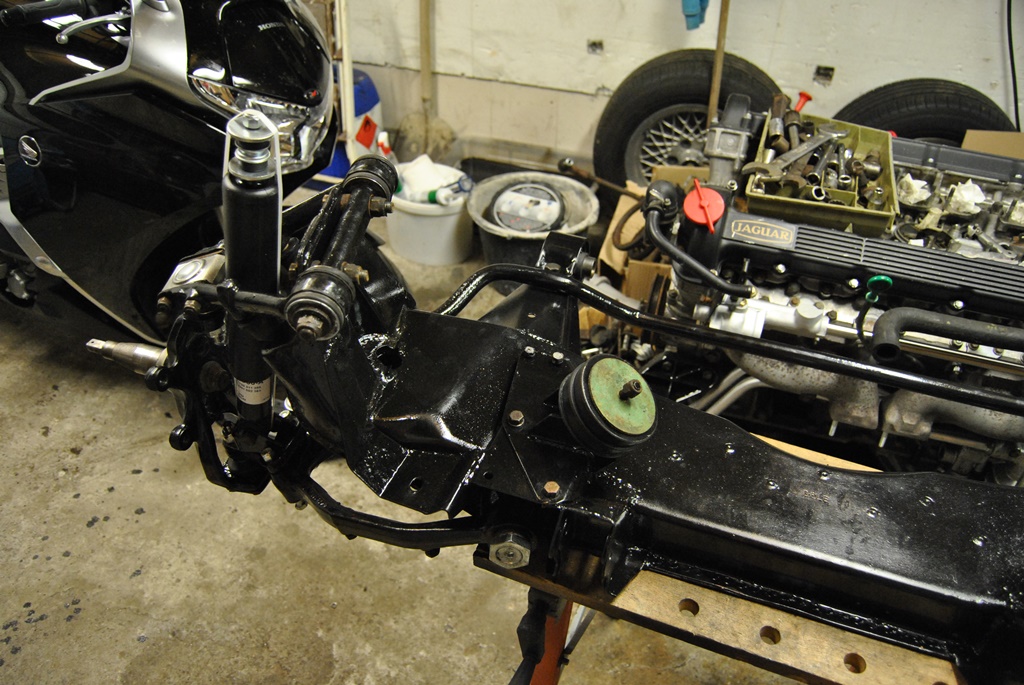
(more pictures here: https://www.flickr.com/photos/288642...57673901034316)
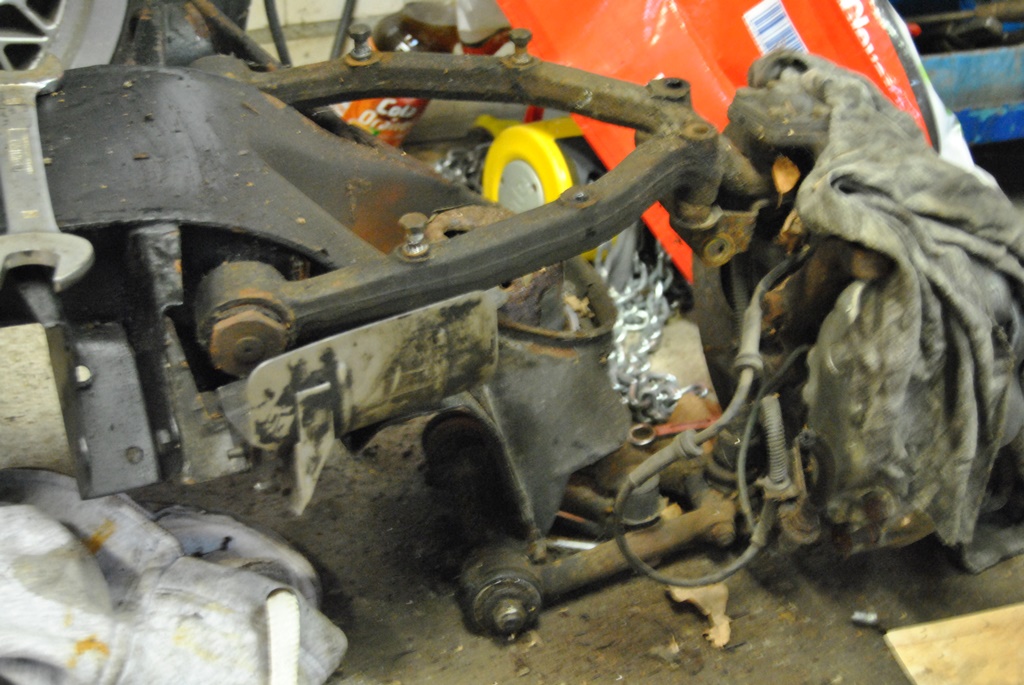
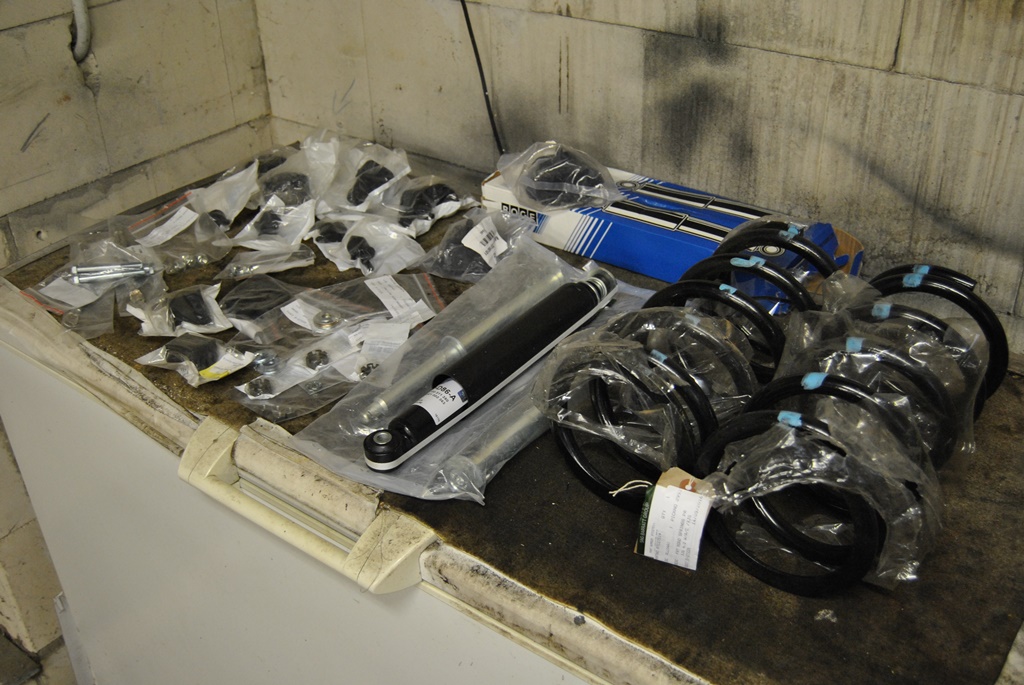
I am now still stuck in the fitting of the springs for the front subframe... That seems to take a little more effort. Especially since I need some threaded rods. This will have to wait a few weeks yet though, as I received message that my employer no longer wants me to work for him... Well, could be worse!
So much for the meanwhile I'll spam this thread full instead of the "what did you..." thread
Well, I'll shorten a long story...After having an accident 2015 I was limited in working on my old lady. This year I was able to and had to check on what had happend in the last ~18 months so I know what to do. Body was still fine, had a few little rust spots but nothing bad. But some mice decided to live in my engine bay and poop all over my then freshly blasted intakes and a bad batch of coolant had reacted with the other coolant (even though I flushed the system thoroughly) and caused loads of damage to some gaskets and the water pump.
So I thought "Heck, I'll start to clean that mess up". This resulted in the removal of the entire aircon system under the bonnet (compressor, condenser and hoses) followed by a clean up.
With that out, I could see a huge mess of what looks like 27 years of oiling seals... Never mind! I started to clean it...
Though I couldn't get the (even worse looking) sides done. As there were loads of gaskets to change, I needed to move to more desperate measures: engine removal!
With the engine out, I could see all the problems and leaks I'd be having to work with... Not really loads but first thing was to get that old engine (even though it is a great one and really well cared for oil- and servicewise) a little up to my standards... Which means a clean engine! A little sweat is okay, that is honest, but this engine is coated in oil and grime. So out come the paintbrushes and on goes the cleaner! I also replaced the studs, as they were getting a little rusty and the water rails were removed to be blasted (again). The exhaust manifolds too were sandblasted but not treated afterwards. I want them to go red again (little rusty red, not rust flakey red!). Last but not least, the camshaft carriers received a little bead of high temperature engine silicone to avoid it leaking from there again (thanks Greg for your tip! Hope this holds a while!
)(more pictures here: https://www.flickr.com/photos/288642...57669008788445)
The lower gaskets (like sump gasket, sandwich plate gasket and the rear seal) were also replaced, but not much need to show that. The tranny received all gaskets and seals required to make it oil tight. As the TH400 was available in many applications, with larger, thinner, stronger, weaker, etc. shafts and co, to get the right seals can be an annoying task. I ordered one seal wrong, but that was my own fault, as I didn't measure it...
(more pictures here: https://www.flickr.com/photos/288642...57668783695203)
Currently the engine and tranny are mounted back together again and are awaiting further assembly. Some more parts are ordered and I hope to carry on with some nice new parts mid-November (in that case "Movember"
). Some little other jobs had been done, like the starter cleanup and greasing, and co. But the current "big job" is getting the front axle done. As I had the engine out, it was a logical step to remove the front subframe and work on that. Especially since it was coated in oil and had rust in certain areas... So out it came and it was taken to pieces. The subframe would be repairable but at a high cost! It was ditched and an older frame from a 1976 XJ6 Series II was bought (it is the same). All sandblasted and all parts then coated with POR15 and fitted with some new rubbers... All to look nice again and stand up to rust a little longer!
(more pictures here: https://www.flickr.com/photos/288642...57671215146702)
(more pictures here: https://www.flickr.com/photos/288642...57672258600372)
(more pictures here: https://www.flickr.com/photos/288642...57673901034316)
I am now still stuck in the fitting of the springs for the front subframe... That seems to take a little more effort. Especially since I need some threaded rods. This will have to wait a few weeks yet though, as I received message that my employer no longer wants me to work for him... Well, could be worse!
So much for the meanwhile
I'll spam this thread full instead of the "what did you..." thread

Veteran Member


Joined: Jan 2012
Posts: 14,612
Likes: 10,809
From: France
Great stuff Daim, and very interesting. The standard of the workmanship is really first class. AND your tappet chest silicone beading is a work of wonder, I shall NOT be showing that to Madame GiF, who was very critical of my bodgy efforts!
Greg
Greg
Thread Starter
|
Veteran Member
Joined: May 2014
Posts: 5,906
Likes: 2,183
From: Bremen, Germany
My dad is a tile layer so he taught me yonks ago how to do a good silicone beading...
I just hope that the old bugger will run as planned when I start her sometime in the future

Veteran Member
Joined: Jul 2010
Posts: 7,362
Likes: 1,241
From: Austin tx and Daytona FL.
lookin good!
i have most of my build on VHS,and i dont even have a VHS player any more, 2hrs of almost boring stuff!
it shocks me that i could do that much work(like you are doing) 22years ago.
what posseses us to push so high, with little thought about costs!
that darn hypnosist William Lyons, and his dreams!
the only approval we get is when someone says great CAR!!
Veteran Member
Joined: May 2010
Posts: 4,638
Likes: 2,583
From: Vic Australia
That silicon bead is a good idea. In the Jaguar V12 rebuild guide I have, it calls for Loctite 518 between the cam carrier and cylinder head. When I pulled the cam carrier off my 6.0L engine it was bare no sealant at all, no wonder Jaguars leak from the factory.
Thread Starter
|
Veteran Member
Joined: May 2014
Posts: 5,906
Likes: 2,183
From: Bremen, Germany
Thread Starter
|
Veteran Member
Joined: May 2014
Posts: 5,906
Likes: 2,183
From: Bremen, Germany
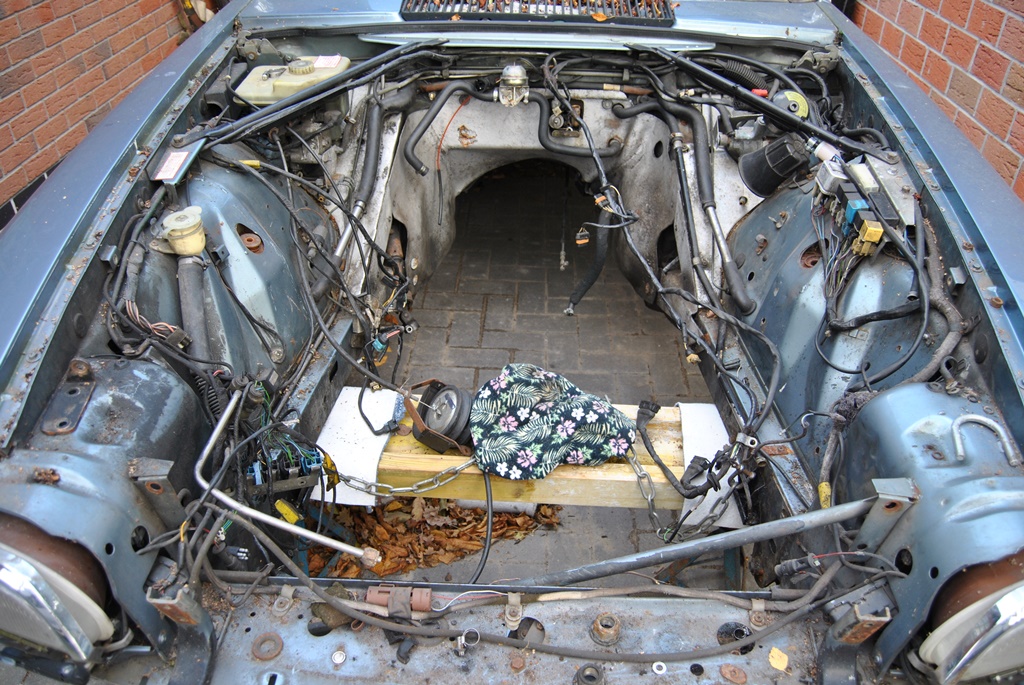
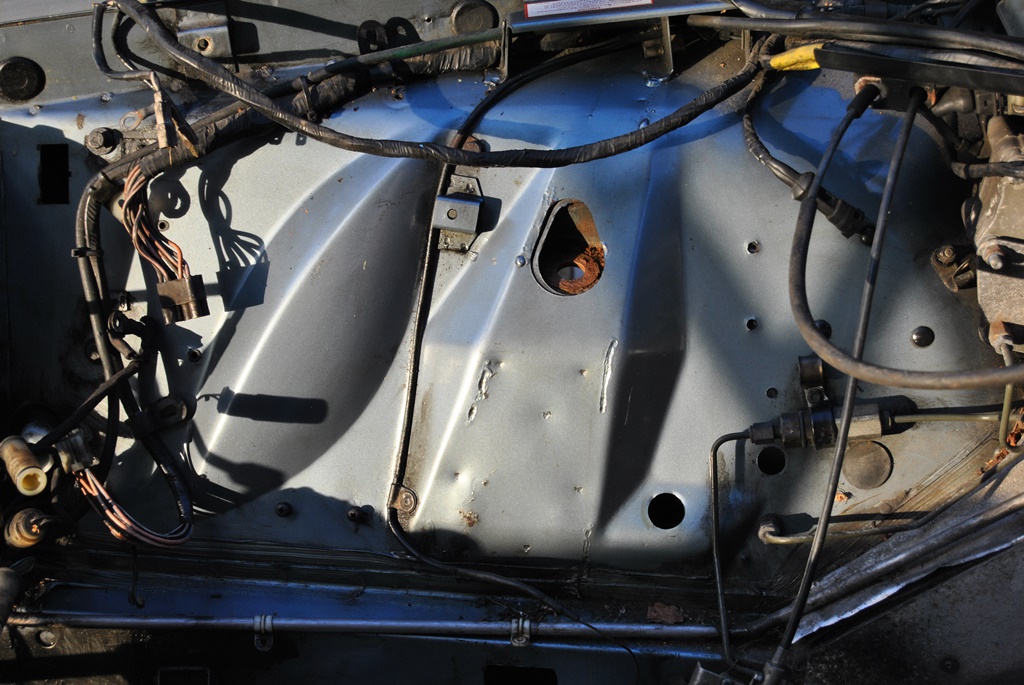
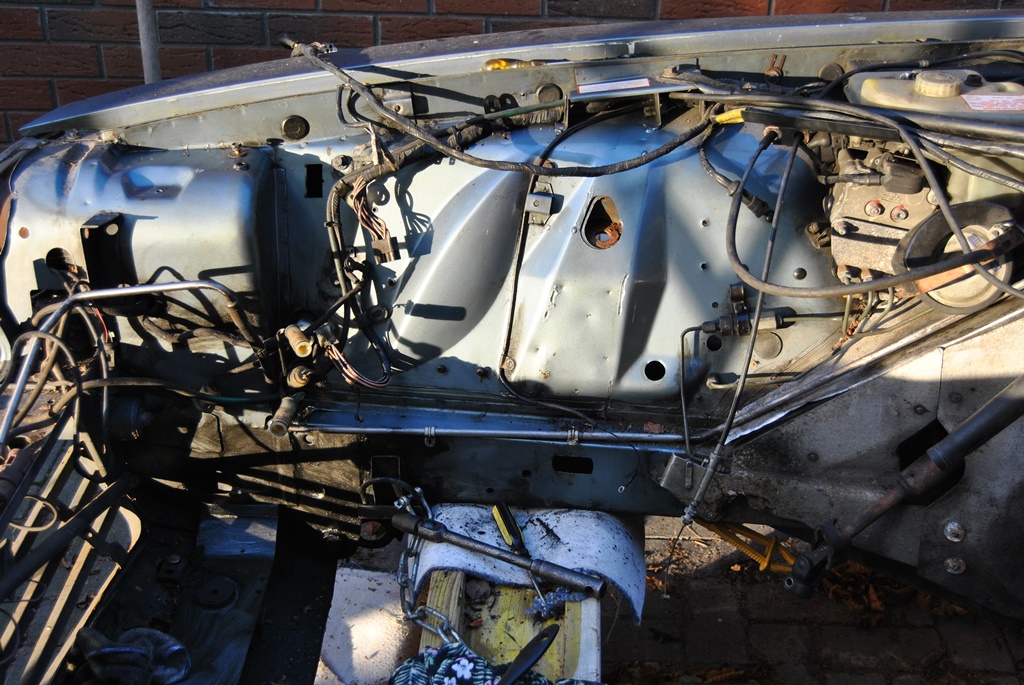
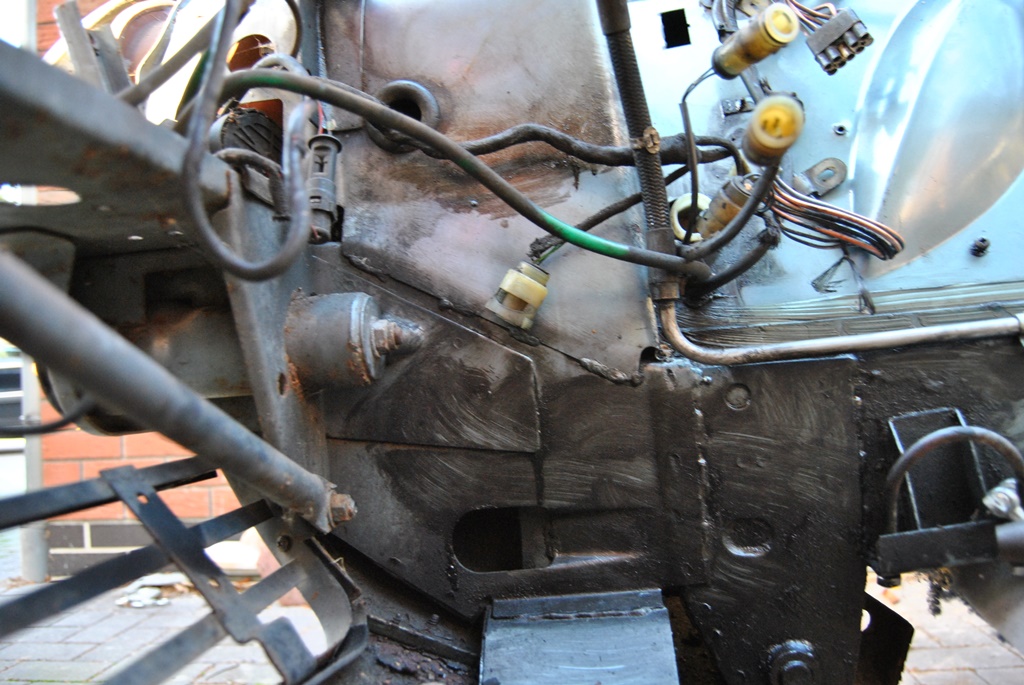
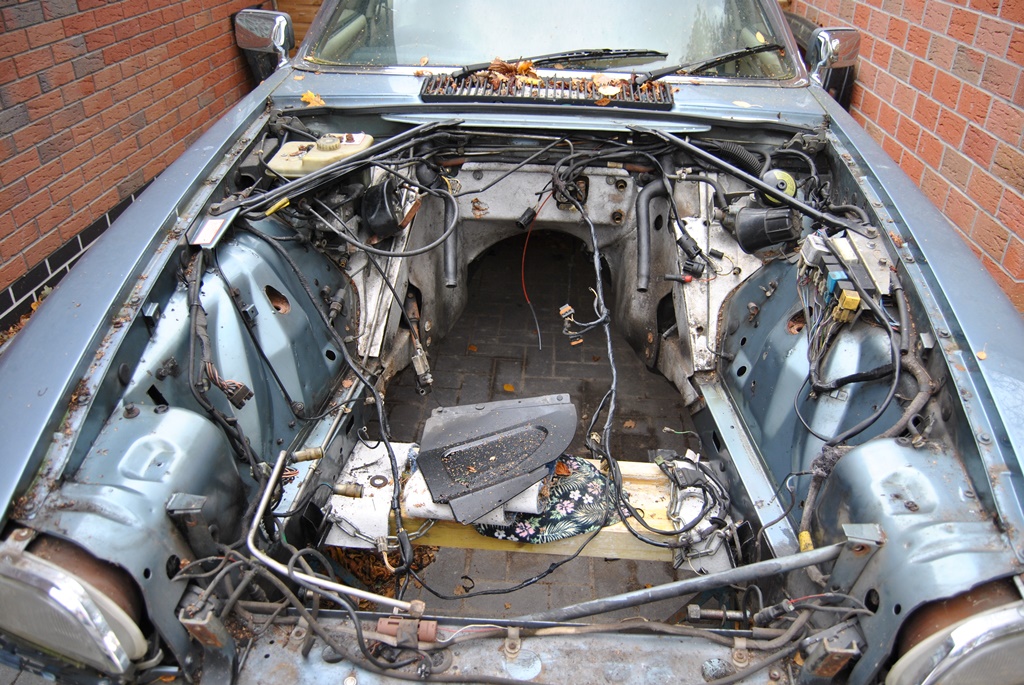
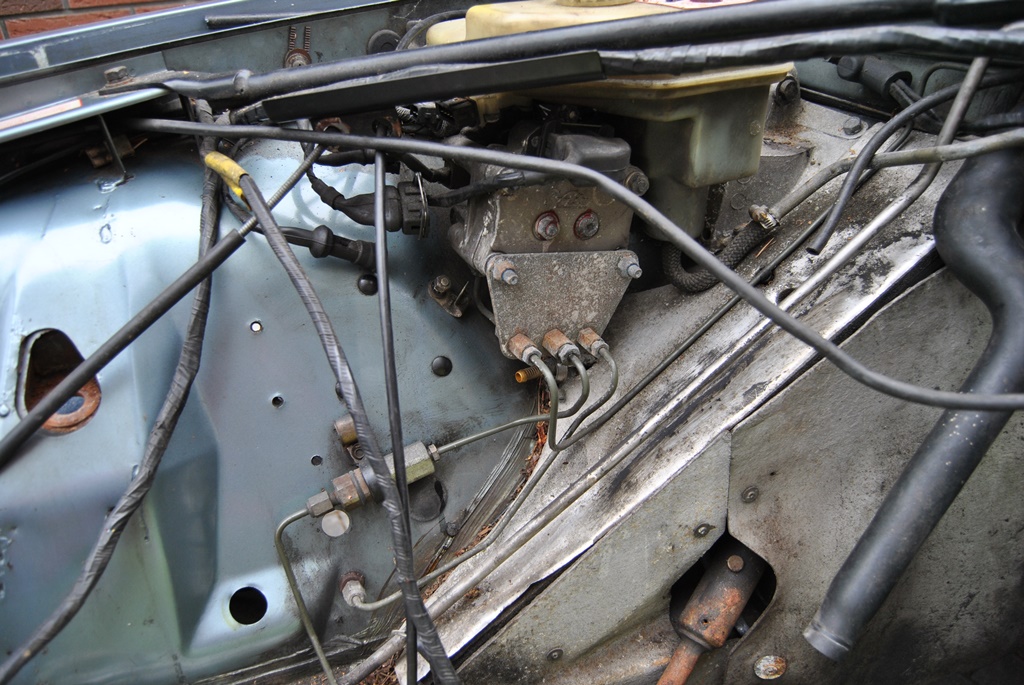
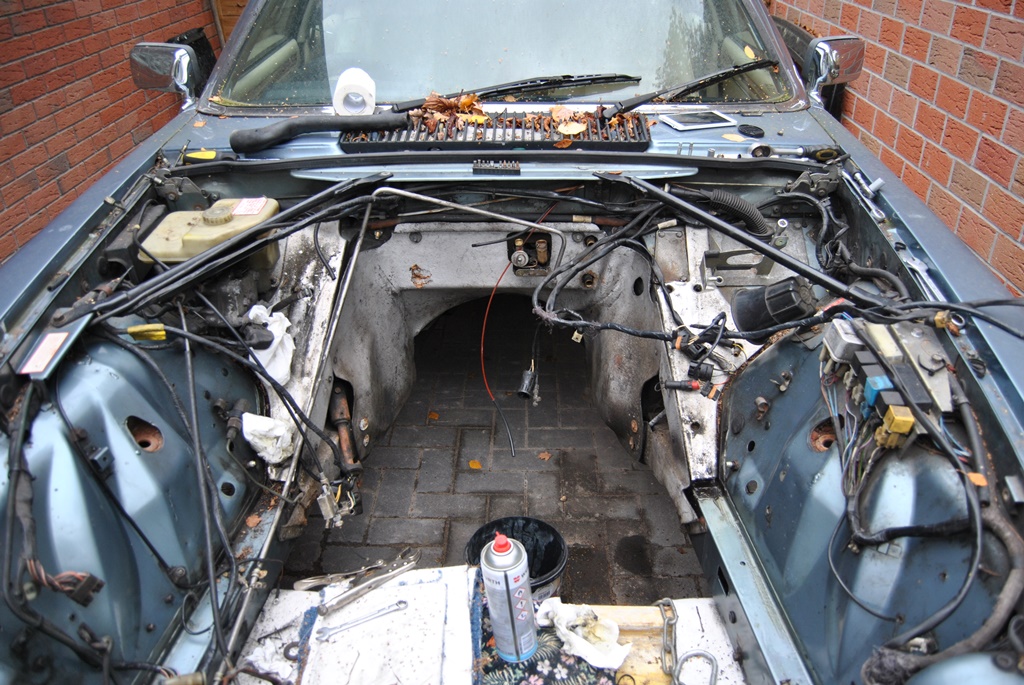
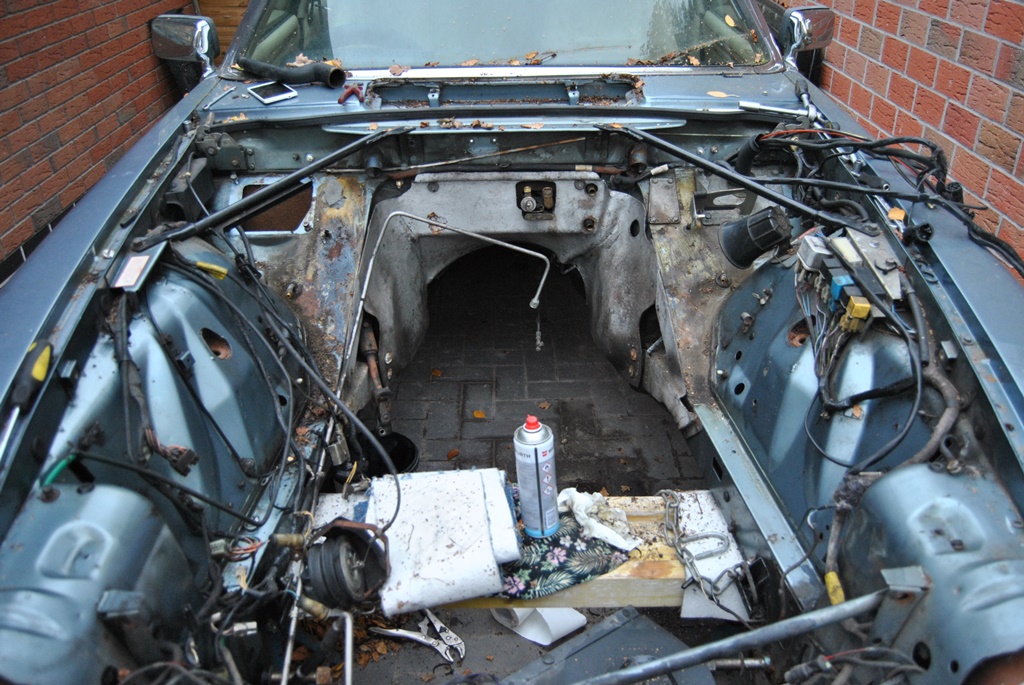
Engine bays, which have been neglected for a while, tend to be dirty... Well, mine is slightly dirty but enough to make me unhappy. So I started to clean it up! And the result is a very disappointing one!
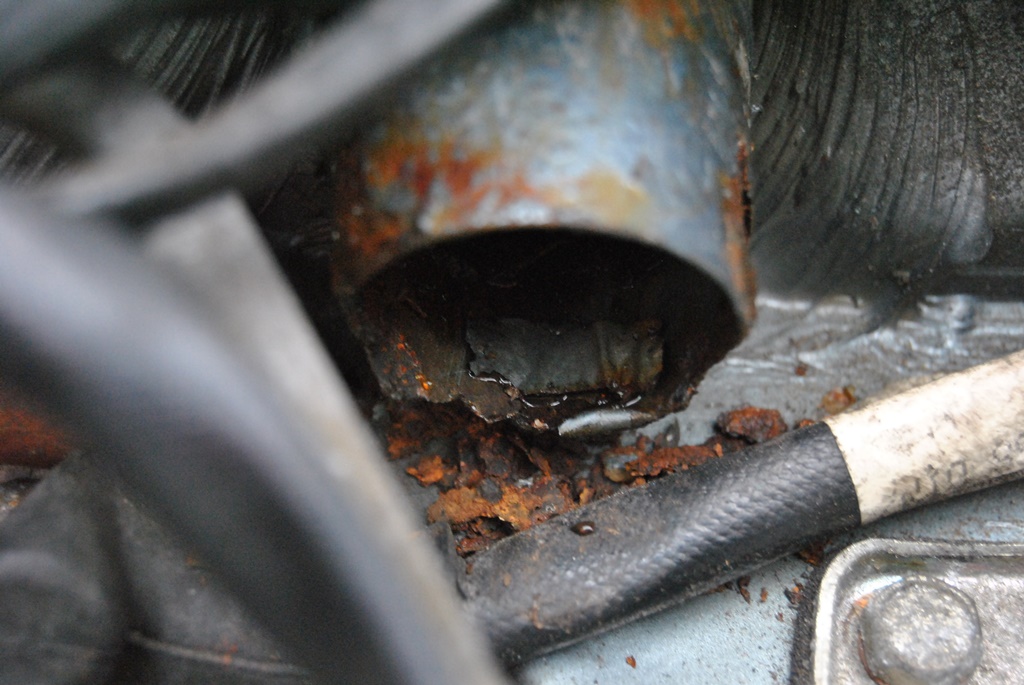
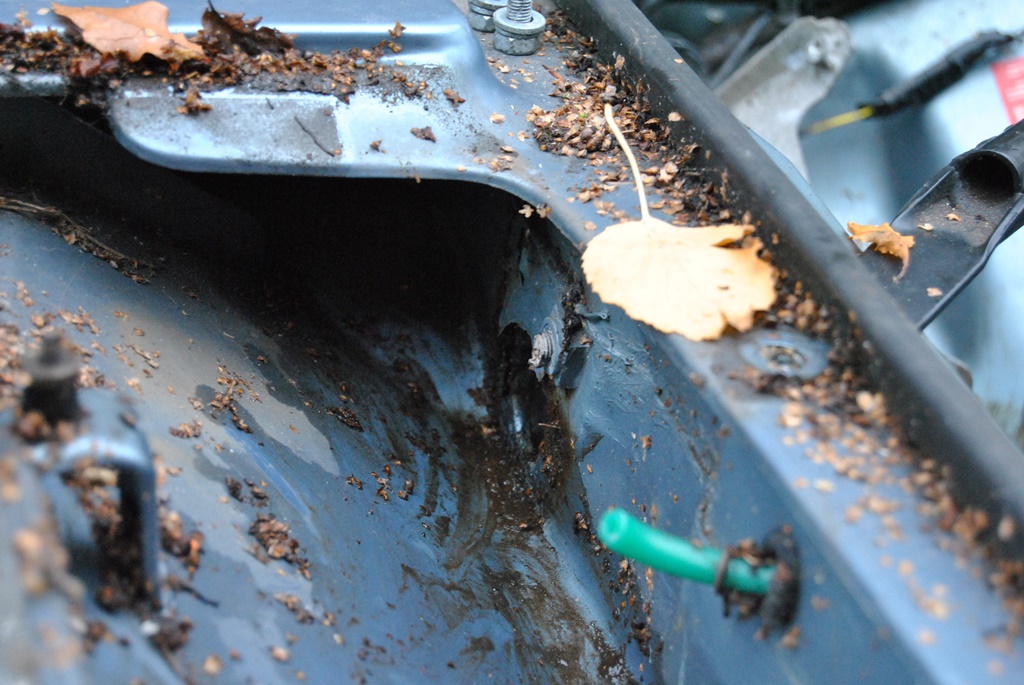
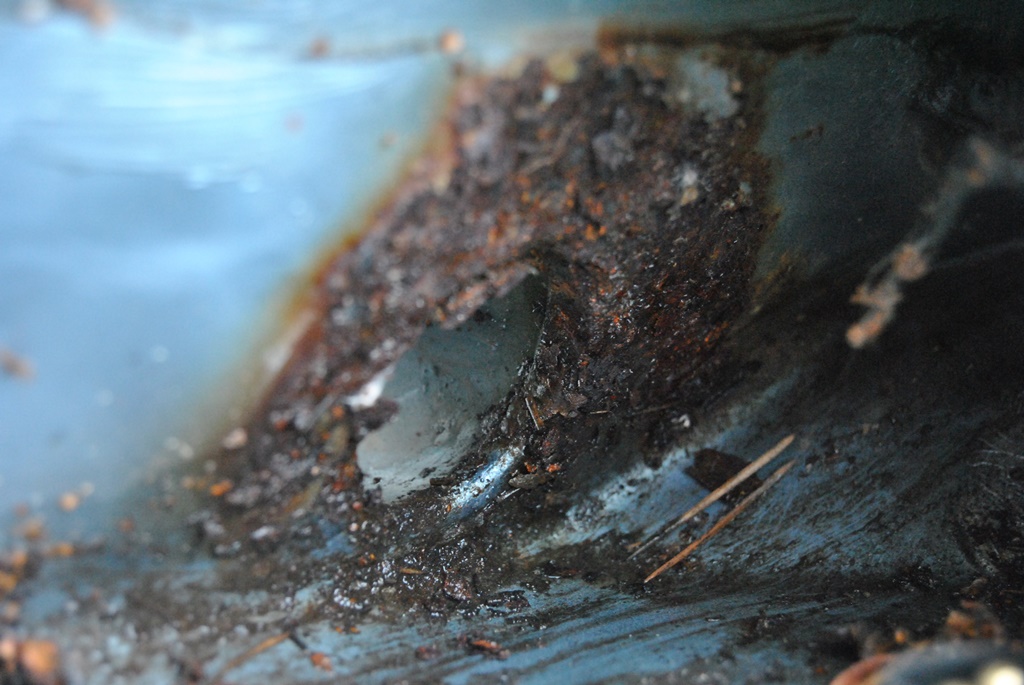
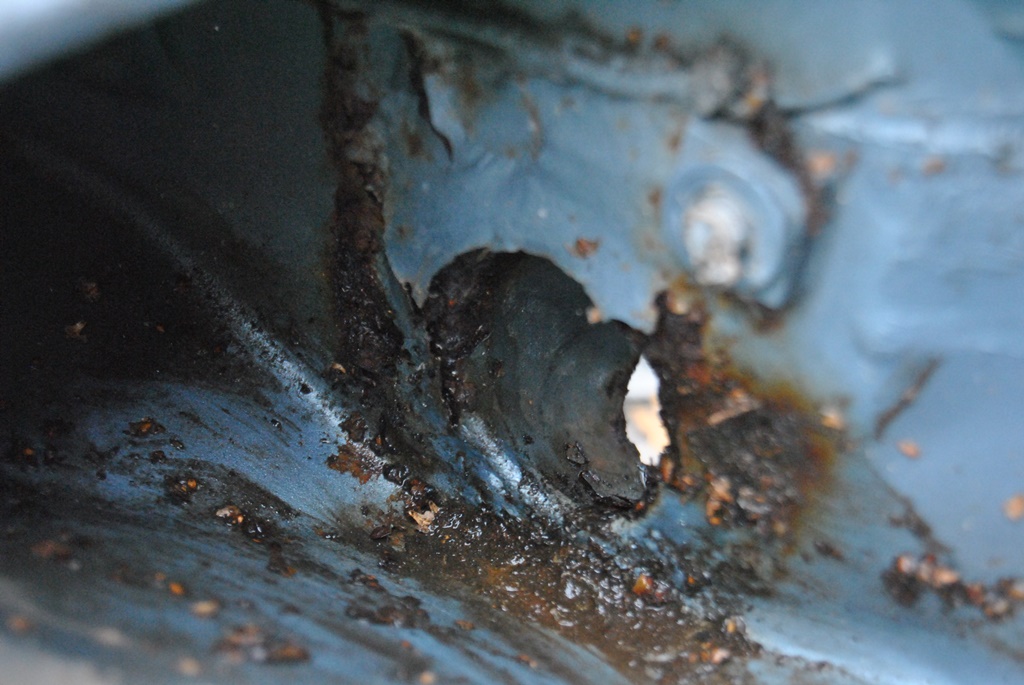
My XJ-S seems to be bodywise very good. 27 years old and so far not welded. But 27 years are not bad for British steel. But a few spots are showing their age. The passenger side (left) scuttle pipe has rotted through. Okay, that isn't that bad. But then also the right hand wheel well has a few bubbles. Luckily the engine is out!
So that means: I'll be hiring someone to do some welding for me... It won't rot away within the next 6 months, but it is still upsetting. My plans were to have the rear bubbles welded when the engine is running and all has been overhauled again. But that seems impossible.
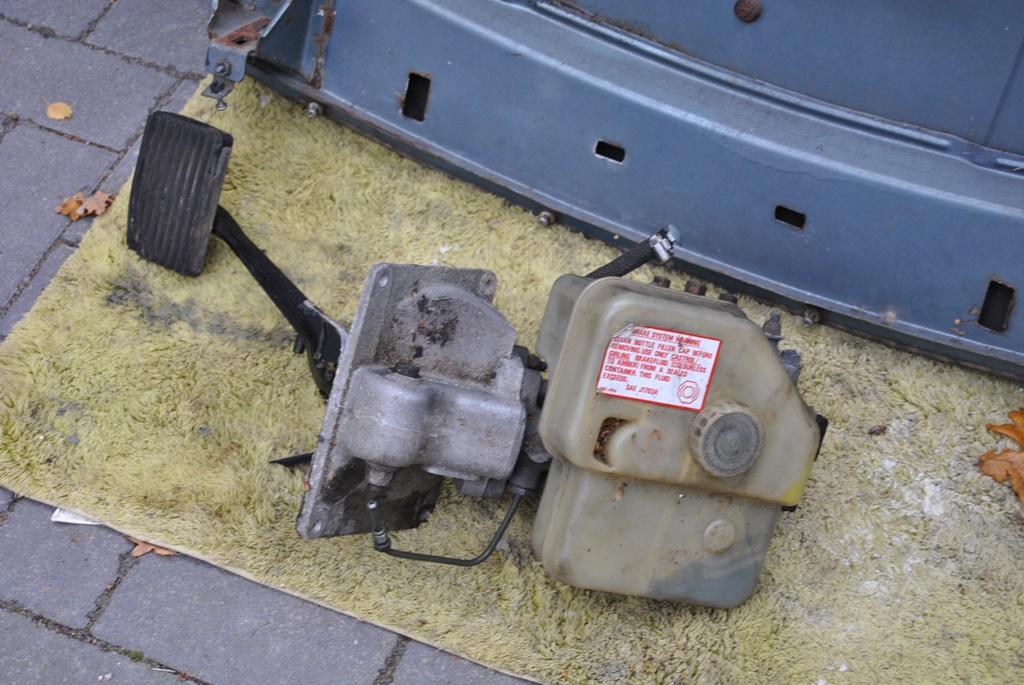
Next steps are obvious: remove the ABS pump, ABS module and brake pipes. Make a way to the rotten drain pipe and also get the wheel wells welded... Looks as if they had been spot welded before...
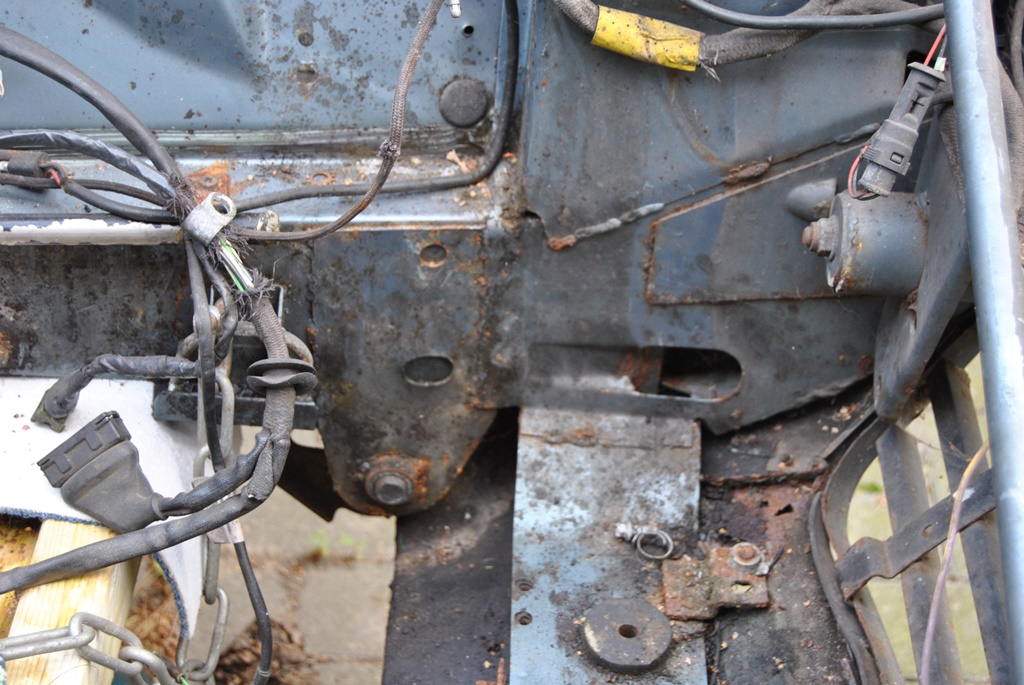
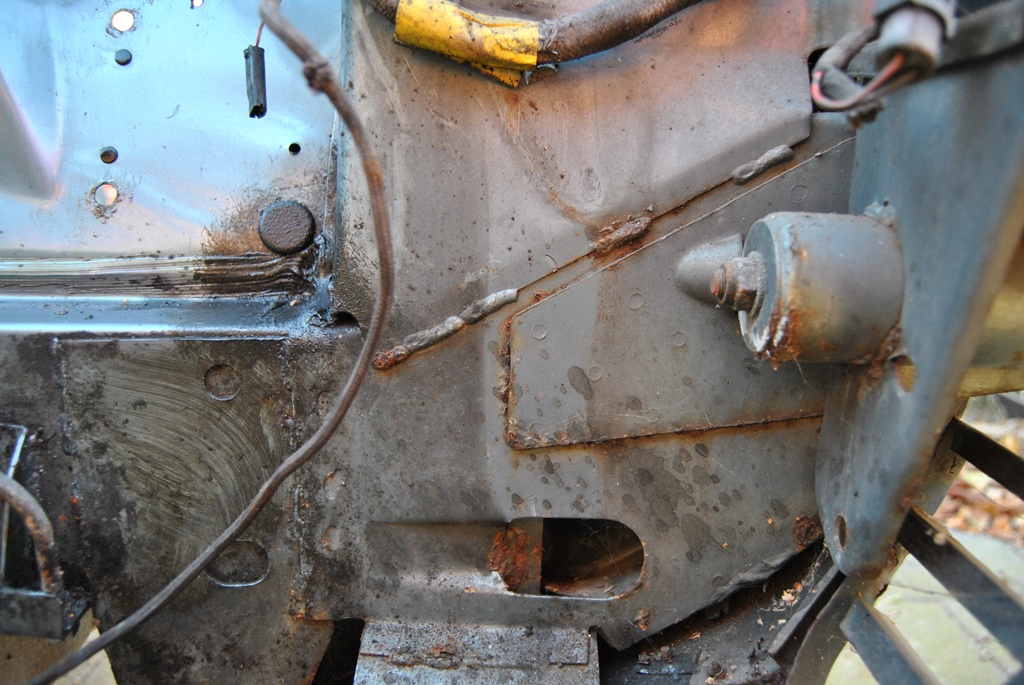
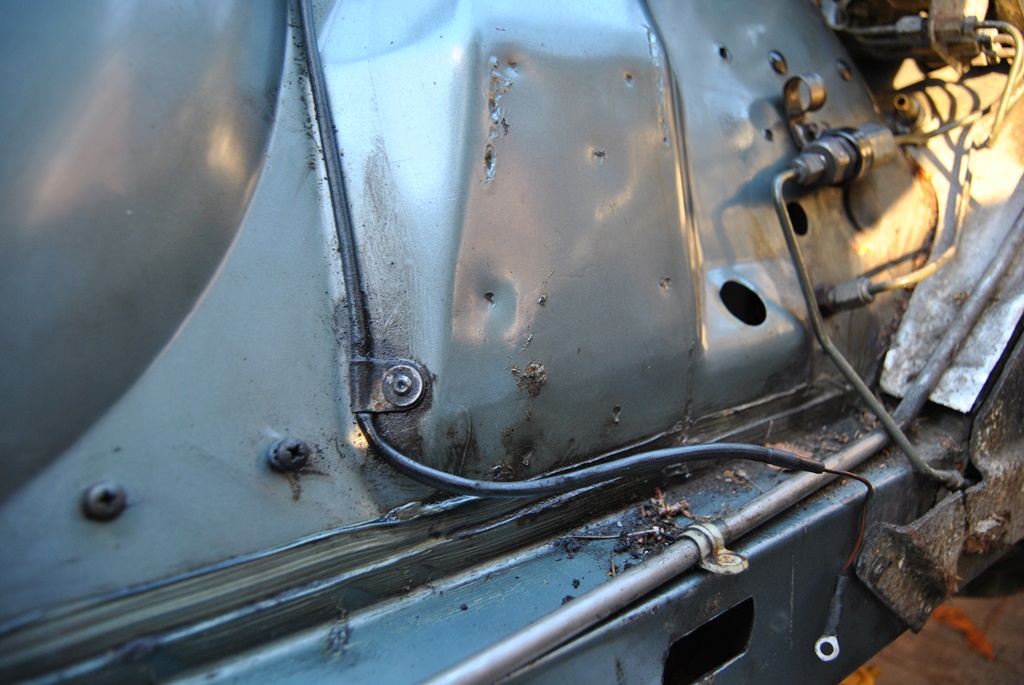
My XJ-S seems to be bodywise very good. 27 years old and so far not welded. But 27 years are not bad for British steel. But a few spots are showing their age. The passenger side (left) scuttle pipe has rotted through. Okay, that isn't that bad. But then also the right hand wheel well has a few bubbles. Luckily the engine is out!
So that means: I'll be hiring someone to do some welding for me... It won't rot away within the next 6 months, but it is still upsetting. My plans were to have the rear bubbles welded when the engine is running and all has been overhauled again. But that seems impossible.
Next steps are obvious: remove the ABS pump, ABS module and brake pipes. Make a way to the rotten drain pipe and also get the wheel wells welded... Looks as if they had been spot welded before...
Veteran Member
Joined: Jan 2012
Posts: 14,612
Likes: 10,809
From: France
Daim
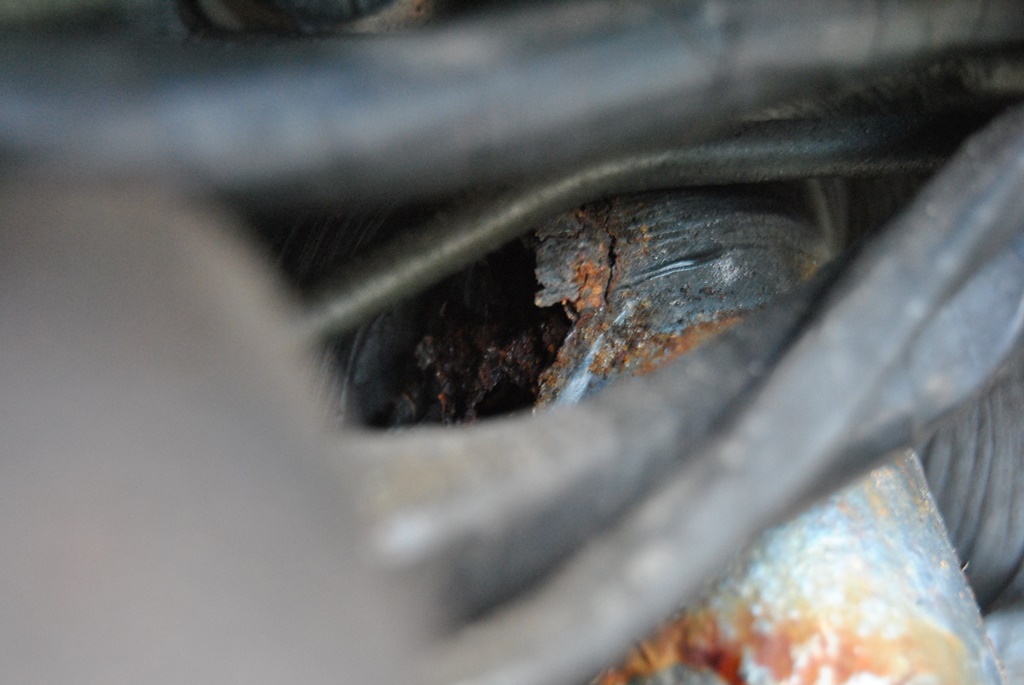
Is it the actual metal tube that comes out of the wiper well that is rusty? That is what it looks like. If so it looks nasty and if what I think I saw in the photo is what is actually there, the actual bulkhead round it looked bad too.
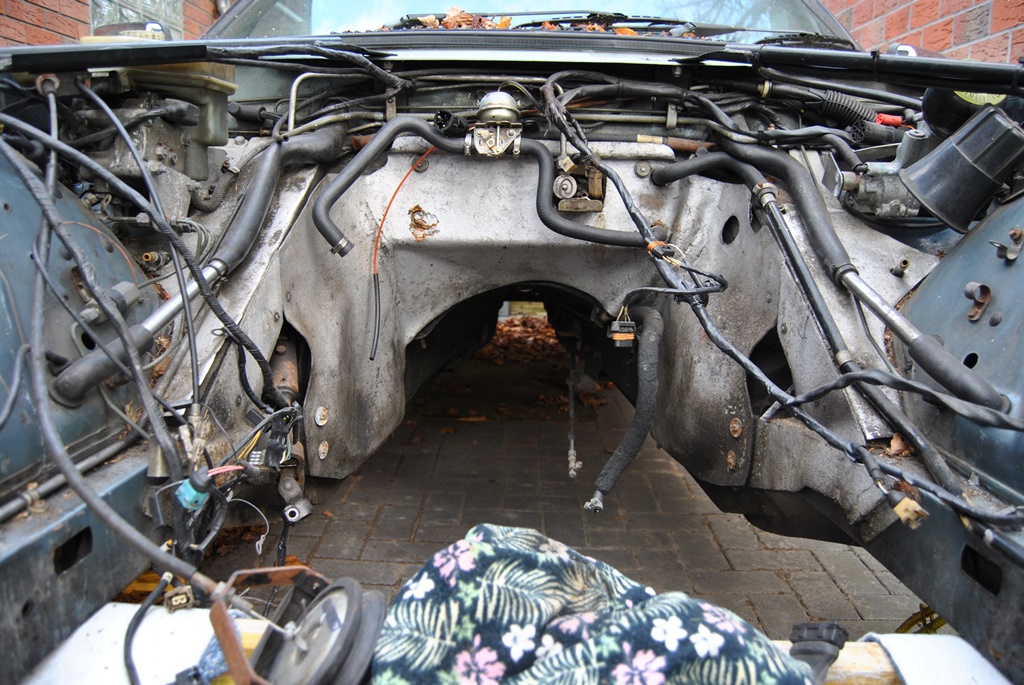
The next thing to remove is the huge heatshield that goes over the bulkhead and into the exhaust tunnel. This is not that hard to do.
Once it is out you will see what's what far better.
You have some closeups of the lower chassis rails too. There are plenty of access holes, luckily. I strongly suggest you get a sprayer and a probe, buy 5 litres of AquaSteel and get spraying into the rail. Drill a hole in the front of the sills (from the wheelarch below the baffle in the wheelwell) and do the same along the sill inner, wriggling the probe through the stringers that go acros the inside of the sill. Wait a few days and then repeat with Dinatrol or similar. My experience has been that waxing without AquaSteel first does NOT hold rust back very long. When welding done, repeat this treatment over the welded parts. Remove the rear baffle in the front wheelwells and take a look inside. Waxetc in here too.
The top chassis rail has an access hole at the back of the headlight nacelle, covered with a squareish rubber bung. Remove the headlights lights, prise out the bung and you can do this treatment right along its length from the front. Any surface and seam rust that is non-structural, aquasteel and paint.
I suggest you change the aircon evaporator valve while the engine is out too. They are not expensive and new ones make a big difference I found. Also swap out those plastic P clips holding the aircon pipe to the chassis rail and an others you see, for stainless ones.
All good so far. Congrats on all the effort
Greg
Is it the actual metal tube that comes out of the wiper well that is rusty? That is what it looks like. If so it looks nasty and if what I think I saw in the photo is what is actually there, the actual bulkhead round it looked bad too.
The next thing to remove is the huge heatshield that goes over the bulkhead and into the exhaust tunnel. This is not that hard to do.
Once it is out you will see what's what far better.
You have some closeups of the lower chassis rails too. There are plenty of access holes, luckily. I strongly suggest you get a sprayer and a probe, buy 5 litres of AquaSteel and get spraying into the rail. Drill a hole in the front of the sills (from the wheelarch below the baffle in the wheelwell) and do the same along the sill inner, wriggling the probe through the stringers that go acros the inside of the sill. Wait a few days and then repeat with Dinatrol or similar. My experience has been that waxing without AquaSteel first does NOT hold rust back very long. When welding done, repeat this treatment over the welded parts. Remove the rear baffle in the front wheelwells and take a look inside. Waxetc in here too.
The top chassis rail has an access hole at the back of the headlight nacelle, covered with a squareish rubber bung. Remove the headlights lights, prise out the bung and you can do this treatment right along its length from the front. Any surface and seam rust that is non-structural, aquasteel and paint.
I suggest you change the aircon evaporator valve while the engine is out too. They are not expensive and new ones make a big difference I found. Also swap out those plastic P clips holding the aircon pipe to the chassis rail and an others you see, for stainless ones.
All good so far. Congrats on all the effort
Greg
Last edited by Greg in France; Oct 31, 2016 at 11:50 AM.
Thread Starter
|
Veteran Member
Joined: May 2014
Posts: 5,906
Likes: 2,183
From: Bremen, Germany
Greg,
cheers for the tips!
Regarding the pipe: it looks (at the moment) as if only the pipe has been affected. I'll have to have a look inside the scuttle area, not that there are holes in there. I'll be removing all the ***** in that area to get that rust removed.
The car has been waxtreated prior my purchase. It still drips out wax on very hot days... But a few other spots (the sills) have just started to rust... I need to get the engine bay sorted out first
The air con valve will be replaced. I was actually thinking of leaving the air con out but the more I think of how our hot summers are getting hotter and wetter, the more I think the air con will stay (especially since I want to ditch the sunroof and have that welded up again... More headroom!).
Lots of work to do yet... I mean really LOTS And I thought the engine would be a lot
cheers for the tips!
Regarding the pipe: it looks (at the moment) as if only the pipe has been affected. I'll have to have a look inside the scuttle area, not that there are holes in there. I'll be removing all the ***** in that area to get that rust removed.
The car has been waxtreated prior my purchase. It still drips out wax on very hot days... But a few other spots (the sills) have just started to rust... I need to get the engine bay sorted out first
The air con valve will be replaced. I was actually thinking of leaving the air con out but the more I think of how our hot summers are getting hotter and wetter, the more I think the air con will stay (especially since I want to ditch the sunroof and have that welded up again... More headroom!
). Lots of work to do yet... I mean really LOTS
And I thought the engine would be a lot
Thread Starter
|
Veteran Member
Joined: May 2014
Posts: 5,906
Likes: 2,183
From: Bremen, Germany
Yeah, after sitting in a jam on the Autobahn here in my XJ8 on black leather during a hot wet day, I wanted to die...
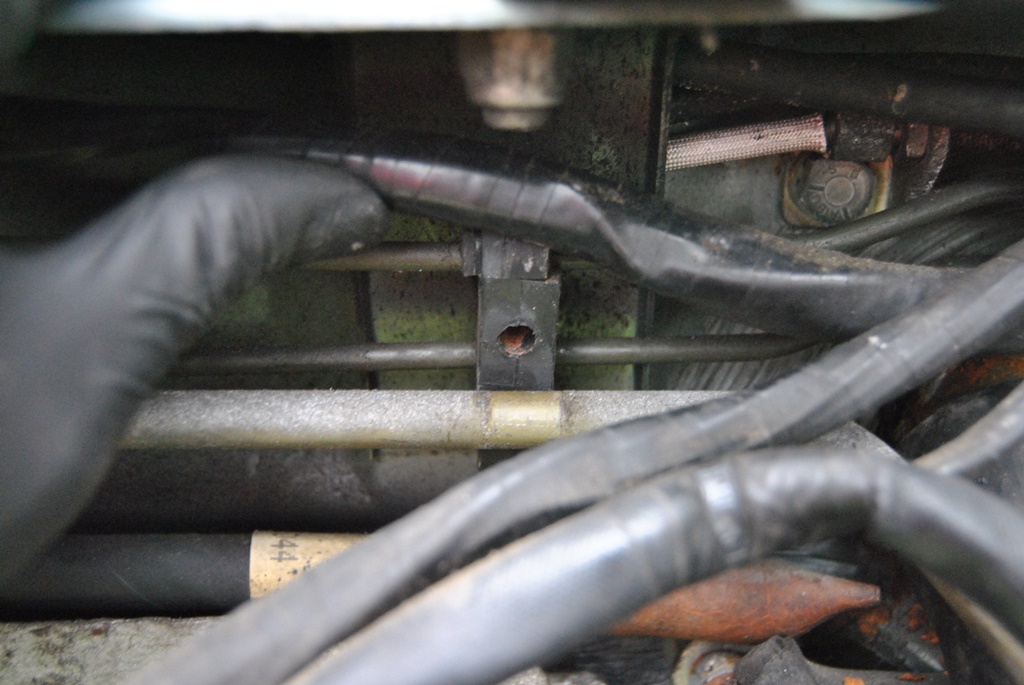
Greg, do you know if the heat shield as seen on my picture for the tunnel contains asbestos? I have a little sticker saying about asbestos... Being a mere 30 (haha) I don't fancy getting some kind of lung cancer...
And what would you use to insulate that area with? A modern material or a self sticking version of the bonnet mat?
Veteran Member
Joined: Jan 2012
Posts: 14,612
Likes: 10,809
From: France
It is made of compressed woodship as far as I can see. No asbestos AFAICS either. That large shield is VERY effective, put it back. It has an airgap behind it, because of how it is fitted, and that is absolutely the best thing for effective heat shielding.
Grant swears by one thing though: do NOT put back or replace the foam on top of the gearbox (always assuming it was still there anyway). Rather, fit some Hi-Tec very thin sound and heatshielding stuff to the tunnel instead. This leaves an airgap above the gearbox and forms a very effective path to get hot air out of the engine bay.
If your authority allows it, remove the OEM black heat and sound insulation from the bonnet too, and replace with 2mm SilentCoat type nitrile/aluminium self adhesive panels. These are very easy to fit, cheap from Amazon, MUCH more effective at noise and heat suppression, and allow FAR more air into the top of the engine bay on the move. As you may recall, this summer I did endless temperature tests on engine bay temps, holes in bonnet, etc etc, and what really worked was this. My under hood temps dropped by 10 degrees C, and the top of the induction was cool enough to touch easily on stopping. Cutting down the vertical bit of the radtop panel (the one that holds the relays, fan cowl etc) by a few mm also helps greatly.
Still worth raising the bonnet on stopping on really hot days. I proved a 40 C air temp DIFFERENCE between doing so and not doing so; the temp, bonnet closed, reaches 80 C immediately on stopping and hardly drops even after 2 hours. With the changes I made this is not necessary on anything but very hot days. Heatsoak from the engine when stopped will still have an effect the rubber components, even given far lower airtemps on the move.
Finally, forget the foams round the rad. This also does wonders for under bonnet temps, and (I am braced for a deluge of disagreement) has absolutely NO effect on radiator coling efficiency. The reason being the front of the car must be thought of as a bulldozer pushing the air aside; at 30 MPH there is a huge wave of air in front of the car trying to get out of the way, far more than any 1 inch leakage round the rad sides could possibly bleed off.
Greg
Last edited by Greg in France; Nov 1, 2016 at 03:39 AM.
Thread Starter
|
Veteran Member
Joined: May 2014
Posts: 5,906
Likes: 2,183
From: Bremen, Germany
Okay, no asbestos... Phew! Probably only the brake pads (formerly).
The heat shields seem fine (just dirty and a few little cracks). The foam mat has long gone and will stay gone. Full of mice pee... Yummy!
I'll be looking into the bonnet insulation as mine is slowly falling apart...
The heat shields seem fine (just dirty and a few little cracks). The foam mat has long gone and will stay gone. Full of mice pee... Yummy!
I'll be looking into the bonnet insulation as mine is slowly falling apart...

Veteran Member
Joined: Jul 2012
Posts: 6,796
Likes: 2,403
From: Walnut Creek, California
Daim:
I don't have an XJS. I do have an XJ wuzza 6. And, I've always enjoyed
fixing stuff as opposed to just putting on a replacement. But, from age 16 to 87, I've learned that each has it's place.
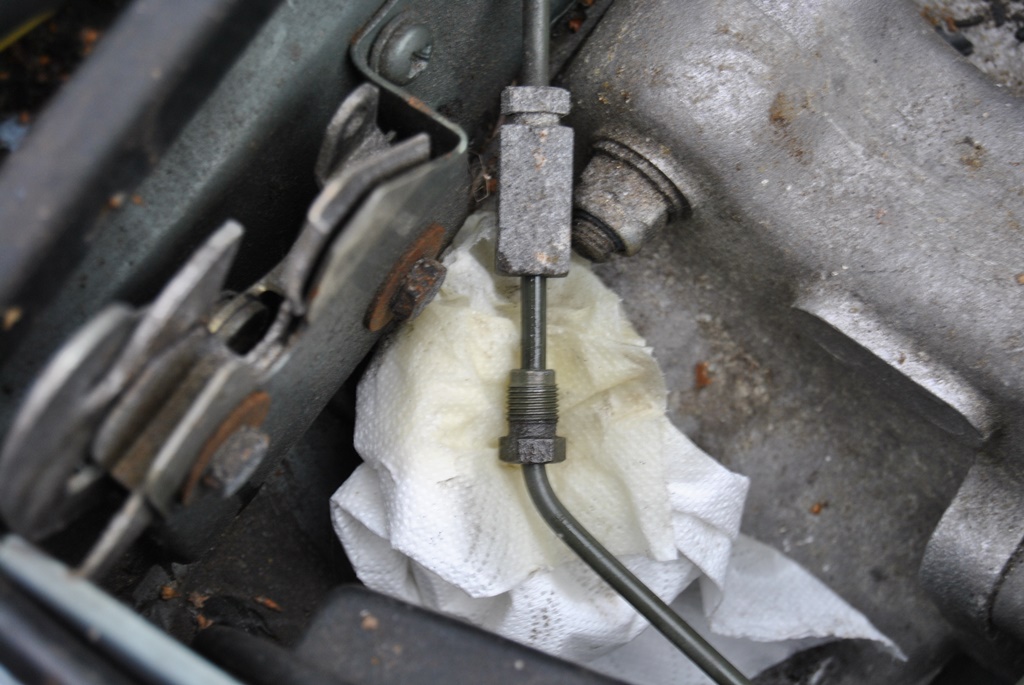
BTW, the failed PS pump is a GM thing. Failures occur with age in all genre....
Nostalgia: I served in the U.S. Army. My assignment from 52 -55 was in Germany. A great time in my life. The 54/55 year was at Todendorf. A firing range near Lutjenburg.
Your home in Bremen was not that far away. I went there a lot. Wonderful countryside, I'll never forget it...
Luckily, rust/rot is not an issue around here. Sun burn can be.
Tough on interiors and paint.
But, the original Thermoplastic Grosvenor Brown on my car, an 83,
has done well.
Carl
I don't have an XJS. I do have an XJ wuzza 6. And, I've always enjoyed
fixing stuff as opposed to just putting on a replacement. But, from age 16 to 87, I've learned that each has it's place.
BTW, the failed PS pump is a GM thing. Failures occur with age in all genre....
Nostalgia: I served in the U.S. Army. My assignment from 52 -55 was in Germany. A great time in my life. The 54/55 year was at Todendorf. A firing range near Lutjenburg.
Your home in Bremen was not that far away. I went there a lot. Wonderful countryside, I'll never forget it...
Luckily, rust/rot is not an issue around here. Sun burn can be.
Tough on interiors and paint.
But, the original Thermoplastic Grosvenor Brown on my car, an 83,
has done well.
Carl
Thread Starter
|
Veteran Member
Joined: May 2014
Posts: 5,906
Likes: 2,183
From: Bremen, Germany
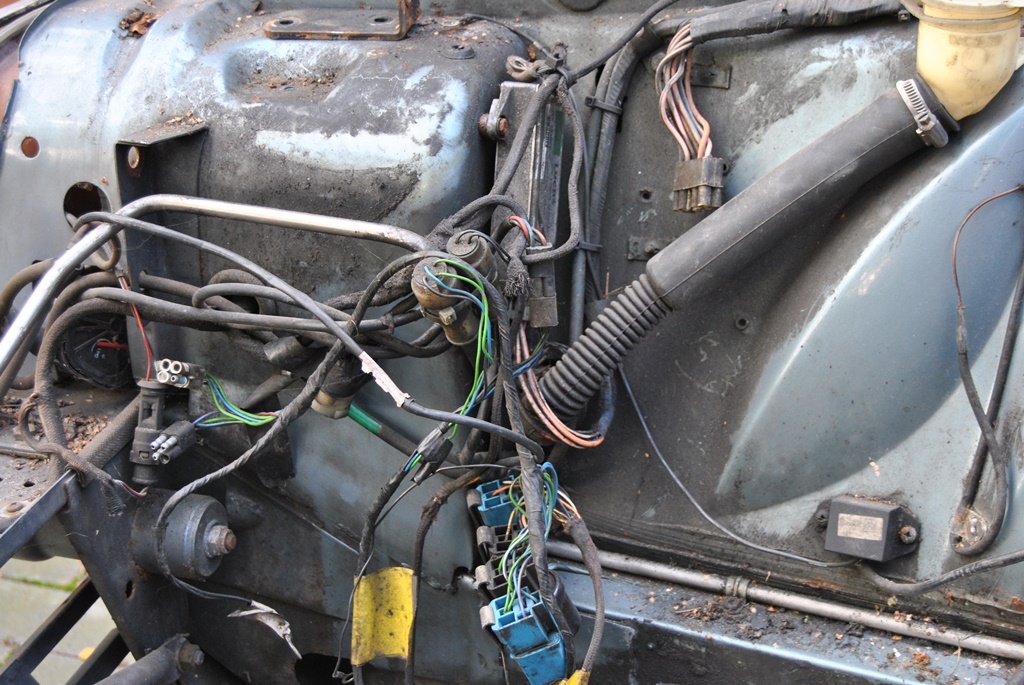
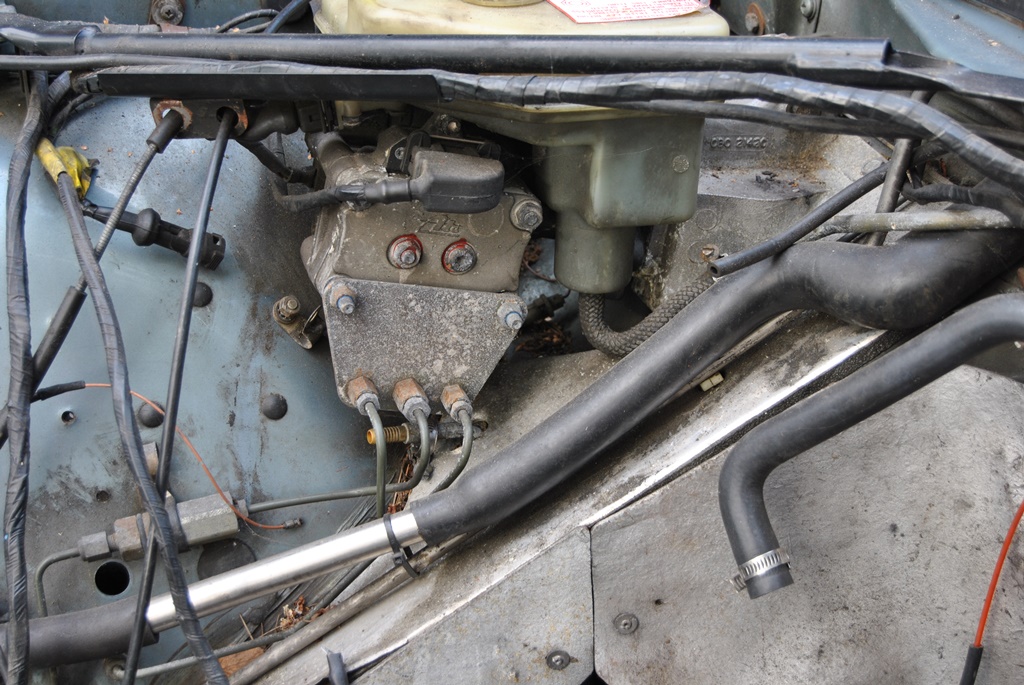
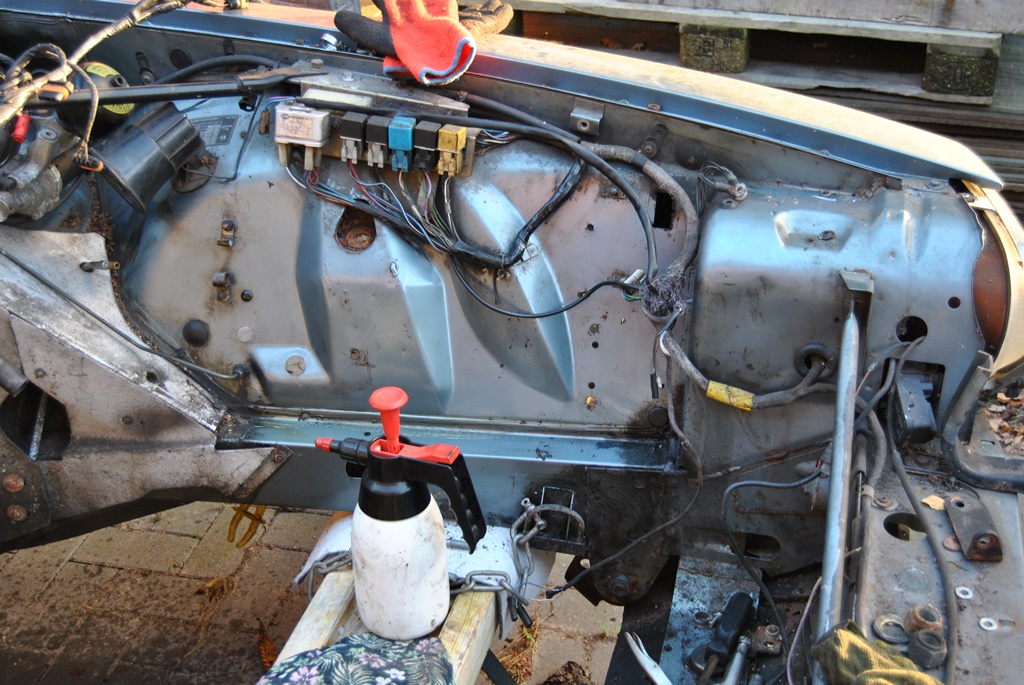
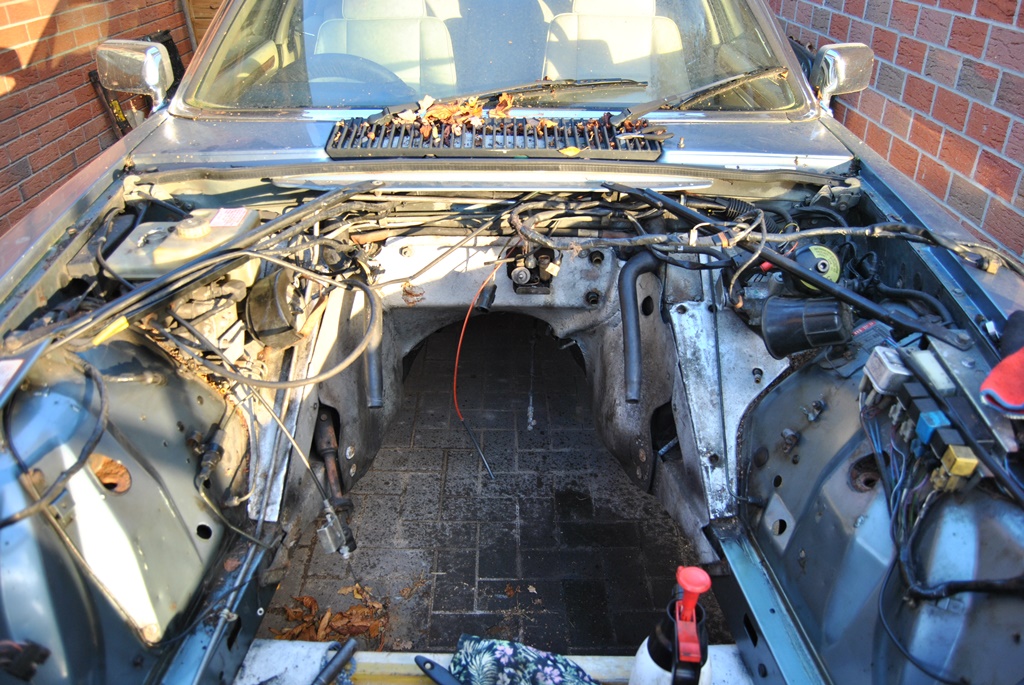
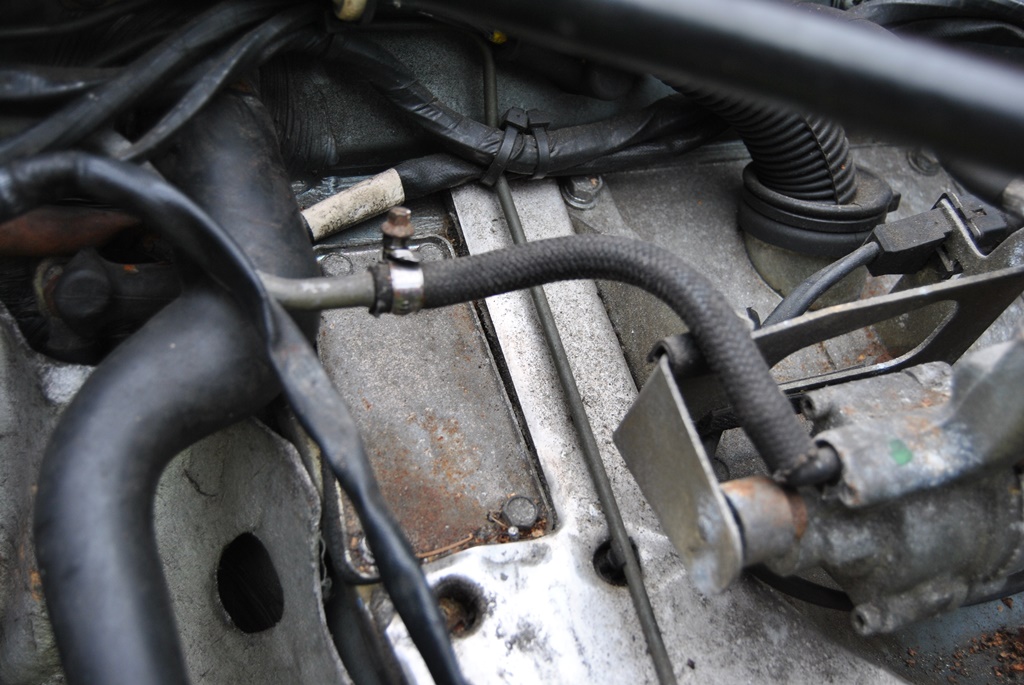
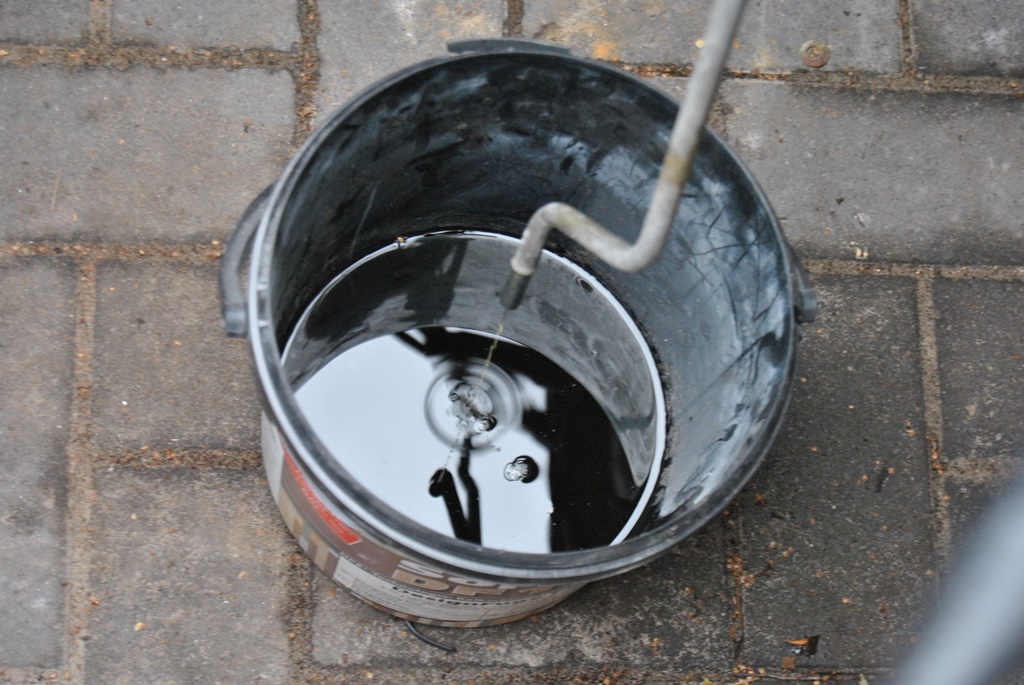
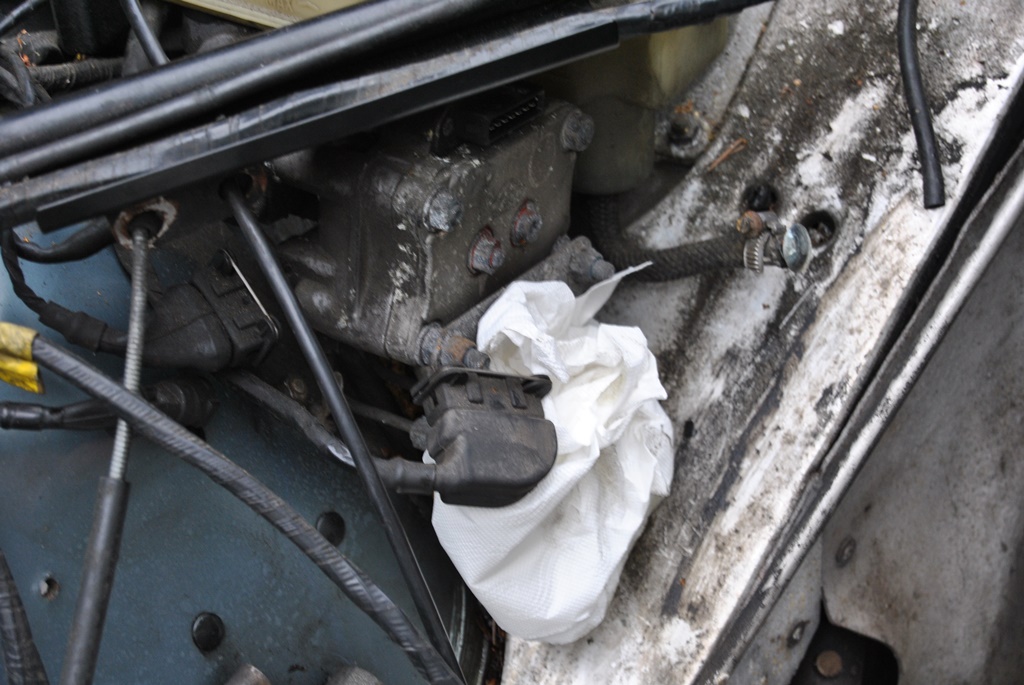
Fiddly day today... Removed all the brake system in the engine bay, gained as much access to the scuttle drains as possible. At the same time, I checked beneath the heat shields/soundproofing for rust and found very little surface rust. Possibly just in time...
As I removed the wiper assembly, I found out why my scuttle drains are rusty: even though you can't feel any blockage inside the pipes, they were blocked with pine needles. I pulled a good 2 kg of needs, seeds and co out of that area and checked for rot... Only around the pipes. So that will be an easy job for my bodywork specialist


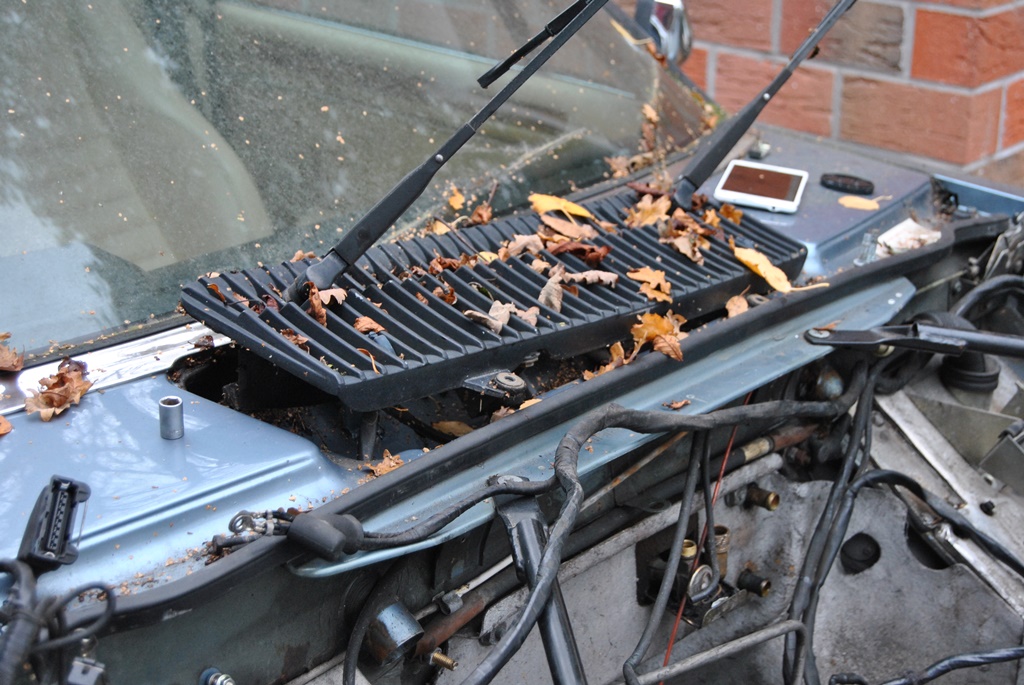

As I removed the wiper assembly, I found out why my scuttle drains are rusty: even though you can't feel any blockage inside the pipes, they were blocked with pine needles. I pulled a good 2 kg of needs, seeds and co out of that area and checked for rot... Only around the pipes. So that will be an easy job for my bodywork specialist
Veteran Member
Joined: May 2010
Posts: 4,638
Likes: 2,583
From: Vic Australia
Check right down in the far reaches of the scuttle (towards the guards) for rust. There are a couple of drains that run down inside the guards,, these block up, mine were blocked with seam sealer so they NEVER worked.