Fuel lines in trunk
#1
Not sure how I managed to goof this up. I drew a diagram and even took pictures of the junk yard cars but I am still a bit confused.
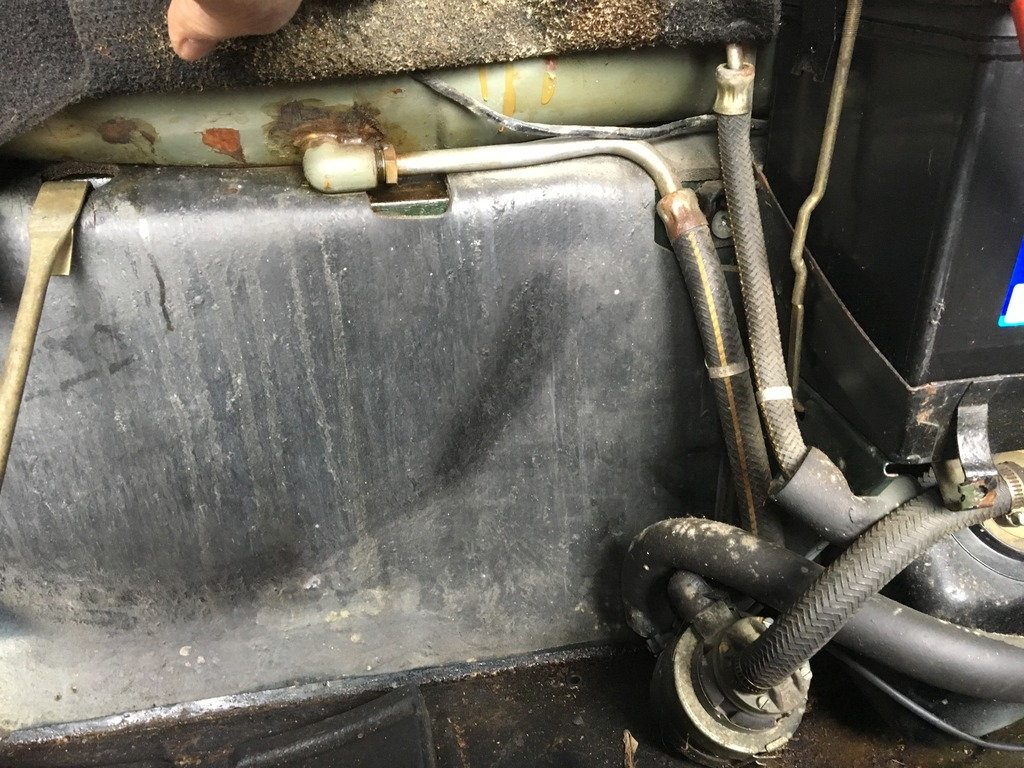
I am re-installing the fuel lines after cleaning my tanks and refurbishing all the detail in the trunk. For some reason the hoses are not lining up like I think they should. I have an inordinate amount of excess hose in the #4 position, see below.
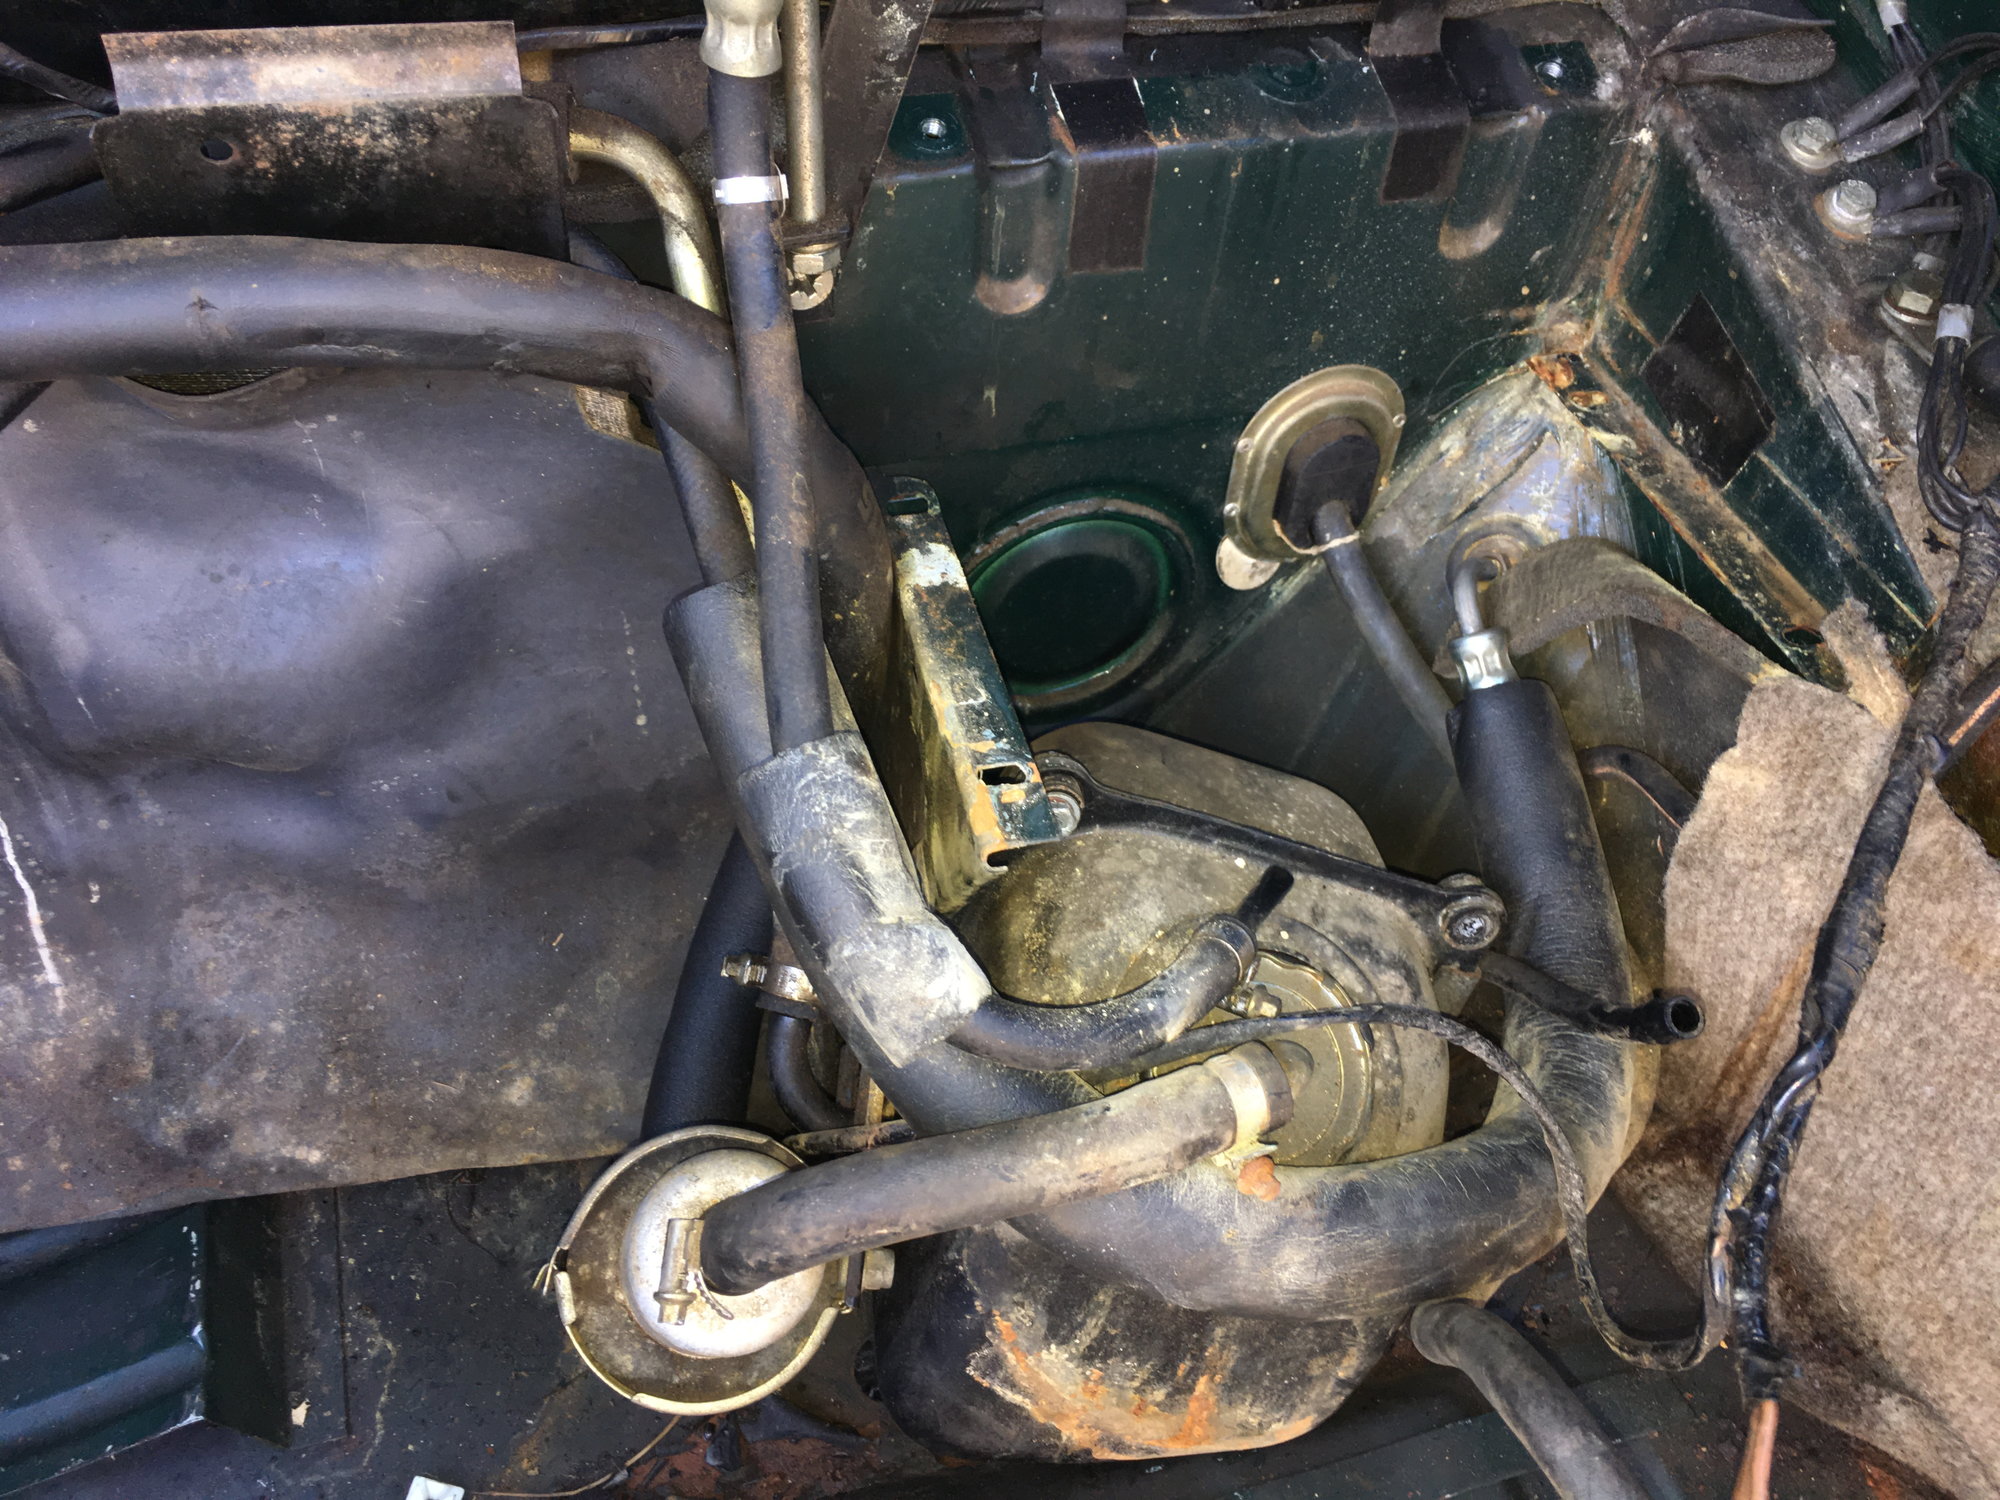
Position #1. Main tank supply connected via "L" shaped pipe with rubber hose connector on each end tp sump tank side tube. That's OK.
Position #2. The screw in line on the right side of the main tank connected to the fixed tube on top of the sump tank. I call this the sump tank return line. That is OK.
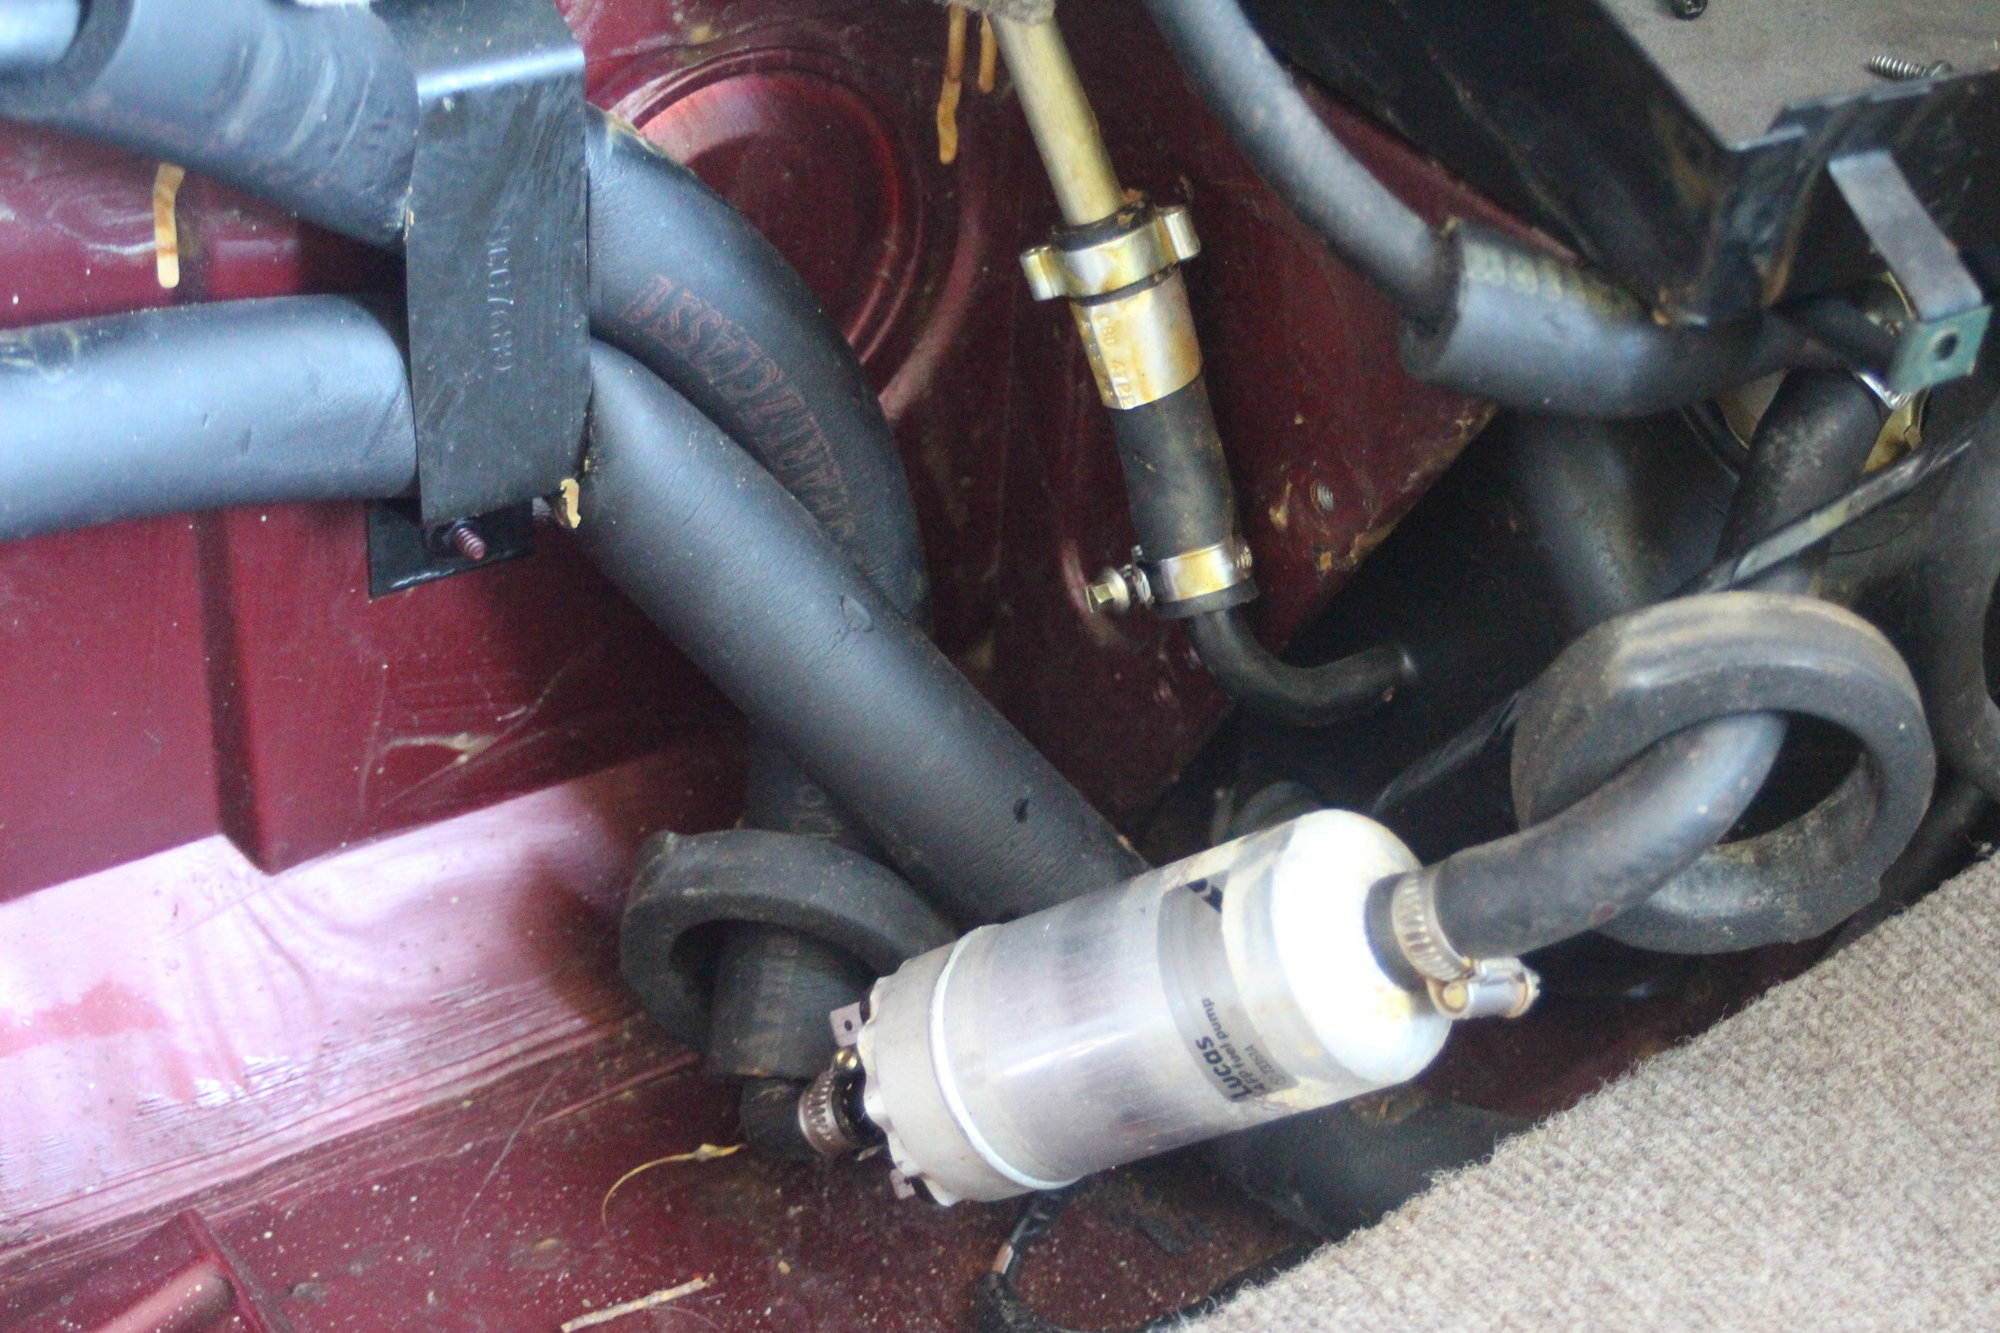
Position #3. Sump tank large tube connected to fuel pump top, no electrical connections.
NOTE: fuel pump electrical connections are facing down.
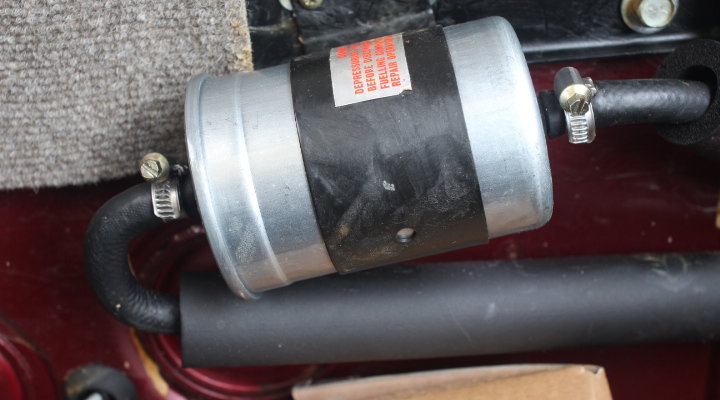
Position #4. Fuel pump small connector (between positive and negative terminals) connects to fuel filter 'Inlet" port. This hose has a neoprene sleeve over it. It goes from the bottom of the fuel pump then upwards and then turns left routing above the filter and then makes a "U" turn to connect to the filter "Inlet" port.
(This is where I have all kinds of excess hose where it connects to the pump)
Position #5.Fuel filter "Outlet" port connected to fuel to engine hose. This hose routes down and then across the base of the sump tank and has a large neoprene sleeve over it.
Fuel filter is pointing Inlet/Left to Outlet/Right
All the vent hoses are connected.
The fuel return line is connected on the left side of the main tank.
The filler neck rubber grommet is connected and clamped along with the alignment bracket correctly fastened.
Sending unit is installed and wires connected. L to R: Black, Green, Red
#3
Position #3. Sump tank large tube connected to fuel pump top, no electrical connections.
NOTE: fuel pump electrical connections are facing down.
Position #4. Fuel pump small connector (between positive and negative terminals) connects to fuel filter 'Inlet" port. This hose has a neoprene sleeve over it. It goes from the bottom of the fuel pump then upwards and then turns left routing above the filter and then makes a "U" turn to connect to the filter "Inlet" port.
Brad
It sounds from the above (no pic was posted) that you have the feed FROM the sump tank TO the pump on the wrong end of the pump (and the supply to the filter also on the wrong end)On mine, the inflow to the pump is on the same end as the terminals.
Greg
The following users liked this post:
BradsCat (02-27-2017)
#4
Brad,
The fuel pump has a 1/2" inlet spigot that takes the fuel hose FROM the sump tank top plate. This is facing you as you look into the boot, and has a moulded 90deg bend in it AT the pump.
The Hi pressure OUTLET is 5/16" (8mm) and faces the floor of the boot. The wires are either side of this Hi pressure outlet. That hose also has a 90deg moulded bend in it, and travels upwards, and does a loop to enter the fuel filter which is behind the spare wheel.
The exit hose from the filter travels to the RH side of the boot area, and connects to the brass elbow behind the sump tank, where it makes its way to the engine bay.
Most replacement fuel pumps are identical to the OE in configuration. Just ensure you connect the +ve terminal to the power wire. Sounds stupid I know, but, some pumps have the "large" terminal as the +ve (normal), some have the "large" terminal as the -ve.
I got caught, and hours later I found that little screw up. The pump was running, but backwards.
Last edited by Grant Francis; 02-27-2017 at 02:50 AM.
The following users liked this post:
BradsCat (02-27-2017)
#5
The following 2 users liked this post by orangeblossom:
BradsCat (02-27-2017),
Grant Francis (02-27-2017)
#6
Brad,
The fuel pump has a 1/2" inlet spigot that takes the fuel hose FROM the sump tank top plate. This is facing you as you look into the boot, and has a moulded 90deg bend in it AT the pump.
The Hi pressure OUTLET is 5/16" (8mm) and faces the floor of the boot. The wires are either side of this Hi pressure outlet. That hose also has a 90deg moulded bend in it, and travels upwards, and does a loop to enter the fuel filter which is behind the spare wheel.
The exit hose from the filter travels to the RH side of the boot area, and connects to the brass elbow behind the sump tank, where it makes its way to the engine bay.
Most replacement fuel pumps are identical to the OE in configuration. Just ensure you connect the +ve terminal to the power wire. Sounds stupid I know, but, some pumps have the "large" terminal as the +ve (normal), some have the "large" terminal as the -ve.
I got caught, and hours later I found that little screw up. The pump was running, but backwards.
The fuel pump has a 1/2" inlet spigot that takes the fuel hose FROM the sump tank top plate. This is facing you as you look into the boot, and has a moulded 90deg bend in it AT the pump.
The Hi pressure OUTLET is 5/16" (8mm) and faces the floor of the boot. The wires are either side of this Hi pressure outlet. That hose also has a 90deg moulded bend in it, and travels upwards, and does a loop to enter the fuel filter which is behind the spare wheel.
The exit hose from the filter travels to the RH side of the boot area, and connects to the brass elbow behind the sump tank, where it makes its way to the engine bay.
Most replacement fuel pumps are identical to the OE in configuration. Just ensure you connect the +ve terminal to the power wire. Sounds stupid I know, but, some pumps have the "large" terminal as the +ve (normal), some have the "large" terminal as the -ve.
I got caught, and hours later I found that little screw up. The pump was running, but backwards.
So it sounds like from your description that I do have it connected correctly.
I don't understand why I seem to have so much extra hose. I'll play with again as quick as I can get back to the car.
And yes, I was very careful to connect the wires to the correct terminals although it seemed counter-intuitive. The large positive wire connected to the smaller (+) post and the smaller negative wire connected to the larger (-) post. Rubber boots are well fitted for safety.
#7
Position #3. Sump tank large tube connected to fuel pump top, no electrical connections.
NOTE: fuel pump electrical connections are facing down.
Position #4. Fuel pump small connector (between positive and negative terminals) connects to fuel filter 'Inlet" port. This hose has a neoprene sleeve over it. It goes from the bottom of the fuel pump then upwards and then turns left routing above the filter and then makes a "U" turn to connect to the filter "Inlet" port.
Brad
It sounds from the above (no pic was posted) that you have the feed FROM the sump tank TO the pump on the wrong end of the pump (and the supply to the filter also on the wrong end)On mine, the inflow to the pump is on the same end as the terminals.
Greg
NOTE: fuel pump electrical connections are facing down.
Position #4. Fuel pump small connector (between positive and negative terminals) connects to fuel filter 'Inlet" port. This hose has a neoprene sleeve over it. It goes from the bottom of the fuel pump then upwards and then turns left routing above the filter and then makes a "U" turn to connect to the filter "Inlet" port.
Brad
It sounds from the above (no pic was posted) that you have the feed FROM the sump tank TO the pump on the wrong end of the pump (and the supply to the filter also on the wrong end)On mine, the inflow to the pump is on the same end as the terminals.
Greg
On mine the hose from the sump tank is much too large to fit on the smaller port that is between the fuel pump electrical posts.
(I haven't figured out how to get pic's from my phone onto the computer yet. I am technology challenged at times)
Trending Topics
#8
Yes, the pic's help a lot. Thanks!! If you can take a slight larger frame one that would help as well.
It sounds like I am on the right track. I might just have to play with the hose alignment a bit so the battery frame cover can fit correctly with everything tucked in behind it properly.
I took pictures of the junk yard cars and drew a diagram of my own when I took it apart. (I didn't have an iPhone to take good pictures when I took it apart last fall). Sometimes even being proactive is not enough.
The following users liked this post:
orangeblossom (02-27-2017)
#9
#11
The 90 degree turn on the hose is connected to the filter. Should it be connected to the pump? I would just have to switch the hose around if that's the case.
Next up is the battery install and the some gas. After a check for leaks we'll attempt to get ignition. With luck I won't have any new issues that weren't there before.
Does the spare tire arm hook around the gas tank retaining strap bolt?
#12
Trunk is completely re-assembled now and look almost perfectly new. Thanks go out to all who helped me work thru this project. I'd post some pic's if I could figure out the smart phone. So far it's winning.
My plan to upgrade the plastic door sills with polished stainless sills from one of the junkyard '89's is apparently a "no go." Tried to install them today and they just don't fit plus the door won't close. Not sure why but not going to force things too much and mess up the leather on the rear seats or the front scuttling.
New headliner material fitting goes on later tonite. If all goes well I may be able to install that tomorrow. Once I get some new gas in the tank hopefully she'll be ready to get back on the road soon. I did leave the trim carpeting off that cover the gas tank for now in order to check for any leaks or electrical connection issues once I start her up again. Once I am satisfied that all is well I'll re-install that.
Assuming that things goes mostly well and after addressing the normal maintenance fluid replacements I'll be ready to move on to the three remaining issues on the car later in the spring and summer: the cruise control; the A/C; and removal of the air pump system and rails.
The following 3 users liked this post by BradsCat:
#13
Join Date: Mar 2008
Location: Pacific Northwest USA
Posts: 24,739
Received 10,749 Likes
on
7,100 Posts
Good work !
Unsolicited, off-topic advice: take 10 minutes to clean up those ground points on the RH side of the trunk. IMO it's a good habit to clean grounds *whenever and wherever* you find them as you work on various areas of the car. Soon enough they'll all be clean !
Each ground that that you clean and tighten = one less "Lucas, the prince of darkness" episode.
Good idea on any older car, really. IMO.
Cheers
DD
The following 6 users liked this post by Doug:
BradsCat (03-04-2017),
Grant Francis (03-05-2017),
Greg in France (03-05-2017),
Hedman (07-28-2020),
JJS- Florida (01-06-2024),
and 1 others liked this post.
#14
Thanks, Yep. Did all that. I was very methodical. All the connections were cleaned, the wires or hoses cleaned, new paint along the trunk bottom, new paint on both the main and sump tank. Re-glued trunk carpeting seams where it was getting loose. I scuffed up the paint with a wire brush to get a good ground for the three wire ground connections including the battery to the right of the battery box.
The following users liked this post:
orangeblossom (03-05-2017)
#15
The following 2 users liked this post by Grant Francis:
Greg in France (03-05-2017),
orangeblossom (03-05-2017)
#16
Hmmm......maybe I'll try again later. Just weird that they don't seem to fit. Makes no sense to me that they would change anything (cost of redesign and production) to substitute the parts. You'd think it was just a simple swap out. I do have the plastic endcaps on both ends. I even took a hammer and block of wood to try to get the pieces to fit down on the metal lip I have four of he grippers in each channel.
#17
Join Date: Mar 2008
Location: Pacific Northwest USA
Posts: 24,739
Received 10,749 Likes
on
7,100 Posts
Hmmm......maybe I'll try again later. Just weird that they don't seem to fit. Makes no sense to me that they would change anything (cost of redesign and production) to substitute the parts. You'd think it was just a simple swap out. I do have the plastic endcaps on both ends. I even took a hammer and block of wood to try to get the pieces to fit down on the metal lip I have four of he grippers in each channel.
Did your SS sill plates come from a coupe or a convertible? They are different....but I can't remember how. It might explain the problem?
Cheers
DD
#18
#19
Started to put the headliner material on. Started from the back half. I may have a problem. The headliner board was not perfectly flat due to the removal of the old headliner material. The new material is not as thick as the old material and it is showing some of the indentations.
I am considering the possibility of putting a second layer on. Thoughts? comments? suggestions?
Thanks
I am considering the possibility of putting a second layer on. Thoughts? comments? suggestions?
Thanks
#20
Update. Found the other '89 coupe in the junk yard today. Boy did they mess the car up moving it around with the fork lift. Lots of damage to the body panels and broken windows. Sad. Someone else has been into the car removing the sports steering wheel , instrument panel, hood, radiator, console, throttle arms, cruise, a/c, headlights, injector control unit, and headlight buckets. They also took the fuel rail and fuel injectors off the car. I got a couple of things I wanted: the body side molding end caps and the enrichment valve. I also got a cruise control actuator unit off an XJ6. I now have three. Hopefully I can one of them to work correctly.
Saw something interesting but don't know what it is. On the firewall was a heavy gauge blue wire connected to two large bolts about 2 feet apart. I've never seen that set up before. Any ideas?
Still trying to figure out my next steps with the headliner.
I know this car is an '89 but it sure seems to be a Lucas ignition car and not a Marelli. Was the Marelli a mid year introduction?


