
Guide to replacing Rochester valve 1992-94


Thread Starter
|
Senior Member
Joined: Oct 2013
Posts: 274
Likes: 88
From: Denver
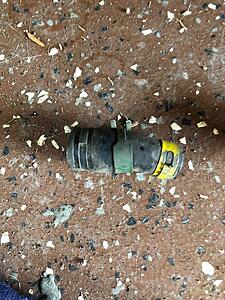
Did this job today replacing the Rochester valve with the inexpensive AC Delco version of the part. The Delco number at Napa is 214-552 at the price is around $30. You will also need about four inches of 3/8" fuel hose to complete the connections.
I had a terrible fuel smell in my cabin, more prominent with the top down for some reason and a large amount of vacuum in my gas tank when I would remove the cap. This lead me to a stuck valve.
1. Remove drivers side front tire
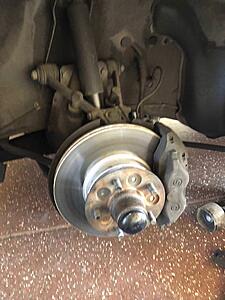
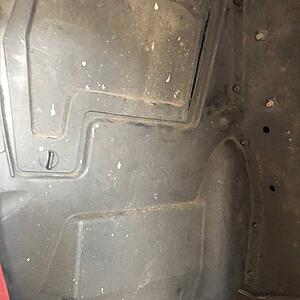
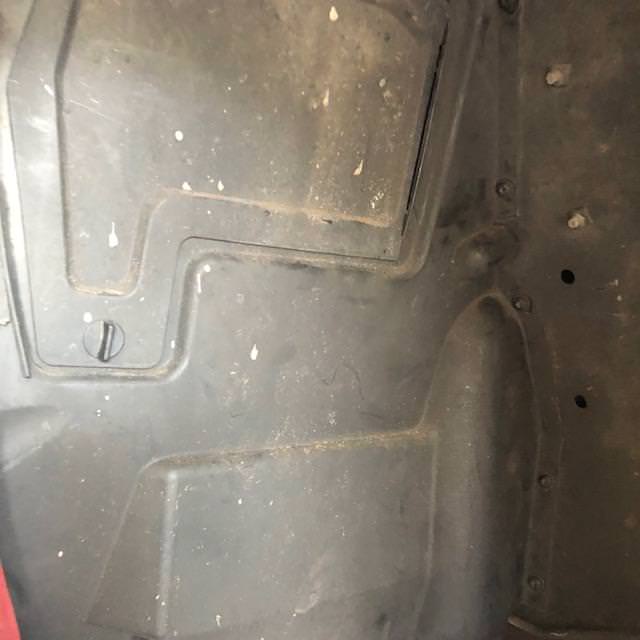
2. Remove upper access/inspection panel
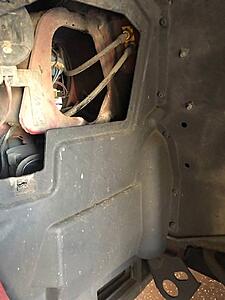
3. Remove the five Phillips head screws on the inner splash panel, the two on the bottom below the brake cooling duct; the spruce pin on the inner fender lip, and the plastic pin securing the brake cooling duct to the splash panel.

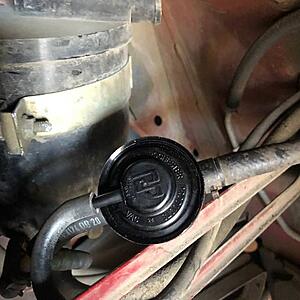
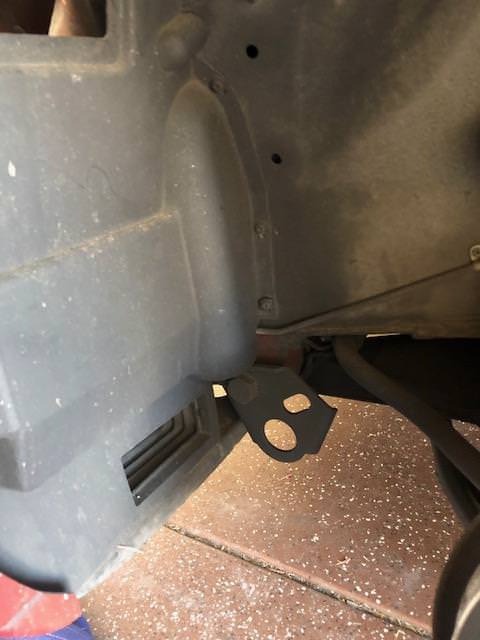
4. You now have access to the valve which you can see Jaguar installed by using reducers on both the tank side and the canister side. Why? I have no idea.
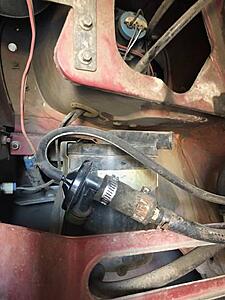
5. Disconnect the valve from the tank side rubber reducer. Be careful here, I had fuel backed up in my line and it spilled on the floor, so I wouldn't be having a smoke while doing this.
6. Disconnect and remove the canister side reducer. We wont be reusing this.
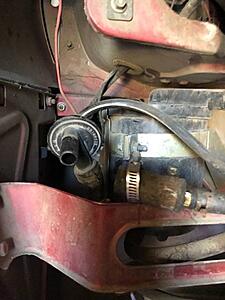
7. Cut a piece of 3/8th fuel hose (you can get this from any parts store) about 4 inches long.
8. Install the 3/8th piece you cut between the canister and the valve to the side marked "canister" on the valve. Install the tank side of the valve directly to the line you removed the large reducer from and connect the vacuum line.
9. Replace the splash guard and inspection panel and your done.
No more fuel smell for me, and the "woosh" from my fuel cap is gone. I do suspect that my canister is about done for though. I can pass air through it, and my lines were free of charcoal but I noticed it rattles a bit when you tap it.
I had a terrible fuel smell in my cabin, more prominent with the top down for some reason and a large amount of vacuum in my gas tank when I would remove the cap. This lead me to a stuck valve.
1. Remove drivers side front tire

2. Remove upper access/inspection panel

3. Remove the five Phillips head screws on the inner splash panel, the two on the bottom below the brake cooling duct; the spruce pin on the inner fender lip, and the plastic pin securing the brake cooling duct to the splash panel.
4. You now have access to the valve which you can see Jaguar installed by using reducers on both the tank side and the canister side. Why? I have no idea.

5. Disconnect the valve from the tank side rubber reducer. Be careful here, I had fuel backed up in my line and it spilled on the floor, so I wouldn't be having a smoke while doing this.

6. Disconnect and remove the canister side reducer. We wont be reusing this.

7. Cut a piece of 3/8th fuel hose (you can get this from any parts store) about 4 inches long.
8. Install the 3/8th piece you cut between the canister and the valve to the side marked "canister" on the valve. Install the tank side of the valve directly to the line you removed the large reducer from and connect the vacuum line.

9. Replace the splash guard and inspection panel and your done.
No more fuel smell for me, and the "woosh" from my fuel cap is gone. I do suspect that my canister is about done for though. I can pass air through it, and my lines were free of charcoal but I noticed it rattles a bit when you tap it.

Junior Member
Joined: May 2021
Posts: 1
Likes: 0
Thanks for the information post, I just wanted to add one more thing�.
Take apart, and inspect first� It could save you thirty five dollars.
it could be a severed vacuum hose instead of the Rochester Valve.
live and learn.
Take apart, and inspect first� It could save you thirty five dollars.
it could be a severed vacuum hose instead of the Rochester Valve.
live and learn.
Did this job today replacing the Rochester valve with the inexpensive AC Delco version of the part. The Delco number at Napa is 214-552 at the price is around $30. You will also need about four inches of 3/8" fuel hose to complete the connections.
I had a terrible fuel smell in my cabin, more prominent with the top down for some reason and a large amount of vacuum in my gas tank when I would remove the cap. This lead me to a stuck valve.
1. Remove drivers side front tire

2. Remove upper access/inspection panel

3. Remove the five Phillips head screws on the inner splash panel, the two on the bottom below the brake cooling duct; the spruce pin on the inner fender lip, and the plastic pin securing the brake cooling duct to the splash panel.

4. You now have access to the valve which you can see Jaguar installed by using reducers on both the tank side and the canister side. Why? I have no idea.

5. Disconnect the valve from the tank side rubber reducer. Be careful here, I had fuel backed up in my line and it spilled on the floor, so I wouldn't be having a smoke while doing this.

6. Disconnect and remove the canister side reducer. We wont be reusing this.

7. Cut a piece of 3/8th fuel hose (you can get this from any parts store) about 4 inches long.

8. Install the 3/8th piece you cut between the canister and the valve to the side marked "canister" on the valve. Install the tank side of the valve directly to the line you removed the large reducer from and connect the vacuum line.

9. Replace the splash guard and inspection panel and your done.

No more fuel smell for me, and the "woosh" from my fuel cap is gone. I do suspect that my canister is about done for though. I can pass air through it, and my lines were free of charcoal but I noticed it rattles a bit when you tap it.
I had a terrible fuel smell in my cabin, more prominent with the top down for some reason and a large amount of vacuum in my gas tank when I would remove the cap. This lead me to a stuck valve.
1. Remove drivers side front tire
2. Remove upper access/inspection panel
3. Remove the five Phillips head screws on the inner splash panel, the two on the bottom below the brake cooling duct; the spruce pin on the inner fender lip, and the plastic pin securing the brake cooling duct to the splash panel.
4. You now have access to the valve which you can see Jaguar installed by using reducers on both the tank side and the canister side. Why? I have no idea.
5. Disconnect the valve from the tank side rubber reducer. Be careful here, I had fuel backed up in my line and it spilled on the floor, so I wouldn't be having a smoke while doing this.
6. Disconnect and remove the canister side reducer. We wont be reusing this.
7. Cut a piece of 3/8th fuel hose (you can get this from any parts store) about 4 inches long.
8. Install the 3/8th piece you cut between the canister and the valve to the side marked "canister" on the valve. Install the tank side of the valve directly to the line you removed the large reducer from and connect the vacuum line.
9. Replace the splash guard and inspection panel and your done.
No more fuel smell for me, and the "woosh" from my fuel cap is gone. I do suspect that my canister is about done for though. I can pass air through it, and my lines were free of charcoal but I noticed it rattles a bit when you tap it.

Veteran Member


Joined: May 2010
Posts: 5,352
Likes: 1,750
From: Arlington, VA
That AC Delco part has been mentioned in older posts about needing to reverse the connections so that the side marked TANK is connected to the charcoal canister and the CAN side is connected to the fuel tank side.
How did you connect yours?
How did you connect yours?
Veteran Member
Joined: May 2010
Posts: 5,352
Likes: 1,750
From: Arlington, VA
Can confirm. The valve should be rotated. The hose connecting the charcoal can should be tied to the "TANK" side of the AC Delco valve, and the hose coming from the gas tank should be connected to the "CAN" side of the valve. That top part of the AC Delco valve, the one that has the vacuum line port on it, rotates, so you can easily switch it around without having to monkey around with the hoses in the car.
Veteran Member
Joined: May 2010
Posts: 5,352
Likes: 1,750
From: Arlington, VA
I have to rescind my last post. I�m not sure if the valves are reversed or not. What I did to my valve was wrong and led to fuel smells in my trunk.
Heres the definitive way to test which way is which.
Blow through both of the larger ends. One side will let you blow through after apply some
pressure. That is the side that attaches to the hose from the gas tank.
The other end will allow you to blow a tiny amount of air under heavy pressure, but significantly less than the other side. That end goes to the hose with the charcoal canister.
The 1/4 hose attaches to the small end.
Dont know how I botched it, but thought I would share.
Trending Topics
Senior Member
Joined: Apr 2010
Posts: 151
Likes: 65
From: Virginia
This can be really confusing  . My '94 had pressure when opening the fuel filler and some fuel smell in the boot. On this and another forum I saw that the rochester valve could perhaps be disassembled and cleaned so I took it out to service it. Upon removal it looks to be a non serviceable part as there are no clips to disassemble it, just like the one the last picture in this particular post. It does happen to be a genuine rochester valve but having read the last post on this string it seems as though it is reversed as some have said about the AC delco unit. The easily blown through side says can and the harder to blow through side says tank. I took my vacuum pump and applied it to the small port and it seems to be working just fine. So I grabbed the top and was able to slowly twist it to the opposite side to maintain the geometry of what was currently set up with the hoses. Hopefully this is correct, I guess I'll find out soon enough. Anyone else observe something like this?
Veteran Member
Joined: May 2010
Posts: 5,352
Likes: 1,750
From: Arlington, VA
Do not botch this, or you might rupture your fuel tank!
Blowing into the TANK side without a vacuum, should be somewhat forceful. With a vacuum, should be no effort.
Blowing into the other side, CAN, should be easier, or no effort and with a vacuum, no effort.
The valve is not specifically made to come apart, but they do. Just be careful as the plastic could be brittle and snap off if you're trying to separate by the plastic ports.
The TANK side should be facing the back of the car, or at least the hoses coming into the TANK side, should be coming from the rear of the car (from the fuel TANK). The CAN side should be facing the front side, and you should be able to clearly see the hoses connecting to the charcoal CANister.
Nickr76 has a good idea....ditch it entirely.
Last edited by Vee; Mar 24, 2025 at 06:36 PM.

Senior Member

Joined: Apr 2016
Posts: 209
Likes: 91
From: Southwest Florida


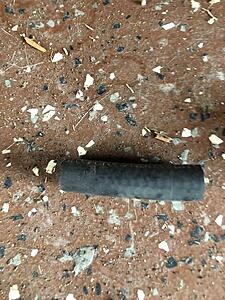
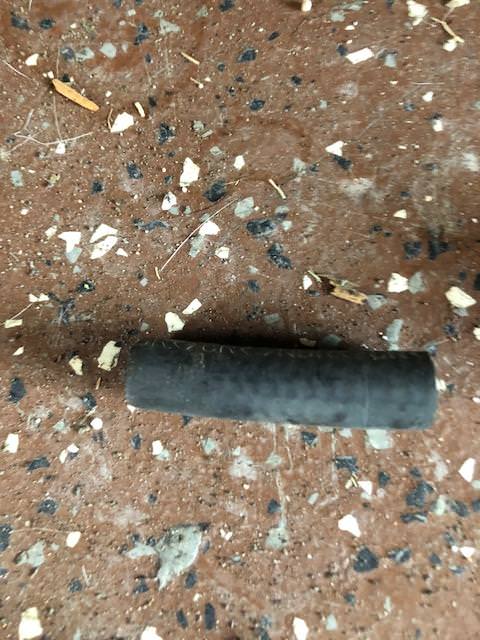
The smaller piece at the top of the photos has some very small holes in the cross shapped section that get clogged up. I cleaned mine and then attached a piece of hose and held the thing under water and blew through the hose. It took a lot of cleaning but eventually bubbles started coming out of the small holes, indicating that the valve had been clogged up. I'm not sure if all Rochester valves work the same way. Another check is to open the gas fill with the car running. If no air escapes or enters, the system is probably working fine. If air escapes after shutting the car down, it is just tank expansion that hasn't reached the pressure release valve pressure yet.
Senior Member
Joined: Apr 2010
Posts: 151
Likes: 65
From: Virginia
Do not botch this, or you might rupture your fuel tank!
Blowing into the TANK side without a vacuum, should be somewhat forceful. With a vacuum, should be no effort.
Blowing into the other side, CAN, should be easier, or no effort and with a vacuum, no effort.
The valve is not specifically made to come apart, but they do. Just be careful as the plastic could be brittle and snap off if you're trying to separate by the plastic ports.
The TANK side should be facing the back of the car, or at least the hoses coming into the TANK side, should be coming from the rear of the car (from the fuel TANK). The CAN side should be facing the front side, and you should be able to clearly see the hoses connecting to the charcoal CANister.
Nickr76 has a good idea....ditch it entirely.
Blowing into the TANK side without a vacuum, should be somewhat forceful. With a vacuum, should be no effort.
Blowing into the other side, CAN, should be easier, or no effort and with a vacuum, no effort.
The valve is not specifically made to come apart, but they do. Just be careful as the plastic could be brittle and snap off if you're trying to separate by the plastic ports.
The TANK side should be facing the back of the car, or at least the hoses coming into the TANK side, should be coming from the rear of the car (from the fuel TANK). The CAN side should be facing the front side, and you should be able to clearly see the hoses connecting to the charcoal CANister.
Nickr76 has a good idea....ditch it entirely.
Veteran Member
Joined: May 2010
Posts: 5,352
Likes: 1,750
From: Arlington, VA
Both of these situations assume the car is off and there is no vacuum.
I believe, with vacuum, there should be no effort to suck or blow.
Last edited by Vee; Mar 25, 2025 at 06:01 AM.
Senior Member
Joined: Apr 2010
Posts: 151
Likes: 65
From: Virginia
Do not botch this, or you might rupture your fuel tank!
Blowing into the TANK side without a vacuum, should be somewhat forceful. With a vacuum, should be no effort.
Blowing into the other side, CAN, should be easier, or no effort and with a vacuum, no effort.
The valve is not specifically made to come apart, but they do. Just be careful as the plastic could be brittle and snap off if you're trying to separate by the plastic ports.
The TANK side should be facing the back of the car, or at least the hoses coming into the TANK side, should be coming from the rear of the car (from the fuel TANK). The CAN side should be facing the front side, and you should be able to clearly see the hoses connecting to the charcoal CANister.
Nickr76 has a good idea....ditch it entirely.
Blowing into the TANK side without a vacuum, should be somewhat forceful. With a vacuum, should be no effort.
Blowing into the other side, CAN, should be easier, or no effort and with a vacuum, no effort.
The valve is not specifically made to come apart, but they do. Just be careful as the plastic could be brittle and snap off if you're trying to separate by the plastic ports.
The TANK side should be facing the back of the car, or at least the hoses coming into the TANK side, should be coming from the rear of the car (from the fuel TANK). The CAN side should be facing the front side, and you should be able to clearly see the hoses connecting to the charcoal CANister.
Nickr76 has a good idea....ditch it entirely.
Veteran Member
Joined: May 2010
Posts: 5,352
Likes: 1,750
From: Arlington, VA
It should still be routed through the charcoal canister, which should help?
In any case, if that pressure release comes back, especially on a hot day, or immediately after a long drive, something is wrong and it needs to be addressed before you burst your fuel tank.
In any case, if that pressure release comes back, especially on a hot day, or immediately after a long drive, something is wrong and it needs to be addressed before you burst your fuel tank.

Thread
Thread Starter
Forum
Replies
Last Post
Currently Active Users Viewing This Thread: 1 (0 members and 1 guests)