
Glove Box HOW TO RESOLVED


Thread Starter
|
Member
Joined: Dec 2009
Posts: 53
Likes: 8
From: Tampa, FL
The glove box on my 2007 xk no longer remains latched. Does anyone have any experience in this type of problem?
I'm thinking that this type of repair would be best brought to a dealer
Any advice?
Thanks
Jerry
I'm thinking that this type of repair would be best brought to a dealer
Any advice?
Thanks
Jerry
Last edited by GGG; Mar 11, 2019 at 04:19 AM.

Popular Reply
Jul 24, 2011, 10:35 PM
Senior Member
Joined: Feb 2011
Posts: 111
Likes: 34
From: Sugar Land, TX
Glove box is now fixed and it's great to have it open slowly! It took about an hour to complete since we did a bit extra by making an aluminum sleeve that went over the screw to avoid any wearing and breaking of the loop.
Thanks 07XKJaguar for the details!
I've attached some pics of the job.
Notice white tube where the spring is housed. The loop is hanging below and to the left of the glove box.
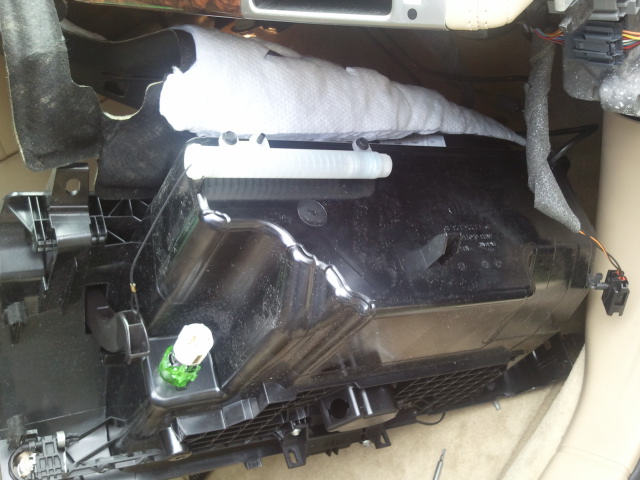
Loop hanging

The pieces for the fix. A bolt, nut, and 7mm aluminum sleeve

The fix. It was easier to remove the plastic tube housing the spring to release the tension.


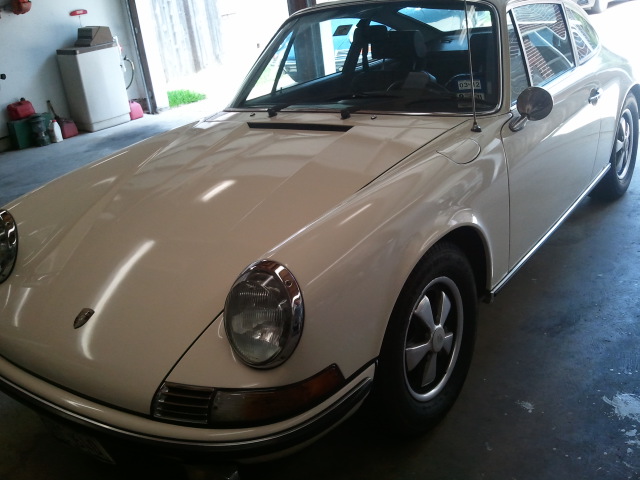
Gratuitous pic of the car

My friends car. He worked on the glove box while I took my orbital polisher to his 1971 911T. It was about 100 degrees out and we were both about wiped out after a couple hours of working outside!
Thanks 07XKJaguar for the details!
I've attached some pics of the job.
Notice white tube where the spring is housed. The loop is hanging below and to the left of the glove box.
Loop hanging
The pieces for the fix. A bolt, nut, and 7mm aluminum sleeve
The fix. It was easier to remove the plastic tube housing the spring to release the tension.
Gratuitous pic of the car
My friends car. He worked on the glove box while I took my orbital polisher to his 1971 911T. It was about 100 degrees out and we were both about wiped out after a couple hours of working outside!
Senior Member
Joined: Feb 2011
Posts: 344
Likes: 47
From: NW Alabama
The glove box is pretty easy to get out. I really didn't want the fumble fingers at this dealership to touch it. Took mine out to repair the cable thing that allows it to open slowly instead of flopping open. 5 torx bolts, 2 inside the glove box at the top, two under it and one on the outside near the door panel. You have to remove the end cap from the dash to get at the outside one. The cap just has push in metal clips.

Junior Member
Joined: May 2010
Posts: 15
Likes: 6
From: Texas
I noted in this post that you repaired the glove box damper. I am experiencing the same problem of the box dropping quickly upon opening. I would appreciate hearing what you found the problem to be before I remove the box assembly. Thanks in advance.

Senior Member
Joined: Jan 2009
Posts: 130
Likes: 15
From: Dallas
That damper is apparently a VERY common problem. I would first try and get the dealer to cover if possible. There have been MANY prople here that have experienced the same failure. It also depends on your dealer but apparently the better dealers seem to handle under warranty without issue...the worse ones...not so much. I had a worse one....but dont let them man handle you. There is absolutely no reason as many people here that have had this exact problem that they should not cover under warranty....
Senior Member
Joined: Feb 2011
Posts: 344
Likes: 47
From: NW Alabama
I'd be more than glad to tell you how to fix it. If you take out the glove box, you will see it's just a small rope/cable that is attached to a spring inside a tube housing. The spring dampens the opening of the glove box door. The little cable attached to a hook on the inside of the arm that is hollow on the side with the button/lock on it. You can see it once it's out. All I did was drill a small hole through the arm where the tab was broken off. You should have it where when the door is closed, the cable is taught. I know you will have to guess but I think as long as it's close it will be ok. I took a screw that was just long enough to go through the plastic and not stick out on the inside of the arm. Start the screw, hook the cable on the screw so it's inside the arm in the cutout and then tighten the screw in the other side. Try it out, should work just fine. I know this sounds kind of hard but once you get the glovebox out, you will see what I am talking about and it's real easy to fix. Email me if you can't figure it out, I'd be glad to help you with it.
Trending Topics
Junior Member
Joined: May 2010
Posts: 15
Likes: 6
From: Texas
I finally had some time today to attend to my glove box damper problem. After taking out the glove box unit, I found the problem to be exactlly as 07XKJAGUAR described in this thread. Following his lead, the fix was quick and much better than the original design with the flimsy plastic tab. Thank you.
Senior Member
Joined: Feb 2011
Posts: 111
Likes: 34
From: Sugar Land, TX
Glove box is now fixed and it's great to have it open slowly! It took about an hour to complete since we did a bit extra by making an aluminum sleeve that went over the screw to avoid any wearing and breaking of the loop.
Thanks 07XKJaguar for the details!
I've attached some pics of the job.
Notice white tube where the spring is housed. The loop is hanging below and to the left of the glove box.
Loop hanging
The pieces for the fix. A bolt, nut, and 7mm aluminum sleeve
The fix. It was easier to remove the plastic tube housing the spring to release the tension.
Gratuitous pic of the car
My friends car. He worked on the glove box while I took my orbital polisher to his 1971 911T. It was about 100 degrees out and we were both about wiped out after a couple hours of working outside!

Senior Member
Joined: Jul 2011
Posts: 665
Likes: 110
From: Federal Way,WA
Jaguar recommends a 2 mm x 23 mm cotter pin , and using a 2mm drilled hole. Didn't have metric cotter pins! so used 1/16" hope that's OK and don't lose JCNA points!! Only problem was trying to figure out how to remove the under panel clips; they simply pull out not sideways or fore and aft, dummy!
Adrian, 2007 XK Coupe
Adrian, 2007 XK Coupe
Is the removal of the dash end cap without causing damage easy? I'm always nervous removing trim. I've had way too many clips snap and edges of the trim get scratched and split. Any advice on how to best approach this using coventional tools would be much appreciated.
Thanks
Thanks
Junior Member
Joined: May 2010
Posts: 15
Likes: 6
From: Texas
The end cap is held in place by plastic tabs with metal clips that can simply be pryed (sp?) loose. Just go gently. I did not have a problem with removal but lining the tabs up for reassembly was a bit tricky. Make sure you have the tabs lined up before applying pressure during reattachment or you could break a tab.

Junior Member
Joined: Feb 2012
Posts: 20
Likes: 4
From: orlando, fl
You know, it sickens me to have to fix a $90k automobile like an old model T with bailing wire and a screwdriver. Dealer service people do their 141 point check to sell you more services and don't bother to fix little annoyances such as this with a hastle. You cant go to the dealer for any repair and get it done in less than 4 hours and a lot of hastle. I'm on my last Jag which I love, but servicing this ***** is a pain.
Veteran Member


Joined: Dec 2011
Posts: 3,453
Likes: 882
From: Pacific Northwest
Sadly I also repaired my glove box damper with a similar idea to Dans..... The problem was that drilling across the arm actually weakened the arm, and it snapped the end completely off at the drilled hole.
I had to then reattach the piece with outside aluminum braces, and re-drill again.
It works fine now, but I was sad that my fix was not as "clean" as I had envisioned.
Food for thought...
Vince
I had to then reattach the piece with outside aluminum braces, and re-drill again.
It works fine now, but I was sad that my fix was not as "clean" as I had envisioned.
Food for thought...
Vince

Does anyone know if the 2005 XKR glove boxes can be repaired in the same way? Mine just nose-dived on me today. I do not feel confident I can pry off dashboard end caps and put that back together. I probably will go to the dealer, but hate to at $125 per hour, but do not want, as other threads have stated, my glove box hinges to become ruined to force acquiring a whole new box. I can only grimace at what Jaguar may want for that repair part.
Glove box is now fixed and it's great to have it open slowly! It took about an hour to complete since we did a bit extra by making an aluminum sleeve that went over the screw to avoid any wearing and breaking of the loop.
Thanks 07XKJaguar for the details!
I've attached some pics of the job.
Notice white tube where the spring is housed. The loop is hanging below and to the left of the glove box.
Loop hanging
The pieces for the fix. A bolt, nut, and 7mm aluminum sleeve
The fix. It was easier to remove the plastic tube housing the spring to release the tension.
Gratuitous pic of the car
My friends car. He worked on the glove box while I took my orbital polisher to his 1971 911T. It was about 100 degrees out and we were both about wiped out after a couple hours of working outside!
Thanks 07XKJaguar for the details!
I've attached some pics of the job.
Notice white tube where the spring is housed. The loop is hanging below and to the left of the glove box.
Loop hanging
The pieces for the fix. A bolt, nut, and 7mm aluminum sleeve
The fix. It was easier to remove the plastic tube housing the spring to release the tension.
Gratuitous pic of the car
My friends car. He worked on the glove box while I took my orbital polisher to his 1971 911T. It was about 100 degrees out and we were both about wiped out after a couple hours of working outside!
Veteran Member

Joined: Apr 2010
Posts: 7,657
Likes: 3,020
From: Arlington VA USA
Arland, the 2005 is a completely different design. On your car usually the latch mechanism just needs lubrication. Try spraying a light lubricant on the two latch pins near the top of the door (which often bind) and also behind the latch handle. It may work free without dis-assembly.