
AJ's 2007 Coupe Mod Thread


Thread Starter
|
Senior Member
Joined: Jun 2015
Posts: 107
Likes: 117
Rather than creating a new thread every time I do something to the Jag, I decided to start a mod thread.
I think it might be good to start with what my XK is to me. I have company car that I use for daily driving, but I needed a second car for errands and a backup in case something happens to that one. I set out with a budget of 25K to find the coolest 2nd car I could. I wanted to get a lot of car for my money, and so I started out looking for something like a low end DB9 or GranTurismo, but those were all closer to $50K, which was way more than I wanted to pay for a second car. I needed something that was at least a 2+2 so that I could throw the kids in the back in a pinch, and I wanted something you didn't see all the time. I easily could have picked up a mustang, camera, challenger etc. because they are so common.
I narrowed myst list down to
2010 BMW M6 (66K, $22,500)
2006 Maserati GranSport (44K, $24,500)
2008 Jaguar XKR (72K, $25,000)
2007 Jaguar XK (40K, $22,500)
I opted against the M6 because it is still too common. I ruled out the Maserati because of the maintenance cost on the ZF transmission (couldn't find one in an automatic). That left picking between the higher mileage XKR and the lower mileage XK. What really pushed me towards the XK was the XKR was black on black, and I hate that combination in Houston due to the sweltering heat. I love the white interior on my XK. Also I don't really need the extra power of the XKR. It would be nice, but not nice enough for the price/mileage increase and the bad color combo. My 65 mustang has 475HP at the crank in a 2300-lb car if I need an adrenaline rush.
In addition to buying a car that was unique, I always mod my cars. I can't help it, that is what I love to do with my spare time. My '65 mustang is defiantly a 1 of 1 with quite a few custom parts on it that doesn't exist anywhere else. I know a lot of people think the Jaguar is perfect and not a single bolt or stitch should be changed, but that is just not in my DNA.
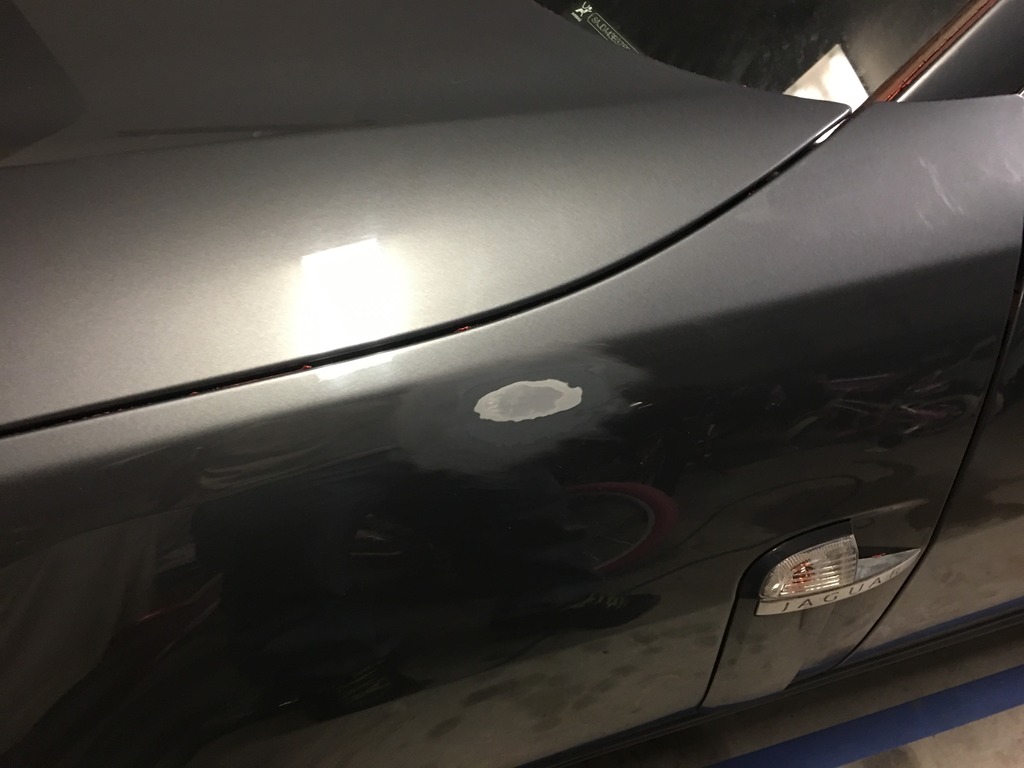
My first real undertaking was plasti dipping the car about six months in. A lot of people are really against dipping, but to me it is a great solution. The paint on my Jag is the one thing that I was really disappointed in when I got it (I bought it sight unseen online). There are a lot of scratches though the clear, and even the clear has swirls and scuffs all over the place. Additionally the first day I got it someone hit it with a shopping cart and popped off a huge chunk of paint on the drivers fender, here is a picture of it after I hammer and dollied it then sanded and primed:
Of course I could have the fender painted, but with the scuffs and swirles all over it would really need a full paint job. I could also have that done fairly cheap if I didn't want a color change, but since I plan on taking the car to the track occasionally, I don't see the point in an expense paint job I might chip up or even put into a wall. I could also have it wrapped (I lack the skill set required to wrap), but that is still close to $2500 bucks to have that done. I can do a dip for under $400 dollars and it gives me the flexibility to change colors every year.
I documented my first dip effort here:
https://www.jaguarforums.com/forum/x...terior-156550/
My next project was pulling the dash to repair the pulled, shrunken leather. Documented here:
https://www.jaguarforums.com/forum/x...g-dash-172398/
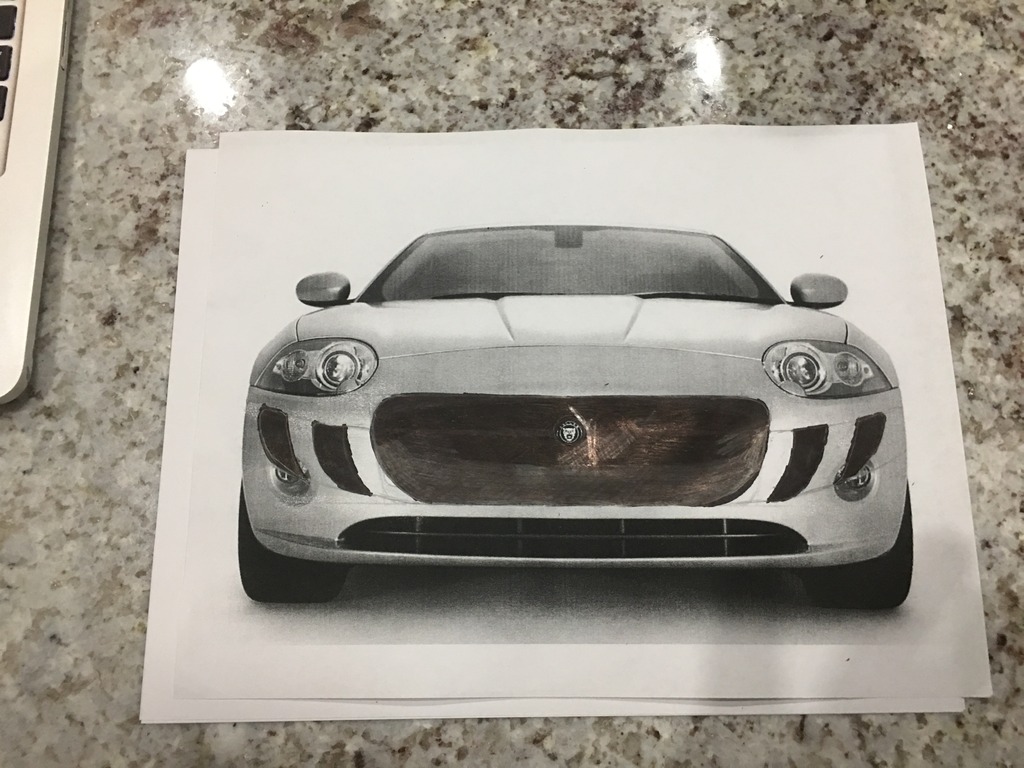
My most current endeavor is my most ambitious. I wanted to change the bumper cover out. While I love the look of the XK and I understand the nostalgia it's tribute to the old Jag's provides, it looks a little dated to me. I considered just getting a 2010 nose, because swapping the fogs for the vents does help a bunch, but that was still too stock for me. I also looked at some body kits from mina, paragon, and every other site I could find on google. While some looked really good, they were all $1600+ for just the nose, and may of them would have looked funny without the side skirts and rear bumper which ran the cost up over $3,000 on all of them. I'm sorry, but there are just other things I would rather spend my money on, and I enjoy doing up as much as I can. What I really was shooting for was something like the F-type with the large center opening and double vents on the side. Here is a sketch of my idea:
I'm pretty handy with fiberglass as I did all the body work on my Mustang, but I didn't think bonding fiberglass on the urethane bumper would hold up well, and I didn't want to go through the hassle of trying to make a full bumper which would require a buck and mold. May too much dust and mess to have going on in the garage for a period of a few weeks (burn up way to many Wife Approval Points for the project).
So I decided to see what I could come up with by just cutting on a stock bumper cover and came up with this:
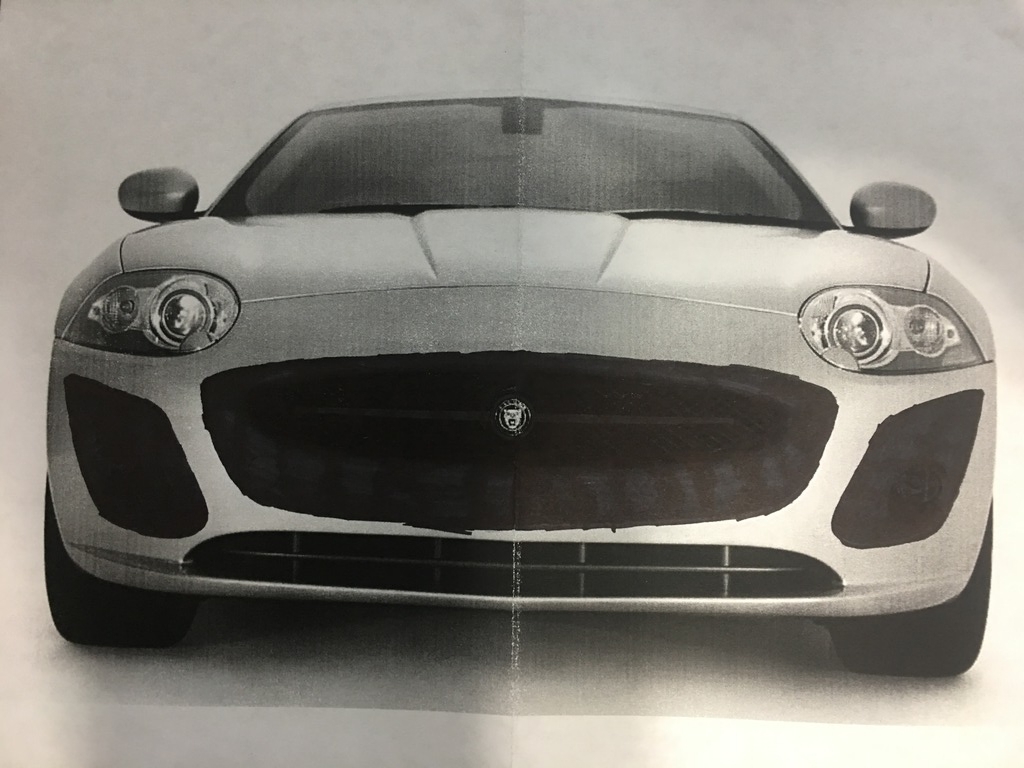
That is a little more XF than F-type, but it works with only cutting and not having to bond anything on, and still update the look of the car (to me anyway)
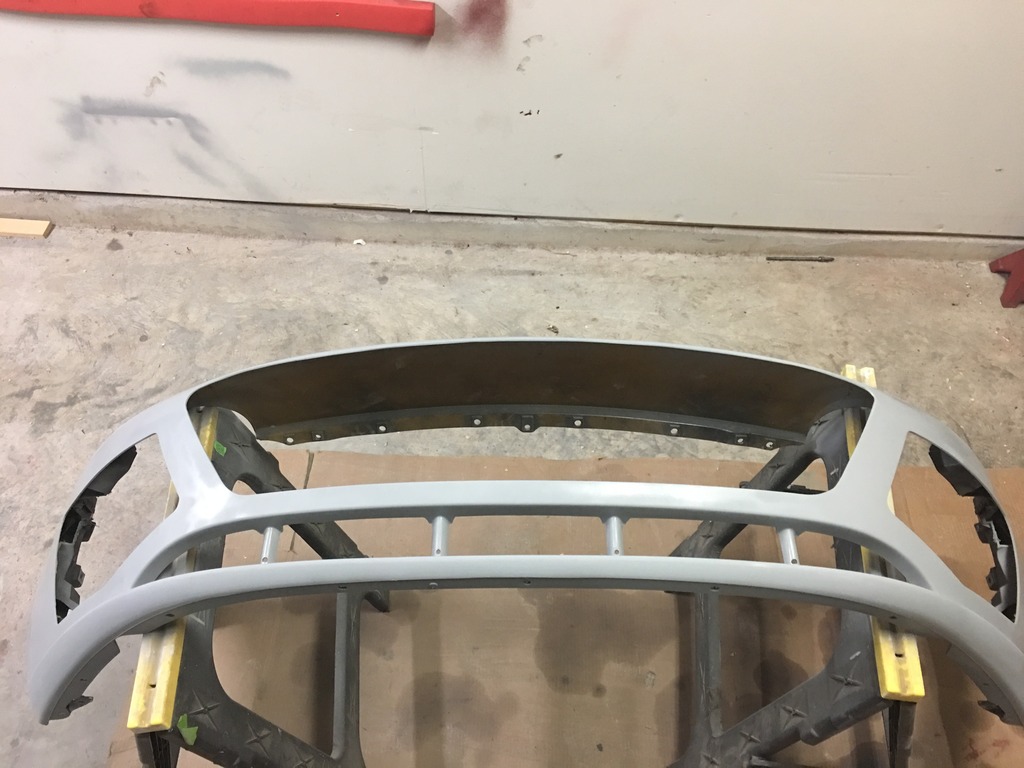
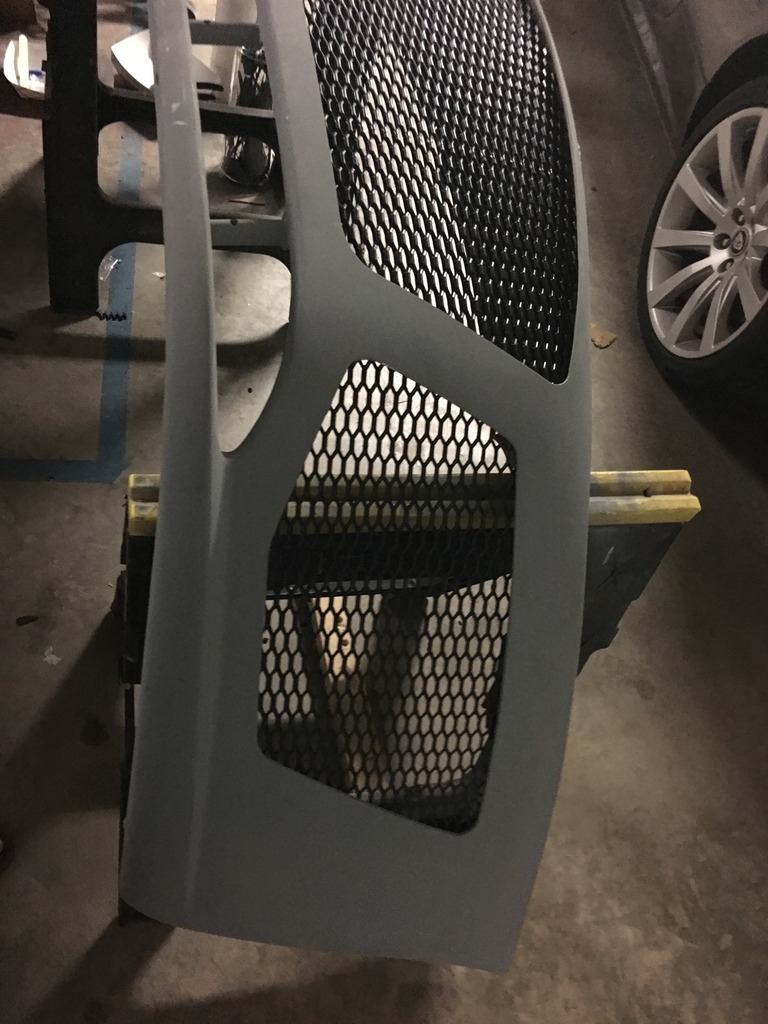
I found a repaired bumper cover on craigslist off a 2008 XK on craigslist for a $100, so I brought it home and started to play with how the new cutouts would look:
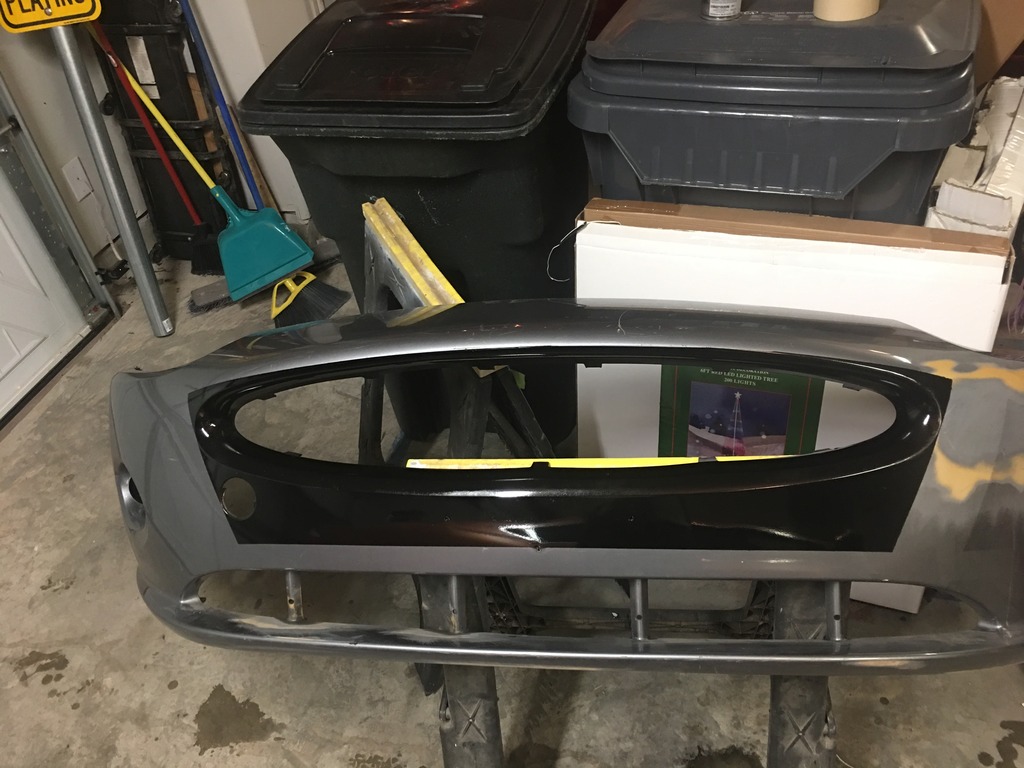
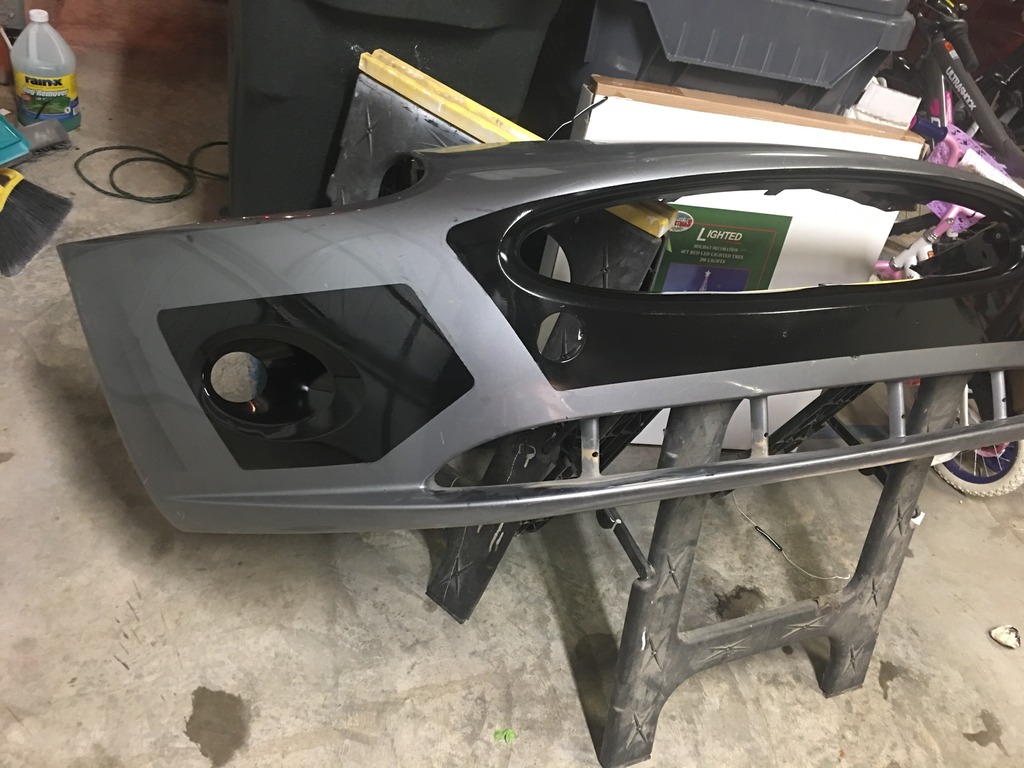
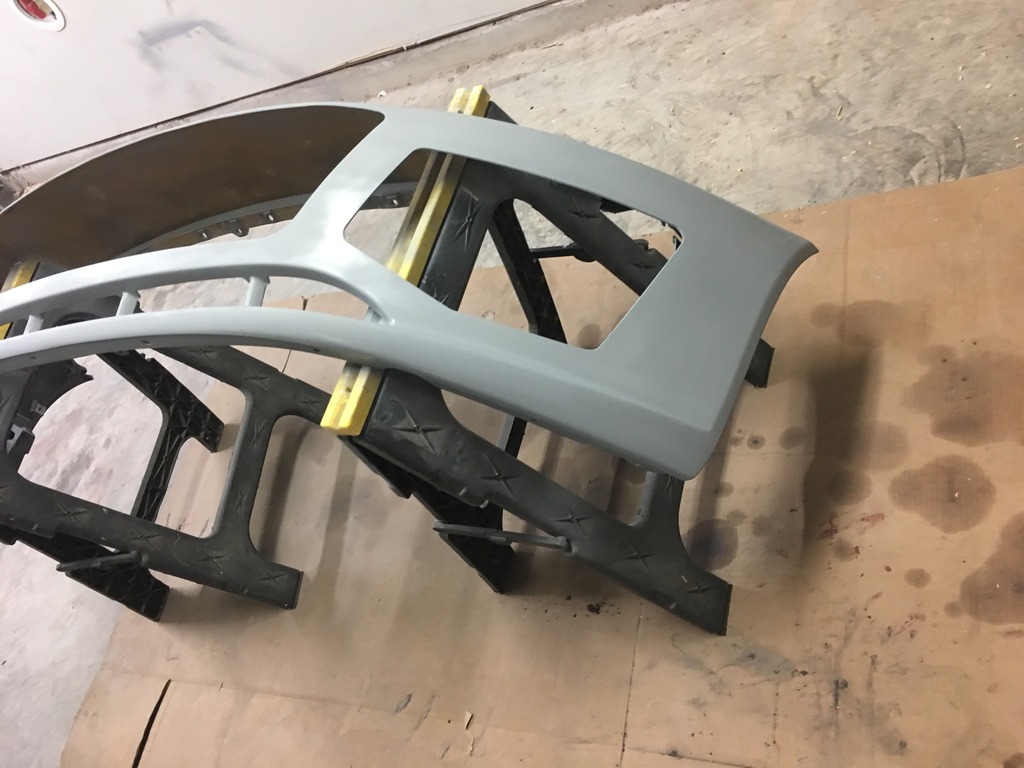
It was looking good enough to me that I broke out the jigsaw and dremel and went to town:
Not sure if it really shows up in the picture, but I don't have the steadiest hand, those cuts are pretty wavy. That is an easy fix though, because urethane sands super easy.
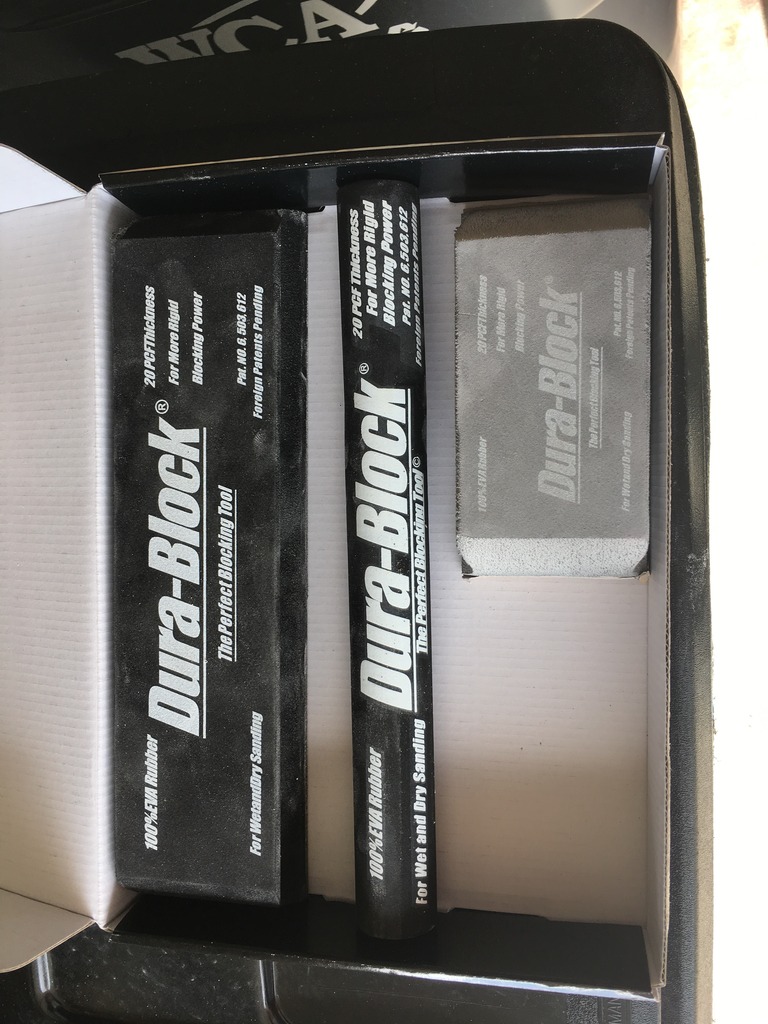
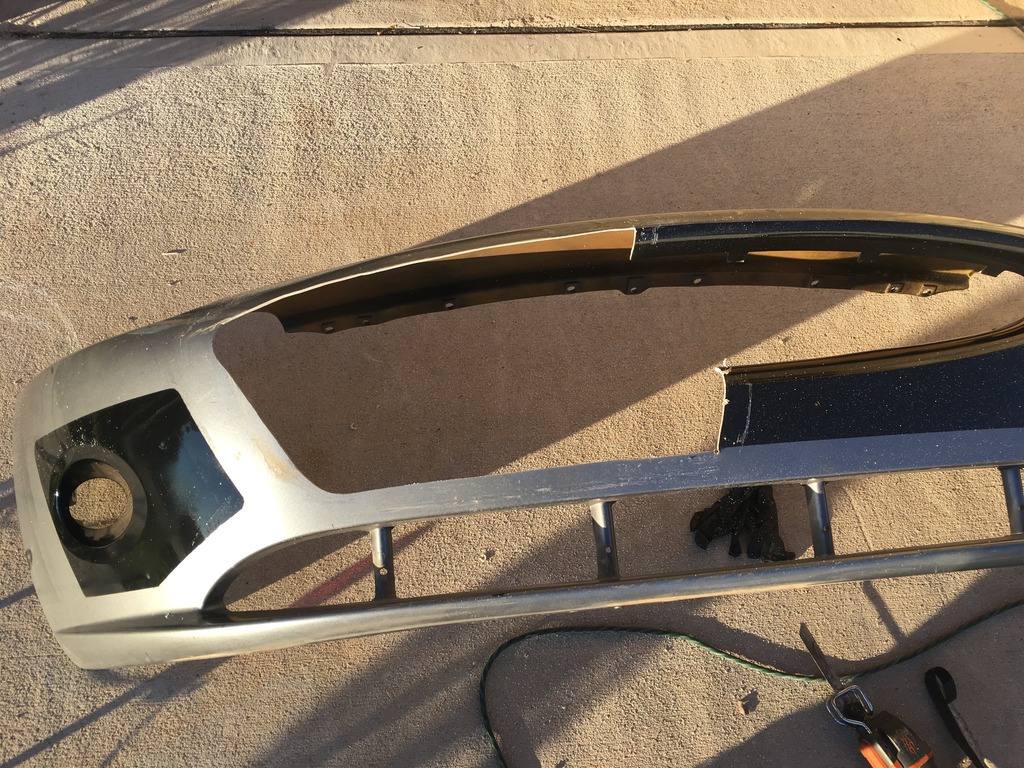
I started with 80 grit. I used the round block to ensure that all the corners had the same radius, then use the long block to straighten all the lines. I followed the 80 grit up with 180 and 220.
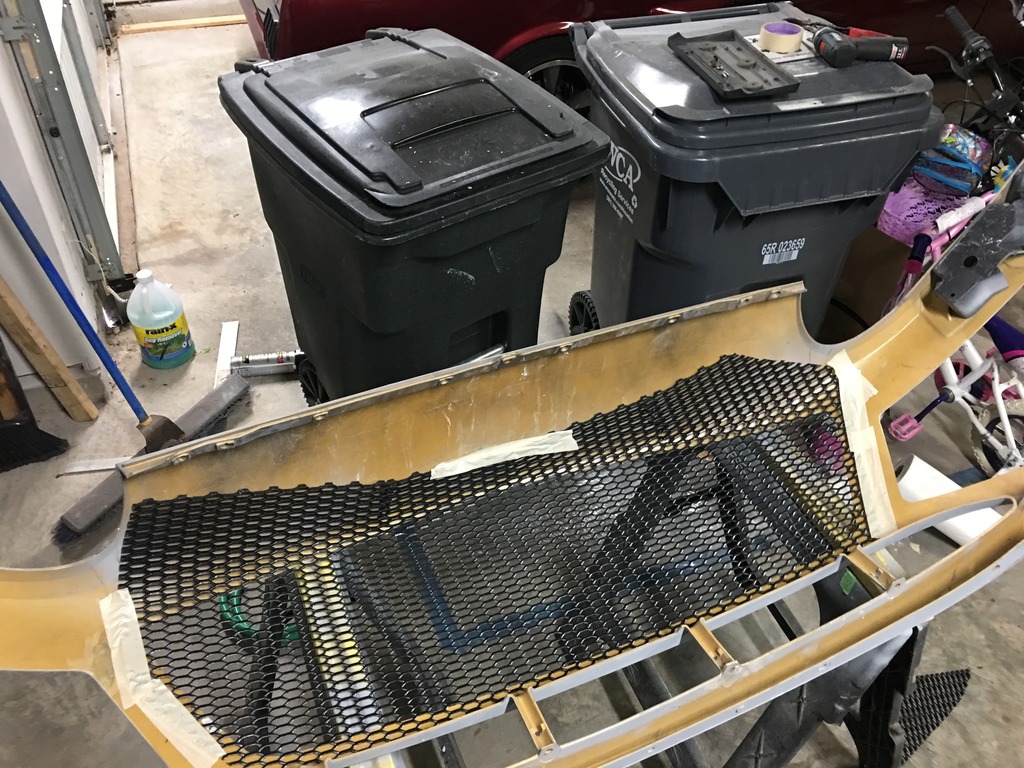
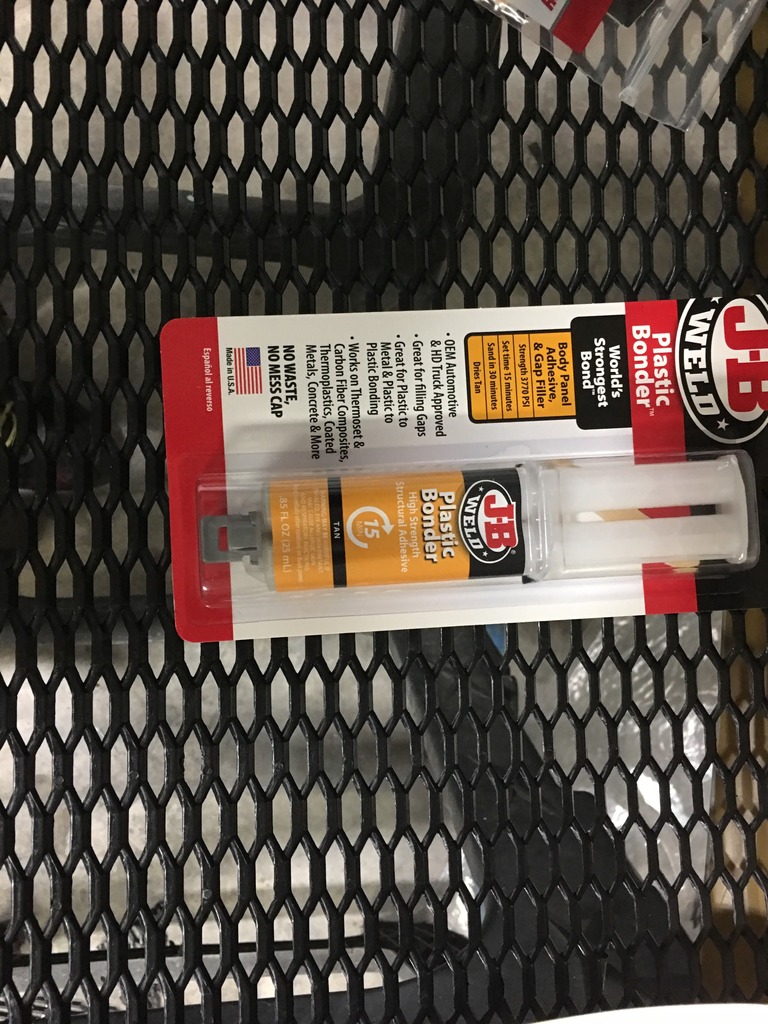
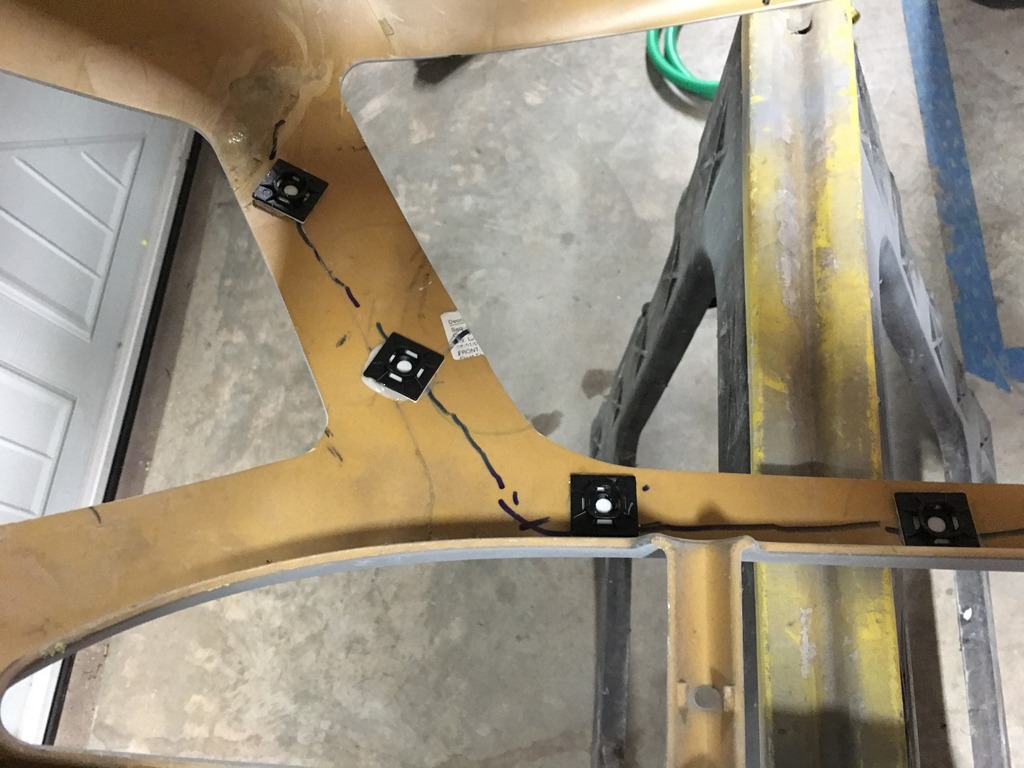
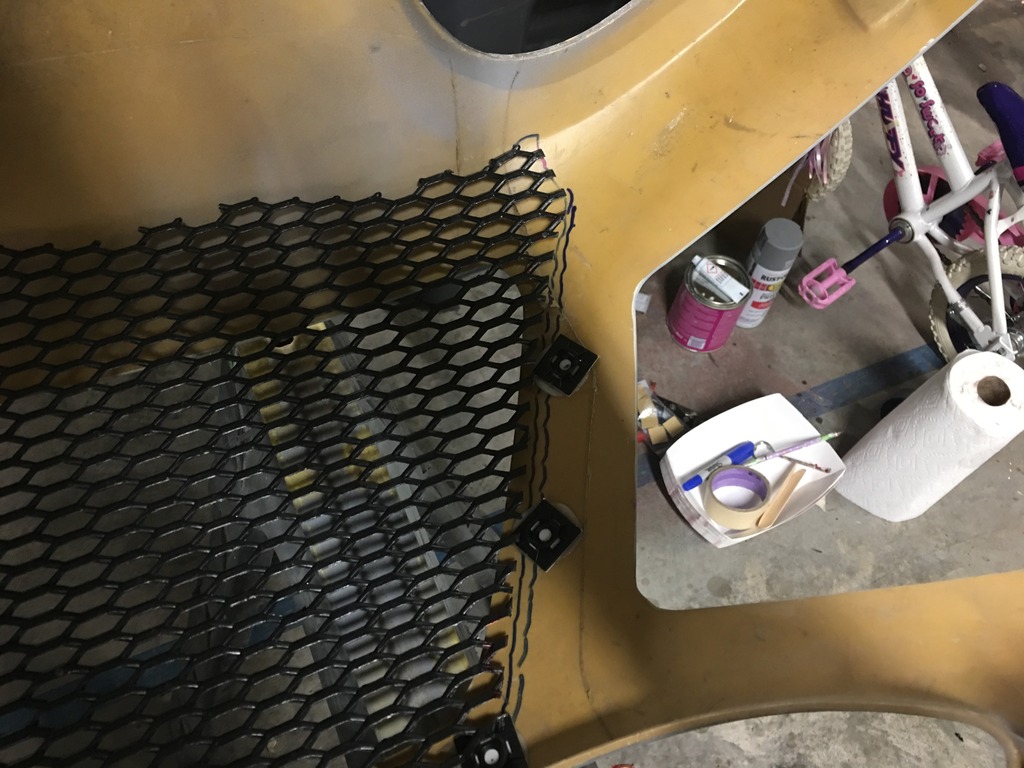
I ordered some flexible black honeycomb pattern grill material (2 each at 48" x 16"). I used some JB Weld for thermo plastics to bond on some zip-tie holders to the inside and cut the grill material in to fit the new openings:
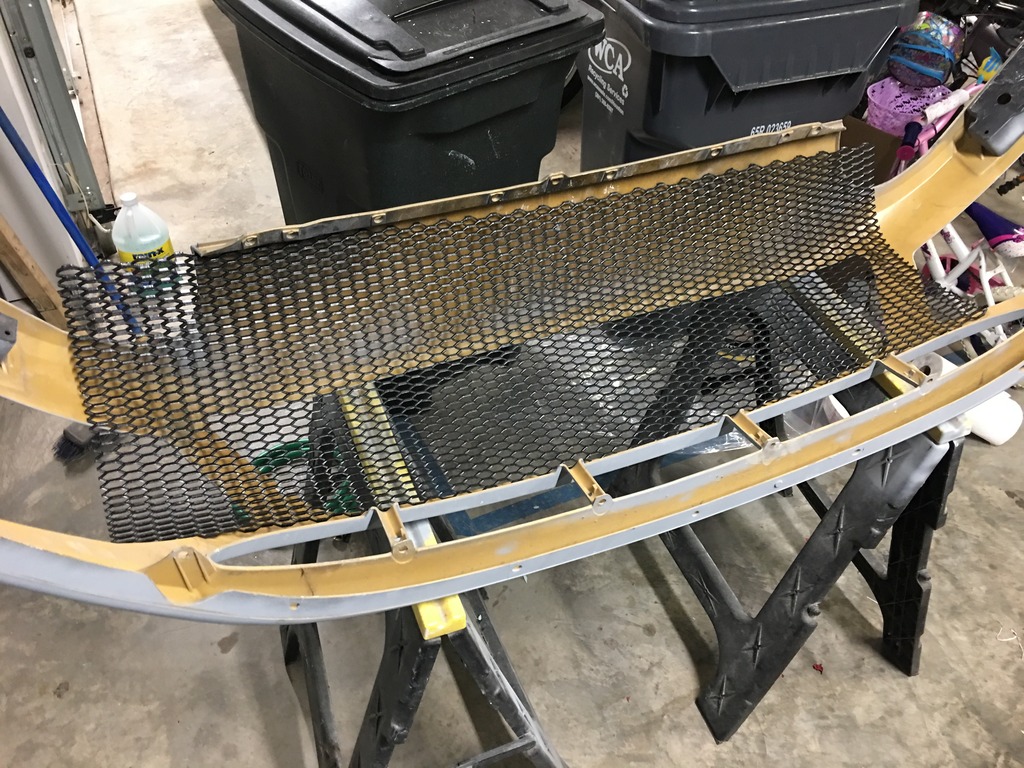
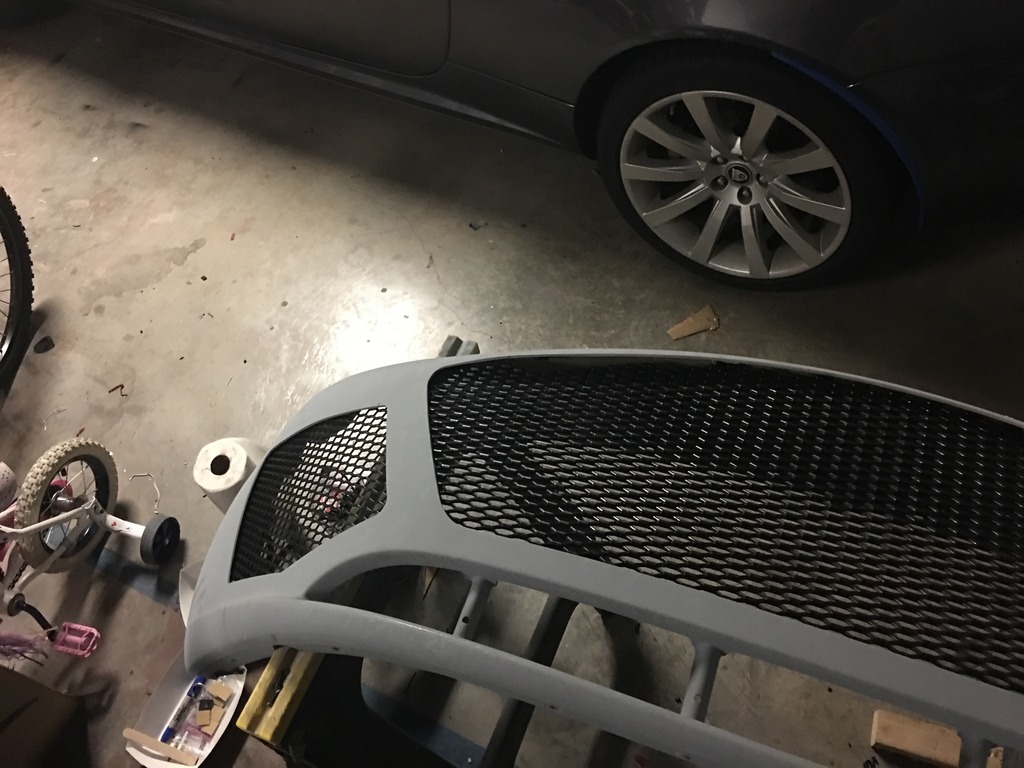
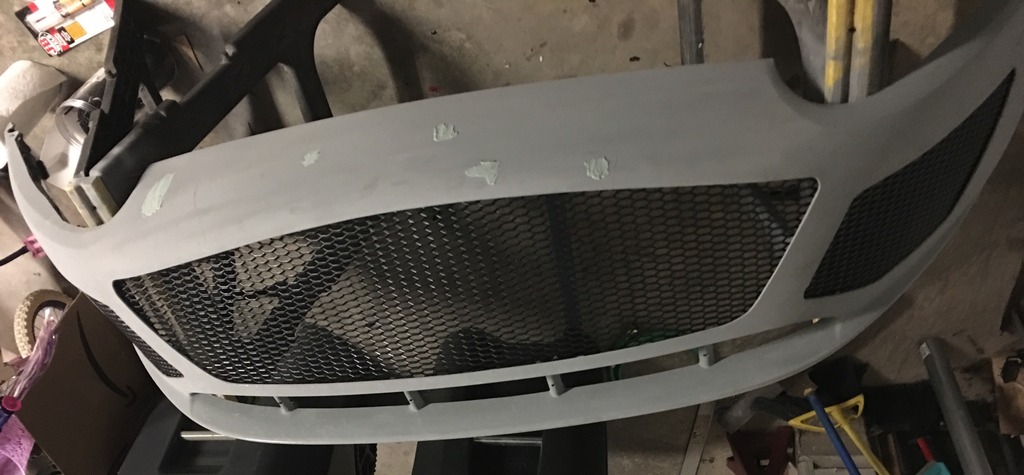
The small dabs of body filler you see are from where there were some pretty deep scratches on the used nose I bought. I sanded them down to minor lines, but they still needed a small amount of filler in them.
Now that I had the new nose ready to go on, I had to paint it. I had plenty of the copper paint left from the last time I dipped the car, and could have coated this and slapped it on. Tut the copper had a lot of runs in it, and I had been wanting to re-do it anyway
As much as I love the copper, it has actually become a pretty popular color here in Houston and I usually see 3 or 4 a day. This time I decided to go with my second favorite car color, electric blue.
Being the second time I dipped the car, I applied a lot of lessons learned from my first attempt. I back masked all the jambs this time because the thin layer of dip that gets inside there is really hard to get off. Also I made sure to mask up all the rubber around the glass really well. I didn't mask it off last time with the assumption I would just peel it off, but it doesn't peel off of rubber well at all. You have to take a solvent too it, and that takes some of the rubber seal with it.
I also had a bad problem with striping last time. To combat that I hung 12 48" work lights in the garage to get it super bright inside.
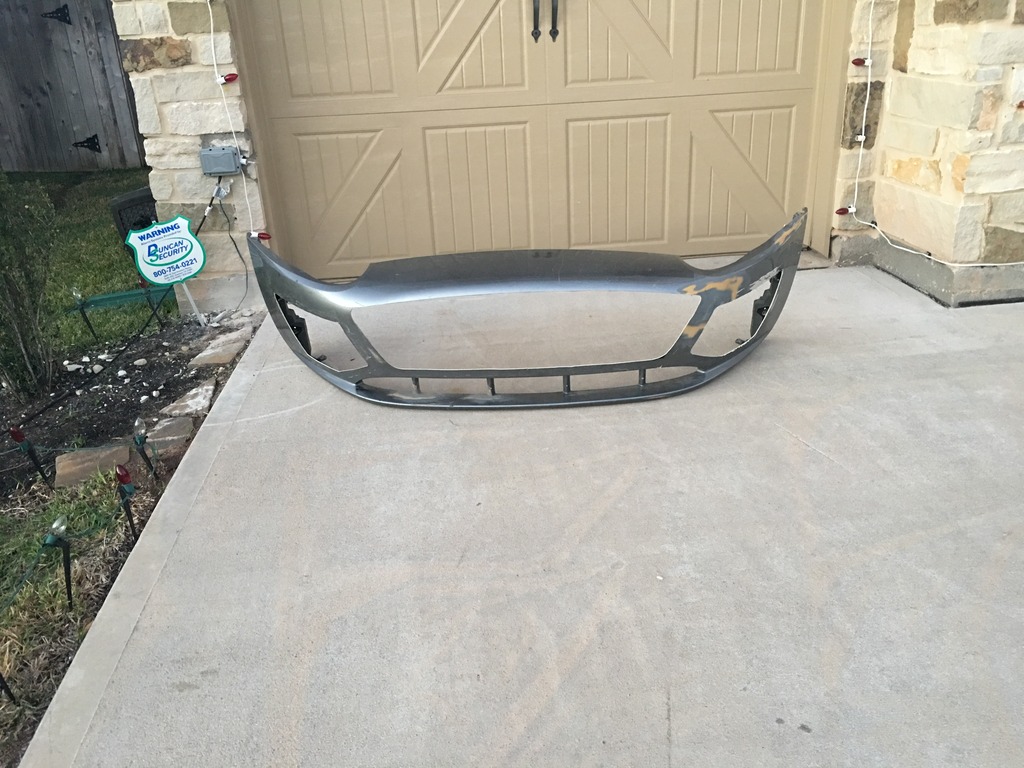
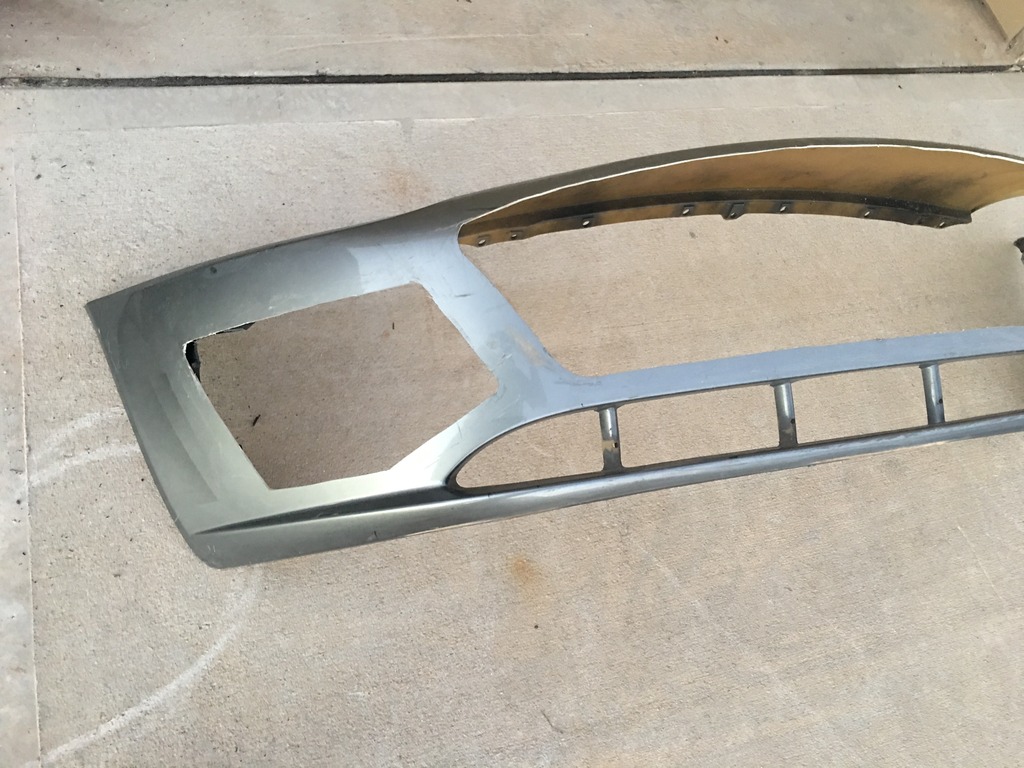
I applied 4 coats of Flex Blue, followed by 1 coat of a teal pearl, and then 3 coats of gloss:
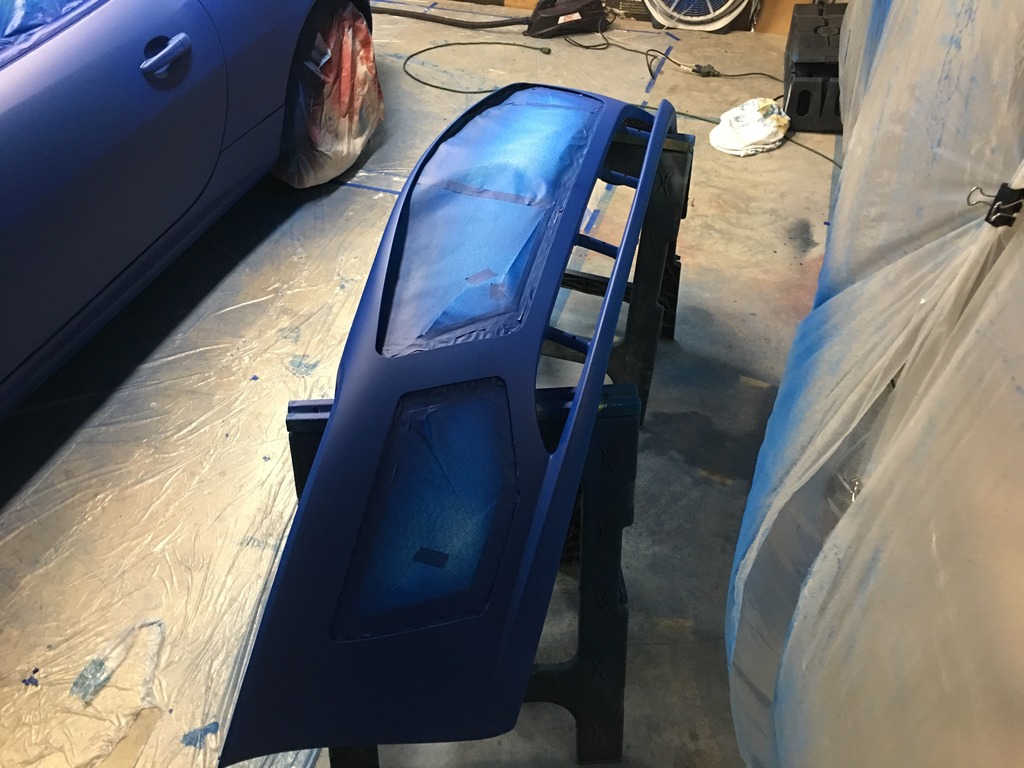

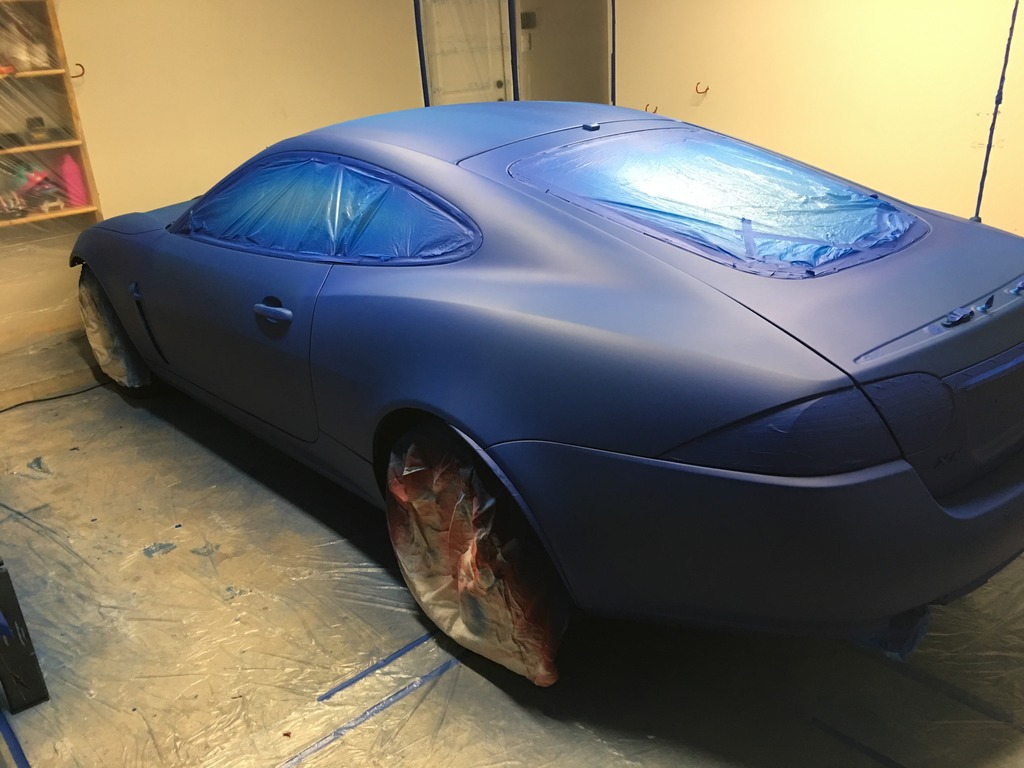
Below are some pictures of the final dip and the nose installed. You can't see the teal color flip on camera, perhaps if it ever stops raining I'll get the car out in the sunlight and the teal will show up on the camera, but that could be a few weeks based on the current forecast.
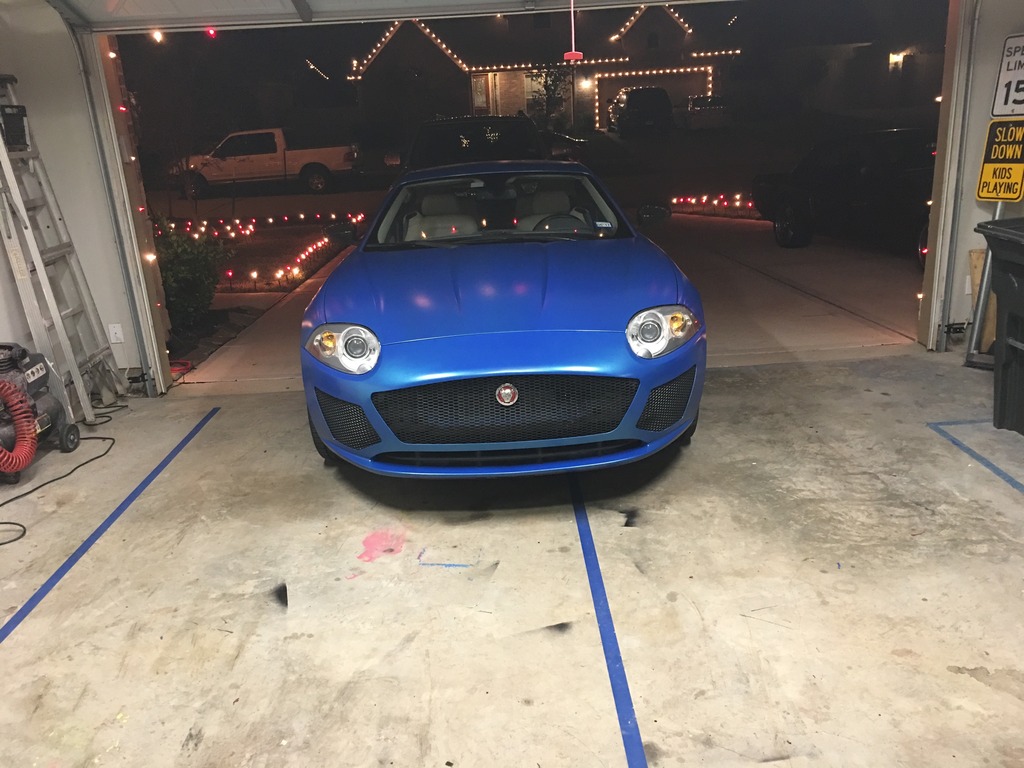
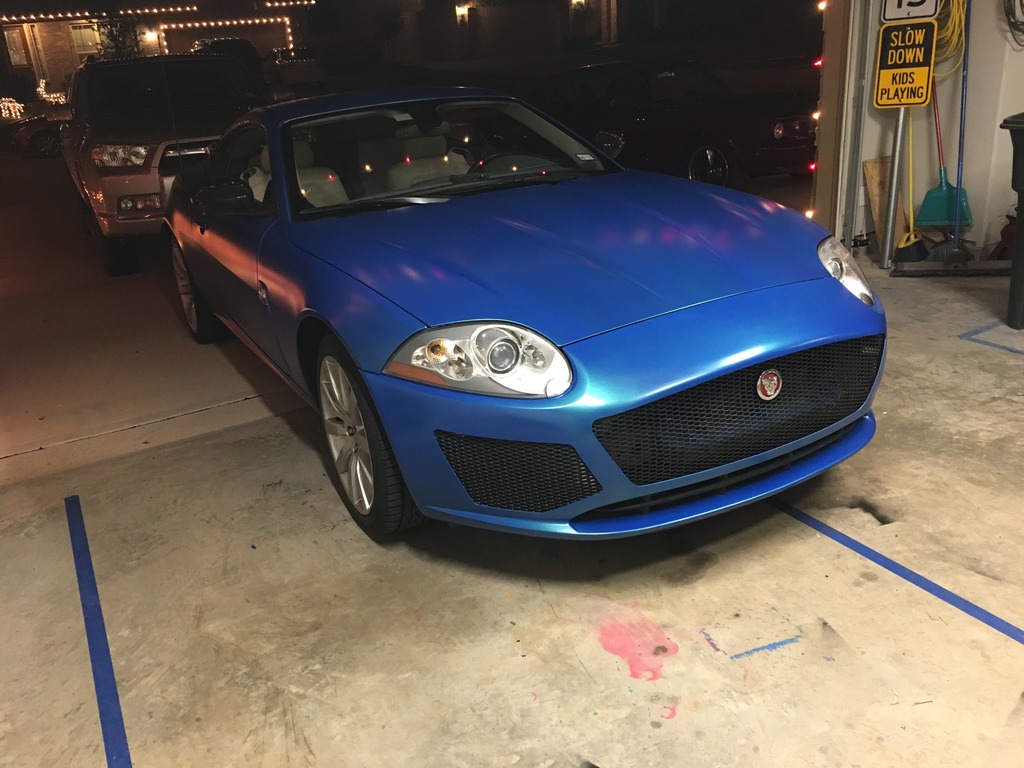
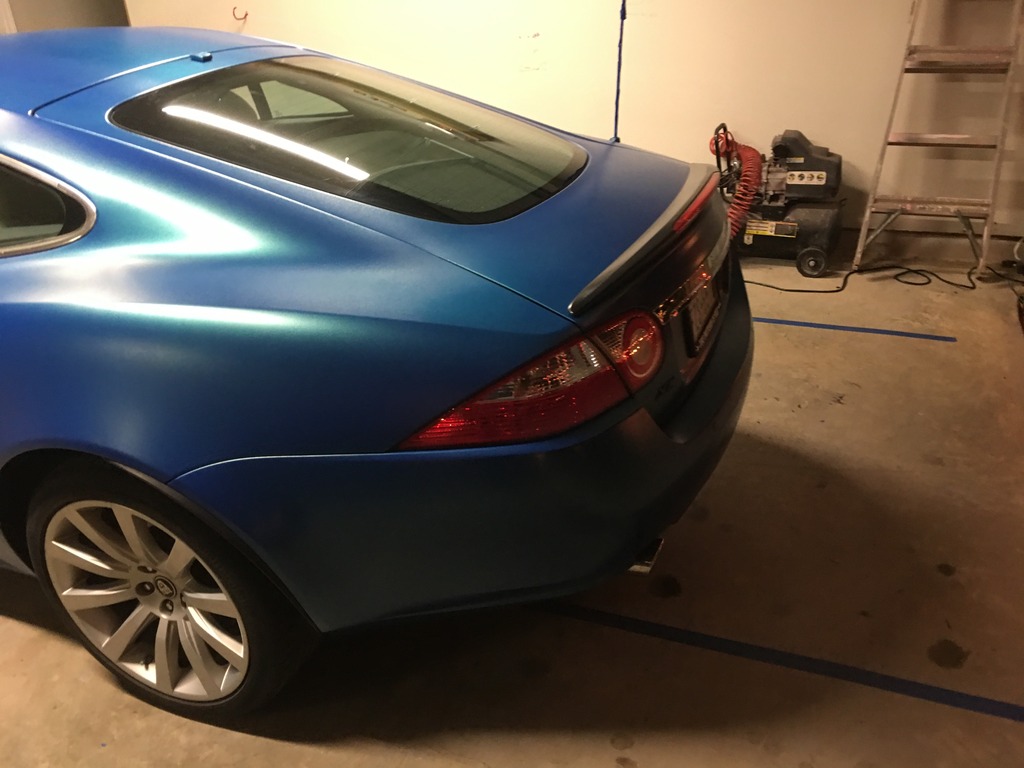
This is the color of the teal pearl coat that you can see when the light hits it right:

The curve of the nose creates and optical illusion at the corners on the top. It makes it look like the opening flattens out rather than keeping a consistent arc. In hindsight I probably should have down a downward arc to make the opening a little more round on the top to combat that, but it wasn't really visible just looking at it on the saw horses.
I think it might be good to start with what my XK is to me. I have company car that I use for daily driving, but I needed a second car for errands and a backup in case something happens to that one. I set out with a budget of 25K to find the coolest 2nd car I could. I wanted to get a lot of car for my money, and so I started out looking for something like a low end DB9 or GranTurismo, but those were all closer to $50K, which was way more than I wanted to pay for a second car. I needed something that was at least a 2+2 so that I could throw the kids in the back in a pinch, and I wanted something you didn't see all the time. I easily could have picked up a mustang, camera, challenger etc. because they are so common.
I narrowed myst list down to
2010 BMW M6 (66K, $22,500)
2006 Maserati GranSport (44K, $24,500)
2008 Jaguar XKR (72K, $25,000)
2007 Jaguar XK (40K, $22,500)
I opted against the M6 because it is still too common. I ruled out the Maserati because of the maintenance cost on the ZF transmission (couldn't find one in an automatic). That left picking between the higher mileage XKR and the lower mileage XK. What really pushed me towards the XK was the XKR was black on black, and I hate that combination in Houston due to the sweltering heat. I love the white interior on my XK. Also I don't really need the extra power of the XKR. It would be nice, but not nice enough for the price/mileage increase and the bad color combo. My 65 mustang has 475HP at the crank in a 2300-lb car if I need an adrenaline rush.
In addition to buying a car that was unique, I always mod my cars. I can't help it, that is what I love to do with my spare time. My '65 mustang is defiantly a 1 of 1 with quite a few custom parts on it that doesn't exist anywhere else. I know a lot of people think the Jaguar is perfect and not a single bolt or stitch should be changed, but that is just not in my DNA.
My first real undertaking was plasti dipping the car about six months in. A lot of people are really against dipping, but to me it is a great solution. The paint on my Jag is the one thing that I was really disappointed in when I got it (I bought it sight unseen online). There are a lot of scratches though the clear, and even the clear has swirls and scuffs all over the place. Additionally the first day I got it someone hit it with a shopping cart and popped off a huge chunk of paint on the drivers fender, here is a picture of it after I hammer and dollied it then sanded and primed:

Of course I could have the fender painted, but with the scuffs and swirles all over it would really need a full paint job. I could also have that done fairly cheap if I didn't want a color change, but since I plan on taking the car to the track occasionally, I don't see the point in an expense paint job I might chip up or even put into a wall. I could also have it wrapped (I lack the skill set required to wrap), but that is still close to $2500 bucks to have that done. I can do a dip for under $400 dollars and it gives me the flexibility to change colors every year.
I documented my first dip effort here:
https://www.jaguarforums.com/forum/x...terior-156550/
My next project was pulling the dash to repair the pulled, shrunken leather. Documented here:
https://www.jaguarforums.com/forum/x...g-dash-172398/
My most current endeavor is my most ambitious. I wanted to change the bumper cover out. While I love the look of the XK and I understand the nostalgia it's tribute to the old Jag's provides, it looks a little dated to me. I considered just getting a 2010 nose, because swapping the fogs for the vents does help a bunch, but that was still too stock for me. I also looked at some body kits from mina, paragon, and every other site I could find on google. While some looked really good, they were all $1600+ for just the nose, and may of them would have looked funny without the side skirts and rear bumper which ran the cost up over $3,000 on all of them. I'm sorry, but there are just other things I would rather spend my money on, and I enjoy doing up as much as I can. What I really was shooting for was something like the F-type with the large center opening and double vents on the side. Here is a sketch of my idea:

I'm pretty handy with fiberglass as I did all the body work on my Mustang, but I didn't think bonding fiberglass on the urethane bumper would hold up well, and I didn't want to go through the hassle of trying to make a full bumper which would require a buck and mold. May too much dust and mess to have going on in the garage for a period of a few weeks (burn up way to many Wife Approval Points for the project).
So I decided to see what I could come up with by just cutting on a stock bumper cover and came up with this:

That is a little more XF than F-type, but it works with only cutting and not having to bond anything on, and still update the look of the car (to me anyway)
I found a repaired bumper cover on craigslist off a 2008 XK on craigslist for a $100, so I brought it home and started to play with how the new cutouts would look:


It was looking good enough to me that I broke out the jigsaw and dremel and went to town:


Not sure if it really shows up in the picture, but I don't have the steadiest hand, those cuts are pretty wavy. That is an easy fix though, because urethane sands super easy.

I started with 80 grit. I used the round block to ensure that all the corners had the same radius, then use the long block to straighten all the lines. I followed the 80 grit up with 180 and 220.


I ordered some flexible black honeycomb pattern grill material (2 each at 48" x 16"). I used some JB Weld for thermo plastics to bond on some zip-tie holders to the inside and cut the grill material in to fit the new openings:


The small dabs of body filler you see are from where there were some pretty deep scratches on the used nose I bought. I sanded them down to minor lines, but they still needed a small amount of filler in them.
Now that I had the new nose ready to go on, I had to paint it. I had plenty of the copper paint left from the last time I dipped the car, and could have coated this and slapped it on. Tut the copper had a lot of runs in it, and I had been wanting to re-do it anyway
As much as I love the copper, it has actually become a pretty popular color here in Houston and I usually see 3 or 4 a day. This time I decided to go with my second favorite car color, electric blue.
Being the second time I dipped the car, I applied a lot of lessons learned from my first attempt. I back masked all the jambs this time because the thin layer of dip that gets inside there is really hard to get off. Also I made sure to mask up all the rubber around the glass really well. I didn't mask it off last time with the assumption I would just peel it off, but it doesn't peel off of rubber well at all. You have to take a solvent too it, and that takes some of the rubber seal with it.
I also had a bad problem with striping last time. To combat that I hung 12 48" work lights in the garage to get it super bright inside.
I applied 4 coats of Flex Blue, followed by 1 coat of a teal pearl, and then 3 coats of gloss:


Below are some pictures of the final dip and the nose installed. You can't see the teal color flip on camera, perhaps if it ever stops raining I'll get the car out in the sunlight and the teal will show up on the camera, but that could be a few weeks based on the current forecast.


This is the color of the teal pearl coat that you can see when the light hits it right:
The curve of the nose creates and optical illusion at the corners on the top. It makes it look like the opening flattens out rather than keeping a consistent arc. In hindsight I probably should have down a downward arc to make the opening a little more round on the top to combat that, but it wasn't really visible just looking at it on the saw horses.
Last edited by ajzride; Dec 11, 2016 at 11:34 PM.
Veteran Member


Joined: Apr 2011
Posts: 5,008
Likes: 2,623
From: Los Angeles
Well done, and I love the adventurousness that it takes to make the car the way you want it. I did it with the rear bumper on my car because I wanted something just a little different. Good for you!
Veteran Member
Joined: May 2013
Posts: 3,294
Likes: 1,250
As we all know these cars suffer a great depreciation factor. Now that you have destroyed a beautiful automobile, the depreciation factor was really gone up.
You completely lost the originality of the XK/XKR.
The Plasti dip looks terrible as well as the front grille/bumper and rear spoiler. It's your XK/XKR, and you have the choice to do whatever and are certainly innovative in your design work and color choice.
Realistically, who would ever want to buy this should you decide to sell it?
..
Veteran Member
Joined: May 2013
Posts: 1,368
Likes: 636
From: tampa, fl
Who cares, it was a $22,000 car. Less than a Honda CRV.
The bumper modification was to one he bought online, he could throw the original bumper back on to the car, strip the plastidip, and it is back to stock.
The bumper modification was to one he bought online, he could throw the original bumper back on to the car, strip the plastidip, and it is back to stock.
Trending Topics

Senior Member

Joined: Jan 2016
Posts: 806
Likes: 340
From: new jersey
While I typically prefer the stock look on a car, I think you did a pretty nice job overall. A+ for effort and being different.
As for Richards question: "Realistically, who would ever want to buy this should you decide to sell it?" People buy anything today even if it looks hideous...just look at the new Lexus- it's horrid yet they have record sales.
As for Richards question: "Realistically, who would ever want to buy this should you decide to sell it?" People buy anything today even if it looks hideous...just look at the new Lexus- it's horrid yet they have record sales.
Veteran Member
Joined: Jan 2015
Posts: 5,323
Likes: 2,597
From: Naperville, Illinois USA
Love your enthusiasm and willingness to give it a shot at creating something that makes you happy.
Personally, I'm not a fan of the 'big mouth' look, but that's just me (so I haven't considered upgrading my Lexus to a newer model).
It's your car and I applaud your efforts.
Wish I had the time to work on more mods myself.
Personally, I'm not a fan of the 'big mouth' look, but that's just me (so I haven't considered upgrading my Lexus to a newer model).
It's your car and I applaud your efforts.
Wish I had the time to work on more mods myself.

i see where you're going with this, good execution. my personal taste, i would have liked a little more depth in the cutouts. It literally looks like you just cut into the bumper right now, although adding depth would have required some molding
Thread Starter
|
Senior Member
Joined: Jun 2015
Posts: 107
Likes: 117
I agree, my initial plan was to create deep dual scoops on the sides, but that was just more project than I wanted to tackle right now. Perhaps if work ever slows down I'll revisit that idea.

Veteran Member
Joined: Oct 2015
Posts: 2,181
Likes: 656
From: Carolinas
I think there was a reason your previous copper color was becoming common - it really really looked sharp.
Your newest color though, fits your new bumper better than the copper would have.
Enjoy.
Your newest color though, fits your new bumper better than the copper would have.
Enjoy.
I love what you've done and your brave undertaking here. Creative is an understatement to say the least. I'm confident our crowd are drawn to Xk/Xkr styling is because it is different than most other vehicles on the road. So differnt strokes for different folks as the saying goes.
I wonder though, because the new openings lack inner rolled surfaces, how structurally stable those areas are? Have you experienced any unusual or noticable vibrations/noise at varying speeds. Or can it be assumed that the mesh material negates deflection?
I wonder though, because the new openings lack inner rolled surfaces, how structurally stable those areas are? Have you experienced any unusual or noticable vibrations/noise at varying speeds. Or can it be assumed that the mesh material negates deflection?
Thread Starter
|
Senior Member
Joined: Jun 2015
Posts: 107
Likes: 117
However I think the lack of a rolled edge that gives it some depth definitely changes the look. I think it would look much better with the grills set back about 1/2" roll.

Thread Starter
|
Senior Member
Joined: Jun 2015
Posts: 107
Likes: 117
The lower black bar actually just snaps over the bumper cover, which looks pillars running between the upper grill and the lower (you can see them in the primer pictures). I was afraid that if I did cut those pillars out, that bottom lip would get really floppy.
Veteran Member
Joined: Sep 2013
Posts: 5,209
Likes: 1,847
From: NY
I wonder how it would look with a chrome or brushed aluminum trim around the grill opening. Also maybe some fog/driving lights in the side grills. Just some thoughts.