When you click on links to various merchants on this site and make a purchase, this can result in this site earning a commission. Affiliate programs and affiliations include, but are not limited to, the eBay Partner Network.
Yeah, that's what I was referring to. Thought it uses ultrasonic frequencies, and drives some hearing aid folks nuts.
One more reason to avoid getting the hearing aids my wife claims I need. I view a reduction in sound from that "source" as an added bonus of the aging process.
That's funny. I just sat through a mandatory training on hearing protection. Only part that was relevant was the definition of 'Noise' which is an unwanted sound that serves no purpose.
Until I found out that the telephone mic was inside the A-pillar of my '07, I thought those were microphones up there. Later read about an ultrasonic alarm option (may not have been available in the US), which is what I think those ports are for.
I do believe, of course I may be wrong, those are the sensors for the Supplemental Restraint System (air bags).
Guess I'm wrong about the location of the ultrasonic sensors too.
From the user manual:
Intrusion sensing
"When the vehicle is armed and (if fitted)
double-locked, movement within the
vehicle interior will activate the alarm.
When the security system is disarmed the
intrusion sensors are also disarmed."
The workshop manual says that this is microwave based, and there are two modules, one for the front seat area and one for the rear. The rear one, if equipped, is located under the arm rest between the rear seats. The front one is in the floor console.
Well, there's nothing there now except black rubber booties on the round parts and a chunk of black foam on the square one. My next junk yard trip will be to source the console form an S type or XJ series to see if I can gain the sunglasses holder. it's currently 94` so the ride home on the bike should be desiccating rolling up the interstate.
From looking around Google it looks like all the other models use a similar overhead console with the missing sensor's. It's just annoying because it looks like the ports should be doing 'something'. in other news, my mandatory seven on is done but I'm greedy so heading in for another short day (8hrs) tomorrow.
Note that since it's been unreasonably hot I haven't been doing much to the car except driving it.
OK, so here we go. Once home from work and washed the funk off I made a trip to Jo-Ann fabric here in town looking for some flavor of stretch fabric to recover the liner in. Figured since I was in the female domain I'd just ask what they had. The answer surprisingly was that they stock three colors of foam backed headliner material. Mouse grey, non matching tan and black. I went black since sometimes I get pretty dirty at work and it all doesn't wash off the first time.
The liner less old foam. Removing the foam just sucked. It was gummy and came off in clumps. I used a cheap 1/2" bristle wire brush from Harbor Freight and stroked it like I was brushing the dog. Just like a heavy shedding day, the stuff got everywhere and really doesn't taste good. Anyway, took almost two hours to clean the board.
Novice tip here. Lay the board on the material and mark the foam side within a couple inches. The spray adhesive sticks to everything so the mark is a guide for where to limit the spray to. Once you get glue on your fingers things go poorly.
Like this... Also only do as much as you can handle at one time. Spray an even heavy coat and allow it to set up for a couple minutes.
Since the front was the most technical I decided to start there. Again, only spray as much as needed to keep the material from gluing before you want it to
The material also 'shrinks' easier than it 'stretches' so I chose to start in the middle and then work out and down to the sun visor recesses. To help line it up I had the fabric laying clam shell like with the front of the fabric farthest away from the front of the liner. Once the glue tacked over I flipped the fabric over the liner and with some help held the edges away while pushing the fabric onto the panel. Four fingers working smoothly to work the dimples and recesses. Spend extra time where the edges and valleys are.
Once satisfied I flipped the loose material up over the front
And sprayed the rest of the board and fabric. I spent the rest of the tack time smoothing the front and then worked front to back, middle to outside...
To finish fitting the fabric to the board.
Once satisfied that the fabric was bonded to the panel I flipped it over. The front edge had been overlapped so I cut the fabric 1" away from the board and carefully sprayed both the fabric and the board with once heavy pass. Once the glue tacked I rolled the edge and then pressed the flap, again working out any wrinkles or other issues. Final step was to cut out the overhead console opening and trim the excess material away. I used a sharp hobby knife for this laid down so the edge was almost flat.
Once it cures overnight I'll trim out the sun visor openings and fit it back in the car. The side panel covers are dingy so I may try hitting them with some Tide and a bristle brush to clean them up before reassembly. Material is normally $14.98 per yard but was on sale for $11.24 per yard. Two yards of material did one liner so $24 for the material and I forget what one can of 3M #27 costs. Definitely DIY territory.
And yes, a black console and sun visors may be on the short list, especially if I can source them from a more common model.
Last edited by Ranchero50; Jul 20, 2017 at 09:27 PM.
Just for future reference, the foam backed fabric that JoAnn's carries is velour, very similar to OEM headliner and 'A' pillar fabric. However, if you want to upgrade a bit (for actually less money), the faux suede (in our cars it's called Alcantara, which is simply a brand) is available in about 100 colors, at a cost in most downtown textile districts at under $6-7 per running yard (36"X60"). It is thicker and denser than the velour, and actually doesn't need the foam. I have used tens of thousands of yards of this faux suede over many years, and just redid my Pantera's headliner as well as line the front trunk and rear tub with it. Anyone who can't find it but wants to use it, just contact me, and I'll get it for you.
And yes, a black console and sun visors may be on the short list, especially if I can source them from a more common model.
There are a few black consoles on ebay for less than $100 or you could buy SEM or other brand plastic dye, disassemble the console and re-colour each piece. DOn't forget you will also have all of the canvas coloured plastic bits around the headliner and visors to replace, but the cost for those is minimal, $2, $4, $7 & $8 each:
Also, the headliner material you picked out has a thicker foam backing than the OEM, about twice as much and if you choose to do the pillars, fitment might be a bit of an issue. I'd go with Tberg's suggestion of using just fabric.
By the way the brand Jaguar uses is Alston, made in the UK. Alcantara is made in Spain.
tberg, I'd never messed with this foam backed stuff before and had the spray glue go through the fabric other times. Good info about the Alcantara but I'm pretty sure my '07 has the same fabric for the pillar covers. I did noticed that the foam backed stuff isn't as 'tight' as the OEM stuff was and some of the details are washed out around the sun visor recesses.
The ease of doing this has me seriously thinking about picking up some gauge pods for the A pillar and covering everything above the doors with black fabric. We'll see how cleaning the panels goes.
Damn, getting my butt kicked because I haven't figured out how to remove the package shelf. Wanting to pull the B pillars to scrub them and the parcel shelf R+R is referenced in the X150 manual but that section appears to be missing.
It is easy to get glue on one's fingers, and this can really slow down the job. Try using nitrile (sic) surgical-type gloves. Then whenever glue gets on the gloves discard the contaminated gloves for new gloves.
OK, figured out the parcel shelf, the whole dang rear interior is coming out to get it out. Looks like the headliner is the first part of the interior installed. Oh well because it looks like more than one soda exploded back there and it needs cleaned up.
OK, figured out the parcel shelf, the whole dang rear interior is coming out to get it out. Looks like the headliner is the first part of the interior installed. Oh well because it looks like more than one soda exploded back there and it needs cleaned up.
This is by far and away my favorite site thread, but at this point I'm curious where you're at with your original conundrum. Is it:



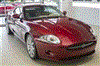





 Finally some progress...