When you click on links to various merchants on this site and make a purchase, this can result in this site earning a commission. Affiliate programs and affiliations include, but are not limited to, the eBay Partner Network.
It's s lot easier if you have the right tool. Start in a corner and slowly pry the cover up a little at a time while going all around until you can pull it out from the clips. Be careful to not break any of the plastic tabs.
Can someone please give me a hint on how to remove the trim panel covering the cabin temperature sensor. I have tried today a bit just my hands, but had no chance to get the panel off.
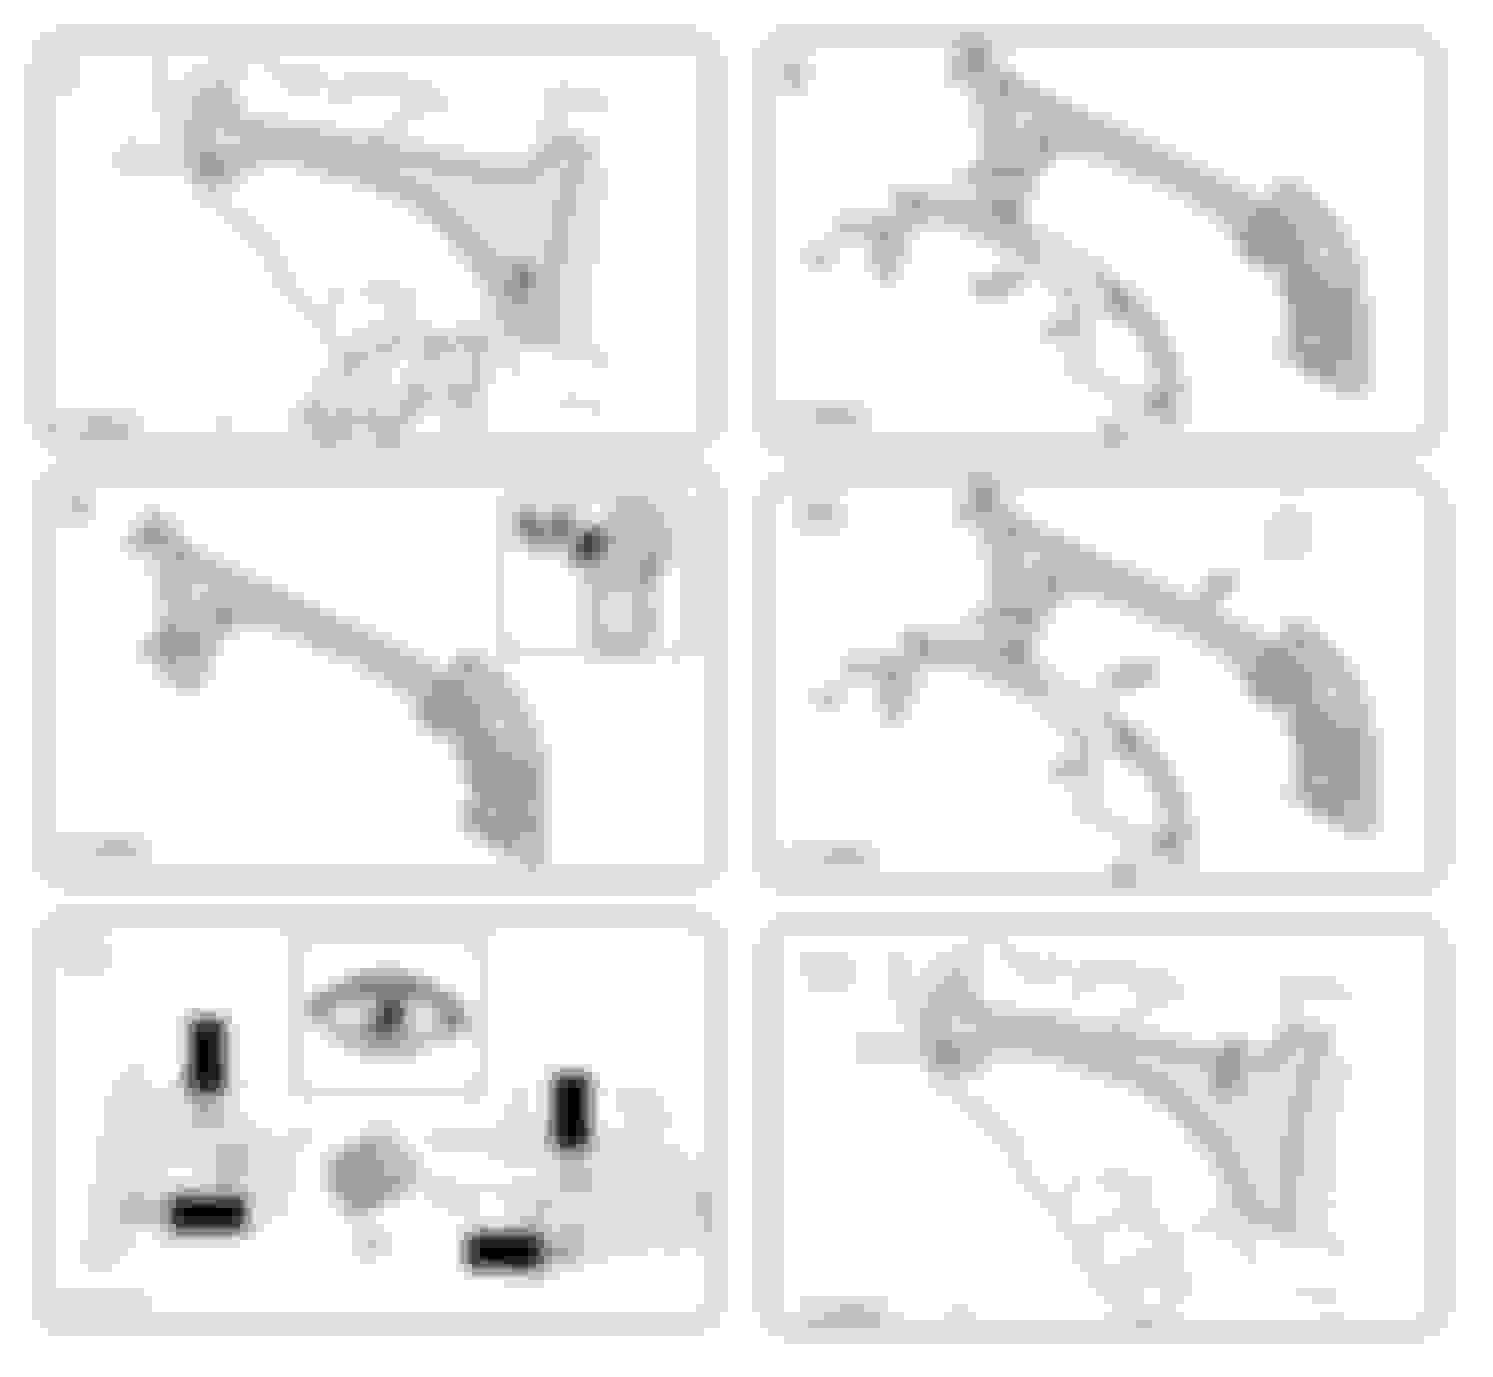
Note the location of the four spring clips in drawing 11. Starting at the bottom using a trim tool, ease the trim progressively out from each one until it releases. Don't attempt to free them completely one at a time or you risk breaking the plastic "tongues" on the back of the panel.
Ignore drawing 10 as it only applies to trim change, not straightforward removal and refit.
Graham
Note that this diagram is for RHD, with the air quality sensor on the left towards the center of the car. LHD models are the opposite, with that sensor on the right.
Meanwhile I purchased a replacement interior air temperature sensor.
Has anyone here changed this sensor themselves? What needs to be removed, to access the sensors and all of its connectors to swap it for a replacement?
Hi all! So I will attempt these days to replace my cabin ambient temperature sensor. I would like to inquire here again, which panels need to be removed (and how) if you want not only to clean but also to fully replace the cabin ambient temperature sensor. Particularly, does one need to remove also additional panels on the underside of the steering wheel to access screws and/or the cable connector of the sensor?
btw - here pictures of the replacement sensor waiting to be installed:
Hi all! So I will attempt these days to replace my cabin ambient temperature sensor. I would like to inquire here again, which panels need to be removed (and how) if you want not only to clean but also to fully replace the cabin ambient temperature sensor. Particularly, does one need to remove also additional panels on the underside of the steering wheel to access screws and/or the cable connector of the sensor?
many thanks!!!
ter
Why are you replacing the sensor? How did you determine the old one was faulty?
Had about the same problem, hot air the first 10 minutes. As per Cee Jay's advice, look at interior temp sensor, I first tried to clean the sensor, no change. Bought a new one, installed by removing the two panels behind (in fact in front of) the steering wheel, the shiny one above and the black knee bolster below. Easy to replace connector.
And BTW, problem solved.