When you click on links to various merchants on this site and make a purchase, this can result in this site earning a commission. Affiliate programs and affiliations include, but are not limited to, the eBay Partner Network.
The access panel door in my 2011 does not latch very well. I use that opening to attach my CTEK battery charger to the terminals in there. So I glued a piece of hard plastic to the back of the opening where the door latches. I'll know tomorrow if it works.
Took off the clamps holding on the plastic reinforcement piece and it looks good. Nice and straight. The removable door fits great. Nice and tight. It was worth doing.
Not much to see but OK. I cut a very thin piece of plastic from a clean flat plastic bottle. One inch by about four inches and roughed up one side so the glue would stick good. Applied glue to the plastic and the inside of the opening and clamped it with three clothe pins and let it sit over night. The door now clips on snugly. This where I connect the battery charger. The plastic is behind the inside right edge of the opening.
I intend to get it "hard wired" so I don't need the clips. I don't want to hard wire it at the back where the door is but want to connect directly to the battery. I have an extension cord ordered that will allow me do do that. Things are very tight in the back inside that door and I don't want to disconnect the battery to remove the positive terminal where I have the clips attached. If I didn't disconnect the battery it would be easy to short out the battery where I have the positive clip attached when I remove the nut holding the cable down. I'll post pics when I get the extension cord.
I used the standard CTEK lead and simply used strong gardening scissors and was able to cut through the CTEK positive eyelet and slip it through the bolt of the positive terminal with the nut loosened there was just enough room for the CTEK connector it to peak out from under the battery cover trim...so as to make plugging in easy
Got the extension cable for the CTEK. The battery attachment cable with the fuse in it is too short so I needed to get the extension cable. It is a bit long but I decided not to shorten it. I snaked it under the trim carpet along the driver side toward the opening for the tail light access. Used three zip ties to fasten some of the extra length to the bar in front of the battery. You can see in the pic where the wire is going under the carpet to the back on the left side of the picture. I now can just quick connect the charger to the battery.
95 Cat you should mount the neg. terminal to one of the ground studs on the lower right side of the battery. Either one of the 2 studs will do. The way you have it mounted will not allow the battery monitoring system to work correctly. Just an FYI
That is very interesting. I did not know that. I am going out to the car right now. Where do you find this information? Can't hurt so I'll do that. Thanks
That is very interesting. I did not know that. I am going out to the car right now. Where do you find this information? Can't hurt so I'll do that. Thanks
If you look at the battery neg. cable you will see it go into a small monitor box. In the 5.0l cars this feeds back charging status to the ECU and turns the alternator on/off as the system requires. Normal driving voltage will run from 13.5 to 14.5 depending on need. The system is explained in the maint. manual. The 4.2l cars don't have this.
jagtoes, Done. Took me a few minutes. It's a bit scary working on this car. The last thing I want to do is damage something. Never thought something as simple as hooking up a battery charger could do damage. Not like the old days. Thanks again



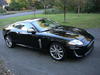
 Rear Tail Light Access Panel