
Trans Pan/Filter and sleeve replacement.. photos


Thread Starter
|
Member
Joined: Nov 2012
Posts: 66
Likes: 69
Many thanks to CCC for his excellent post on this topic. I am fortunate to have a lift so I thought a few more photos and details may help others hoping to do this. My first sign of trouble was a puddle on my garage floor. It was NOT my electronics sleeve but my pan that was leaking. On the advice of others it is wise to replace the sleeve anyway. My car is an 2007 XK with 46,000 miles. I studied all the threads and decided to go with The California Transmission Supply Company..The CTSC - ZF Parts. I purchased the kit which includes pan/filter/gasket/drain plug assembly and 6 liters of lifeguard trans fluid. I also ordered 21 new T40 bolts at 1.97 each, which I ended up not using(pm me for a good deal if you need some) and a new electronic sleeve seal. Total cost shipped was $322.00. The dealership quoted me $1200.00 for the job! The job took me 2 1/2 hours with taking pictures.
The evidence:
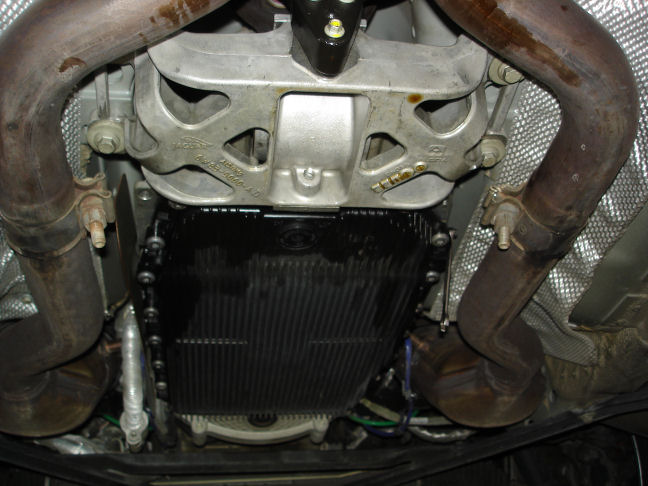
Start with a level car and get it as high as you safely can

Remove the passenger side heat shield held by two 8mm bolts

I used CCC's tip with an 8mm allen bit, mine just pulled out of my 3/8"drive socket. I used a cheater bar over the 8mm box end wrench and it broke free pretty easily.

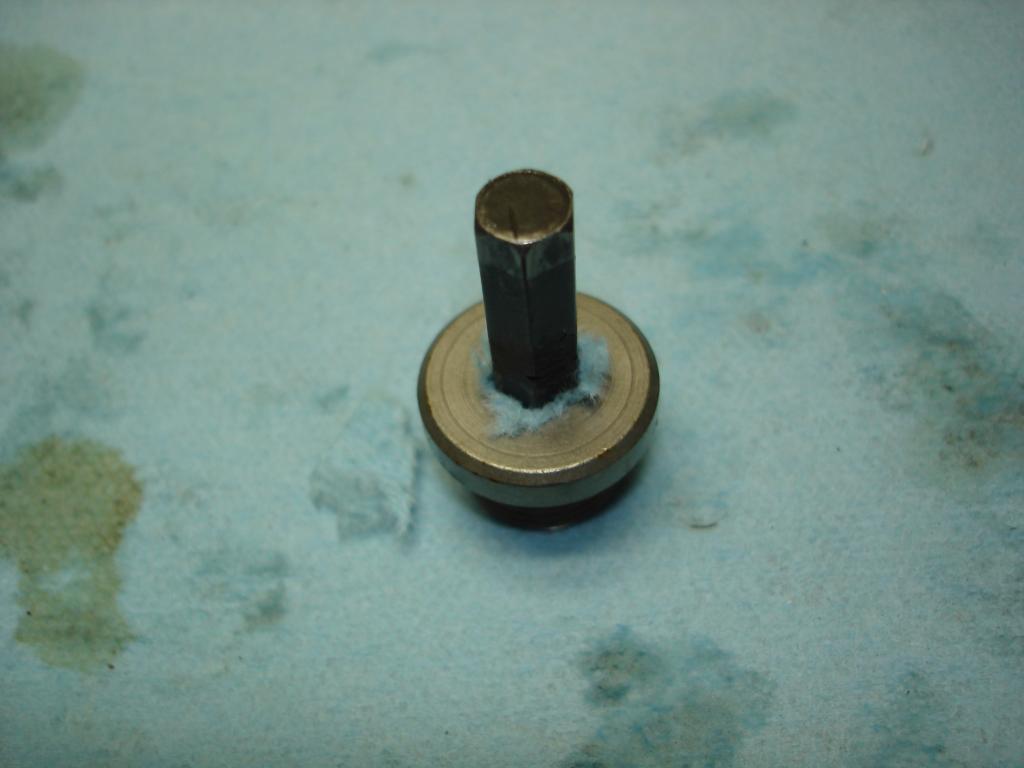
I learned you should remove the drain plug on the bottom of the pan (10mm allen) BEFORE you remove the fill plug or this will happen!

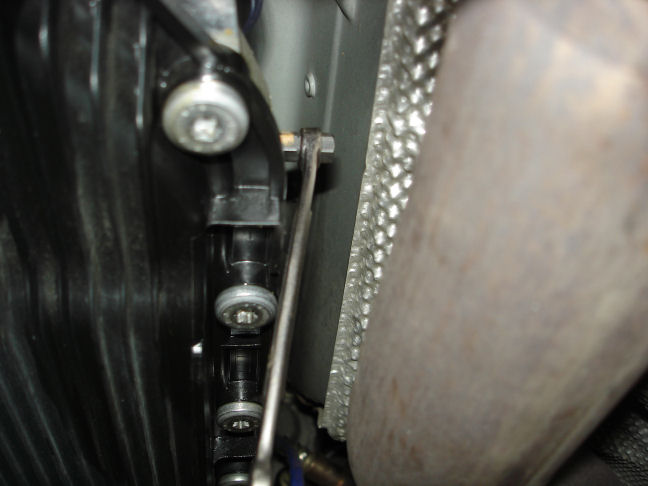
The transmission is obviously filled above the level of the "fill" plug so drain first. My pan bolts were T40 torx heads and removed easily

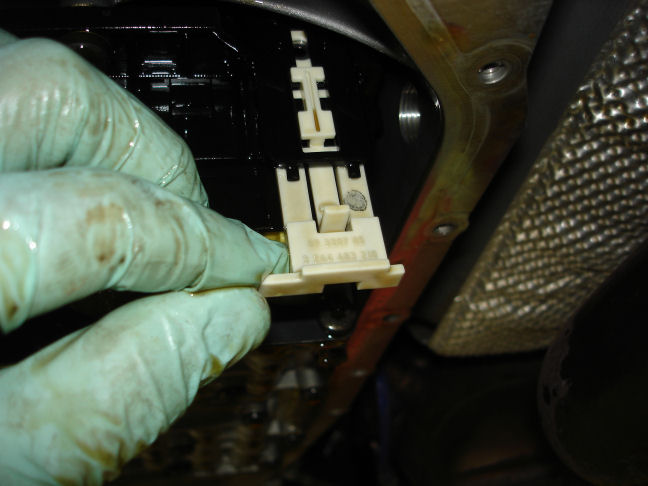
This is the white clip which needs to be released to allow removal of the electronics sleeve. Just press the tab in and pull down
Now the transmission support bracket needs to be removed. You must support the transmission before you do this. I supported it at the bellhousing

Then there are 6- 13mm bolts- 2 on top
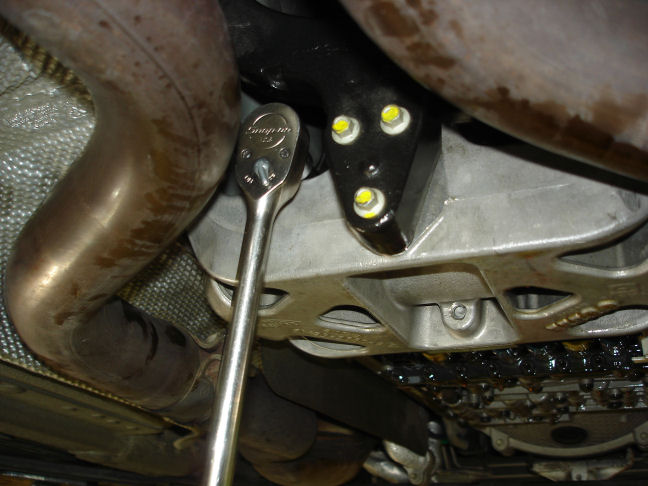
and 4 on the bottom. You may need an open end wrench for the 2 front ones as the exhaust brackets get in the way

With the bracket removed you can seen the electronics. First remove the bracket holding the connection with an 8mm open end

Then remove the electric connector by turning it counterclockwise and it pulls right out
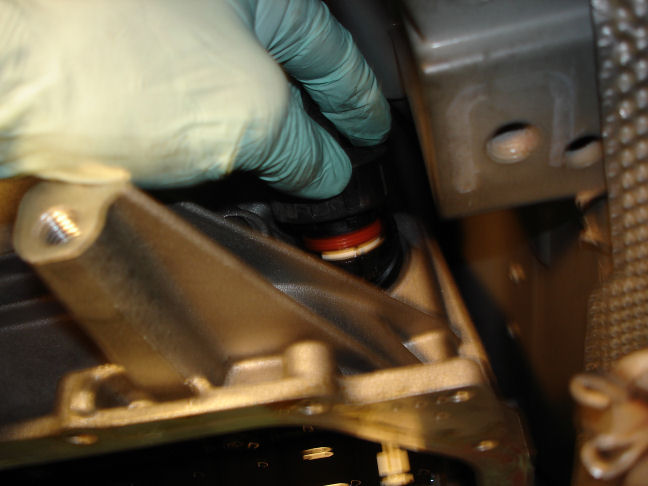
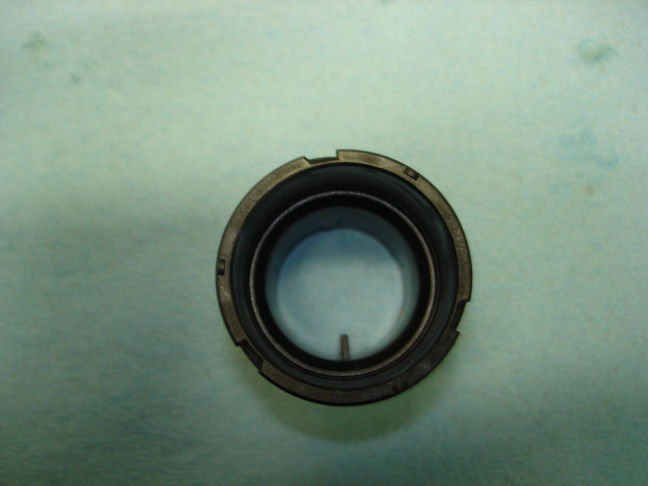
Now the sleeve is visible and pulls out

Note that the new sleeve has an inner "tab" that needs to be oriented to the bottom when you insert it. I lubed the o rings with silicone grease
It takes a little effort to push the new one in as it is tighter than the old one. I fit a 1" socket with a short extension and carefully tapped it in to insure it was seated

Don't forget to slide the locking tab back up

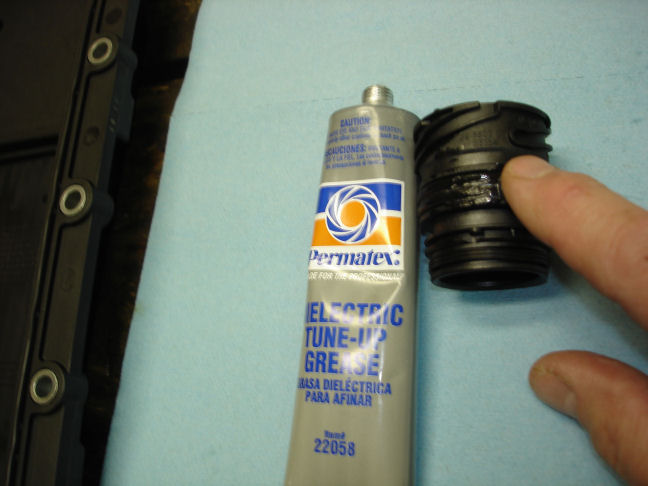
The electric connector has a groove which orients with the tab I mentioned earlier

Orient this groove to the bottom and push the connector in. The little handle on the right pushed down and clicks when in place

Clean the surface and install the new pan/filter assembly. Put a light coating of silicone grease on the filter pick up tube before inserting. Torque the bolts to 53 INCH pounds. Do not overtighten!!
Now reinstall the transmission support bracket. The filling procedure is as CCC described. Make sure you have a catch pan under the fill area.

My initial fill took 3 liters. Then I temporarily replaced the fill plug I found it helpful to wedge my 8mm allen into the plug using a paper shop towel. This makes it all stay together when you are reaching up by the hot exhaust pipe. Wear a glove!


After the first 3 liters and replacing the plug I started the Jag and removed the plug. She took another 2 1/2 liters before leaking out. I replaced the plug again and ran the selector through the gears as recommended. Removed the plug again and monitored the fluid temp with an infared gauge. When it reached 105 degrees F I added a little and closed her up. DONE!
The evidence:

Start with a level car and get it as high as you safely can

Remove the passenger side heat shield held by two 8mm bolts

I used CCC's tip with an 8mm allen bit, mine just pulled out of my 3/8"drive socket. I used a cheater bar over the 8mm box end wrench and it broke free pretty easily.


I learned you should remove the drain plug on the bottom of the pan (10mm allen) BEFORE you remove the fill plug or this will happen!

The transmission is obviously filled above the level of the "fill" plug so drain first. My pan bolts were T40 torx heads and removed easily

This is the white clip which needs to be released to allow removal of the electronics sleeve. Just press the tab in and pull down

Now the transmission support bracket needs to be removed. You must support the transmission before you do this. I supported it at the bellhousing

Then there are 6- 13mm bolts- 2 on top

and 4 on the bottom. You may need an open end wrench for the 2 front ones as the exhaust brackets get in the way

With the bracket removed you can seen the electronics. First remove the bracket holding the connection with an 8mm open end

Then remove the electric connector by turning it counterclockwise and it pulls right out

Now the sleeve is visible and pulls out

Note that the new sleeve has an inner "tab" that needs to be oriented to the bottom when you insert it. I lubed the o rings with silicone grease


It takes a little effort to push the new one in as it is tighter than the old one. I fit a 1" socket with a short extension and carefully tapped it in to insure it was seated

Don't forget to slide the locking tab back up

The electric connector has a groove which orients with the tab I mentioned earlier

Orient this groove to the bottom and push the connector in. The little handle on the right pushed down and clicks when in place

Clean the surface and install the new pan/filter assembly. Put a light coating of silicone grease on the filter pick up tube before inserting. Torque the bolts to 53 INCH pounds. Do not overtighten!!
Now reinstall the transmission support bracket. The filling procedure is as CCC described. Make sure you have a catch pan under the fill area.

My initial fill took 3 liters. Then I temporarily replaced the fill plug I found it helpful to wedge my 8mm allen into the plug using a paper shop towel. This makes it all stay together when you are reaching up by the hot exhaust pipe. Wear a glove!


After the first 3 liters and replacing the plug I started the Jag and removed the plug. She took another 2 1/2 liters before leaking out. I replaced the plug again and ran the selector through the gears as recommended. Removed the plug again and monitored the fluid temp with an infared gauge. When it reached 105 degrees F I added a little and closed her up. DONE!
Last edited by DenverDDS; Jan 17, 2014 at 09:12 PM.

Thread Starter
|
Member
Joined: Nov 2012
Posts: 66
Likes: 69
Thats what I meant to show by the picture of my arm full of oil because I didn't!
Thread Starter
|
Member
Joined: Nov 2012
Posts: 66
Likes: 69
A quick update on my repair. I have had NO leaks since I did this. We even had a long cold spell when I didn't drive the Jag, which for some reason was a trigger for the leak, and NO LEAK! Be sure to order from California Transmission Supply....great prices and quick shipping!

Veteran Member
Joined: Apr 2015
Posts: 1,386
Likes: 370
From: Virginia
The exact line from the DIY above is "Don't forget to slide the locking tab back up". I am fairly confident the sleeve is seated properly, but the plastic tab will not budge. The entire job has been at a standstill for an hour now because the tab won't go back in.
Please tell me something simple to fix this so I will feel stupid, and yet get the tab in and put my transmission back together.
Thanks
----edit---
Removed and re-inserted using small 2x4 and small hammer. Seated a little lower and plastic locking tab went up.
Please tell me something simple to fix this so I will feel stupid, and yet get the tab in and put my transmission back together.
Thanks
----edit---
Removed and re-inserted using small 2x4 and small hammer. Seated a little lower and plastic locking tab went up.
Last edited by harvest14; May 26, 2015 at 08:49 PM.
Trending Topics

Veteran Member


Joined: May 2009
Posts: 27,494
Likes: 4,895
From: Yorkshire, England
That locking tab can be very awkward. Same trans on S-Type, same pesky tab! And sadly it CAN be "locked" when sleeve not properly seated, subsequently causing oil leak or non-working electrics.


Thread
Thread Starter
Forum
Replies
Last Post
Currently Active Users Viewing This Thread: 1 (0 members and 1 guests)