
4.2 thermostat housing "how to"


Thread Starter
|
Veteran Member


Joined: Apr 2012
Posts: 1,854
Likes: 987
From: UK
I documented changing mine today as I couldn't find a "how to" anywhere else.
Thanks to kstevusa who gave me a few tips, luckily it seems to be a much easier job on the 4.2 compared to the 4.0.
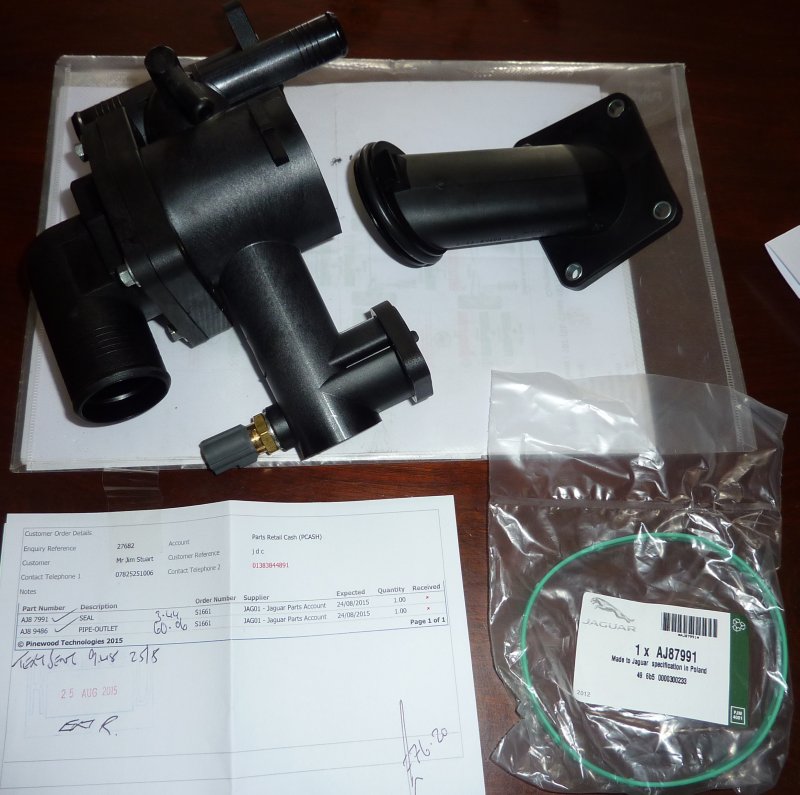
Here are the new parts, its worth while to buy a new gasket for the front cover of the intake manifold just in case.
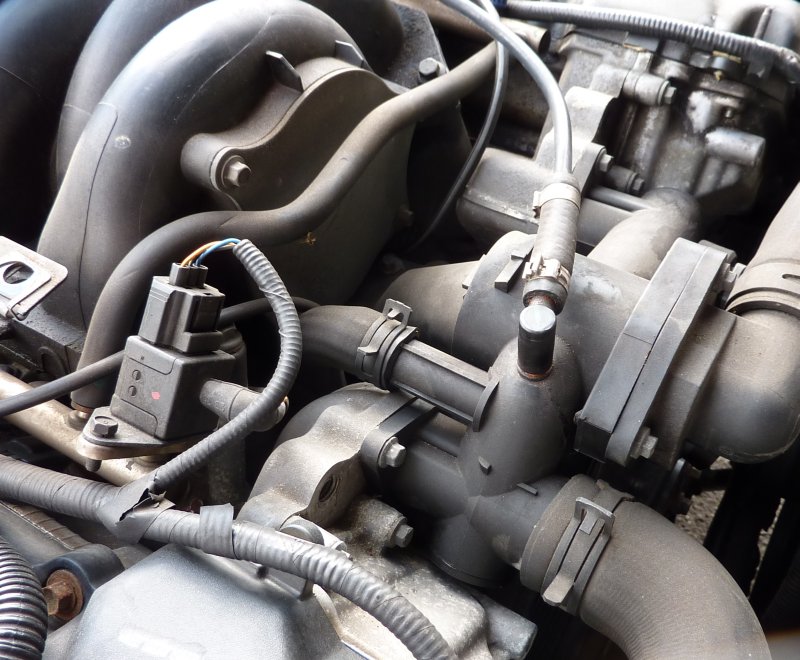
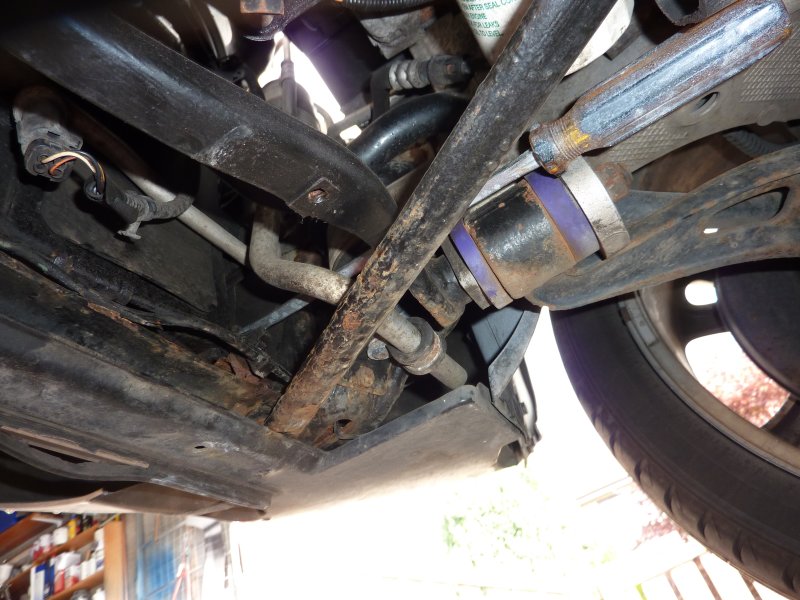
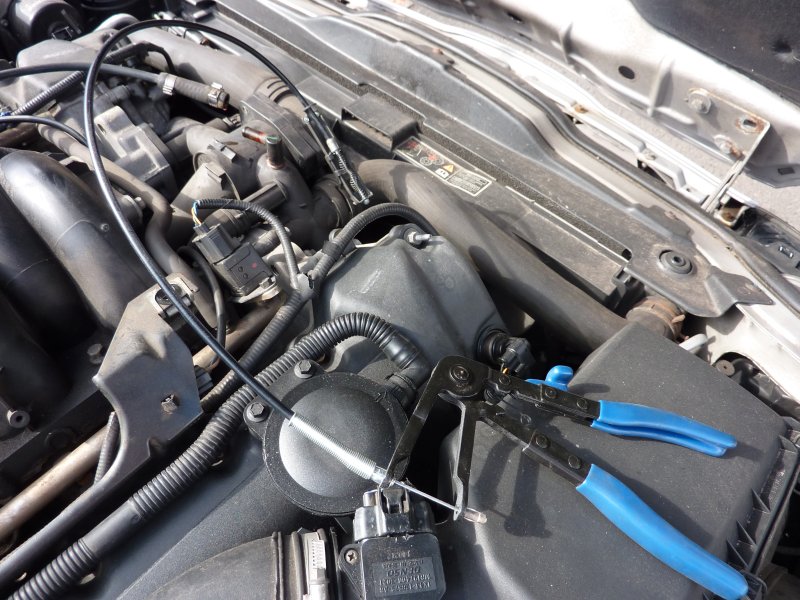
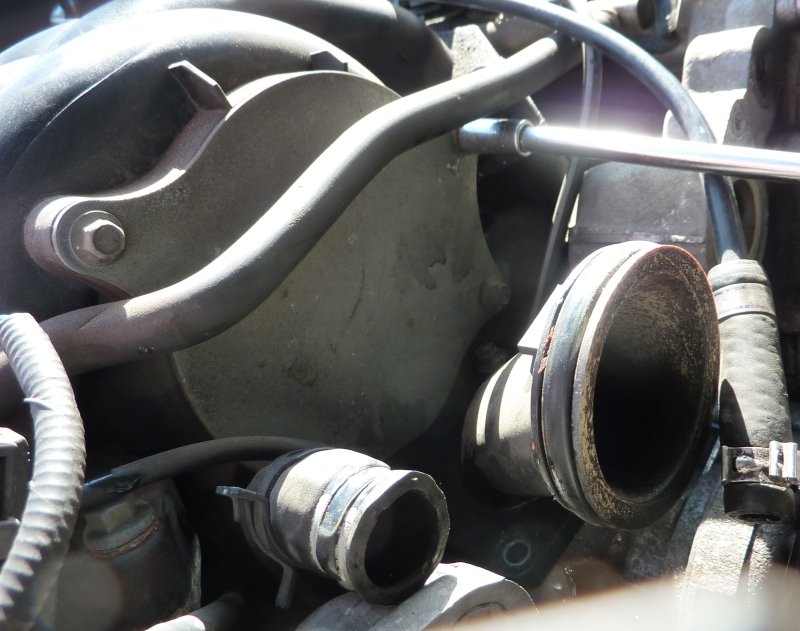
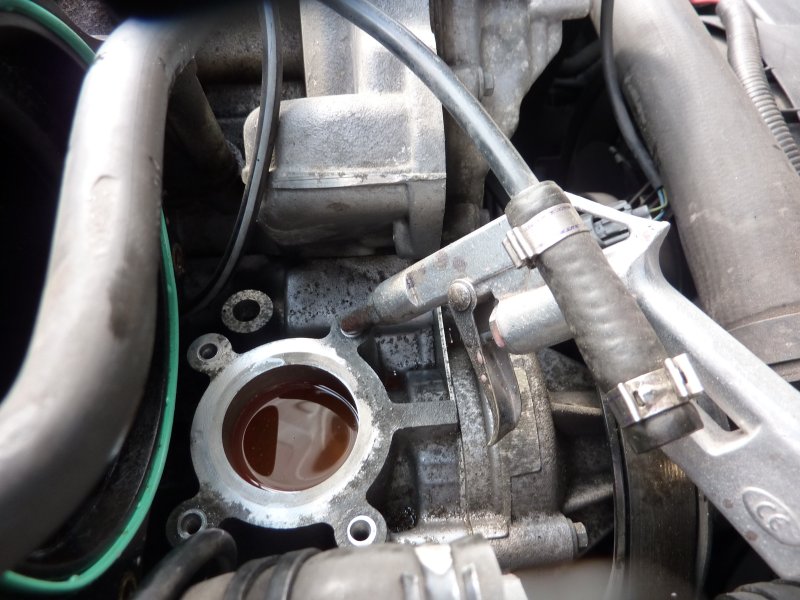
So this is the area where you will be working, not too cramped.
First I removed the alternator cooling duct to get access to the radiator drain plug, .... and yes I know it is on upside down, our summers are so cold we need to keep it warm.
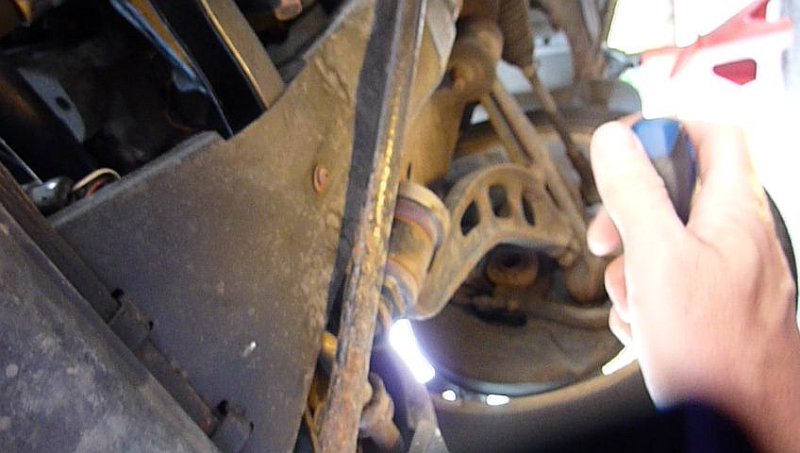
I initially thought it would be impossible to get to the drain plug, it is not easy to see or access on the 4.2 engines, especially the convertibles as there is a lot in the way. It is in the bottom right of the picture below.
However I was able to get this large flat headed screw driver on to it and the plug loosened easily, it also had a tether on it so it would not fall out.
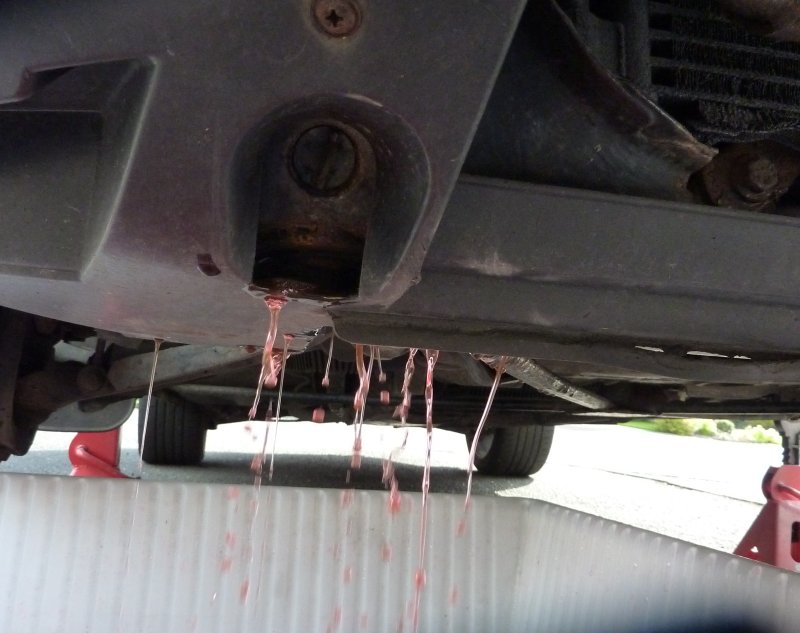
Before removing it, I took off the wheel and put a container under the car to catch the coolant.
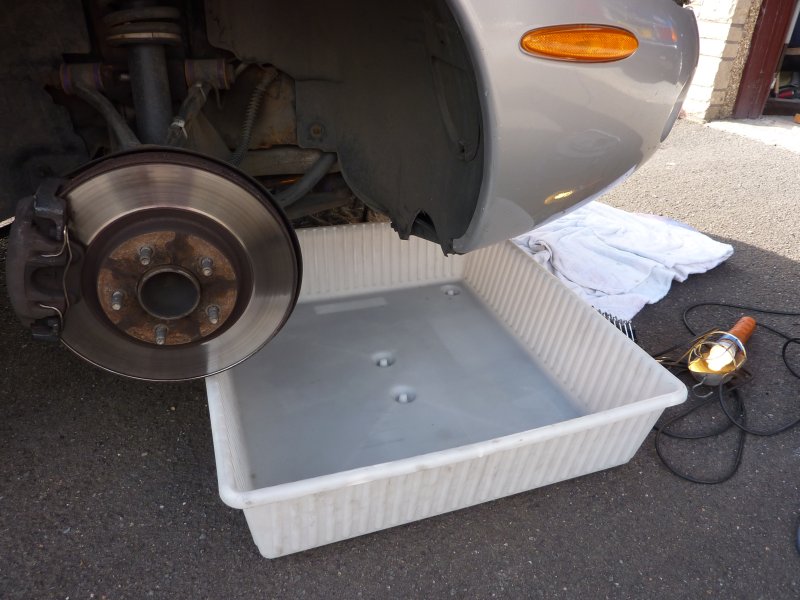
Take off the coolant filler stopper to help the flow, the coolant does not drain out cleanly, it splashes everywhere.
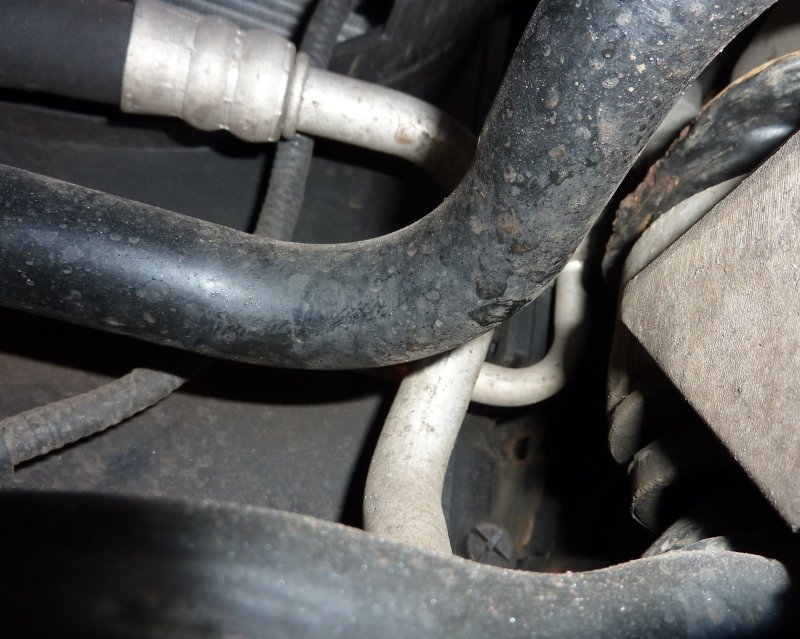
I prised off this clip with pliers and a pick, I did not reuse it as I've not had good luck with reuse with these in the past, I replaced it with a jubilee clip.
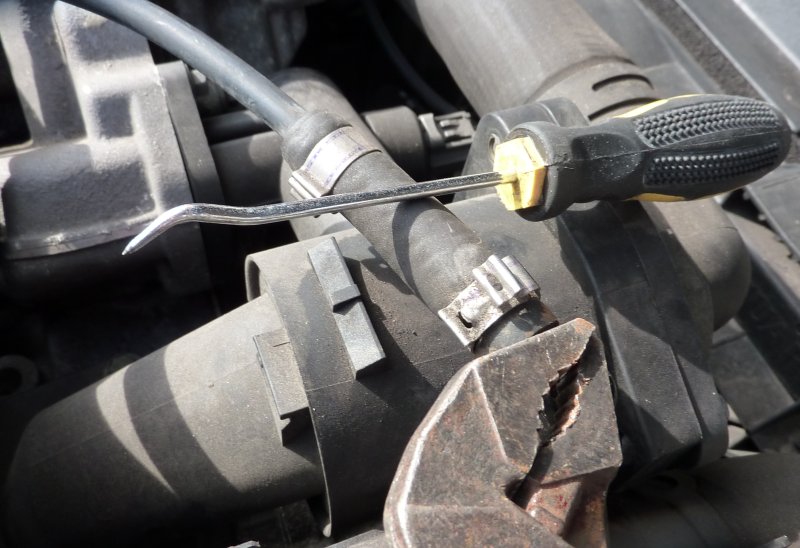
A hose clip removal tool like this is almost essential for this car, it makes the job easy.
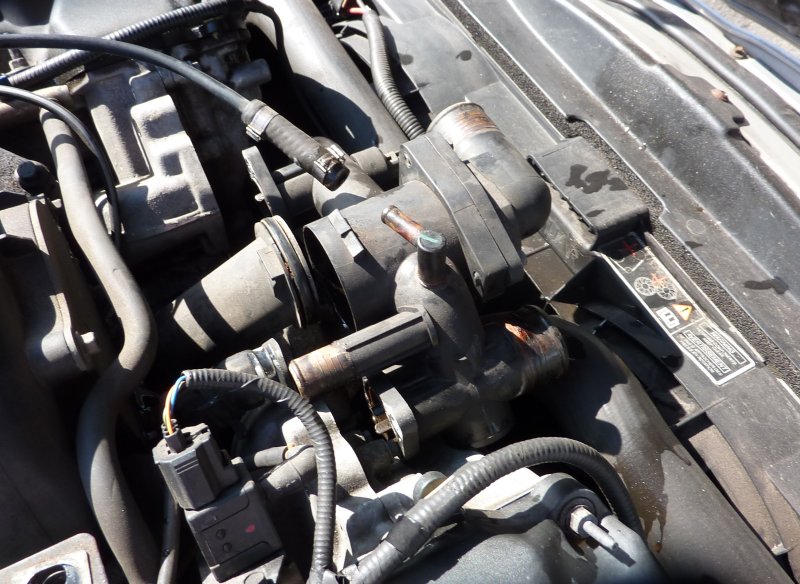
Next I removed the temperature sensor connector.

There are four easily accessible bolts holding the main part of the housing in place. The bolts released easily.
The main part of the housing can then be lifted away. A fair bit of coolant leaked out at this point over the serpentine belt, now I have heard that the coolant can make the serpentine belt squeal so I gave the area a good flush with clean water.
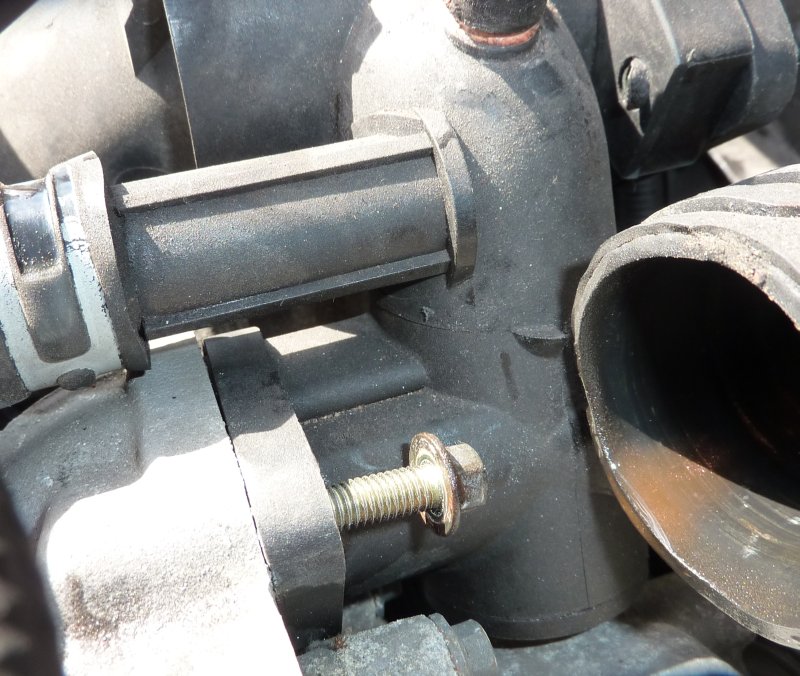
The lower part of the housing is held on with these four bolts, the two at the front are easily accessible the back two are a little bit tricky.
I used this crows foot ratchet spanner to break the back two free but there was insufficient space to fully wind them out.
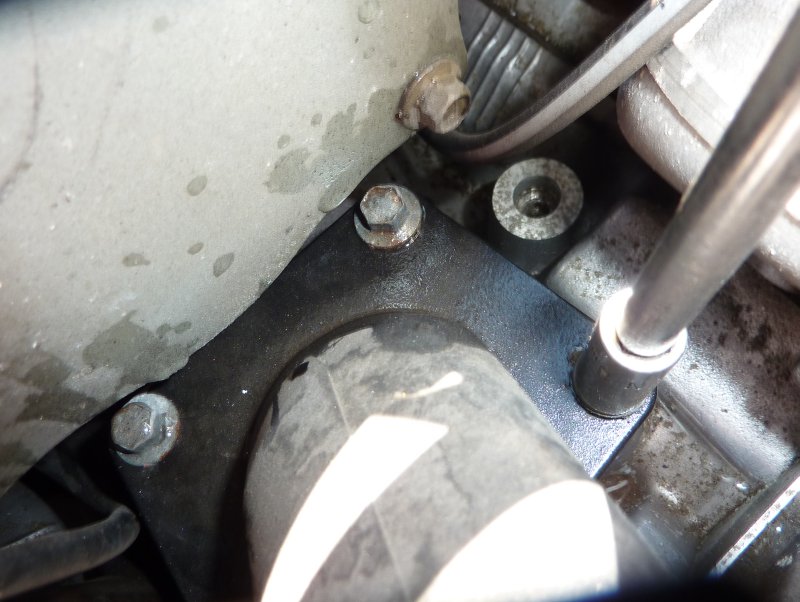
Removing this front plate on the intake manifold gives just enough space to get the bolts out by hand.
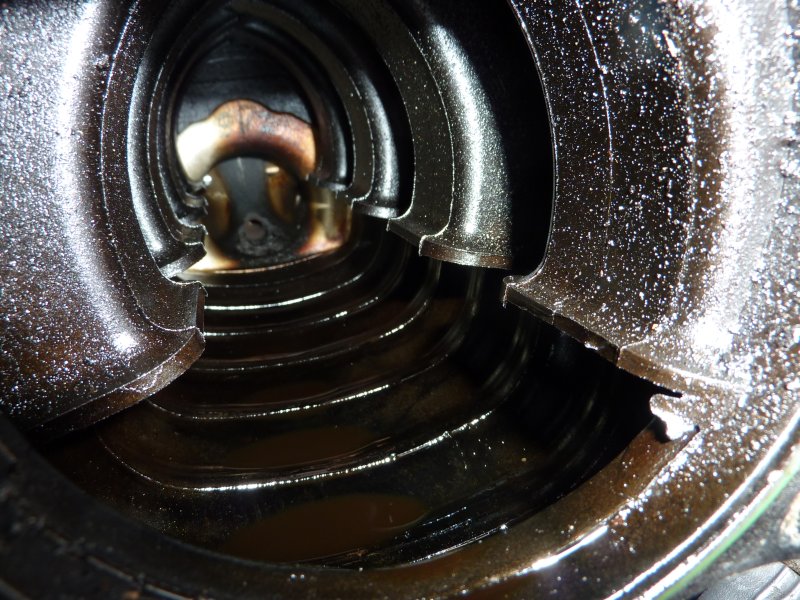
Don't know if I splashed this water in here?
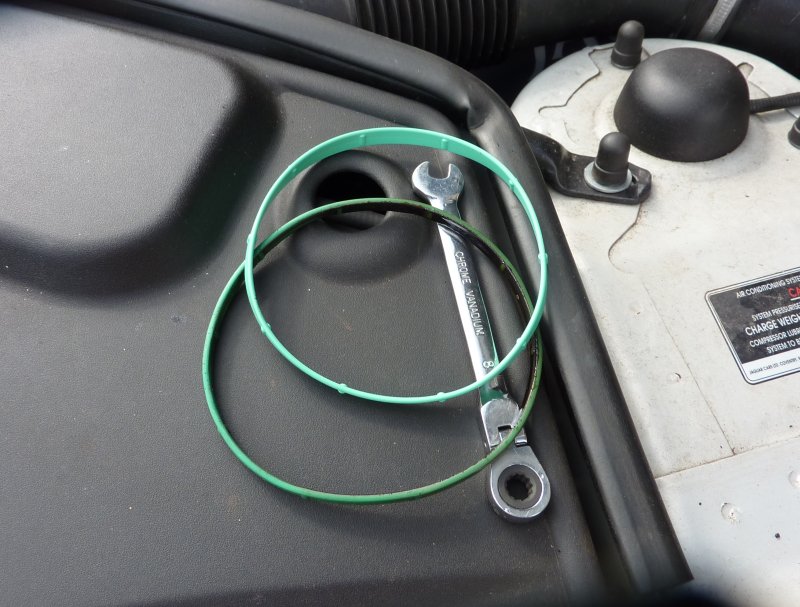
New and old gaskets for the manifold cover.
I gave this surface a good glean up as it was a bit corroded and also used compressed air to blow out the 4 bolt holes as they are closed at the bottom, otherwise they may hydraulic when putting the bolts back in.
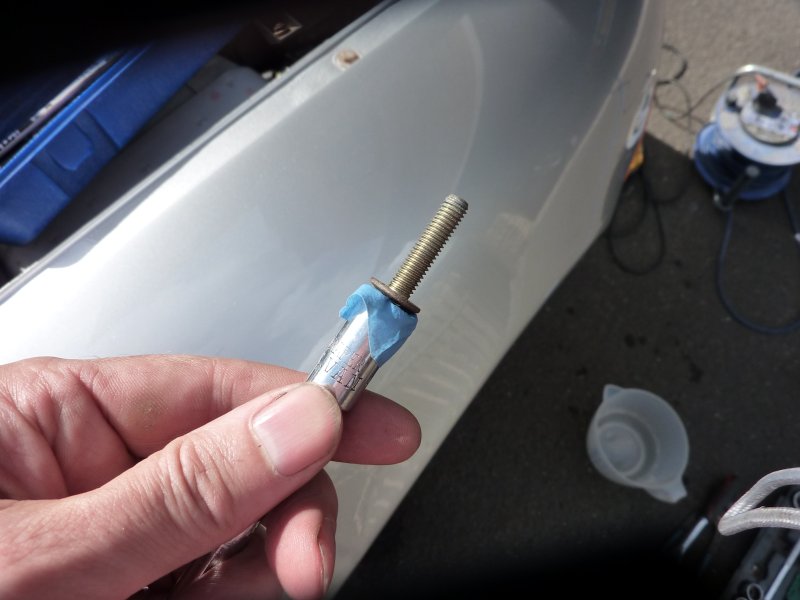
Here is a tip for holding the bolts into a socket when trying to reach these tricky areas, cut off the end of a finger of a rubber glove and use it to hold the bolt in place.
I put everything back together in reverse order, 10Nm for all the bolts, filled the system with coolant, started the engine and watched for leaks, and toped up the coolant as air escaped from the system.
I think the job can easily be done in 1 to 2 hours, the biggest problem is going to be if you have big hands and the two back bolts, so have a child handy if you do.
Thanks to kstevusa who gave me a few tips, luckily it seems to be a much easier job on the 4.2 compared to the 4.0.
Here are the new parts, its worth while to buy a new gasket for the front cover of the intake manifold just in case.
So this is the area where you will be working, not too cramped.
First I removed the alternator cooling duct to get access to the radiator drain plug, .... and yes I know it is on upside down, our summers are so cold we need to keep it warm.
I initially thought it would be impossible to get to the drain plug, it is not easy to see or access on the 4.2 engines, especially the convertibles as there is a lot in the way. It is in the bottom right of the picture below.
However I was able to get this large flat headed screw driver on to it and the plug loosened easily, it also had a tether on it so it would not fall out.
Before removing it, I took off the wheel and put a container under the car to catch the coolant.
Take off the coolant filler stopper to help the flow, the coolant does not drain out cleanly, it splashes everywhere.
I prised off this clip with pliers and a pick, I did not reuse it as I've not had good luck with reuse with these in the past, I replaced it with a jubilee clip.
A hose clip removal tool like this is almost essential for this car, it makes the job easy.
Next I removed the temperature sensor connector.
There are four easily accessible bolts holding the main part of the housing in place. The bolts released easily.
The main part of the housing can then be lifted away. A fair bit of coolant leaked out at this point over the serpentine belt, now I have heard that the coolant can make the serpentine belt squeal so I gave the area a good flush with clean water.
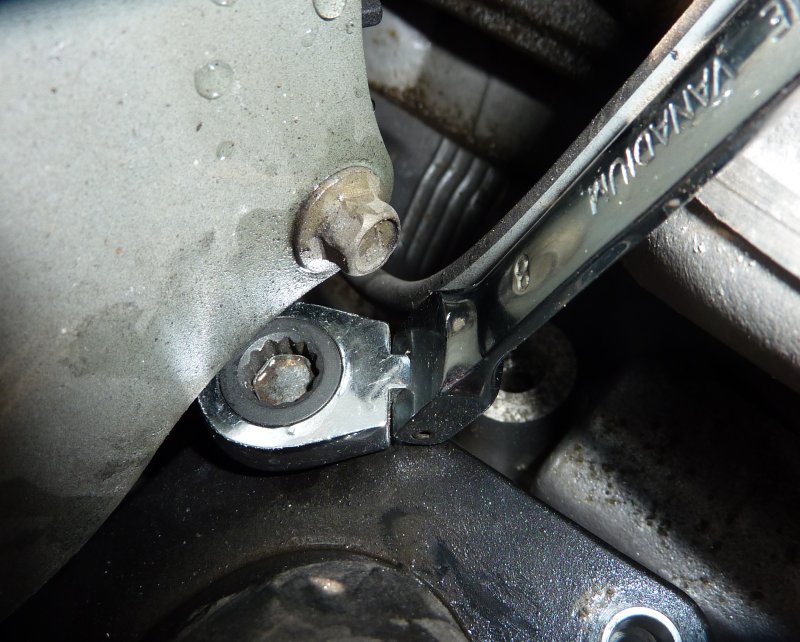
The lower part of the housing is held on with these four bolts, the two at the front are easily accessible the back two are a little bit tricky.
I used this crows foot ratchet spanner to break the back two free but there was insufficient space to fully wind them out.
Removing this front plate on the intake manifold gives just enough space to get the bolts out by hand.
Don't know if I splashed this water in here?
New and old gaskets for the manifold cover.
I gave this surface a good glean up as it was a bit corroded and also used compressed air to blow out the 4 bolt holes as they are closed at the bottom, otherwise they may hydraulic when putting the bolts back in.
Here is a tip for holding the bolts into a socket when trying to reach these tricky areas, cut off the end of a finger of a rubber glove and use it to hold the bolt in place.
I put everything back together in reverse order, 10Nm for all the bolts, filled the system with coolant, started the engine and watched for leaks, and toped up the coolant as air escaped from the system.
I think the job can easily be done in 1 to 2 hours, the biggest problem is going to be if you have big hands and the two back bolts, so have a child handy if you do.
Last edited by RaceDiagnostics; Aug 28, 2015 at 02:52 PM.
Senior Member
Joined: Oct 2014
Posts: 855
Likes: 695
From: Middle Tn. near Hsv. Al
Thanks for write-up and pics. noted you had the hex head bolts where mine has Torx. The torx are less problematic and fairly easy if a 1/4" drive is use on the rear 2 at end of plenum. Glad you are pleased with the job. :-)

Senior Member
Joined: Oct 2012
Posts: 853
Likes: 192
From: Panama City, Florida
Hey Racey,
Great pictures and explanations.
I just replaced mine on my 05/XJ8L, and although somewhat the same system, as you said it wasn't that bad of a job. On my car there are a couple of hoses you didn't have to worry about, but basically the same.
I didn't bother with replacing the short downward housing part, I just removed the old "O" ring and cleaned the housing up real well, installed the new "O" ring and left it attached, also, since there were no leaks in the area I didn't bother with removing the intake cover just to replace the "O" ring.
Other then those few things, the job was (like yours) a success.
Wonder what a job like that would have cost at a dealer or some shop?
Cheers
Last edited by Chuck Schexnayder; Aug 28, 2015 at 11:10 PM.


Member
Joined: Mar 2015
Posts: 92
Likes: 35
From: San Diego, CA
What you are seeing in the intake manifold is oil. Some gets past the PCV damper valve universally. You might check the front left number two cylinder spark plug for oil fouling to see if serious and check the member posts on the PCV system.

Junior Member
Joined: Dec 2015
Posts: 10
Likes: 5
From: Paris
Very useful post thanks. Just ordered new cooling parts, thermostat and housing from britishparts today and will definitely use your procedure when I replace them later this month. Thanks.
Trending Topics

Veteran Member

Joined: Jan 2009
Posts: 13,079
Likes: 4,730
From: Raleigh, NC
Good job and photo tutorial. I did this repair in late November 2014 due to a leaking thermostat housing cover. Instead of draining the coolant as you did, I used a hand pump to pump enough out to get the remaining coolant level below all the hose ends that had to be disconnected. Might save a little time that way. And yes, the key is to remove that metal manifold plate (just four small bolts if I remember correctly) to gain slightly more working room for your hands and tools. Be sure to purchase a new green manifold gasket as shown in the photo because your original gasket will be absolutely cooked from many years of engine heat. Our 2006 model also had the Torx bolts instead of Hex so it was indeed a bit easier. As mentioned, use a 1/4-inch socket drive instead of a 3/8-inch because every millimeter of working space you can gain in that area will help you. But I have huge hands so working in these tight spaces is always a challenge for me....

Thread
Thread Starter
Forum
Replies
Last Post
mikiep
XK8 / XKR ( X100 )
14
Dec 20, 2019 07:37 PM
Currently Active Users Viewing This Thread: 1 (0 members and 1 guests)