When you click on links to various merchants on this site and make a purchase, this can result in this site earning a commission. Affiliate programs and affiliations include, but are not limited to, the eBay Partner Network.
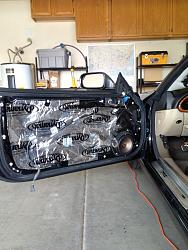
I took most of the advice you all had in the "Black and Tan Door Card" thread to change the speaker covering and replace the door handle escutcheon with black. https://www.jaguarforums.com/forum/x...r-card-100855/
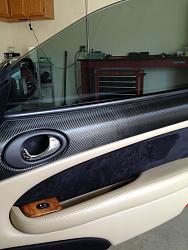
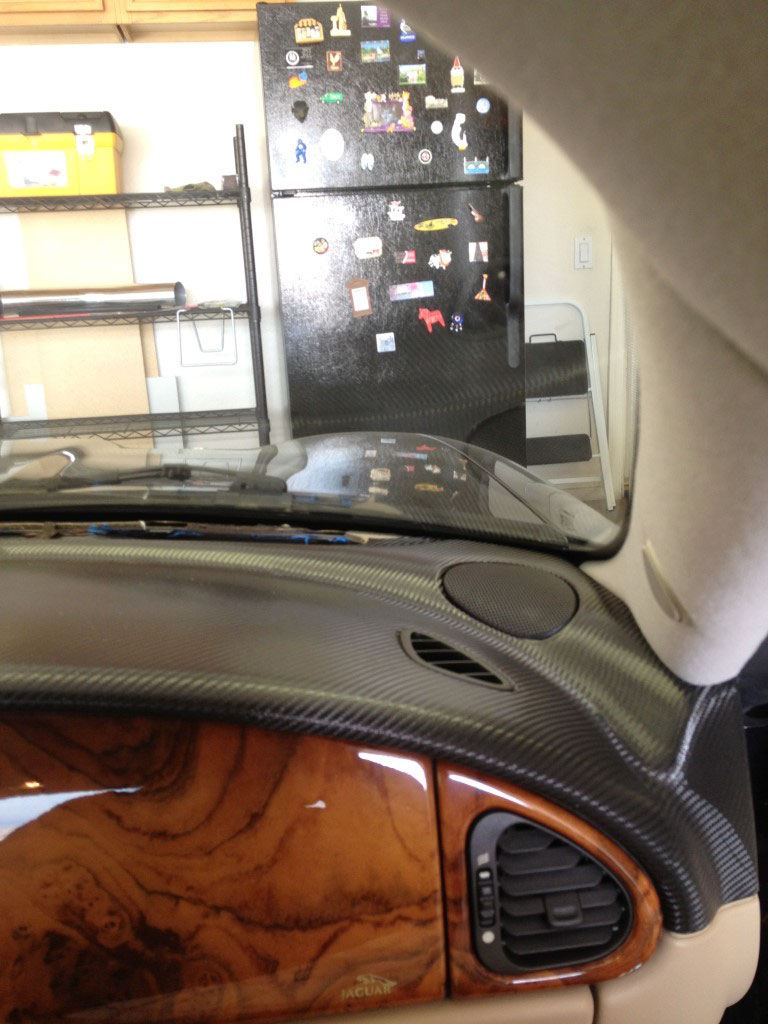
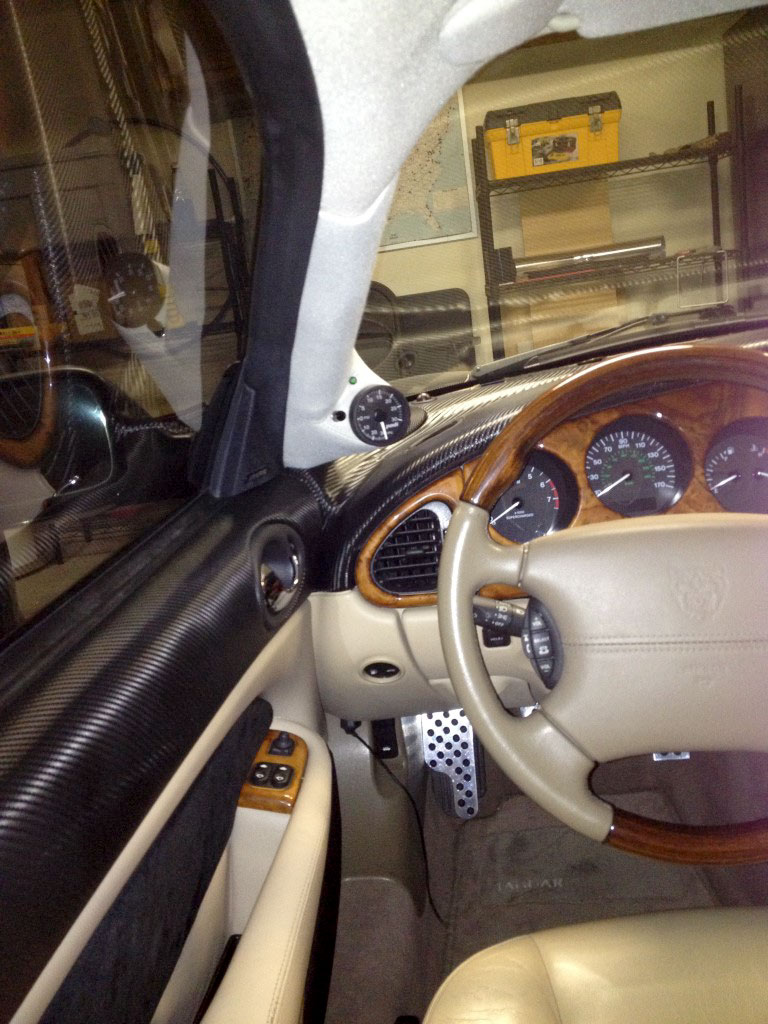
I also finished covering the dash top with the carbon fiber wrap, so it is now a continuation of the door caps. Vent and speaker covers are black now too.
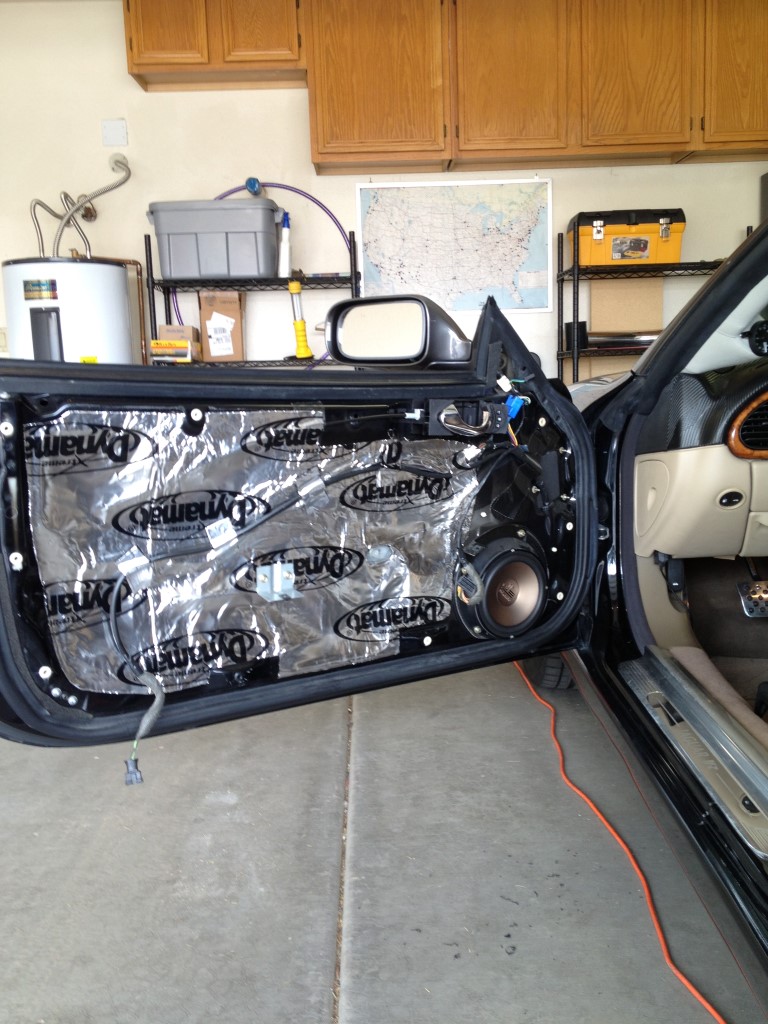
Since everything was apart I figured it was a good time to change out the speakers for the ever popular Polk DB6501 set. Dynamat was already done from when I had to fix a door handle.
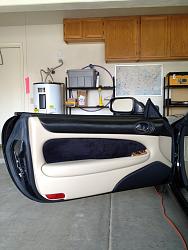
With the new and improved look with black door escutcheon and speaker to match.
Close up of the door cap. The texture is not too over the top and the camera makes it look more shiny that it really is.
I think the color contrasts well with the wood of the dash. There are a lot of things I would do, but removing the wood dash is not one of them It is part of what makes this a Jaguar.
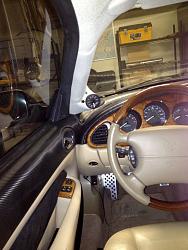
Vents replaced with black. Took the opportunity to fix the rattly demister problem and re-glued the front of the dash pad. I've left the demister vents out for now as I want to make sure that there isn't any trouble with bubbling of the wrap where it goes through the compound shape near the windscreen. If need be can peal the wrap back from inside the vents and glue it down.
Inside with the door closed.
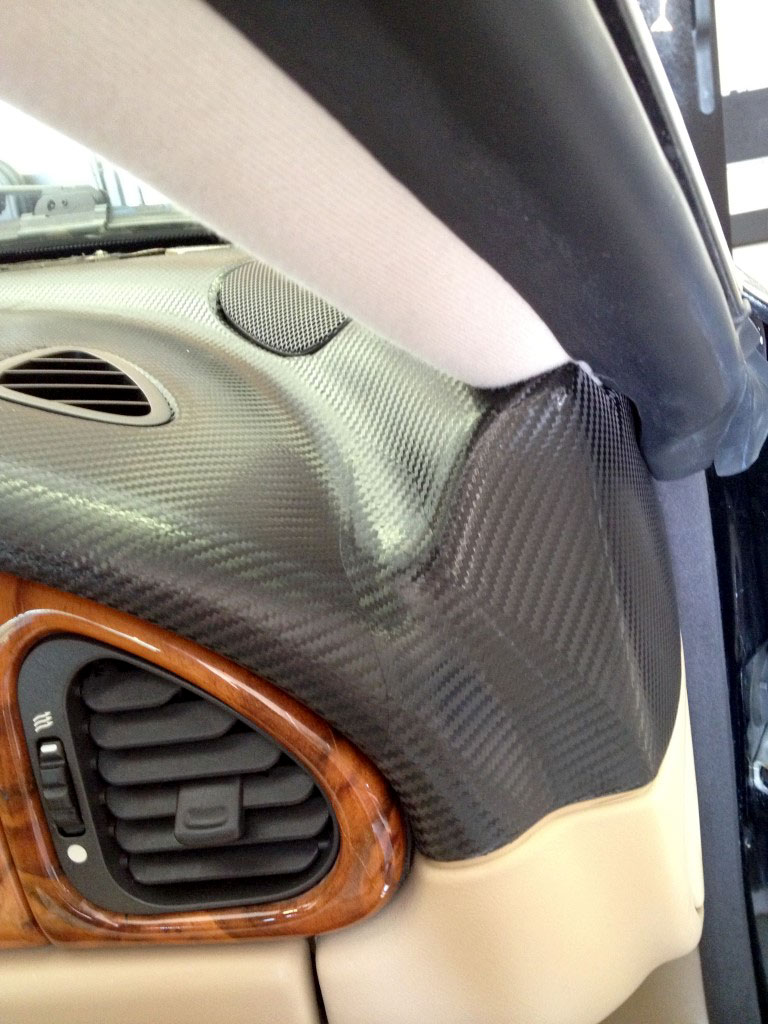
This is the worst part of wrapping the dash. There is just no way to bend a single sheet through this complex shape near the corners so I've had to piece it. It isn't too obvious, and if you aren't looking closely it really doesn't looks like a separate piece, just a warble in the pattern. All around, this picture gives the best indication of the true color of the wrap.
I used this same wrap on the coil pack covers, and it's held up well even at engine temperatures, so I think wear won't be a problem.
Having to piece the wrap on the dash isn't ideal, but it's not too intrusive, and honestly, it's still better than the faded dash pad that was there before.
All around, I'm happy with the look. The black and tan suits me much better than the brown, brown and brown it was before. I'd say it's a unique look, if nothing else.
Not normally a fan of carbon fiber, but I have to admit it looks really nice and it is certainly unique. Probably need to see it in person to really appreciate it, but the pictures are pretty good! Does give it a more modern look.
I see what you mean about the compound curves at the A pillar ends. Never thought about it before. Nice job there as you must look very closely to see (and only because you said something).
That is freakin AWESOME!!
What brand wrap did you use?
And I've ordered real carbon pieces for my porsche and they also have strange patterns on complex curves. It's the nature of the beast!!
Excellent job!!
That is freakin AWESOME!!
What brand wrap did you use?
And I've ordered real carbon pieces for my porsche and they also have strange patterns on complex curves. It's the nature of the beast!!
Excellent job!!
Real carbon fiber (before the resin) is a weave that you can distort and do things with that these flat plastic sheets just wont so I can imagine you would get all sorts of odd looking patterns going around corners.
If you're going to try something like this I have two recommendations:
1) A heat gun. A hairdryer will work, but a real heat gun is SO much faster and controllable.
2) A sharp exacto knife. Get a big package of blades and change it out for a new one every 30 minutes. It seems wasteful but having that razor sharp point makes all of the little detail work a million times more precise.
Rear speaker upgrade + a bad case of "while you're at it"
I had previously upgraded the door speakers in my coupe to Polk DB6501 and been pretty happy with them.
Over Thanksgiving weekend I thought I would have a go at upgrading the rear speakers and subwoofer. Well it snowballed into a pretty bad case of "while youre at it" which caused it to spill over into the next weekend and resulted in the entire interior being out of the car!
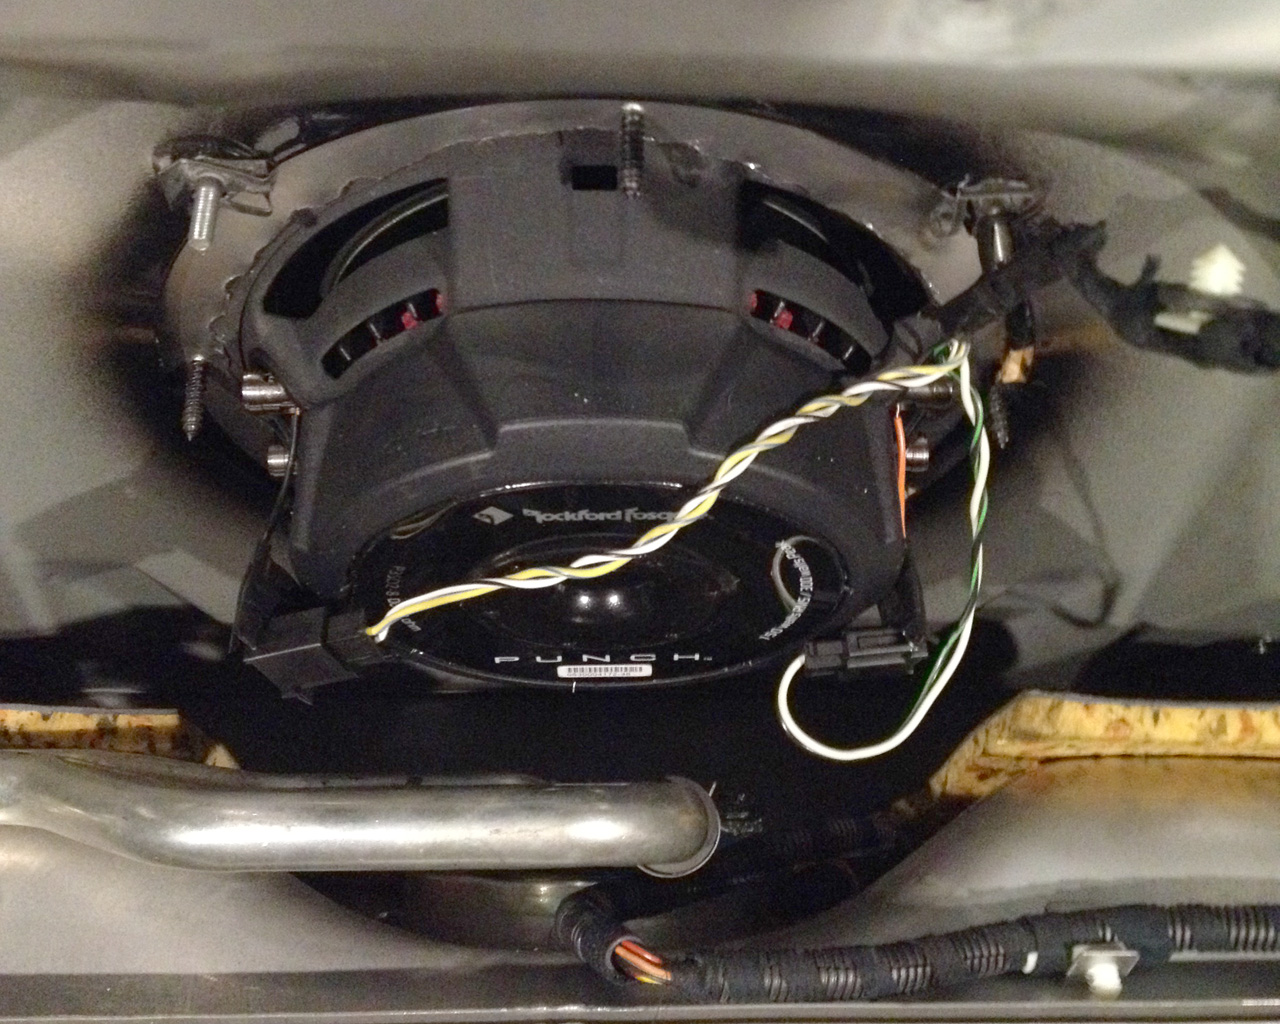
For the rear side speakers there isn't a lot of clearance under the grills so I went with Polk DB651s, a slimline midrange + integrated tweeter. For the subwoofer, options are a bit limited because of the shallow clearance to the gas tank and the fact that it is just hanging out there in the open air. I'm not car audio expert but I tried my best to learn a bit about what makes a good infinite baffle subwoofer and settled on the Rockford Fosgate P3SD2-8.
First was to take out the rear speaker grills, except they won't let go. Ok fine, they are attached to the quarter panel trim so maybe I can take those out instead... to JTIS I go.
First: take out the rear seat. Done that before, easy enough.
Next take the seatbelts loose... rear, no problem, just one bolt each side. Front... well you can't get to the bolt that holds the lower bracket the seat track is in the way. Out come the front seats. Ok great, seatbelts are loose side panels are out and now I can get to the speakers.
Well gee, now that I can see the package tray, it's looking kind of tired. I guess if I'm going to fix it, now's the time since everything else is out. Out it comes.
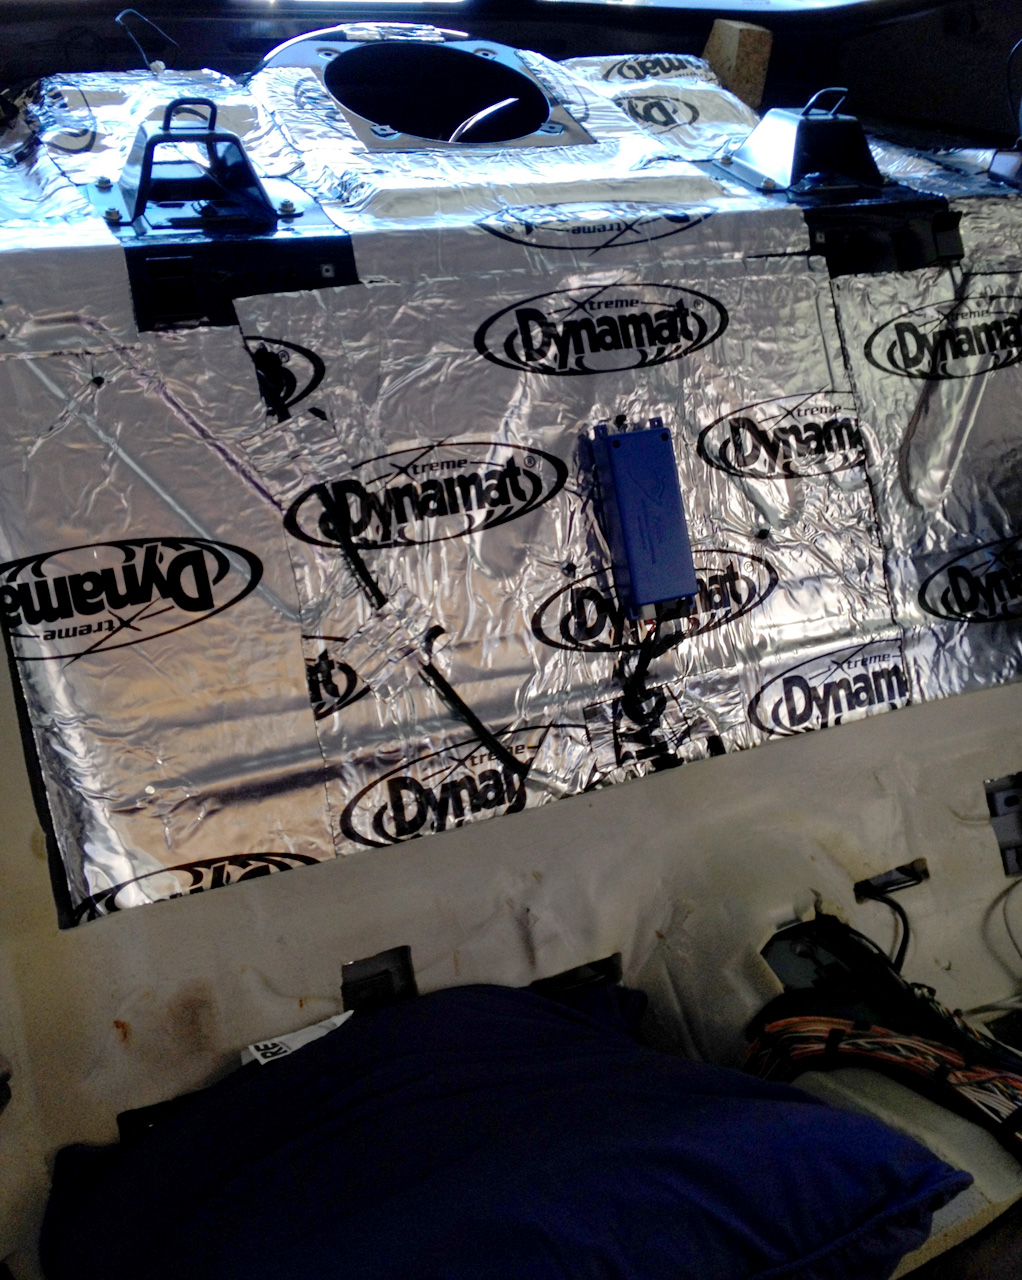
I was really glad I dynamatted the doors, made everything a lot quieter. Since the package tray is out and I'll be installing a new subwoofer, I guess I should do that on the package tray and bulkhead.
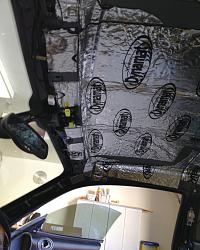
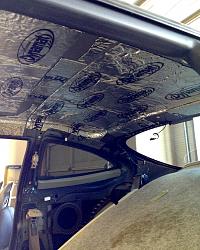
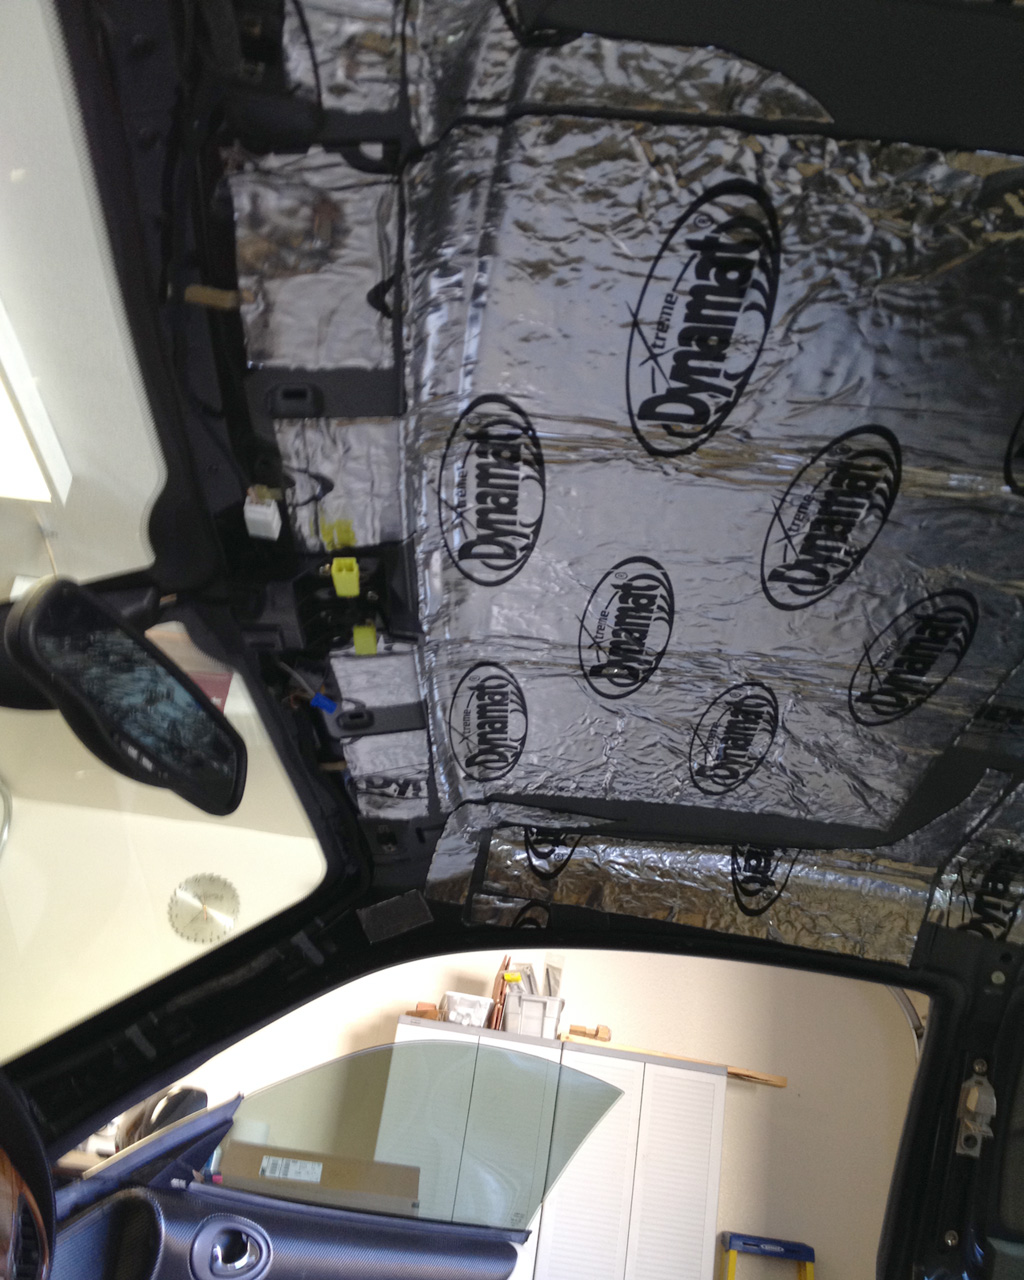
Since the rest of the interior is out, if I'm ever going to dynamat the roof, now's the time to do it. Down comes the headliner.
On and on it went and that's how I ended up with the entire inside of the car on the outside.
I had the big box of dynamat from another project, so might as well use it. The roof used to "bong bong" when you knocked on it, now it's more like "thud thud".
Gotta do the package tray so that new subwoofer doesn't rattle things. But WATCH OUT for the GPS antenna, it's down in the rear corner of the window on the drivers side and very easy to just throw a sheet of dynamat right over it. Doesn't work so well when you do that (don't ask how I know).
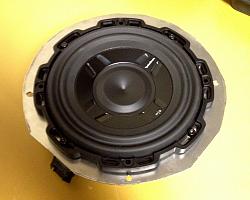
The stock subwoofer is a sort of odd size. The speaker itself is an 8" but has a very large flange and a larger opening than most 8" would have. Not big enough for a 10" though, something in between to where you need an adapter ring.
Made one out of some sheet steel. It isn't pretty but gets the job done.
On the bottom side, clearance is good, maybe even a little more than the stock speaker. I used the connections from the original speaker so that I wouldn't need to modify the harness in the car.
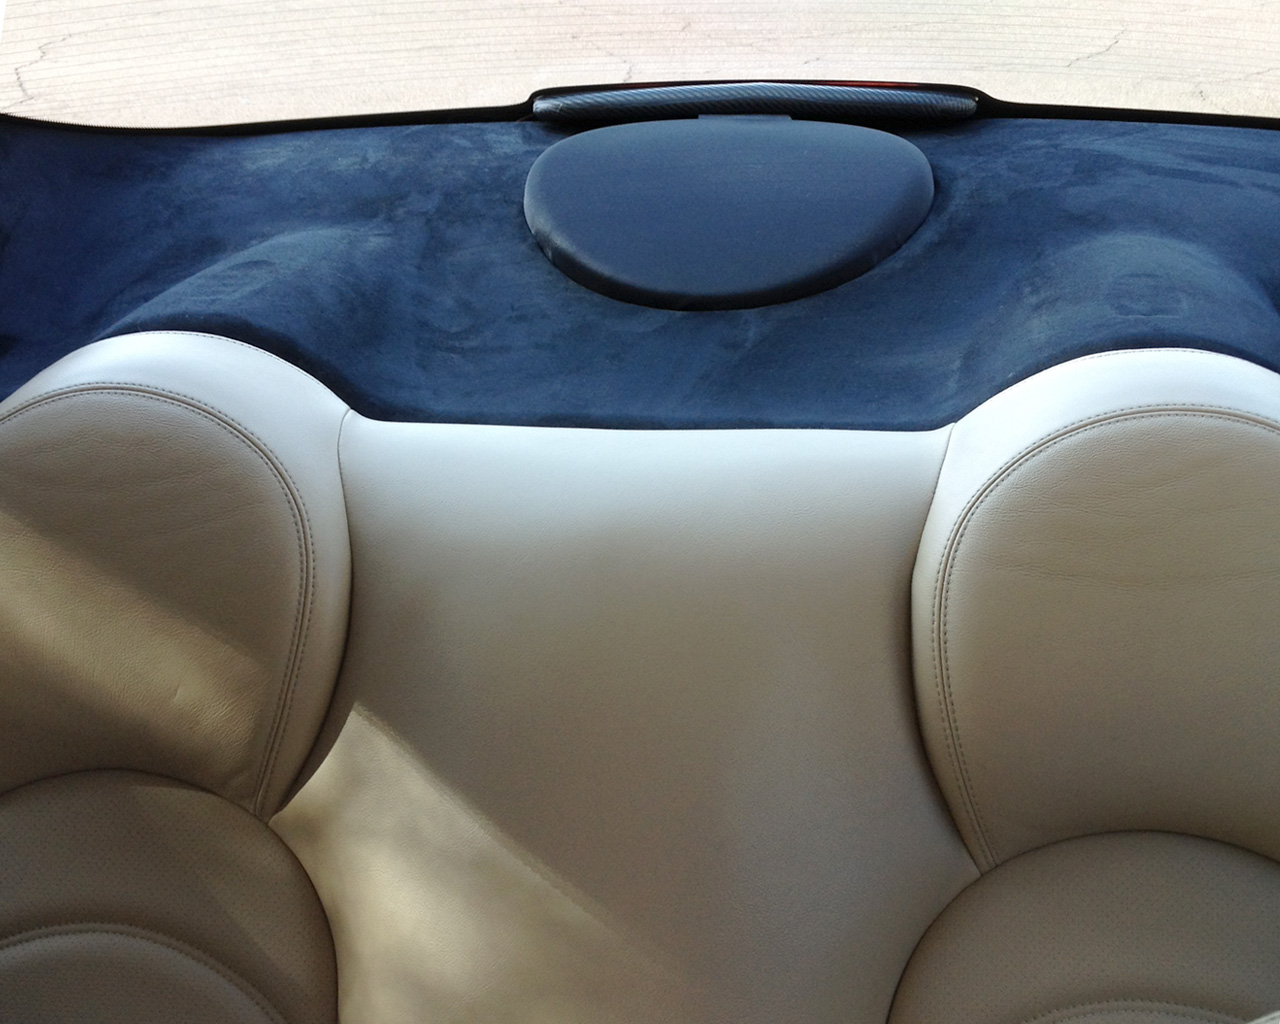
The package tray got a good scrubbing with a wire brush to get rid of all that nasty broken down foam, then recovered in black passion suede. It is a little harder to stretch than typical headliner material so the complex corners need a few cuts to pull tight. None of it is visible once the rear seat is back in though.
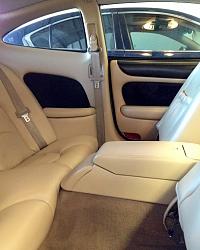
I sprayed the rear speaker grill in black to go with the black and tan theme inside the car. Lines up with the door panel pretty well.
The finished rear package tray with the speaker cover and seats back in. The child seat restraint covers I have are brown, so I covered over the opening. There is a little bit of a depression, but not too noticeable.
Not bad I don't think, but I couldn't do projects like this without the collective wisdom of the forum.
Thanks to Phil (philhef) for his thread about the Duplicolor headliner spray. I looked into buying black speaker grills but they are few and far between. Saved a bundle re-dying them.
Thanks to Ted (tberg) for putting me on to the Passion Suede. This stuff looks great, is easy to work with and is inexpensive.
And Steve (whitexkr) from a thread long ago for his tip about using paint thinner to touch up an over glued headliner. Needed that on a spot or two of the package tray.
Looks amazing!! I actually did the same but in reverse!!! Lol. Also black headliner in faux suede. I did replace my fascia veneer with a new set in a georgous color that Saul (British Autowood) found sitting on his shelves. They were still in their original factory boxes. I'll have to take a photo.
That's what I like about our cars. They have so much potential for customizing and at the current values of them, it's not such a risk. (Although I'm doing the same thing to my XF!) And don't you LOVE every time you get in your car, you know there's not another like it in the world!!
I have had this stuff done for a while and finally took some pictures. I didn't realize how long it had actually been since I updated the thread, yeesh life gets in the way I guess...
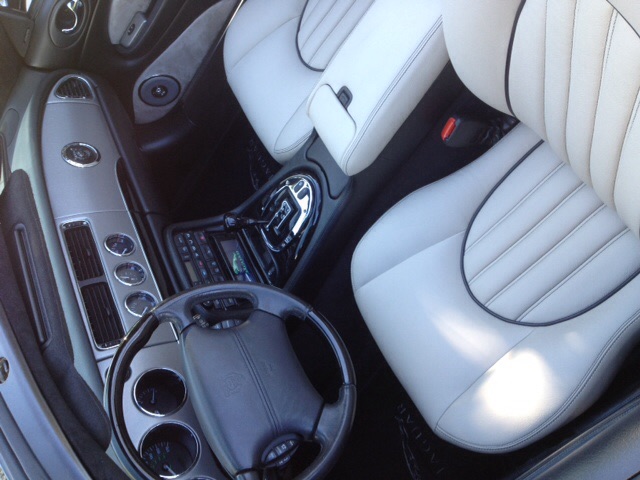
Anywho, I found a set of Recaro seats from another forum member (thanks Rob), redid them in the same Black and Tan theme.
This is the original appearance as they come out of Rob's blue portfolio car "Thundercat".
I dismantled the seats and took the the cushion parts to an upholstery shop nearby. He did a great job. Took everything apart, made patterns and redid them in matching tan leather with Ultra-Suede inserts. Even have an embroidered a black leaper on the headrest.
This is the finished product before I put them in the car.
I used the black seat switchgear from the black and blue seats.
Got a set of black and tan floormats also with embroidery from a place Deuce2000 recommended. The shop is in Italy but the price wasn't bad. Only problem was I don't speak Italian!
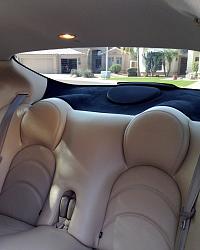
Upholstery shop redid the inserts in my rear seats to match. These are the original rear seats, not the Recaro style, so the insert shape is not exactly the same. Thundercat is a convertible and the rear seats are little different in a coupe. But I had the shop sew the seams strait across rather than on a curve so it matches the front pretty well. Not like anyone ever gets in the back of these cars anyway.
Seat inserts are done in the same material as the package tray I recovered some time ago.
I think I'm done with the interior, at least until something breaks. I've had it this way for a good while now and it's holding up well and I'm very happy with the look.