
disk brake shield (dust shield) Screw removal


Thread Starter
|
Veteran Member
Joined: Apr 2014
Posts: 5,457
Likes: 1,816
From: New Jersey USA
Once again I'm going to ask for help. I am in the process of removing the disk brake sheld from the front wheel/hub assembly. There are 3 T30 Torx screws, each with rounded heads. I got the first 2 off, not an easy job. Unfortunately the 3rd now has a stripped head.
It is stuck in the vertical link (the metal piece that connects to the ball joints and supports the hub assembly). The good news is that the dust sheild can move, it pivots on this one screw. Guess that tells me the culprit must be in the vertical shield's threads / screw's threads.
OK coming clean - I tried to file flat opposing surfaces on the screw head. Just don't bother. The short access virtually prohibits you from creating a perpendicular face, it winds up sloping up towards the center. So, no grip improvement there. May have even made it worse.
For those of you who dont recall, the 3 screws are underneath the hub so you get no access from the top beyond the 1.5 inches above the screw head.
I'm stuck. I've read about applying heat, Ok but to what end? I don't seem to have anywhere to get a bite on this screw anymore. I thought of epoxying a T30 bit into the screw, but bit + screw length is > (greater than) the availble head room below the hub.
I suppose I could cut a slot in the screw head, hoping to wedge a screwdriver in to turn it out. but I"m getting into a shotgun approach. As you can see my brilliant ideas haven't worked yet. So, I wanted to please run this by you guys to see if anyone had faced this before.
Thanks as always. I wish there was a way to press the hub out with the dust shield on, that'd give me vertical access but its in the way.
John
Thread Starter
|
Veteran Member
Joined: Apr 2014
Posts: 5,457
Likes: 1,816
From: New Jersey USA
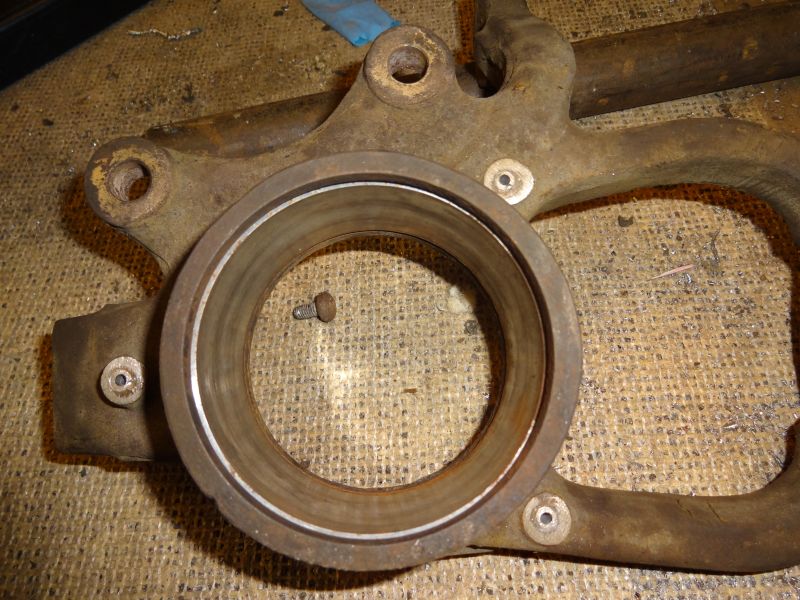
Wound up using a Dremmel cut off blade to etch away at the exposed head. Then took a drill bit to try to drill it out. Almost not quite, just can't get the angle, so after drilling down into the screw head below the dust guard, I used the dremmel cut off wheel to nibble away at the remaining screw head.
Dust guard is now off with no damage, no tools or bits ever touched the hub. I do have to find my screw extractor to remove the threaded portion of the screw remaining in the vertical link.
Looks like I have clear access to vertical link so I can press the hub out.
John
Dust guard is now off with no damage, no tools or bits ever touched the hub. I do have to find my screw extractor to remove the threaded portion of the screw remaining in the vertical link.
Looks like I have clear access to vertical link so I can press the hub out.
John


Veteran Member


Joined: Jul 2015
Posts: 1,536
Likes: 790
From: Sacramento, CA
John,
I had the same problem last week when working on a XJ8. I soaked them with PB BLASTER . I then took a chisel and put a notch on the outside edge of the screw
Then from a 90� angle I put the chisel in the notch and tapped it with a hammer in a counterclockwise direction. It took several taps to break them loose. One was screw stubborn so I used the chisel to break the head of the screw off. Use an extractor to get the stud out and replaced with new screws.


Joined: Dec 2009
Posts: 13,743
Likes: 9,694
From: Wise County,TX
The screws are attached using a thread locking compound and HEAT is your friend.
As BobRoy stated, cracking the screw loose with a cold chisel might help but he lock compound breaks down with HEAT.
bob
As BobRoy stated, cracking the screw loose with a cold chisel might help but he lock compound breaks down with HEAT.
bob
Thread Starter
|
Veteran Member
Joined: Apr 2014
Posts: 5,457
Likes: 1,816
From: New Jersey USA
I'm now on wheel 2, same thing! But from all your responses it sounds like a common issue. I got one off, the other two screws are soaking in PBblaster now.
I will apply heat, hey how hot should I let it get? I suppose the nearest piece of non metal is the grease ring under the ABS nut so I'm paranoid. But I am not so sure so I wanted to ask, do you apply heat til she glows red hot?
John
I will apply heat, hey how hot should I let it get? I suppose the nearest piece of non metal is the grease ring under the ABS nut so I'm paranoid. But I am not so sure so I wanted to ask, do you apply heat til she glows red hot?
John
