
Nav Pics

Thread Starter
|
Senior Member


Joined: Mar 2010
Posts: 355
Likes: 46
From: South of Buffalo, NY
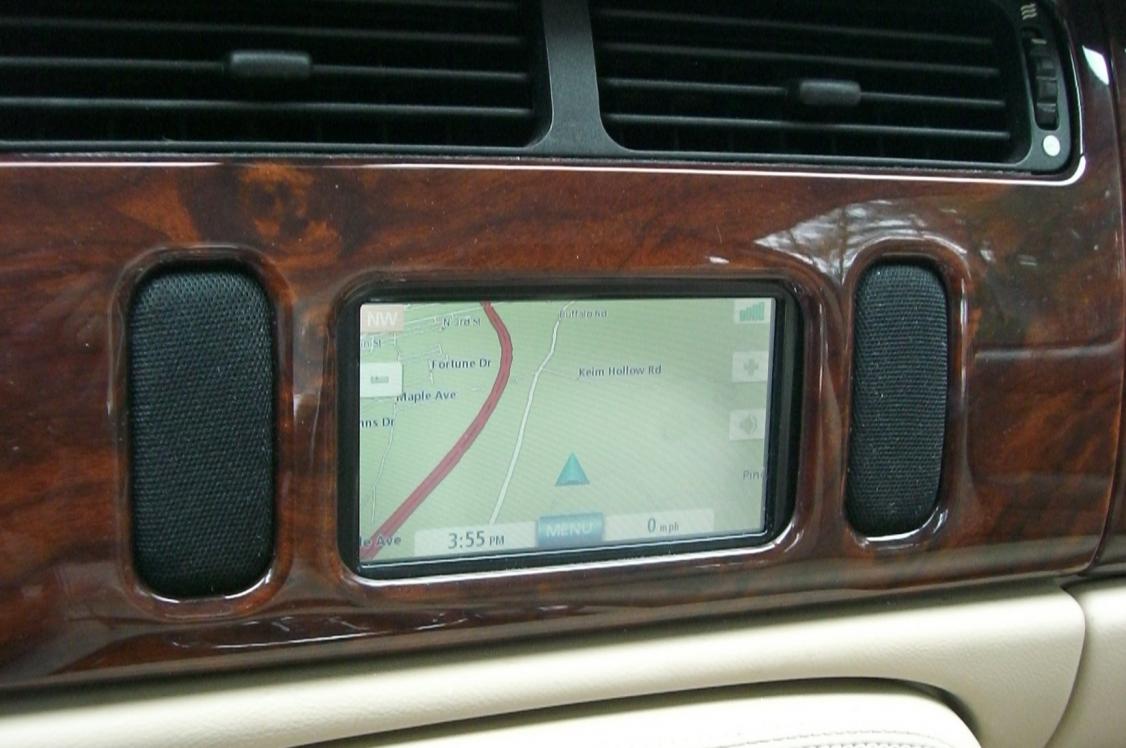
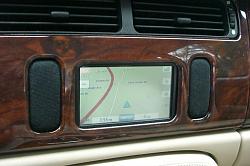
I was asked before to post some pics of my home made nav system. I used the Magellan Maestro 5310, which fit perfectly into the opening. I made a custom bracket using ABS plastic, and a custom moldable material which is doughy and forms into shape and is then cured into a solid. This eliminated much of the difficulty of lining up the unit. It is wired into the previous wiring harness using pins I found at radioshack. All in all I think it took about 5 hours to rig up. I put cost at $150 total. GPS came from Tigerdirect remanufactured for $120 including shipping. I have about $15 for plastic from ebay, $10 for speaker grills from ebay and a couple of bucks for the pins from radoshack. My local stereo store gave me the speaker mesh because I needed so little of it. The longest and hardest part, but arguably the one that makes it look the most natural, is that I cut out a jig and pounded the speaker mesh into it so that it made the "speakers" look molded and round so they follow the contours of the veneer and appear to bulge out from the sides as they naturally would if they were stock.
I really like it and it has worked flawlessly. No problem hearing it (coupe) and no problem with signal.

I really like it and it has worked flawlessly. No problem hearing it (coupe) and no problem with signal.
Last edited by H20boy; Jun 12, 2010 at 09:16 AM.
Veteran Member


Joined: May 2010
Posts: 4,114
Likes: 1,274
From: North Carolina
That's awesome! Although, personally, I can't stand Magellans. I love the Garmin units. I've been thinking about doing something similar with a Garmin Nuvi 1490T. I have a few questions, if you don't mind...
How did you cut the jig for the speaker mesh?
What's the blue stuff called?
How did you line up the GPS so that it was in the correct position when you put the dash trim back on? And how did you make sure it was spaced properly from front to back?
Also, Garmin recognizes whether or not you are using their charger, and if you're not, it won't turn on (pisses me off, I can't plug it into my cell phone charger even though the plugs are the same.) So I was planning cutting into the harness and finding the switched power, then splicing a female cigarette lighter adapter into the harness. I would then plug the Garmin power cable into the rigged harness.
My biggest concern is the audio level. I have a convertible, and I'm not sure it's going to be loud enough.
Veteran Member
Joined: May 2010
Posts: 4,114
Likes: 1,274
From: North Carolina
I just had a thought! I could crack open the Garmin, locate the speaker wires, run them to a tiny amplifier, and mount a speaker behind one of the mesh grills. I could also run the wires through a potentiometer to give me some volume control. Where could I place the pot...?
Veteran Member
Joined: May 2010
Posts: 4,114
Likes: 1,274
From: North Carolina
Ok, ok, ok... I'm getting excited now. I just ordered a Garmin Nuvi 1490t five inch GPS from tigerdirect.com ($190). How stiff is that speaker mesh? I realized that I can control the volume from the touch screen, but I'm thinking about mounting a small rocker switch for power in the speaker mesh if it's stiff enough.
Veteran member

Joined: Mar 2007
Posts: 11,345
Likes: 1,165
From: Oak Ridge, TN
good project for you Sam, good luck with it.
Regarding the on/off switch, the toggle will look pretty out of place in the grilles, I would either leave the unit on all the time via the switched power, or if you did want a switch, how about a pressure switch mounted behind the speaker grille fabric, maybe air brush a small power icon image over the pressure switch. If you got a switch that had an LED, it would also illuminate the area of the grille where the image is located. That would be cool.
definitely a good DIY thread if you pursue it further. looking forward to updates.
Regarding the on/off switch, the toggle will look pretty out of place in the grilles, I would either leave the unit on all the time via the switched power, or if you did want a switch, how about a pressure switch mounted behind the speaker grille fabric, maybe air brush a small power icon image
over the pressure switch. If you got a switch that had an LED, it would also illuminate the area of the grille where the image is located. That would be cool. definitely a good DIY thread if you pursue it further.
looking forward to updates.
Veteran Member
Joined: May 2010
Posts: 4,114
Likes: 1,274
From: North Carolina
Ah... I was thinking that the speaker mesh was more like a hard metal screen. If it's just speaker fabric then your idea would be cool. I need some type of hard speaker mesh/screen, however, because if I place a speaker behind it I need to be able to hear the speaker.
Trending Topics

Junior Member
Joined: May 2010
Posts: 6
Likes: 0
From: Toronto
After looking and reading posts. I decided to get rid of the old nav and replace it with new,
.
I got the idea from one of our other member Stewart. What I did is take his idea and refine it.
I started with a new Garmin 1490T which has a 5.0" screen ( you could also use a older model Garmin 5000 (5.2" Screen). I open the dash up by just pulling the dash panel. Start at the bottom and slowly pull out, the top portion of the dash panel is a little tight.
Once the panel is off / use can now remove the old screen ***'y ( 4 screws ). With the unit out, take small screwdriver and pry the face plate off the old screen ***'y. There are four (4) tabs holding the faceplate to the unit. With the faceplate off you can store the old screen else where ( you will not need this anymore).
So now you have the faceplate with the old buttons attached. I removed the buttons and stuffed some filler under the buttons to stop them from rattling.
I then lined the old screen opening (inside with one side of the Velcro and then stuck the other side of the Velcro to the perimeter of the new GSP. The Garmin 1490T fits perfect and once all the Velcro lines ups it will never fall out.
You will need a Mini USB extension cord ( a 24" works OK) these I found out these are hard to find. I had to ordered one online.
You attach the USB cord to the back of the unit. and I Velcro-ed the cord as well to the back of the unit.
The next step is to get USB Cord into the glove-box area. The Glove box need to be complete removed the are two parts to it the box it self and the liner. Torque screws (4) are found on the bottom of the glove-box. The USB cord can now new routed through the dash and into the glove box. Try to come from the back of the box and have the cable end up in the top left corner to the Glove Box ( looking at it fro the passenger seat).
You will now need a 12 Volt extension cord and a 12 volt "add a circuit" adapter. Now open the fuse panel door on the passenger side of the car ( left-hand drive) You can now find a "ignition on" power supply ( I use circuit # 16 / the old nav screen circuit). Cut the 12 Volt extension to about 24" and route the wire from the Glove Box area to the fuse panel. Install the Add a circuit to Circuit # 16 ( the add circuit piggybacks the orginal circuit.) find a ground and you have completed the wiring.
Route the 12 volt extension and leave in the Mid right corner of the Glove Box. Now route the 12 volt adapter that came with the Garmin from the top left corner of the Glove box to the 12 Volt extension. Plug these two together ( and tape together as well) Now secure the plugs with tie wraps ( right side of the glove box just behind the fuse panel, there is room for this.
The install is now complete, plug the Mini USB extension into the Garmin Power supply and test. Turn key to accessory position and all should work.
If it looks good/ re-assemble.
Points of interest
1) original unit can always be put back, if in the future someone wants an original " as it was built Jag"
2) unit does not need a power switch as unit come no automatically when power is applied.
3) with USB Extension in the Glove Box, unit can be updated any time ( both maps and software)
4) If a better/ newer unit comes outs / you can always upgrade.
5) Sound is Ok / not Great
6) no problems getting a signal.
7) I also installed a Parrot MKi9200 at the same time and head unit fits perfectly in space where the old Nav Screen ***'y was.
8) Garmin 1490T has a FM traffic system and this work great as well
Veteran Member
Joined: May 2010
Posts: 4,114
Likes: 1,274
From: North Carolina
Hey! The Garmin 5000 that Wyndance recommended actually has a built-in FM transmitter. The FM transmitter plays the voice prompts through the car's stereo. My wife and I never listen to the radio while we're in the car together, so we could just have the Garmin talk to us through the stereo. I'd just have to put in the switch to manually lower the antenna. I don't think I'd need a big antenna sticking up if the transmitter is right there in the car.
Veteran member
Joined: Mar 2007
Posts: 11,345
Likes: 1,165
From: Oak Ridge, TN
getting the stereo to mute may be an issue though... overriding existing audio will only make you have to repeat the last command, and that's not very convenient, plus it'll only be on a certain frequency, so no radio listening (or other source) while you're waiting for instructions. I still like you're amplified speaker idea much better, it'll be independent of the radio alltogether, if only you could get that tele-mute to work.
I still like you're amplified speaker idea much better, it'll be independent of the radio alltogether, if only you could get that tele-mute to work.
Veteran Member
Joined: May 2010
Posts: 4,114
Likes: 1,274
From: North Carolina
DO NOT USE THE GARMIN 5000! I bought one today and tried to use it. I was just checking out the fit and I quickly discovered that it is too thick at the bottom. There is a piece of metal down low behind the existing GPS that can't be moved. The Garmin 5000 sits on a little widget from which it gets power (see pic). That widget is too big to fit behind the trim plate thingy. So... I'm going to take it back to CompUSA and get a Garmin 1490t.
It kinda sucks, too, because the 5000 has in input for a back up camera. I don't really need a back up camera, but it would be kinda cool to have it. Also, the lady's voice on the 5000 was barely audible, even when I was stopped at an intersection.

It kinda sucks, too, because the 5000 has in input for a back up camera. I don't really need a back up camera, but it would be kinda cool to have it. Also, the lady's voice on the 5000 was barely audible, even when I was stopped at an intersection.
Senior Member
Joined: Jul 2008
Posts: 154
Likes: 19
From: Encino, CA
We really need someone to figure out the wiring diagram of the stereo to allow these units to 'speak' through the existing Nav audio input.
Since the Stereo has an option for Nav Volume there must be a pair of wires that can be taped to supply that Nav audio source.....
Since the Stereo has an option for Nav Volume there must be a pair of wires that can be taped to supply that Nav audio source.....
Veteran member
Joined: Mar 2007
Posts: 11,345
Likes: 1,165
From: Oak Ridge, TN
Its a pretty simple system actually (regarding the voice over, and muting of the existing audio), there's a single mute lead from the deck. When it is triggered by a current I assume, it mutes the head unit, no matter what source is on. The NAV audio out (existing and the new one you install) must go directly into the amplifier, so that the head unit volume does nothing in regards to its output. Think of it as independent of each other.
For these units that Sam and the previous poster are installing, it can be rigged for external audio, whether by speaker or tapping into the car's amplifier, but none of them will be able to trigger any type of a 'mute' signal that could be used, except for that Garmin GVN 53 that I installed.
For these units that Sam and the previous poster are installing, it can be rigged for external audio, whether by speaker or tapping into the car's amplifier, but none of them will be able to trigger any type of a 'mute' signal that could be used, except for that Garmin GVN 53 that I installed.
Veteran Member
Joined: May 2010
Posts: 4,114
Likes: 1,274
From: North Carolina
Its a pretty simple system actually (regarding the voice over, and muting of the existing audio), there's a single mute lead from the deck. When it is triggered by a current I assume, it mutes the head unit, no matter what source is on. The NAV audio out (existing and the new one you install) must go directly into the amplifier, so that the head unit volume does nothing in regards to its output. Think of it as independent of each other.
For these units that Sam and the previous poster are installing, it can be rigged for external audio, whether by speaker or tapping into the car's amplifier, but none of them will be able to trigger any type of a 'mute' signal that could be used, except for that Garmin GVN 53 that I installed.
For these units that Sam and the previous poster are installing, it can be rigged for external audio, whether by speaker or tapping into the car's amplifier, but none of them will be able to trigger any type of a 'mute' signal that could be used, except for that Garmin GVN 53 that I installed.
Veteran member
Joined: Mar 2007
Posts: 11,345
Likes: 1,165
From: Oak Ridge, TN
BUT... I'm going to work on that, too. Voice activated recorders take an audio signal and trigger the recording mechanism to start. I think I can rig something up to automatically activate the mute signal when the Garmin GPS starts talking.
Veteran member
Joined: Mar 2007
Posts: 11,345
Likes: 1,165
From: Oak Ridge, TN
To any of you who are doing this project, and do not wish to ever use the old system again (or can't be reintegrated) I am needing a DVD unit from the boot. If yours works 100%, please send me a PM and we'll discuss $$. Mine doesn't spin up but maybe 5% of the time, and I still like to see my clock from time to time.
Thread Starter
|
Senior Member
Joined: Mar 2010
Posts: 355
Likes: 46
From: South of Buffalo, NY
The blue stuff is a special material used in dentistry to make custom trays to take impressions. That one made setting it up easy, but is difficult to find.
It was just trial and error as to lining the GPS up for the veneer piece. I had to remove a little bit of the foam dash covering under the surround, and by carefully doing this with an exacto knife, it sat just where it needed to.
As for the power switch, one isn't really needed since they're made to turn on and off while powered from the cigarette lighter. I thought about mounting one on the speaker grill, but I opted to put a little rocker switch inside the center arm rest compartment. I just ran the wire down through the center console.
For power I used a cigarette lighter that I bought on ebay for like $5 and it does work with the magellan. I cracked open the plastic case and used the two wires that connect it to the contacts on the plug in unit, therefore plugging the power into the car's 12 V system before the transformer in the plug so it gets the juice it needs.
The speaker grill is steel mesh material. It is quite rigid and took some pounding with a hammer and the piece that was cut out of the jig to get it into shape. I then covered this with the speaker cloth. I'll see if I can get some pics of the jig tonight.
I know it may be a problem with convertables, but I have zero problems hearing the voice, even with the stereo on. Even thought the unit is tucked behind the veneer, the sound is not muffled and comes out very easy. I agree that if we could find an easy way to tap into the stereo system and play through that while muting the stereo, that would be ideal, but for me this works very well and was cheap.
A forum member JLW1890 posted a very similar setup a couple of months back. At that time he was working on making a bracket to sell that you would easily be able to unbolt the old nav and bolt his bracket right in. I went my rout because I wanted to mess around with it myself, save a few bucks, and I had the blue dental material that made making the bracket relatively easy. I believe the title was Aftermarket Nav Update.
Veteran Member
Joined: May 2010
Posts: 4,114
Likes: 1,274
From: North Carolina
Thread Starter
|
Senior Member
Joined: Mar 2010
Posts: 355
Likes: 46
From: South of Buffalo, NY
The material is called Triad, which I believe is the name brand. It starts out doughy and then cures to a hard plastic. It is different in that alginate is a powder and when mixed with water cures to a soft rubbery material. The Triad is what is used to make a custom tray which the alginate would go into to make an impression.
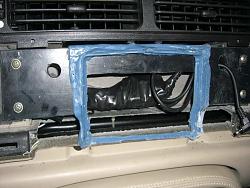
The difficulty is that the plane between the mounting screws is different than the plane of the opening in the dash. If you put a flat piece of plastic between the 2 mounting screws, you'll be at a different angle than the opening in the veneer. Something will be needed to correct that angle.
The difficulty is that the plane between the mounting screws is different than the plane of the opening in the dash. If you put a flat piece of plastic between the 2 mounting screws, you'll be at a different angle than the opening in the veneer. Something will be needed to correct that angle.
Veteran Member
Joined: May 2010
Posts: 4,114
Likes: 1,274
From: North Carolina
I think I'm going to try to attach the 1490t directly to the front piece using some awesome 3M double sided tape. It's the same stuff that is used to hold the molding strips on to the outside of the car. You can buy it at auto parts stores and it is incredibly strong. I've used it to secure the disk that holds the suction cup for the GPS to the dashboard in other cars. It's very difficult to remove once it's on.
First I'm going to line the inside of the bezel piece with plastic wrap to keep the next step from sticking. Then I'm going to use some epoxy putty (kinda like Mighty Putty) to fill in the grooves on the sides of the bezel. I don't want the putty to stick, though, that's why I'm lining it with sandwich wrap first. Then I'm going to cover the GPS with sandwich wrap and push it into the putty and get it positioned properly. The putty cures in 10 minutes or so, so as soon as it's cured I'm going to remove the GPS from the putty and remove the putty from the bezel. Then I can put some tape in the bezel and insert the putty "frame" into the bezel. Then I'll put some more tape onto the edges of the GPS and secure it to the putty. That should hold it in the perfect position, and it won't come out until I pry it out five years from now.
Hmmm... now that I think about it, the tape might hold it too well. I might damage the bezel if I ever want to remove the GPS. I'm going to have to think about this. I think the putty will definitely be the way to go to get the GPS positioned perfectly, but I'm not so sure about how to fasten it securely and still be able to remove it in the future.