
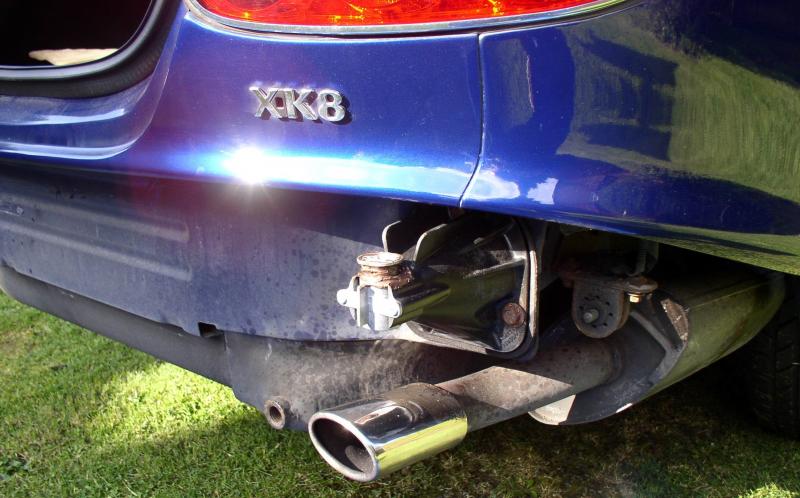
rear bumper bolt spinning


Joined: Dec 2011
Posts: 120,439
Likes: 17,014
From: Durham, UK
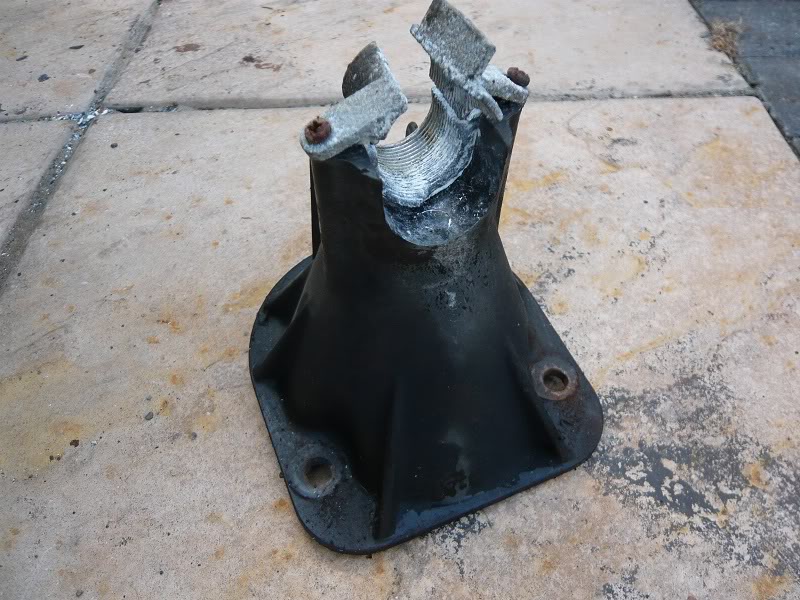
It might help to see what the bracket looks like:
Be thankful our UK bumpers are less complicated than the US energy absorbing variety!
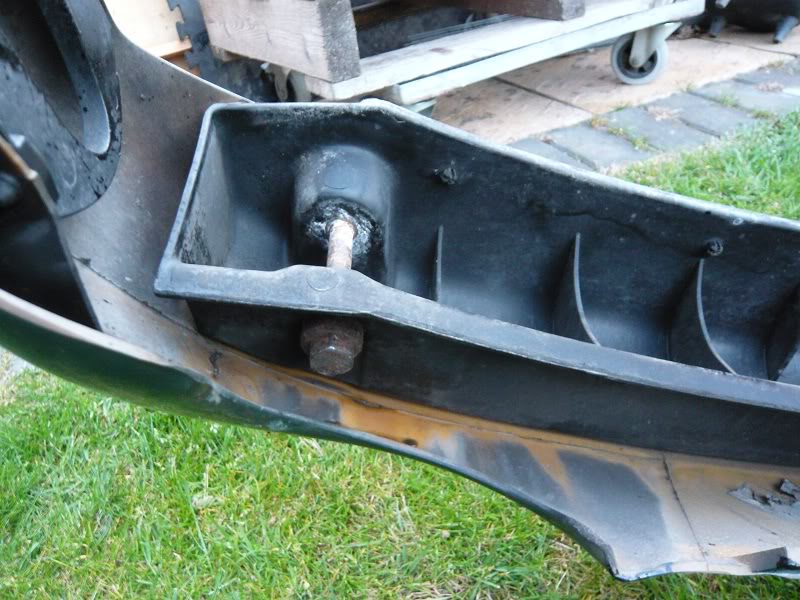
The problem is that the hexagon bolt (item 5) which goes up through the bracket (item 3) from the bottom screws into a brass nut (item 6). This nut is in the bumper plastic beam (item 1) and often breaks away and just spins round as the nut is turned.
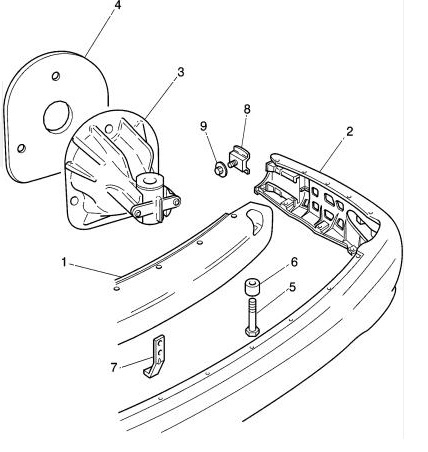
It should be possible to remove the bracket fixing nuts and take the bumper and brackets off together.
Graham
Be thankful our UK bumpers are less complicated than the US energy absorbing variety!
The problem is that the hexagon bolt (item 5) which goes up through the bracket (item 3) from the bottom screws into a brass nut (item 6). This nut is in the bumper plastic beam (item 1) and often breaks away and just spins round as the nut is turned.
It should be possible to remove the bracket fixing nuts and take the bumper and brackets off together.
Graham
Joined: Dec 2011
Posts: 120,439
Likes: 17,014
From: Durham, UK
The last bracket I purchased was in October 2008 when it was �31.45 + VAT from Stratstone Jaguar.
If it comes to the worst and you have to break anything to get the bumper off, the bracket will be the lowest cost item by a long way.
Good luck.
Graham
If it comes to the worst and you have to break anything to get the bumper off, the bracket will be the lowest cost item by a long way.
Good luck.
Graham

Thread Starter
|
Veteran Member
Joined: Apr 2012
Posts: 1,854
Likes: 987
From: UK
I tried to get to the three bolts, too tricky, so I will order up a new tower/bracket and the try to slice throgh the old one, it seems like they are made of plastic so should be possible.
Joined: Dec 2011
Posts: 120,439
Likes: 17,014
From: Durham, UK
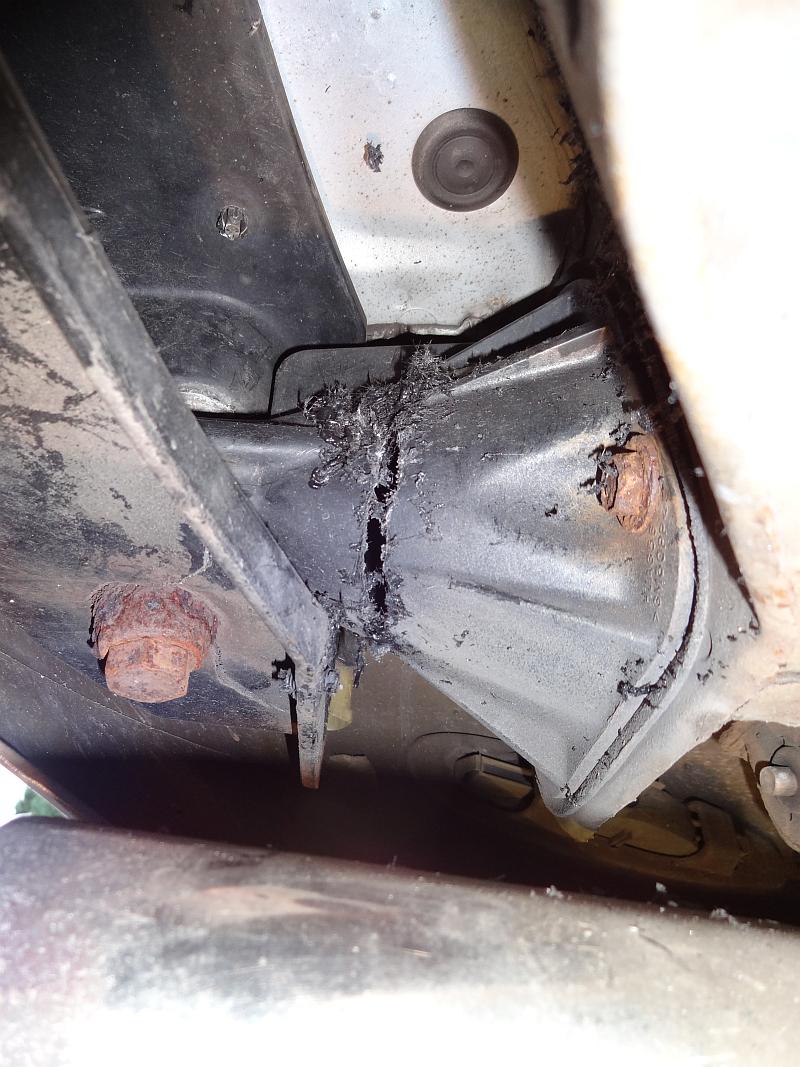
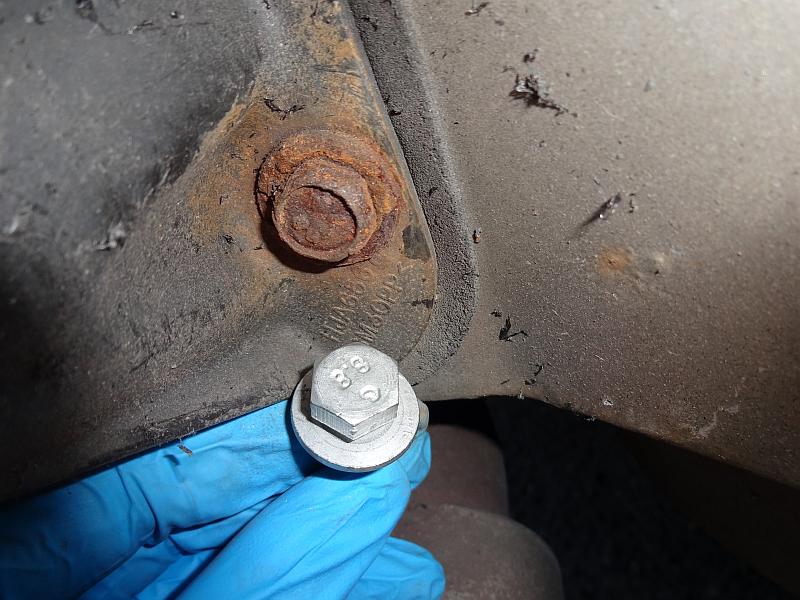
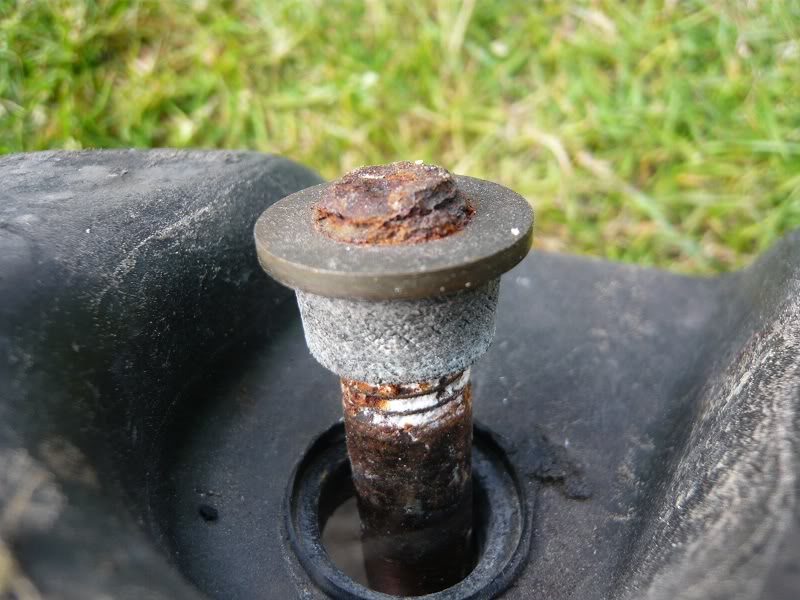
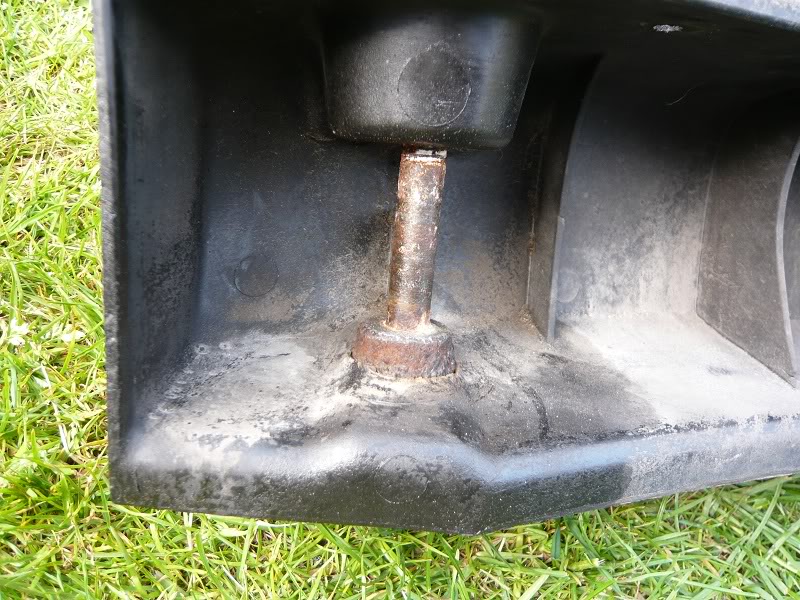
Note where this one sheared. This is the best place to attack them.
Graham

I am not going to get all pedantic here but item 6 is a spacer bush, the brass ferrule is pressed into item 1 and is not sold seperate from the beam...
I normally turn up a new brass ferrule about .5mm larger, this can be drawn into the beam when you do it up
I normally turn up a new brass ferrule about .5mm larger, this can be drawn into the beam when you do it up
Trending Topics
Thread Starter
|
Veteran Member
Joined: Apr 2012
Posts: 1,854
Likes: 987
From: UK
Here we go.
Reversing aid harness off.

Next I used this to cut through most of the bumper pillar.
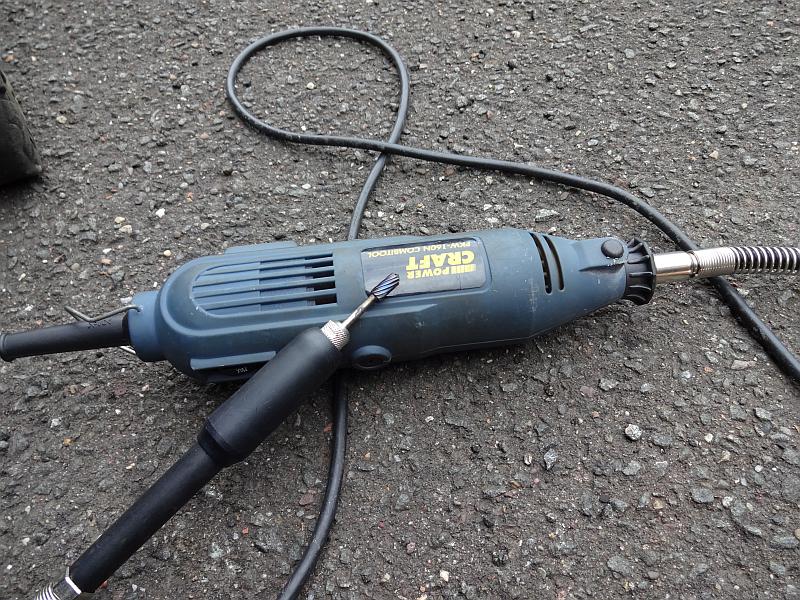
Access was limited so I was only able to cut about 3/4 of the way around.
A hack saw blade did the rest.
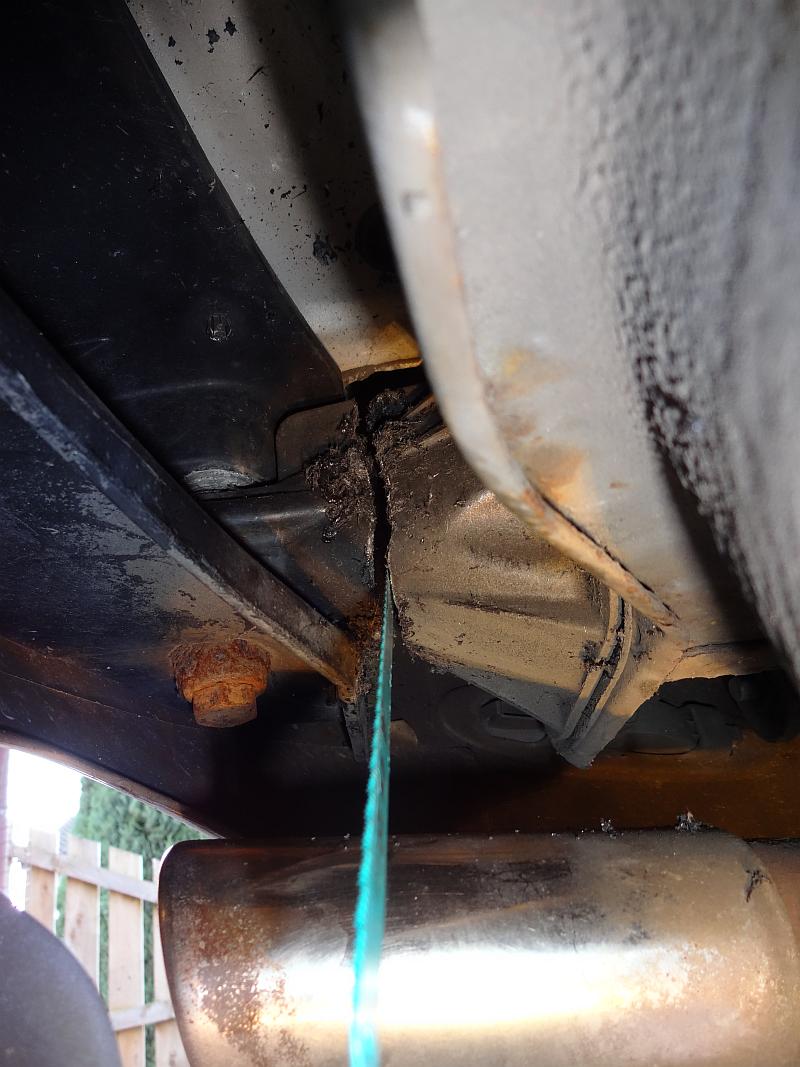
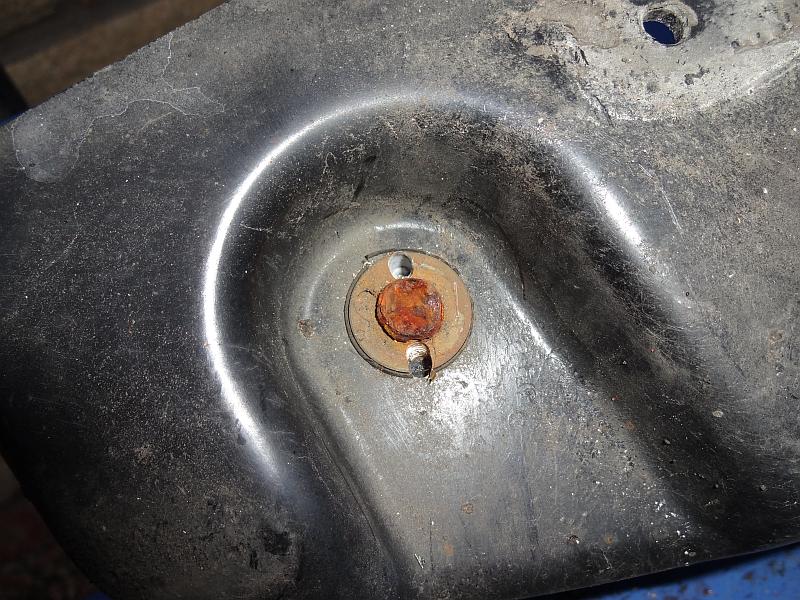
I could then tap the bumper off leaving this.
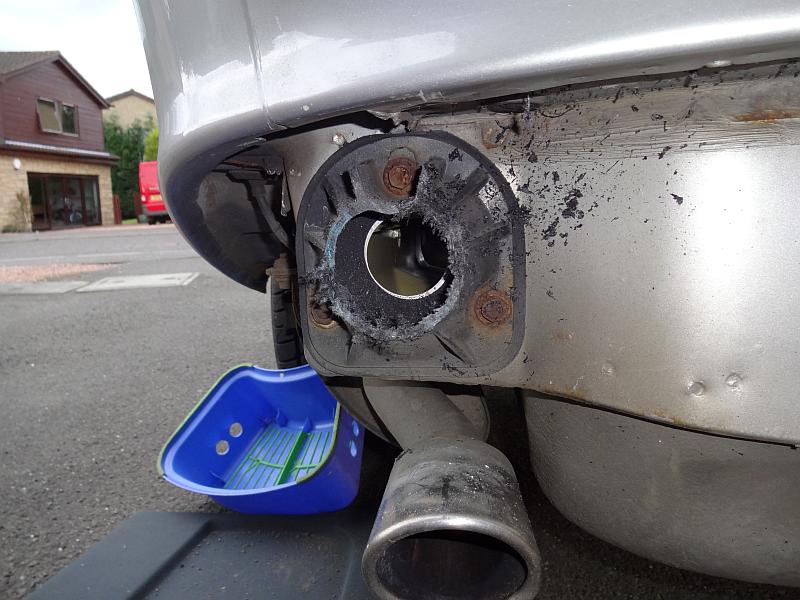
I was worried these would shear off but the came out easily.
Next, how to get the bolt out.
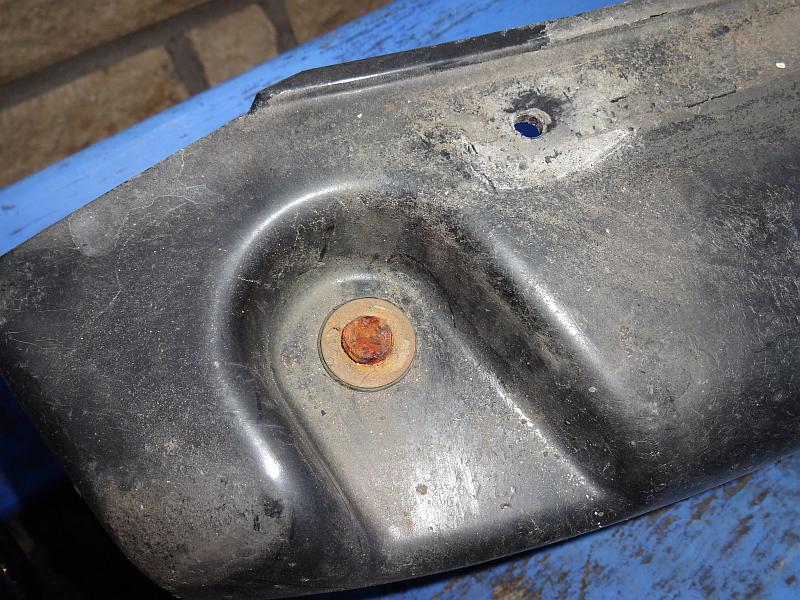
Drilled a couple of holes.
And put in a couple of self tappers.
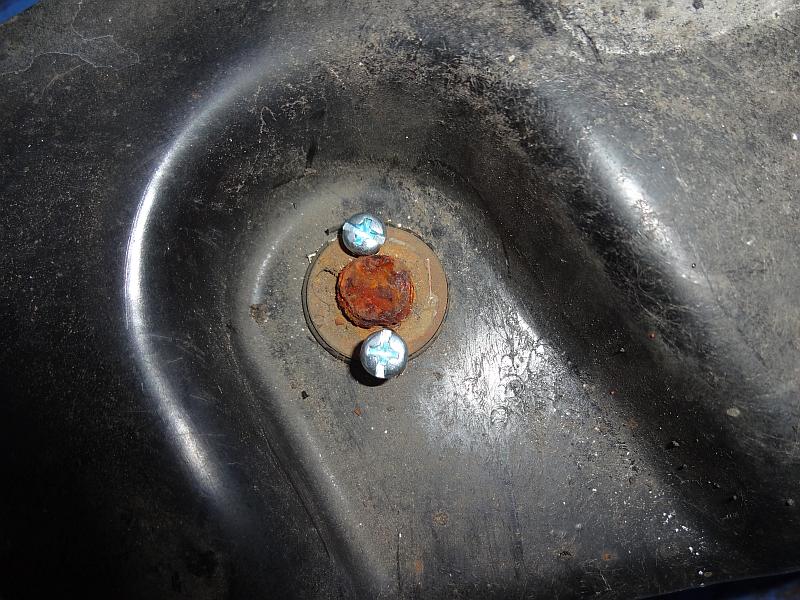
The bolt then came out easily, the bracket was in a mess.

Now on to the actual job of trying to unserseal the problem areas above the bumper.
Reversing aid harness off.
Next I used this to cut through most of the bumper pillar.
Access was limited so I was only able to cut about 3/4 of the way around.
A hack saw blade did the rest.
I could then tap the bumper off leaving this.
I was worried these would shear off but the came out easily.
Next, how to get the bolt out.
Drilled a couple of holes.
And put in a couple of self tappers.
The bolt then came out easily, the bracket was in a mess.
Now on to the actual job of trying to unserseal the problem areas above the bumper.

Senior Member
Joined: Nov 2009
Posts: 185
Likes: 38
Had the same problem ! Ended up being able to pull the bumper off the car once the fastenings behind the wheels were undone - the chassis mounts had pretty much disintegrated, the bumper was practically resting on the exhausts.
Replaced the mounts with new ones on the chassis, but on the bumper, I just used Araldite type 'liquid metal'putty to keep the brass ferrule in place. Slathered lots of copper-grease onto it of course.
Replaced the mounts with new ones on the chassis, but on the bumper, I just used Araldite type 'liquid metal'putty to keep the brass ferrule in place. Slathered lots of copper-grease onto it of course.
Last edited by franksm; Aug 26, 2012 at 05:24 AM.

Thread
Thread Starter
Forum
Replies
Last Post
Tar
XJ6 & XJ12 Series I, II & III
13
Sep 6, 2015 11:24 AM
philwarner
XJ6 & XJ12 Series I, II & III
16
Sep 5, 2015 10:05 AM
Currently Active Users Viewing This Thread: 1 (0 members and 1 guests)