When you click on links to various merchants on this site and make a purchase, this can result in this site earning a commission. Affiliate programs and affiliations include, but are not limited to, the eBay Partner Network.
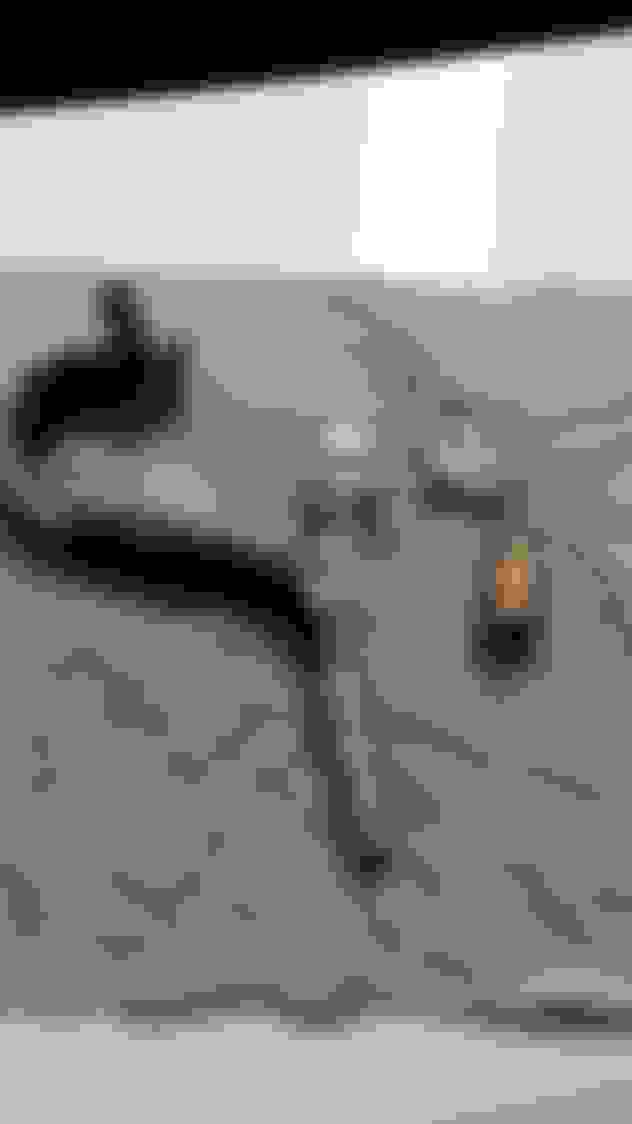
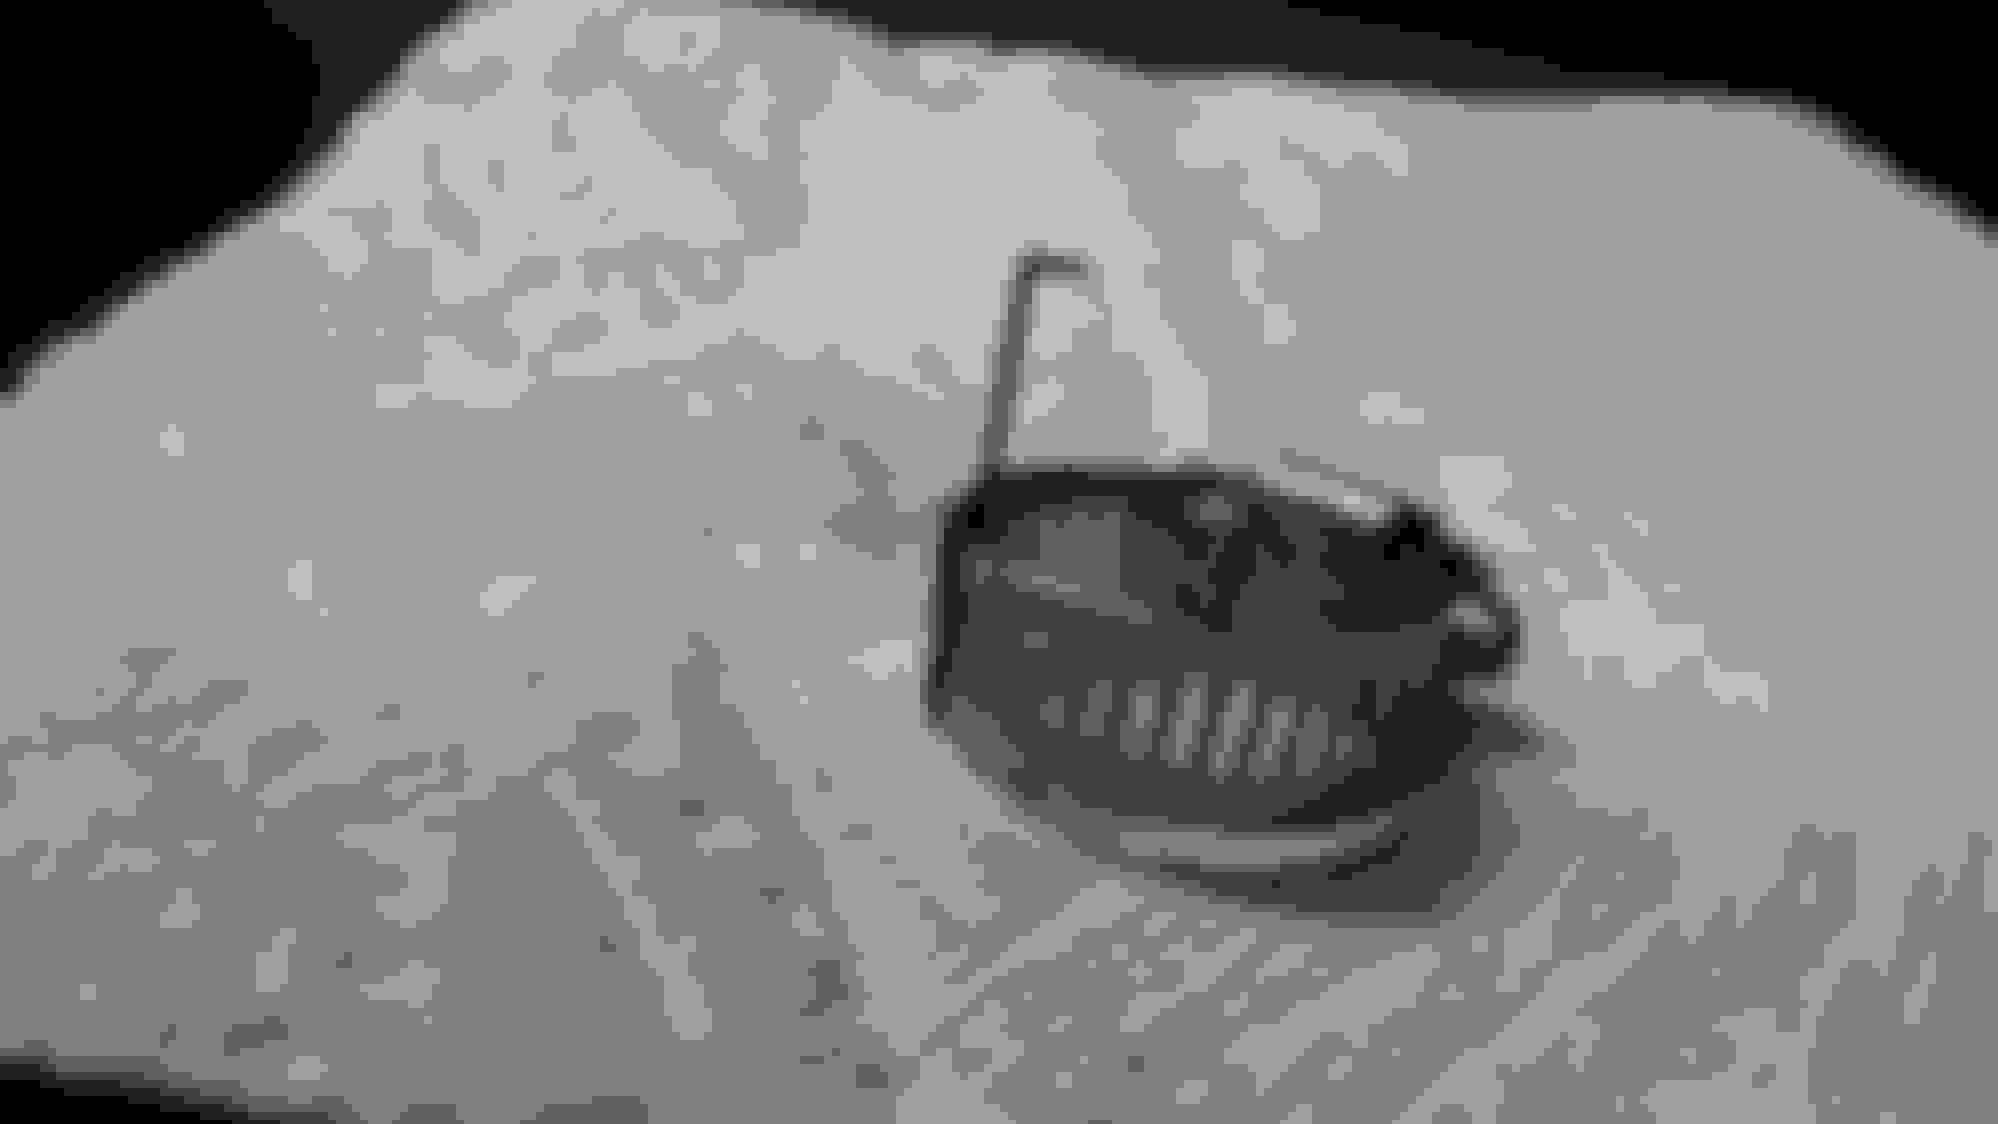
In process now of replacing the 4 engine oil cooler lines. These lines are 5/8" OD or AN10 size. Several options available. First step was removal of the top hose and then the fan shroud from the radiator to allow access to the lines. The lower shield below the front cover must be removed also. The 2 bolts holding the underneath X brace can be loosen to help in removing the lines also. 15mm socket needed. The lines into block are held by a 10mm head bolt. The 2 support bracket holding the lines to frame rail are Torx size? same as the bit used to remove the cover for the fan shroud. Oil cooler attachment lines held by 10mm head bolts, but the lines joints are 5 or 7mm head bolts. Removed the lines and separated the Left & Right sides, took Photos to assist in case a PROBLEM arose. Took them to a Custom Hose shop near by. The owner advised the ends has no bead to hold new hose and would have to have a Barb welded to them. The 2 ends at the block were steel and others were aluminum. Photos attached to show the original smooth end and the crimped end that was cut to use the existing line. The 4 rubber lines were cut from the original lines and new barbed ends added. The 2 longer rubber lines were 28mm each (end to end) and 2 small rubber lines were 14mm (end to end) each. These amounts are from the original cuts to the center line of the welded joints. Photos show the original right side line assembled since it consists of 2 separate lines. The second photo is representative of the other aluminum lines with the barb welded to it. The barbs add 10mm to each end of connection for a total of 20mm that has to be considered. The 2 hoses that attach to block (steel end) is approximately 17mm longer each plus 10mm each on the aluminum lines attached to it. The rubber lines will be shorter due to these additional barb lengths. At this time we are doing the fitting and plan to complete the fabrication and reassemble soon. Reason for us doing the assembly was THE PROBLEM. The welder mixed up the 8 pieces and cleaned the Hose Makers marks he planned to use to index the hoses correctly. Had to refer to photos to get the sides correct.
Presently we are out $200 for the 4 lines and $31 for new OEM o-rings. Will update when concluded and hopefully have money left to celebrate. Left is welded on barb on line. Top right is the crimp that was cut off line. Bottom right is the smooth end of the aluminum line with no crimp. OEM right side line complete ( 2 pieces)
UPDATE: Just completed the reassembly of the new oil cooler lines using the existing metal OEM lines. Had to weld Barbs onto ends to secure the new rubber lines with metal geared clamps. The clamps appear rather HOKEY (out of place or cheap), but they are designed for the application. Please notice the metal guide attached to the clamp body. It is a Guide to allow proper installation and placement of the clamp over the barb for maximum sealing. The tip of the guide is placed 2-3 mm from the end of hose. Probably another shop could have used the barbs and crimped barrels or ferrules which look more attractive. The lines are 5/8" or AN 10 in size. To use Braided S.S. Hose, one would need the threaded fittings welded to the lines. This experiment was to determine if rebuilding the existing metal lines would be satisfactory and dependable. There were no leaks and assembly went well. New O-rings were sourced from a supplier I deal with in Kalamazoo, Mi. Total cost not including fuel and labor was $235. Photos attached of the lines joining the block and the clamp.
Factory parts were about $400 when I did this a number of months ago. And some were inexplicably much more expensive than others. Go figure...
One of my cooler lines somehow became damaged a couple years ago on my xjr. Cost me an engine. And lots of time. Trust me what you've payed to maintain it is worth it.
Nice job guys
Last edited by jazzyjags; May 9, 2020 at 06:12 AM.
UPDATE Checked the Oil Cooler Lines yesterday AM, No Leaks. The Gear Clamps do not look as attractive, but perform the sealing function great. No rubbing, rattles or oil leaks, I am Happy. Stay Safe!
Now this is interesting... I wonder, is it possible to convert these to braided steel lines? Would that have any advantages over rubber lines?
I think it is possible to use braided line though I haven't done it yet. I have done the braided lines on replacement transmission cooler lines. I get the parts from a local speed shop. I made lines like this all the time on my sons race car when he raced when he was younger. Link attached to my repair.
My cooler lines were changed by previous owner just before I bought the car so are brand spanking new.
The cooler bracket however is a rusty POS and according to SNG Barrat the 4.2L supercharged bracket is no longer available... anyone else had this problem? The cooler is pretty much just sitting on top on the bracket now and the last thing I want is it falling off and hitting the road.
Anyone else tackled this? Am thinking i will have to make up some new brackets and mount them off something else?
My wife's 2006 XK8 will be due for an oil & filter change after another 400 to 500 miles. It still has its factory oil cooler lines so I will be taking a good look at their condition when I am underneath the front end of the car. Sure glad to have this thread to help guide me to those hard-to-reach areas where these crazy-shaped lines are installed....
In process now of replacing the 4 engine oil cooler lines. These lines are 5/8" OD or AN10 size. Several options available. First step was removal of the top hose and then the fan shroud from the radiator to allow access to the lines. The lower shield below the front cover must be removed also. The 2 bolts holding the underneath X brace can be loosen to help in removing the lines also. 15mm socket needed. The lines into block are held by a 10mm head bolt. The 2 support bracket holding the lines to frame rail are Torx size? same as the bit used to remove the cover for the fan shroud. Oil cooler attachment lines held by 10mm head bolts, but the lines joints are 5 or 7mm head bolts. Removed the lines and separated the Left & Right sides, took Photos to assist in case a PROBLEM arose. Took them to a Custom Hose shop near by. The owner advised the ends has no bead to hold new hose and would have to have a Barb welded to them. The 2 ends at the block were steel and others were aluminum. Photos attached to show the original smooth end and the crimped end that was cut to use the existing line. The 4 rubber lines were cut from the original lines and new barbed ends added. The 2 longer rubber lines were 28mm each (end to end) and 2 small rubber lines were 14mm (end to end) each. These amounts are from the original cuts to the center line of the welded joints. Photos show the original right side line assembled since it consists of 2 separate lines. The second photo is representative of the other aluminum lines with the barb welded to it. The barbs add 10mm to each end of connection for a total of 20mm that has to be considered. The 2 hoses that attach to block (steel end) is approximately 17mm longer each plus 10mm each on the aluminum lines attached to it. The rubber lines will be shorter due to these additional barb lengths. At this time we are doing the fitting and plan to complete the fabrication and reassemble soon. Reason for us doing the assembly was THE PROBLEM. The welder mixed up the 8 pieces and cleaned the Hose Makers marks he planned to use to index the hoses correctly. Had to refer to photos to get the sides correct.
Presently we are out $200 for the 4 lines and $31 for new OEM o-rings. Will update when concluded and hopefully have money left to celebrate. Left is welded on barb on line. Top right is the crimp that was cut off line. Bottom right is the smooth end of the aluminum line with no crimp. OEM right side line complete ( 2 pieces)
Did you possibly mean centimeters instead of milimeters on rubber hose lengths?