When you click on links to various merchants on this site and make a purchase, this can result in this site earning a commission. Affiliate programs and affiliations include, but are not limited to, the eBay Partner Network.
Hi, new owner here dealing with the "Green Shower," and I have a question:
The routing for the hoses is very convoluted and seems to be overly complex.
Has anyone tried routing the hoses straight back along the left rocker, up under the rear seat, and cross the car while under the seat? This would avoid right angles to go under the carpet in front of the seat, another to go back along the tunnel, the multiple bends over the tunnel, etc. The hose length should be about the same for the new path.
Any reasons (other than originality) for not rerouting?
I printed out your instructions - all 76 pages of them - and have been progressing step-by-step, page-by-page!! They are awesome.
I have pulled and replaced the hoses as far as the rear bulkhead and had to quit for some thought juice. Malted.
The big problem is that I can't see what I'm pulling through. Does it help to raise the top (manually) to get a view?
I also ran the lines straight back past the parking brake, up and across under the back seat. SO MUCH easier than the stock routing. (pix coming)
Yes raise the top half way and you will get a clear view through the chaos.
I don't what the big deal is about routing the lines. I just cut the old ones and used them as pullers. Took like 5 minutes tops.
Yes raise the top half way and you will get a clear view through the chaos.
I don't what the big deal is about routing the lines. I just cut the old ones and used them as pullers. Took like 5 minutes tops.
Thanks for the compliment xskate, will be popping over for a beer.
Rothwell its not so much about routing the lines as getting to them. For instance I had no idea how to remove the kick plate or how to get to the torx screws under the trim (the heat gun bit) so just trying to save others the hassle of trying to work it out. Its usually the fiddly bits that cause the most problems. We are all wiser after we have done the job. How many times have we said "wish I had known that before", I certainly have.
Thats the brilliant thing about these forums. I have found them to be an invaluable resource when I am stuck on a problem or want advice. Just simply trying to return the favour or favor if your in the states. I still smile when I think we are chatting one in England the others in the US. The world is getting smaller.
Rothwell,
Thanks for the help; I will do that tonight.
As for the re-routing - thinking ahead for the next poor sod that might have to do this: this different routing does not require removal of the seat, or deconstruction of the console, or fiddling with the carpet.
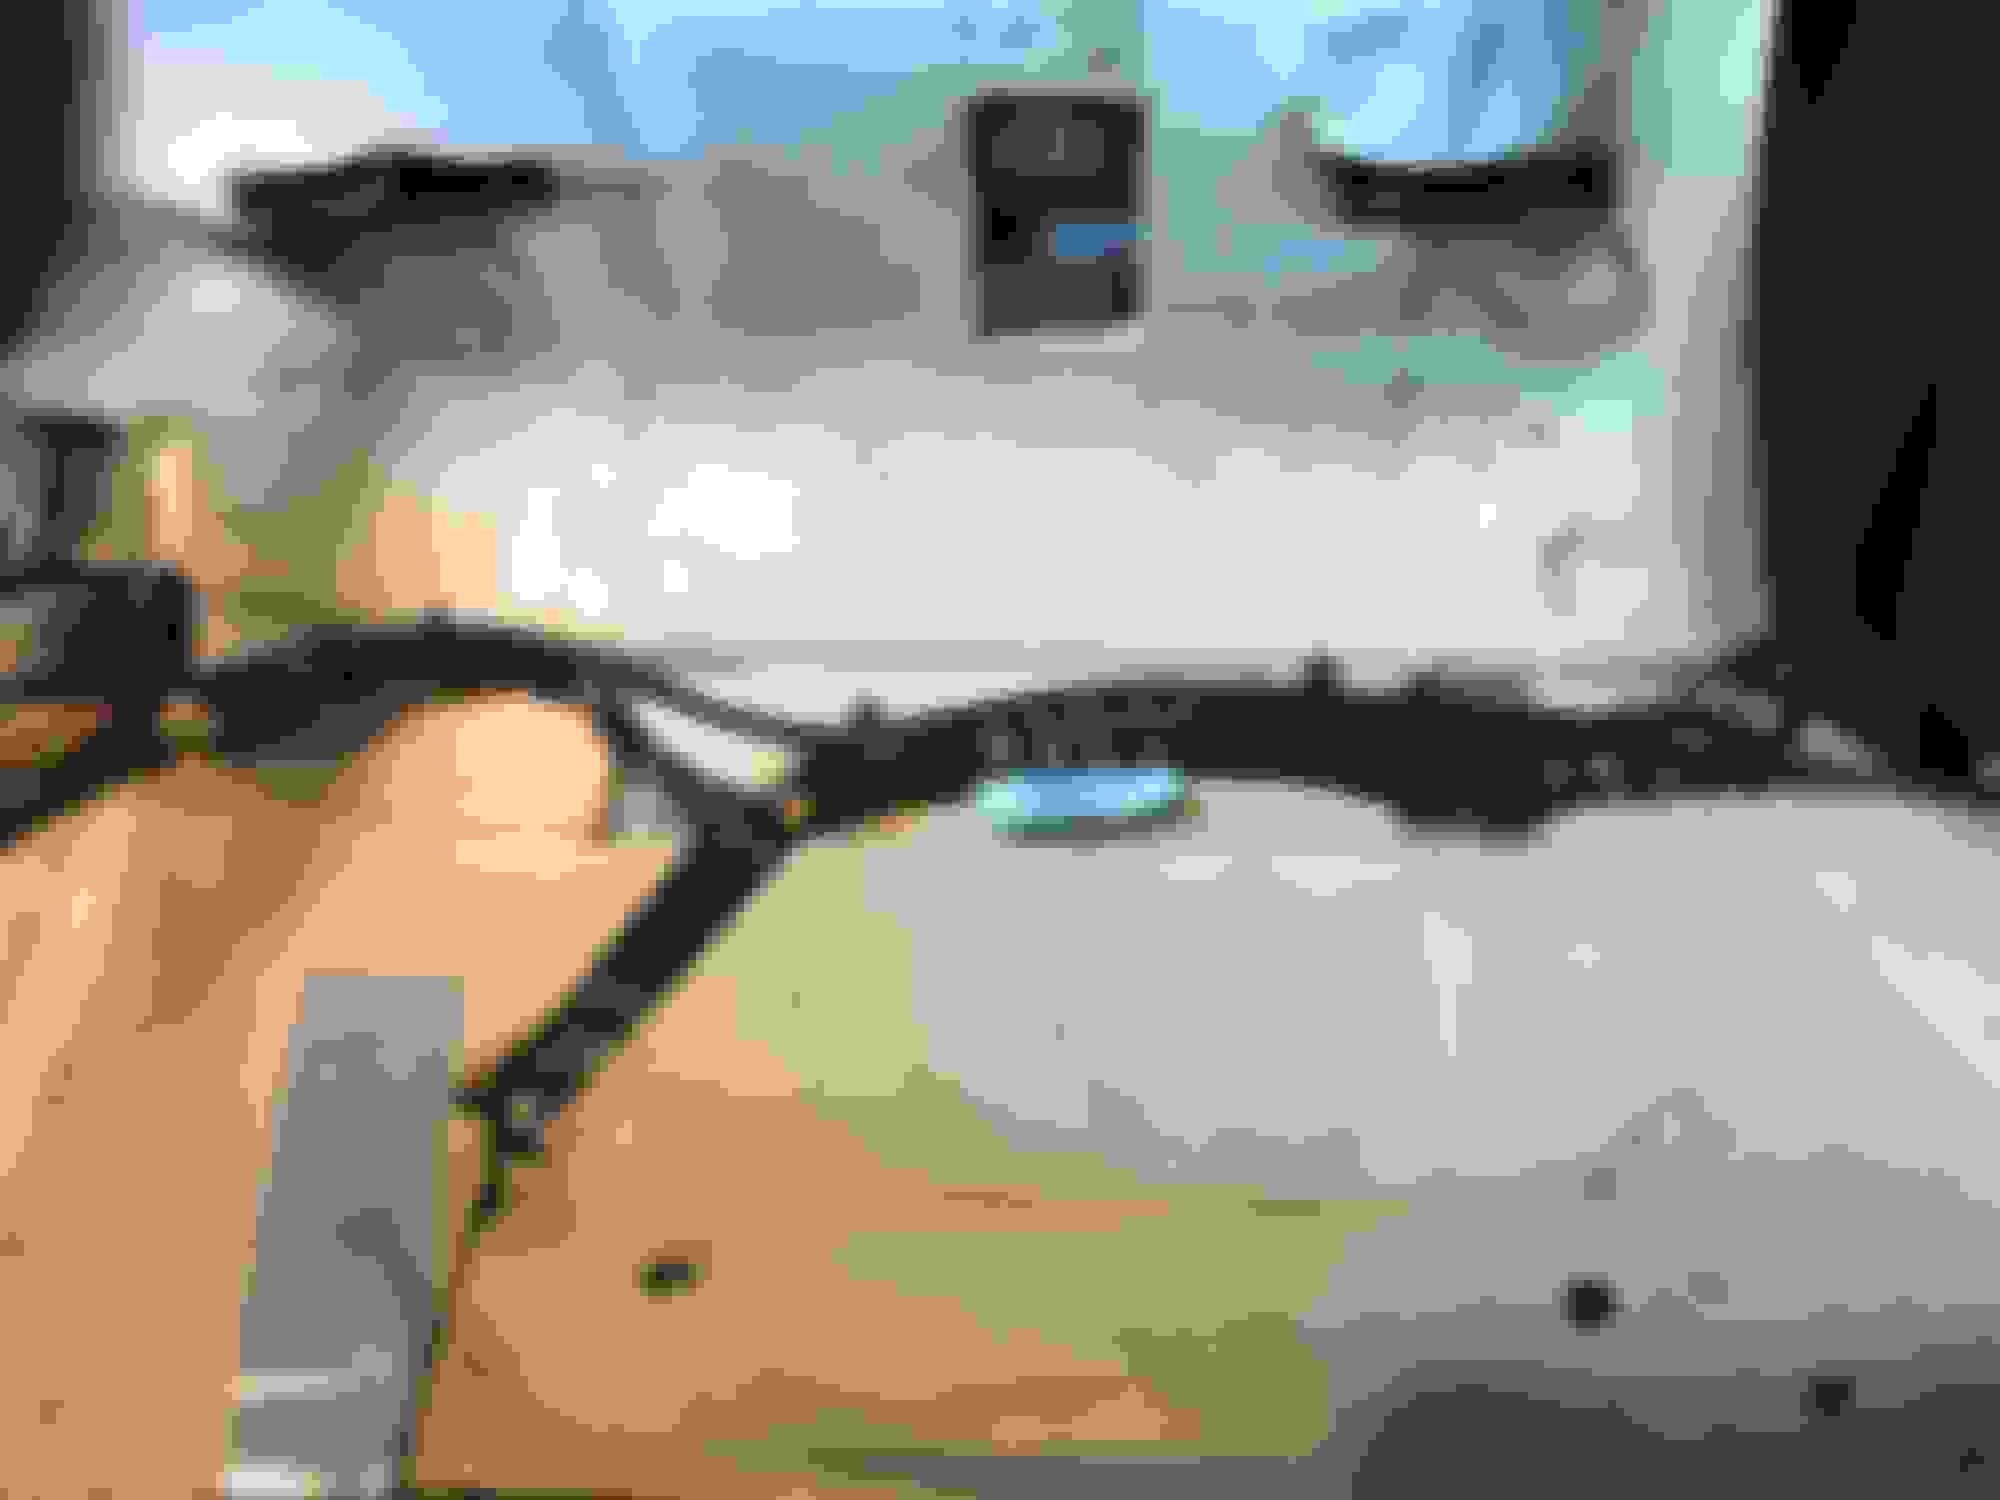
The hoses can run straight back, up and under the rear seat to cross over. Jaguar even thoughtfully put channels in the sound-deadening foam that make natural raceways. See the pic.
Nice raceways in the foam. Note hoses are zip-tied to the cables.
Wow Frank! GREAT set of instructions! They will save me a ton of trial and error in doing this job. I know it was a big effort to do this, but it is going to be appreciated by a lot of us over the years. Thanks again.
Wow Frank! GREAT set of instructions! They will save me a ton of trial and error in doing this job. I know it was a big effort to do this, but it is going to be appreciated by a lot of us over the years. Thanks again.
Thanks! Good of you to say so. So thats another beer then..............
New items to note:
Raising the top definitely allows a better view of the rear bulkhead area. (Thanks, Rothwell)
But removing a screw allows one to peel back the top liner and really see what's going on:
Then, one has a great view. Note that there are two tie downs that are holding the old hoses in place. These are quite hard to access and would have to be cut to allow the hose fitting to pass.
Note that the pass-through to the trunk/boot area is quite large. I elected to not cut these tie downs. I cut the ends off my old hoses instead and without the ends they will drag through the cable ties into the trunk, leaving those tie downs in place.
So now I ran the new hoses over the right side of the passenger seat foam, following the electrical bundle, and ran them right through the foam grommet alongside the bundle.
Zip tie liberally!
All downhill at this point, run the new hoses through the bulkhead hole, put new ties next to the old ones, and connect to the pump. "Bob's your Uncle!" (did I say that right, Frank?)
So the next time I have to replace hoses it will be a ton easier.