Jaguar Forums - Jaguar Enthusiasts Forum
  • LOG IN
  • REGISTER
  • Forums
    • General Jaguar Forums
      • New Member Area - Intro a MUST
      • Jaguar Forums Feedback & Suggestion Center
      • General Tech Help
    • Jaguar Models ( Current )
      • XF (X260)
      • F-Type ( X152 )
      • XE ( X760 )
      • E-Pace
      • F-Pace (X761) / C-X17
      • I-Pace EV
    • Jaguar Models ( Modern )
      • XF and XFR ( X250 )
      • XJ ( X351 )
      • X-Type ( X400 )
      • S-Type / S type R Supercharged V8 ( X200 )
      • XJ XJ6 / XJ8 / XJR ( X350 & X358 )
      • XJ XJ8 / XJR ( X308 )
      • XJ XJ12 ( X305 )
      • XJ XJ6 / XJR6 ( X300 )
      • XK8 / XKR ( X100 )
      • XK / XKR ( X150 )
    • Jaguar Models ( Classics )
      • Mark V - X 420G
      • MKI / MKII S type 240 340 & Daimler
      • XK120 XK140 XK150
      • E type ( XK-E )
      • XJ6 & XJ12 Series I, II & III
      • XJS ( X27 )
      • XJ40 ( XJ81 )
      • XKSS
      • XJ220
    • Other Jaguars
      • Other Jaguar Models / Concepts / Replicas
    • Diesel variants
      • Diesel variants - All models
    • Non Jaguar vehicles
      • Non-Jaguar Vehicles
    • Brand Review
      • Jaguar Press release
      • Jaguar Customer Relationship Centre
      • Jaguar Engines & transmissions
      • Wheels / Tires, Suspension & handling
      • Interior
      • Exterior
      • Audio/Visual Electronics
      • Detailing / Car care
      • Motorsports
    • Jaguar Classifieds
      • Marketplace
      • PRIVATE For Sale / Trade or Buy Classifieds
      • VENDOR 'For Sale' Classifieds
    • Regional
      • US Northeast
      • US Central
      • US Southwest
      • US Western
      • US Northwest
      • US Midwest
      • US Mid Atlantic
      • US Lower Atlantic
      • US Southern Midwest
      • Canada
      • Mexico, South America
      • UK & Eire
      • Europe
      • Australia - Queensland
      • Australia - New South Wales / ACT
      • Australia - Victoria / Tasmania
      • Australia - Western
      • Australia - South / NT
      • New Zealand
      • Other Areas
    • Official Site Sponsors
      • VENDOR Threads
    • General Interest / History
      • Sights N Sounds
      • Photography
      • Forum announcement archives / Forum History
      • Jaguarforums Merchandise
      • Memorial Section
  • News
  • Marketplace
    • Vendor Directory
    • Become a Vendor
    • Member Marketplace
    • Vendor Marketplace
    • Site Store
  • New Posts
  • Tools
    • Car Payment Calculator
    • Tire Rim Calculator
    • Vin Decoder
    • Recalls
    • Technical Service Bulletins (TSBs)
    • Members List
    • Live Feed
  • Gallery
  • View Dark Mode
    • Please register or login to enable Dark Mode.
  • Log In
  • Register
Jaguar Forums - Jaguar Enthusiasts Forum
    • Threads
      • Advanced
Dark Mode

Please register or login to enable Dark Mode.

Log In

Forgot your Password?

By logging into your account, you agree to our Terms of Use and Privacy Policy, and to the use of cookies as described therein.
or
 
  • Recent
  • Commented
  • Albums
  • My Pictures

Peter_of_Australia's Photos

View Profile
Sort:
Commented
  • Most Recent
  • Most Comments
  • Albums
  • Photos
The reason as to why it took so long was only clear after I saw the design (after the airbag came off): While you need a mid sized flathead, the length of such a screwdriver would be too long... Maybe it would be better to choose a small screwdriver, just so that you can lever it towards the centre of the steering wheel, which I can't do with the big screwdriver, because it gets caught on that aperture for the odometer (which is why you would turn the screwdriver (again and again that 90° turn..
0 2023/07/28 05:46:18 Peter_of_A
And something else noteworthy: Those cheap plastic squeegees may well put a few scratches into your brand new tint. This is not what you want. I ordered already a squeegee with rubber-edges, but until this arrives, I created one of those myself, by just covering the plastic squeegee with a bit of proper 1mm rubber (I had a 1mm rubber sheet on a roll).
0 2023/07/25 04:16:58 Peter_of_A
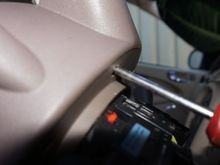
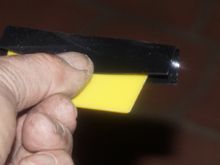
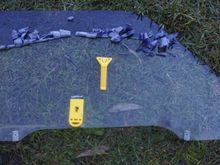
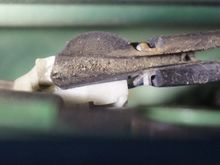
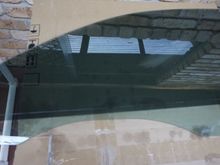
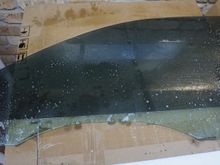
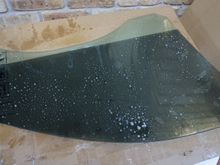
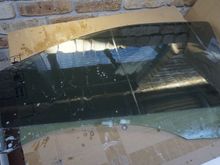
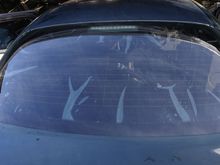
Sometimes, if the tint is not on the glass for that long, you may either be able to pull the tint off by hand of with a water pressure cleaner, but the front side windows of the van were way beyond that: I had to use razor blade scrapers to get the old tint off. I ordered already a proper metal-holder for those razor blades and a box with 100 blades for next time. One the tough bit was done and the old tint has been removed, except for a little bit of residue, I poored a bit of petrol onto the g
0 2023/07/25 04:16:54 Peter_of_A
0 2023/07/21 14:58:44 Peter_of_A
0 2023/07/21 14:58:41 Peter_of_A
0 2023/07/21 14:45:10 Peter_of_A
0 2023/07/21 14:45:08 Peter_of_A
0 2023/07/21 14:45:03 Peter_of_A
0 2023/07/21 05:37:14 Peter_of_A
0 2023/07/21 04:26:05 Peter_of_A
0 2023/07/21 04:26:03 Peter_of_A
0 2023/07/21 04:26:01 Peter_of_A
0 2023/07/21 04:25:58 Peter_of_A
0 2023/07/21 04:25:56 Peter_of_A
0 2023/07/21 04:25:54 Peter_of_A
0 2023/07/21 04:25:52 Peter_of_A
0 2023/07/21 04:25:49 Peter_of_A
0 2023/07/21 04:25:47 Peter_of_A
0 2023/07/21 04:25:43 Peter_of_A
0 2023/07/21 04:25:41 Peter_of_A
0 2023/07/21 04:25:38 Peter_of_A
0 2023/07/21 04:25:35 Peter_of_A
SO THIS IS THE PROBLEM: CORROSION OF THOSE CONTACTS IN THAT HIDDEN CONNECTOR!!! CORROSION MEANS: NO ELECTRIC CONTACT = THE INFORMATION FROM THE SPEED SENSOR DOES NOT GET PASSED ON = ABS SYSTEM FAULT! How silly is it to have a connector there at all instead of having a cable going all the way thru. This is a design fault and a designed-in failure waiting to happen! After cleaning the corroded contact with contact cleaner, and a few minutes later forcing the surface contamination out with compress
0 2023/07/20 05:29:25 Peter_of_A
Somehow I managed to get that connector off. Using a heat gun, I then also managed to get that clip out of the "wall" (without heat gun, the clip would break), as I would not be able to slide the connector back on with the clip still attached to the wall (but I am getting ahead of myself - that is important later for re-assemlbly).
0 2023/07/20 05:29:21 Peter_of_A
That's the connector behind the wheel-liner. On the right is continues on to the speed sensor.
0 2023/07/20 05:29:17 Peter_of_A
0 2023/07/18 04:12:00 Peter_of_A
0 2023/07/18 04:11:55 Peter_of_A
Unit modified with Sony radio in X-Type
0 2023/07/17 05:24:08 Peter_of_A
OE unit in S-Type
OE unit in S-Type
0 2023/07/17 05:24:05 Peter_of_A
And that's the fire extinguisher mounted in the bracket.
0 2023/07/14 04:21:59 Peter_of_A
That's the bracket mounted onto that very solid metal X-bar. I removed the seat (after pulling the airbag-fuse (just in case)) to get better access.
0 2023/07/14 04:21:55 Peter_of_A
It's probably easier, if you take 2 and 3 apart first - but maybe it works like that as well: Transponder 1 goes into his "bed" as indicated. Add a bit of double sided sticky take or glue. Then turn over 6 and place it over 5 - there is only one correct way - one of the 4 "arms" is wider, and this arm goes into the widest gap. Next: Spring 5 goes underneath 5 and with the end that does not have the "spring-arm" sticking out. That spring-arm then goes exactly  into its "bed" in 2 as indicated. Th
It's probably easier, if you take 2 and 3 apart first - but maybe it works like that as well: Transponder 1 goes into his "bed" as indicated. Add a bit of double sided sticky take or glue. Then turn over 6 and place it over 5 - there is only one correct way - one of the 4 "arms" is wider, and this arm goes into the widest gap. Next: Spring 5 goes underneath 5 and with the end that does not have the "spring-arm" sticking out. That spring-arm then goes exactly into its "bed" in 2 as indicated. Th
0 2023/07/02 15:44:58 Peter_of_A
Page 1442 from the workshop manual pointing out the ATF check bolt
0 2023/06/26 06:05:08 Peter_of_A
0 2023/06/26 06:03:18 Peter_of_A
This is the fluid level plug! I have opened the correct one already a few times on 2 different X-Type, and also, you can confirm this on the X-Type workshop manual on page 1442.
0 2023/06/25 21:54:38 Peter_of_A
So after having bend back the 3 metal latches (No. 5s) and having made sure that the 4 No. 8 latches are free, the two halves are still stuck together, because there is kind of a strong bond at point No. 9. To overcome/loosen this, I pried in with a flathead screwdriver at the gap No. 10, using the screwdriver as lever between the plastic housing from the inside and the metal part underneath... And to get those two stubborn parts back together at reassembly, I used a pair of plumbers pliers to p
0 2023/06/21 19:08:47 Peter_of_A
0 2023/06/21 19:07:31 Peter_of_A
And this red cable goes to the interior door handle.
0 2023/06/21 05:01:29 Peter_of_A
Detail with metal rod. With the white bit pulled out, it is possible to re-insert the rod sideways, which makes re-inserting after mounting the mechanisms in the door already (with those 3 bolts) possible.
0 2023/06/21 05:01:27 Peter_of_A
Detail.
Detail.
0 2023/06/21 05:01:25 Peter_of_A
First
Page
11 of 24
Last
Go To
Page
  • 1
  • ...
  • 9
  • 10
  • 11
  • 12
  • 13
  • ...
  • 24
11 of 24
Go To GO
Go to page of 24 pages
  • 1
  • ...
  • 9
  • 10
  • 11
  • 12
  • 13
  • ...
  • 24

Top
Jaguar Forums - Jaguar Enthusiasts Forum
  • Contact Us
  • FAQ
  • Archive
  • Advertising
  • Cookie Policy
  • Privacy Statement
  • Terms of Service
  • Your Privacy Choices
  • Manage Preferences

© 2026 MH Sub I, LLC dba Internet Brands

Follow Us        


When you click on links to various merchants on this site and make a purchase, this can result in this site earning a commission. Affiliate programs and affiliations include, but are not limited to, the eBay Partner Network.