
Fuel Pump issue
#1
 09-10-2010, 06:40 AM


Ironically, I just ran into a fuel pump problem on my car. It will not power up when I turn the key. After reading the post on the "fuel pump overheating" thread, I applied some of that info to my situation without resolve. Here is what I have done:
1.Tested fuel pump directly to 12v power and the fuel pump works
2. Used a jumper from 12v to the green/white wire on the fuel pump relay socket and the fuel pump does not work.
3. Put a voltmeter on the two wires that connect to the fuel pump and turned the key to position 2, there is no power.
This tells me that there is a problem between the relay switch and the pump.
My question to S3 owners: Is the green/white wire that goes from the firewall to the fuel pump a continuous feed or is there a fuse/connector/etc along the line somewhere that would be compromised and stop power from getting to the pump?
This is a frustrating issue because I have spent hours trying to find the problem. The green/white power wire goes into places that I cannot see/reach easily.
#2
09-10-2010, 07:43 AM


Veteran Member
Join Date: Mar 2008
Location: Pacific Northwest USA
Posts: 24,743
Received 10,757 Likes
on
7,101 Posts
The wire/green wire has a connector (number CP9) somewhere in the center console area. The diagram is not very specific, sorry. The fuel tank changeover switch also has connectors at CP9...that might help you find it.
Your fuel pump relay socket probably has two white/green wires with separate terminals. Did you apply 12v to both?
Just FYI, the pump circuit will not power-up by simply turning the ignition on. The starter has to be engaged or air must be flowing thru the air flow meter.
Here's more reading on the subject although it doesn't pertain to your specific question.
http://www.jag-lovers.org/xjlovers/x...lpumpcheck.htm
Cheers
DD
#3
09-10-2010, 08:28 AM
Ok, that helps shed some light on another possibility. No, I did not power up both white/green wires just the front one and I also did not try that when I was engaging the starter. I only had the key on the #2 position. When you say center console, would that be the area around the shifter?
I did read that fuel pump check list and essentially found myself at step 2 of part 1. Fuel pump worked with direct 12v power but not with a jumper with the relay out. However, it appears as if I need try starting the car to have proper tests. Will do that later today. One thing is certain, it is not the fuel pump.
I did read that fuel pump check list and essentially found myself at step 2 of part 1. Fuel pump worked with direct 12v power but not with a jumper with the relay out. However, it appears as if I need try starting the car to have proper tests. Will do that later today. One thing is certain, it is not the fuel pump.
#4
09-10-2010, 08:54 AM
#5
09-10-2010, 09:18 AM
Veteran Member
Join Date: Mar 2008
Location: Pacific Northwest USA
Posts: 24,743
Received 10,757 Likes
on
7,101 Posts
To clarify, you don't need to do that to for all the tests. It's just an easy way to check that the fuel pump works with the key in the "start" position. The starter *circuit* works, but the starter itself doesn't engage becuase of the neutral safety switch. This way you can simply listen for the hum of the pump
Cheers
DD
#6
09-10-2010, 09:22 AM
Veteran Member
Join Date: Mar 2008
Location: Pacific Northwest USA
Posts: 24,743
Received 10,757 Likes
on
7,101 Posts
Make jumping the other white/green wire your first step. This way you'll know if you have a problem on the white/green wire to the pump.
When you say center console, would that be the area around the shifter?
I *think* it's actually behind the vertical panel that holds the radio, trip computer, etc. I'm really not sure.
Cheers
DD
#7
09-10-2010, 09:39 AM
Trending Topics
#8
09-10-2010, 04:39 PM
#9
09-10-2010, 05:15 PM
Veteran Member
The Series 3 has two paths to powering-up the fuel pump:-
1. Feed via the starting circuit, only provided when ign switch is in "Start" position, (the spring-loaded one).
2. Via the MAF meter using two very small contacts that close when air flow starts. This takes over when the "start" position is released on engine start .
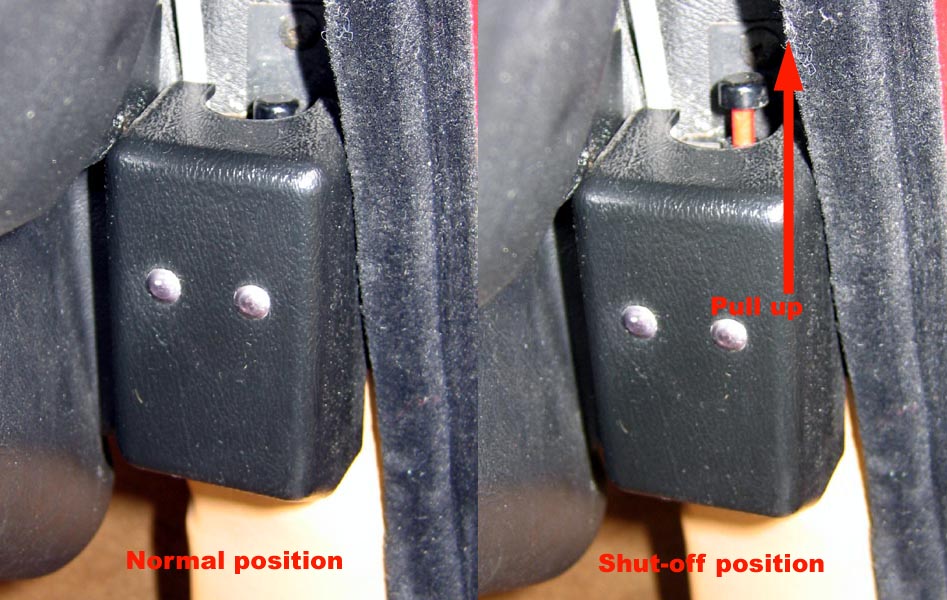
All paths go via the inertia switch I believe, so best to check this.
Best way is to wire up a 12v bulb with very long leads so you can see it easily when you work the ignition switch, and connect to pump contacts so bulb comes on when power is supplied to the pump. It will tell you when power gets there so you can relate it to what you are doing at the time. I did this and managed to identify contacts fault in the MAF
1. Feed via the starting circuit, only provided when ign switch is in "Start" position, (the spring-loaded one).
2. Via the MAF meter using two very small contacts that close when air flow starts. This takes over when the "start" position is released on engine start .
All paths go via the inertia switch I believe, so best to check this.
Best way is to wire up a 12v bulb with very long leads so you can see it easily when you work the ignition switch, and connect to pump contacts so bulb comes on when power is supplied to the pump. It will tell you when power gets there so you can relate it to what you are doing at the time. I did this and managed to identify contacts fault in the MAF
#10
09-11-2010, 04:08 PM
Veteran Member
The reed switch in the MAF was put in as a safety item, so that pump would not continue to pump fuel to the front of the car if an accident occurred. When the engine stops the air flow through the MAF stops and the reed switch opens. NOw having suffered from this little item that can cause you serious trouble, like cutting the engine whilst overtaking !!! I would like to see a mod that still provides the safety feature but uses a different way of doing it.
Did anybody hear about the Airbus that had a "safety feature" to prevent reverse thrust from engaging until aircraft had landed ? This was to detect undercarriage wheel rotation and load on the undercarriage. Problem was pilot made a very gentle landing on a very wet runway, so load was notsufficient and wheels spun up late on the soaking runway with the result the computer would not let him deploy reverse thrust until too late, and the aircraft ran out of runway.
Did anybody hear about the Airbus that had a "safety feature" to prevent reverse thrust from engaging until aircraft had landed ? This was to detect undercarriage wheel rotation and load on the undercarriage. Problem was pilot made a very gentle landing on a very wet runway, so load was notsufficient and wheels spun up late on the soaking runway with the result the computer would not let him deploy reverse thrust until too late, and the aircraft ran out of runway.
#11
09-11-2010, 06:43 PM
Here is a wiring diagram showing the fuel pump, relays, and inertia switch:


Here is a place you can get the entire wiring diagram:
http://cid-562a51a1e467595c.office.l...se.aspx/Jaguar
Click on "Series III electrical guide"
Here is a place you can get the entire wiring diagram:
http://cid-562a51a1e467595c.office.l...se.aspx/Jaguar
Click on "Series III electrical guide"
Last edited by bbarcher; 09-11-2010 at 06:51 PM.
#12
09-12-2010, 09:08 PM
These are some outstanding posts!
An update from my end, the car is now back on the road. My problem ended up being both the fuel pump and one or both fuel relays (I replaced them both). I put a new pump in and I could hear it running but it was bad right out of the box. When I took it back off the car and tested it by just running it out of a 1 gallon gas can with remote power hooked up, it did not flow any gas. I got another pump, tested it the same way and it flowed gas perfectly. Installed it on the car and...nothing. So I took off both relays, took them to Napa and when I installed them... started right up.
Mind you, this was all done before I read these posts and looked at the pics/youtube video. I have a spare red relay from another car so if that goes, I at least have a replacement while I fix the other one as shown in the pics.
Thank you for all the great input. Put 100 test miles on the Jag today and it ran without incident.
#13
09-16-2010, 03:56 PM
UPDATE: I may have spoke too soon on this one. The wife calls me at work and says the car was running rough at idle and hesitating on acceleration. Got it home (after she left it at the kids school 3 mi from home) and pulled the fuel filter. Rusty sediment again. It is only coming from the drivers side tank which the previous owner had left empty for years (yeah I know I have to get it off the car and cleaned but waiting for winter to do it). So I put a NAPA 3248 fuel filter in the 7/16 lines that run from both tanks to the changeover valve. Ran clean gas through the fuel pump after taking it out of the car...runs fine. Going to reinstall a new post-pump filter and see what happens. I read on another post that the pre-pump filters will catch all that sediment and it is a poor mans way to clean the tank. If it works, I will post the results down the line.
#14
09-17-2010, 01:44 PM
espresso, where did you get the new fuel line from the trunk to under hood? Did you make it out of regular steel tubing or find a good used one?
I wonder if anybody has tried a de-rusting agent on the inside of the line.
NOTE: I took out the tank drain plug, sending unit, and allowed all residual fuel to evaporate. At the bottom of the tank there was a 3/4 inch layer of powdered rust and sediment. The walls of the tank were rusty but not horrible. I used a brush taped to a long stiff wire to loosen any rust on the tank sides, and then used a mini shop vac to clean the inside of the tank. Finally, I set the vacuum to blow, and let it go until rusty dust stopped shooting out. Then I installed new mesh filters on the intake tubes, new hoses and in-line filters before the pumps. Hopefully this will help, but I am still worried about the line between the main filter and engine. Before I try to start it I plan to flush out the main line and replace the main filter. It's still in the garage on jackstands at this point.
Last edited by bbarcher; 09-17-2010 at 01:54 PM.
#15
09-17-2010, 02:35 PM
You are correct... car ran really poorly and I ended up taking the injectors and rail off. Sending them to Jacksonville for cleaning and new soft parts. I could see the ends were a reddish brown so I am guessing the screens and other small parts were toast.
I think I will clean the tanks again while the FI parts are out for service. I drained them, but did not vacuume the bottoms like you did through the sending unit hole. Where did you get the new pickup filters and how did you change them? Not familiar with that procedure.
I think I will clean the tanks again while the FI parts are out for service. I drained them, but did not vacuume the bottoms like you did through the sending unit hole. Where did you get the new pickup filters and how did you change them? Not familiar with that procedure.
#17
09-19-2010, 01:12 AM
I'm hoping I don't have the rust issues that bad at least for now.
sneal46, I ordered the filters from autopartswarehouse I believe, but any online parts places should have it. WorldPAC part #: W0133-1627170, you could also get them from Carquest parts stores using this number.
They look like this, one in each tank:

To install, you have to remove the large plug in the bottom of the tanks. There is a small drain plug in the center of the large plug. With the large plug out, you can see the bottom of the filter. It is just pushed onto a tube that comes down right over the plug hole.
You also need to have the sealing gaskets for the senders (one for each side): W0133-1643599
and two fuel tank drain plug gaskets: Jag # C26310
On mine it was very difficult to loosen the old filter, the plastic had bonded to the metal tube. I drilled two small holes in the bottom of the old filter and stuck the jaws of my needle nose pliers in the holes to get a grip, then twisted the filter to break it loose. Then, by slowly twisting it back and forth while pulling down, it came out. The old one may break apart, but keep in mind the idea of breaking it loose first, before trying to just pull it straight off.
Try to get as much debris out of the tank as possible to avoid clogging the new filters. Try that shop vac blowing technique to flush out the particles, just let it blow through the tank for awhile until no more dust is coming out. Messy though, be advised.
Check the fuel door gaskets for cracking also, mine need replacing. They will let water in, so replace those too if needed. Make sure the drain hole near the filler neck is draining water properly, poke it out, flush it with water/air etc.
 Part #: W0133-1619983 --Driver side
Part #: W0133-1621009 --Passenger side
sneal46, I ordered the filters from autopartswarehouse I believe, but any online parts places should have it. WorldPAC part #: W0133-1627170, you could also get them from Carquest parts stores using this number.
They look like this, one in each tank:
To install, you have to remove the large plug in the bottom of the tanks. There is a small drain plug in the center of the large plug. With the large plug out, you can see the bottom of the filter. It is just pushed onto a tube that comes down right over the plug hole.
You also need to have the sealing gaskets for the senders (one for each side): W0133-1643599
and two fuel tank drain plug gaskets: Jag # C26310
On mine it was very difficult to loosen the old filter, the plastic had bonded to the metal tube. I drilled two small holes in the bottom of the old filter and stuck the jaws of my needle nose pliers in the holes to get a grip, then twisted the filter to break it loose. Then, by slowly twisting it back and forth while pulling down, it came out. The old one may break apart, but keep in mind the idea of breaking it loose first, before trying to just pull it straight off.
Try to get as much debris out of the tank as possible to avoid clogging the new filters. Try that shop vac blowing technique to flush out the particles, just let it blow through the tank for awhile until no more dust is coming out. Messy though, be advised.
Check the fuel door gaskets for cracking also, mine need replacing. They will let water in, so replace those too if needed. Make sure the drain hole near the filler neck is draining water properly, poke it out, flush it with water/air etc.
Part #: W0133-1619983 --Driver sidePart #: W0133-1621009 --Passenger side
Last edited by bbarcher; 09-19-2010 at 01:45 AM.
#18
09-19-2010, 04:17 PM

Veteran Member
Join Date: Jul 2010
Location: Austin tx and Daytona FL.
Posts: 7,362
Received 1,231 Likes
on
939 Posts
after thinking about tank and lines rust issues, cannot believe Jag would use such a trashy metal considering what the vehicles cost new!
i had heard that they were trying 3rd generation RECYCLED steel in there manufacturing of the XJ cars, of course all the good alloys had been removed for other more important use.
heck a plastic tank would have been better, and plastic fuel lines.
a lot of vehicles today DO use plastic, and its lighter in weight!
#19
09-19-2010, 07:14 PM
Veteran Member
Join Date: Mar 2008
Location: Pacific Northwest USA
Posts: 24,743
Received 10,757 Likes
on
7,101 Posts
Heh heh. Yeah, a lot of vehicles TODAY use plastics. Your XJ6 is from a from different era entirely and manufactured by a small company with occasional backwards thinking and perpetually limited budget. Modern engineering and materials were something they just dreamed about :-)
In fairness, though, fuel system rust is hardly exclusive to Jags. I maintain a fleet of old cars of many makes and vintages. Fuel (and brake) system rust just happens.
Cheers
DD
In fairness, though, fuel system rust is hardly exclusive to Jags. I maintain a fleet of old cars of many makes and vintages. Fuel (and brake) system rust just happens.
Cheers
DD

Thread
Thread Starter
Forum
Replies
Last Post
Charlene n John
XJ6 & XJ12 Series I, II & III
9
09-28-2015 06:01 AM
Currently Active Users Viewing This Thread: 1 (0 members and 1 guests)