
Dropping rear subframe - advice needed please
#1
 10-27-2014, 04:07 PM

I was thinking - how easy is this, wheels off, calipers off, subframe loose, every bolt has come out easy peesy so far, I'll have this out in a couple of hours. But then I hits a problem .., How do I get the exhaust off without trashing it!! Race diags suggested dropping the exhaust with the subframe, but the guides I have followed just cut the exhaust with an angle grinder. Much I would love to, my budget doesn't stretch to a new stainless exhaust so how can I remove the subframe whilst keeping the exhaust intact. I have soaked the joints in wd40 this eveing but somehow doubt it wil come to pieces tomorrow. Thanks in advance Mark
Last edited by scoobie; 10-27-2014 at 04:31 PM.
#2
10-27-2014, 09:59 PM

#3
10-28-2014, 03:55 AM

No need to drop the exhaust. Just find a way to get the mounting bolts out!
The upper ones are a pain. The technique I used was to lie down under the car, head forwards and wrap my arm over the axle. I found that a ratchet ring spanner would just do it.
A lesson learned on reassembly is to replace the screws with studs so that the mount is located and you don't have the difficulty of trying to position the mount and start the screw.
If you really need to remove the exhaust, try removing it from the catalysts.
You will probably need to cut through the clamp bolts though. Fortunately when I did this to replace the cats, the front cross member was off so I could drop the engine down a little on the support beam for better access.
Last edited by sheddist; 10-28-2014 at 03:57 AM.
#4
10-28-2014, 05:53 AM


#5
10-28-2014, 05:56 AM
#6
10-28-2014, 08:46 AM
OK - everything is unbolted.
Dropped the subframe enough to undo the b***d exhaust clamp bolts.
Prop shaft was easier with my mate holding one spanner and me the other.
But am in a bit of a mess now !!
near side (UK car passenger side) has come free but the drivers side is stuck solid on the big a-frame mount at the front (where the bush fits over an ali tapered 'pin' under the chassis member just before it goes up around the wheel.
Have crow-barred it so much now I am worried that I may be deforming it.
Have spent 3 hours trying to free it - put tons of wd40 there hoping it will come loose.
Any ideas?? (help )
)
Thanks - Mark
Dropped the subframe enough to undo the b***d exhaust clamp bolts.
Prop shaft was easier with my mate holding one spanner and me the other.
But am in a bit of a mess now !!
near side (UK car passenger side) has come free but the drivers side is stuck solid on the big a-frame mount at the front (where the bush fits over an ali tapered 'pin' under the chassis member just before it goes up around the wheel.
Have crow-barred it so much now I am worried that I may be deforming it.
Have spent 3 hours trying to free it - put tons of wd40 there hoping it will come loose.
Any ideas?? (help
Thanks - Mark
#7
10-28-2014, 09:13 AM
Trending Topics
#8
10-28-2014, 09:40 AM
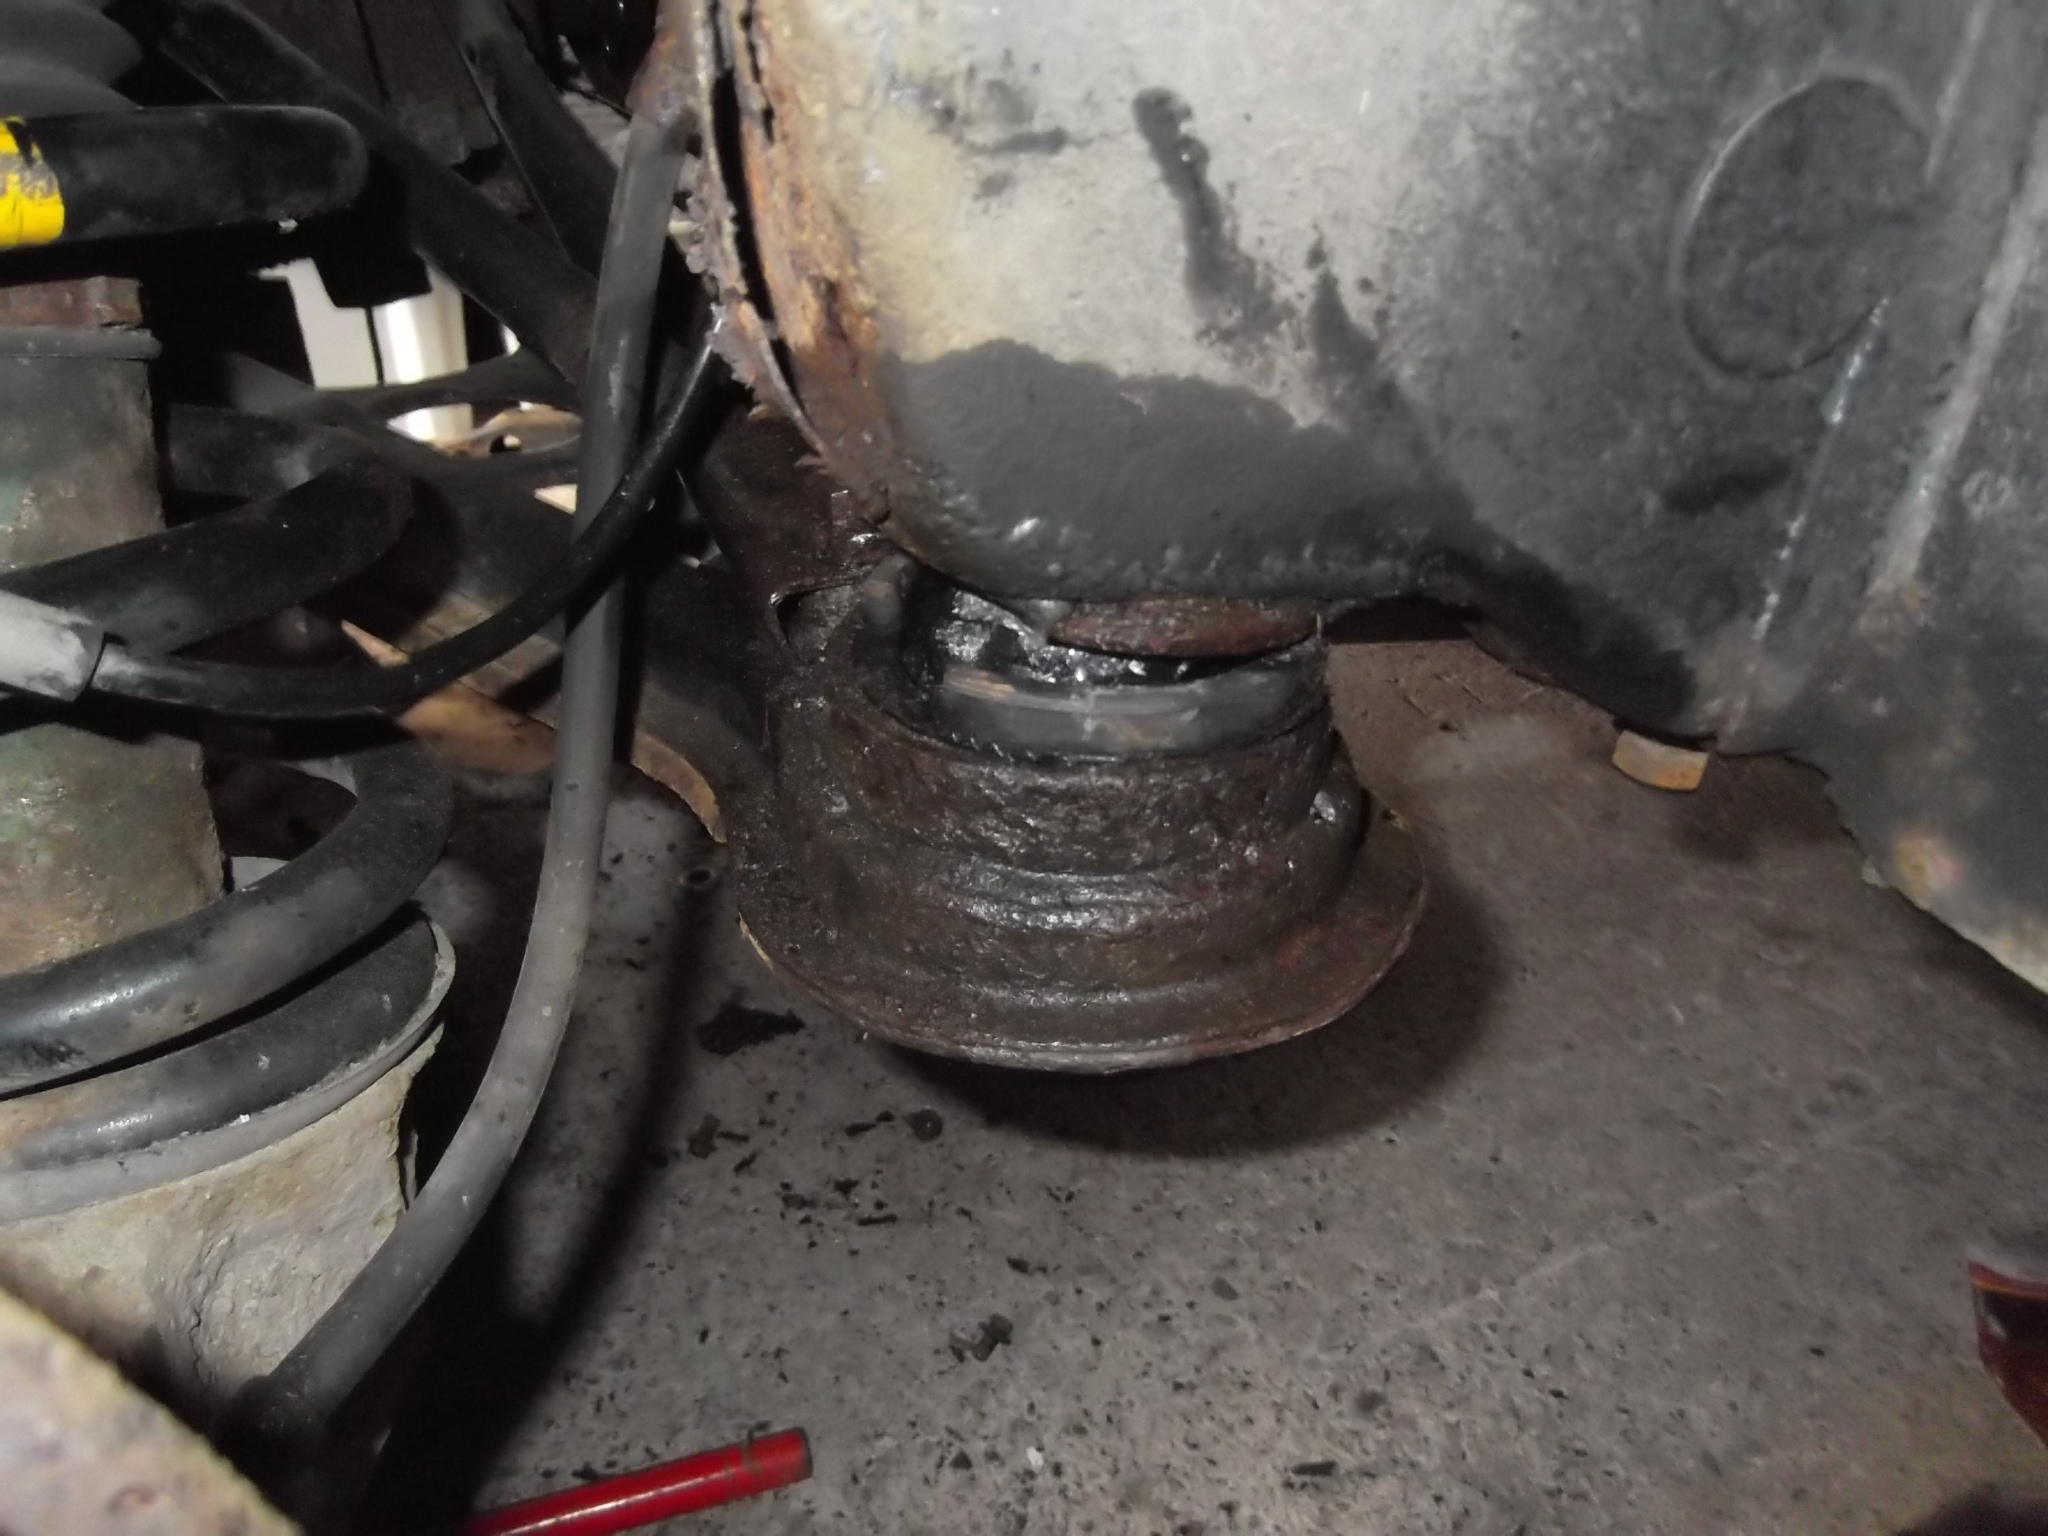
Looks a bit tight!
A flippant comment would be - put it al back together with loose bolts on that mount and go for a drive. Don't think you fancy doing that.
The mount has an aluminium inner that has the usual unpleasant reaction with steel. Warming it up may help, and a dose of acid alloy wheel cleaner or phosphoric acid rust eater might just eat away enough oxide to free it up.
The aluminium inner is tapered, so one the taper is "cracked" it should pop off happily.
WD40 is not a good penetrating oil as it is intended to hang around, protect and lubricate, which it does to an extent, but is is compromised in all these areas so it can do all things to some extent!.
A fork type balljoint splitter may also help.
Best of luck!
And while I remember, make sure your ABS cables are moved well out of the way, I moved mine over the exhaust boxes to be sure.
Last edited by sheddist; 10-28-2014 at 09:42 AM.
#9
10-28-2014, 11:51 AM
I'm following this with interest as the job is on my to do list but I'm getting nervous now!
Could the whole frame be tilted slightly such that the pin is hung up in its socket? Maybe temporarily reattaching the near side would square things up again and allow you to drop the subframe bit by bit on both sides - if that makes sense.
Could the whole frame be tilted slightly such that the pin is hung up in its socket? Maybe temporarily reattaching the near side would square things up again and allow you to drop the subframe bit by bit on both sides - if that makes sense.
#10
10-28-2014, 03:13 PM
Funny thing was that when I removed the main bolt through the bush on the stuck side I swear I saw some water come out so maybe its corroded to pieces.
I intend to get a wide impact ball joint splitter and a Jeremy Clarkson hammer and encourage it to come free, but preparing myself for the worse, can these alloy pins on the chassis members be replaced if they get damaged?
Mark
#11
10-28-2014, 11:31 PM
Veteran Member
Instead of WD-40, try ATF and acetone at 50/50 squirted all around and left to soak.
Lather, rinse, repeat. Time is your friend here.
Then you need one of those pry bars with a small pivot at the end that will fit in
the bolt hole. There is at least one picture around here of someone using one to
remove that bush with an accompanying description.
Lather, rinse, repeat. Time is your friend here.
Then you need one of those pry bars with a small pivot at the end that will fit in
the bolt hole. There is at least one picture around here of someone using one to
remove that bush with an accompanying description.
#12
10-29-2014, 12:34 AM

Funnily enough my mate thought the same, that the 'stuck' bush may be twisted but I reattached the other side and it made no difference.
Funny thing was that when I removed the main bolt through the bush on the stuck side I swear I saw some water come out so maybe its corroded to pieces.
I intend to get a wide impact ball joint splitter and a Jeremy Clarkson hammer and encourage it to come free, but preparing myself for the worse, can these alloy pins on the chassis members be replaced if they get damaged?
Mark
#13
10-29-2014, 04:25 AM
#14
10-30-2014, 05:02 PM
Spent another hour on it tonight and its now off 
What didn't work for me -
crowbar
hammer
WD40 (or at least it didn't appear to help)
steel bar in bottom of bush - trying to lever
Ball joint splitter
shouting and swearing at it
The sequence that did work -
Using a sharp blade to cut away the front of the rubber at the top of the bush exposing the top of the alloy part of the bush
Drilling 3 holes from the top to as far down as I could get (as the inner is steel it appears easy to feel when you finish drilling through alloy)
Hammering a chisel (big screwdriver) in to open up the joint
using the edge of a ball joint splitter to finally drive it down.
Was going to put some photos up but just as I dropped the suspension assy to the floor my beautiful wife shouted 'dinner is ready'.
A fine end to a good day
Next - de-greasing/de-rusting the rear suspension, replace bushes and paint.
I am about to order the paint (rustbeaters mastic) and am wondering what colour to order (I want it to look as original as possible).
Mark
#16
10-31-2014, 04:40 AM
Nice one Mark!
Be really careful checking the A-frame for holes, espsically in the box section that runs along the front. Mine looked OK until it was dropped out and removed, then all sorts of perforations were found. Fortunately I had a polybushed replacement cleaned up and painted in stock. The bolts securing the tie rods that run between the diff and A-frame to the A-frame are fine threaded so don't mix them up!
Be really careful checking the A-frame for holes, espsically in the box section that runs along the front. Mine looked OK until it was dropped out and removed, then all sorts of perforations were found. Fortunately I had a polybushed replacement cleaned up and painted in stock. The bolts securing the tie rods that run between the diff and A-frame to the A-frame are fine threaded so don't mix them up!
#18
10-31-2014, 08:01 AM

Veteran Member
Well done, sound like just the sort of thing that happens to me!
Your not going to go with RED then?

Thread
Thread Starter
Forum
Replies
Last Post
Doug Dooren
XJ XJ8 / XJR ( X308 )
0
08-30-2015 08:51 AM
FS[SouthEast]: 2005 Jaguar XKR Convertible Supercharged
divingmom
PRIVATE For Sale / Trade or Buy Classifieds
0
08-25-2015 07:54 PM
Currently Active Users Viewing This Thread: 1 (0 members and 1 guests)