
My rear subframe refurbishment
#1
 11-23-2014, 05:24 AM

Jetwashed the subframe yesterday in preparation for today's stripdown.
Will follow the procedure in JTIS for removing the diff, so off with the shocks, hubs, aframe etc.
Fortunately the a-frame looks sound with just some surface rust, so will wire brush the rust off and get ready to paint.
Question - what do members use to prepare items before painting, in particular ensuring all the grease is gone.
I used to use cellulose thinners many years back but I guess it's difficult to get hold of now we have water based paints.
Thanks
Mark
#2
11-23-2014, 07:58 AM
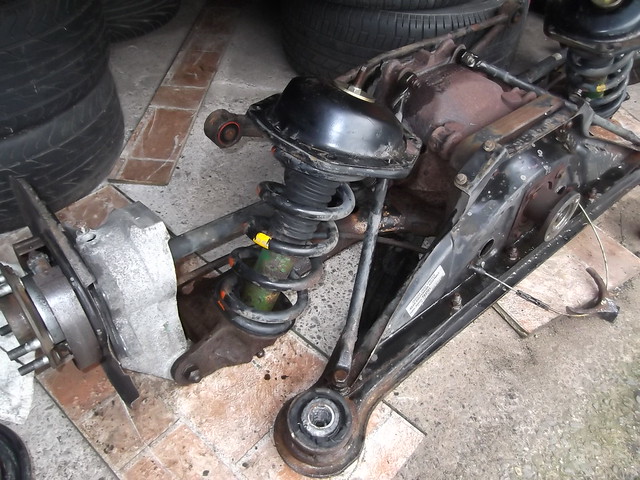
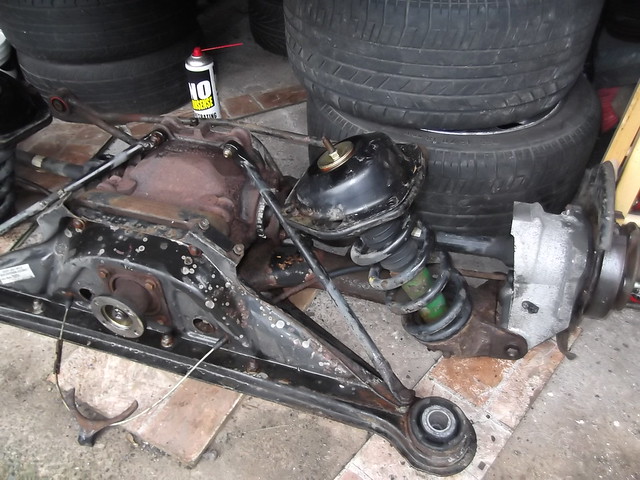
Difficult to believe that it's taken me 2 hours to partly dismantle just one side!
Getting the drive shaft off the diff was the most difficult task - two of the nuts came off quite easily, the other two must have been tightened by King Kong.
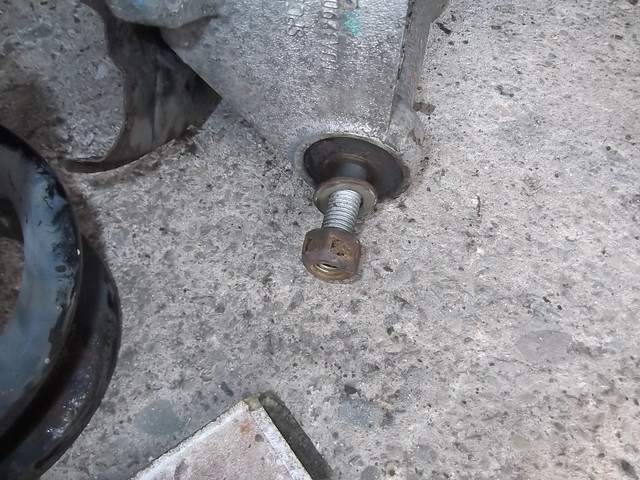
I presume the nuts are 17mm (18mm was too loose) but I struggled to get a 17mm hex socket to fit (I tried both nuts) - in the end I had to hammer the socket on - weird!
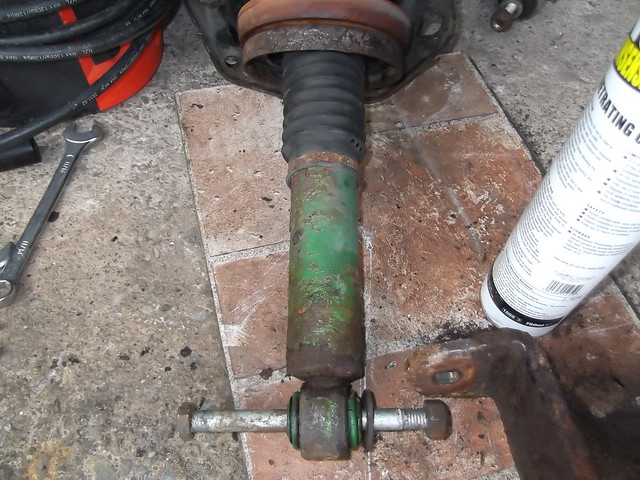
Shock looks quite corroded - shame as it seems to work fine and I don't want unnecessary expenditure. Think this will clean up?
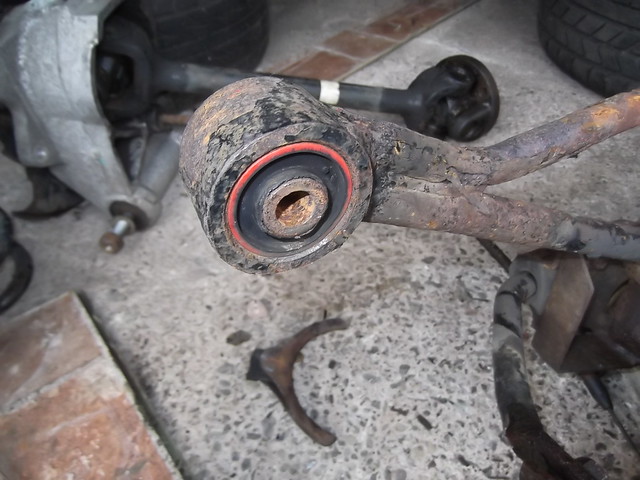
The lower rubber bush in the shock is quite floppy so will change that plus the anti roll bushes and drop links (as they will save tyre wear).
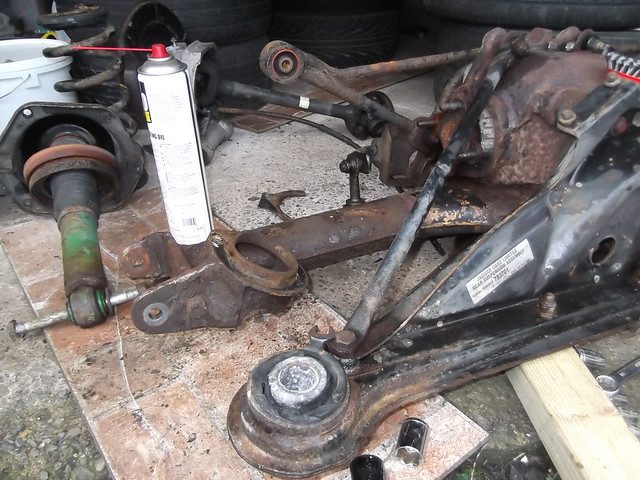
This (whatever its called) appears to be in very good condition and the pin that goes through the centre shows no wear so I will keep these.
These 4 bushes also seem in sound (firm) condition.
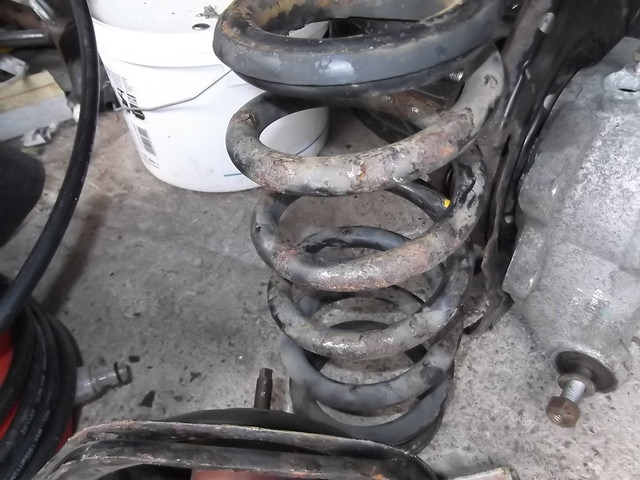
This is the worst part of the spring - the rest is showing little corrosion.
Hopefully I can clean this up and repaint.
My only regret is that I didn't mark the camber before removing the lower fulcrum shaft/pin.
Another job on the list!
Getting the drive shaft off the diff was the most difficult task - two of the nuts came off quite easily, the other two must have been tightened by King Kong.
I presume the nuts are 17mm (18mm was too loose) but I struggled to get a 17mm hex socket to fit (I tried both nuts) - in the end I had to hammer the socket on - weird!
Shock looks quite corroded - shame as it seems to work fine and I don't want unnecessary expenditure. Think this will clean up?
The lower rubber bush in the shock is quite floppy so will change that plus the anti roll bushes and drop links (as they will save tyre wear).
This (whatever its called) appears to be in very good condition and the pin that goes through the centre shows no wear so I will keep these.
These 4 bushes also seem in sound (firm) condition.
This is the worst part of the spring - the rest is showing little corrosion.
Hopefully I can clean this up and repaint.
My only regret is that I didn't mark the camber before removing the lower fulcrum shaft/pin.
Another job on the list!
Last edited by scoobie; 11-23-2014 at 08:03 AM.
#3
11-23-2014, 08:07 AM

Veteran Member
Scoobie, I use a product that is a soup concentrate, Purple Power, just keep wiping it with a stiff cleaning or paint brush. The round ones are good. Have a place with good ventilation. When all has been soaked, use a pressure washer at home or the car wash. I guess they have them there, been a while since I been there (1969).
The old paint may require some stripper, which is always messy.
Wayne
The old paint may require some stripper, which is always messy.
Wayne
#4
11-23-2014, 08:18 AM
Thanks Wayne.
I hadn't considered removing all the old paint, especially where it looks good, just sanding down the rusty or bubbly bits and then painting whatever it is all over with rustbusters 2-pak mastic (which I have I haven't purchased yet).
I was kind of hoping that would stick to the old cr*ppy black jag paint.
Or would I be better with POR-15?
Mark

#6
11-23-2014, 12:16 PM
Dismantled and checked both sides and there seems to be a bit of play between the hub fulcrum bolt and the bush - is this to be expected or should there be no play at all?
Thanks
Mark
#7
11-23-2014, 01:15 PM

Veteran Member
Join Date: Jul 2010
Location: Austin tx and Daytona FL.
Posts: 7,362
Received 1,231 Likes
on
939 Posts
are there any media blast/cleaning places you could go to, results far over rule costs?
question; does the XK8 use anything from an XJS platform or suspension? any one know if a JAG V12 engine would be made to fit between the towers?
Last edited by ronbros; 11-23-2014 at 01:28 PM.
Trending Topics
#8
11-23-2014, 02:24 PM

Veteran Member
Nope, long term tests show that the 2 pack epoxy from rustbusters far out perform por 15.
see here 3-year anti-rust test results | Classics Monthly
#9
11-23-2014, 02:30 PM
Veteran Member
Yes they will clean up with a bit of effort, check out my shock resurrection.
https://www.jaguarforums.com/forum/x...ection-129663/
Also, the best cleaner I have found is brake cleaner, I bought 25l a few years ago from ebay and use it on everything except paint work.
The following users liked this post:
scoobie (11-23-2014)
#10
11-23-2014, 04:38 PM
Is there a trick to getting the wishbone pivots (the long bolts either side of the diff) off.
I have undone the nuts at the front and soaked the bolts in releasing fluid but the pivots will not budge.
Should I persevere with trying to loosen them with a socket and breaker bar or should I put the nuts back on the front and whack them out with a hammer?
I have undone the nuts at the front and soaked the bolts in releasing fluid but the pivots will not budge.
Should I persevere with trying to loosen them with a socket and breaker bar or should I put the nuts back on the front and whack them out with a hammer?
#11
11-24-2014, 01:45 AM
Veteran Member
How do the two sides compare, I had to change one side soon after I bought the car, they are actually bearings not bushes. The inner shells are easy to punch out but the outer shells need a long bent chisel to be hammered out from the opposite side. No pics I'm afraid but I was able to watch an ex-jag mechanic do the job, he needed to sharpen the chisel a couple of times as the lip on the inside is small that the chisel needs to catch on. It took a good 10 hits on each side with a big hammer to punch the shells out.
Last edited by RaceDiagnostics; 11-24-2014 at 03:27 AM.
#12
11-24-2014, 03:30 AM
Veteran Member
Is there a trick to getting the wishbone pivots (the long bolts either side of the diff) off.
I have undone the nuts at the front and soaked the bolts in releasing fluid but the pivots will not budge.
Should I persevere with trying to loosen them with a socket and breaker bar or should I put the nuts back on the front and whack them out with a hammer?
I have undone the nuts at the front and soaked the bolts in releasing fluid but the pivots will not budge.
Should I persevere with trying to loosen them with a socket and breaker bar or should I put the nuts back on the front and whack them out with a hammer?
Uncharted territory for me, but be prepared for damage to the thread on the bolt if you hammer it out with the nut on (this is charted territory for me), is there any way to get access to put a drift on the end of the bolt so as not to damage the thread?
#14
11-24-2014, 07:33 AM
#15
11-24-2014, 09:07 AM
Senior Member
The following users liked this post:
St. Stephen (12-10-2022)
#16
11-27-2014, 03:25 AM

#17
11-27-2014, 05:25 AM

#18
11-29-2014, 07:40 AM
#19
11-29-2014, 11:08 AM